Table of contents
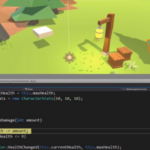
Introduction
Okay. So you’re a budding computer science enthusiast and you’re trying to make an AI that will take over the world. You do your research and find out about this thing called “machine learning.” You’ve seen several impressive demonstrations of machine learning technology so you decide that this is the tool you’re looking for. You do more research into how to create a machine learning agent which inevitably leads you here.
Well, my friend, you have come to the right place. Unfortunately, the AI you’re going to be building in this tutorial is a far cry from the “earth dominating” AI you have in mind. However, the knowledge found here will help you build interesting games and apps.
Through the instructions below, we’re going to be making a much more tame AI that will learn to balance a virtual rigid body. We’re going to be using Unity’s ML-Agents platform to configure and train our neural network (i.e. the algorithms or “brain” of our system). We’re going to go through how to install ML-Agents to work with the Unity Editor – and even how we can save the generated neural network to our project.
So while it isn’t anything close to enslaving mankind, if you’re ready to discover machine learning’s role in game and app development, sit back, and get ready learn how to use ML-Agents.
Did you come across any errors in this tutorial? Please let us know by completing this form and we’ll look into it!

FINAL DAYS: Unlock coding courses in Unity, Godot, Unreal, Python and more.
What is ML-Agents?
Unity ML-Agents is a machine learning framework integrated into the Unity editor that uses Python and TensorFlow (an open-source mathematics library). It is capable of Supervised learning, Unsupervised learning, and Reinforcement learning. Reinforcement learning is what we most think of when it comes to machine learning. An agent is trained to generate a policy (basically a set of instructions) by taking in observations and performing actions. This policy designed to maximize the number of rewards that performing the actions yields.
ML-Agents has five main components, four of which we are going to be using. They are the Training Environment, the Python Low-Level API, the External Communicator, the Python trainer, and the Gym Wrapper (we aren’t going to be using this much). The Training Environment is the scene we set up in the Unity Editor. This is where the agents observe and perform actions. The Python Low-Level API is an external tool that manipulates the machine learning “brain” during training. The External Communicator communicates with the Python Low-Level API and the Learning Environment. The Python Trainer lives in the Python Low-Level API and runs all the algorithms involved in training. The Gym Wrapper is a component tailored for machine learning researchers so we won’t be using that in this project.
Because this is a tutorial about how Unity’s machine learning package, this is not a tutorial about machine learning in general. For that, check out the Machine Learning Mini-degree on Zenva Academy. I highly recommend you learn about how machine learning actually works (assuming you don’t already). It’s a very fascinating and quickly evolving field of computer science.
Project Files and installation
The completed project for this tutorial can be downloaded here: Source Code.
This project is based on an example provided by Unity. If you would like to check out this example or some other cool demos, Unity Technologies has put together a Github with all the projects (ML Agents GitHub). Unity ML-Agents can be imported from the package manager. Go to Window -> Package Manager and make sure you’re viewing all the packages. Download and import ML-Agents.


Next, you’re going to want to install Python 3.6 or later. Go to https://www.python.org/downloads/ and download the 64-bit package for your operating system. It must be 64-bit or you will be unable to install ML-Agents. Once Python is installed, open a command-line window and run this command:
pip3 install mlagents
This will install Tensorflow and all the other components that go into ML-Agents.
This is not the only time we will be using the command line window. Go ahead and keep it open as we work through our project.
Project Overview
Observations
When approaching any machine learning project, it’s a good idea to have some sort of allocation plan for rewards and observations. What sort of observations is the agent going to take in? What sort of rewards are we going to give it for performing certain actions? Now, for a machine learning project you’re making from scratch, often your original allocation plan will need to be tweaked. Fortunately, you’re following along with a tutorial so I’ve already found the correct plan for taking observations and setting rewards. First off, the “agent” in our project is whatever is attempting to balance the ball (this could be a plane or a cube). There are three key observations this agent needs. The first is the velocity of the ball it is trying to balance. The second is the rotation of the ball in the X and Z axes (we don’t need the Y-axis). Lastly, it needs the position of the ball.

The cool thing about this project is we can train the neural network to use either a plane or a cube. I’m going to be using a cube throughout this project but feel free to do some experimentation.
Rewards
In terms of rewards, there are two main ways we are going to be manipulating them. The first and most obvious is when the agent drops the sphere. We will give it a reward of -1. However, when the agent continues to keep up the sphere, we’ll give it a very small reward each calculation (a value of about 0.01). This way, the agent will be rewarded for how long it keeps the ball up and punished if the ball falls. The idea of training the neural network, then, is to teach it to get the maximum number of rewards.
Setting up the Environment and the Agent
Setting up the actual elements in the scene is pretty simple. We need a cube and a sphere both scaled to a reasonable size.


We don’t need to worry about exact sizes since the neural network will train to regardless. Assign a Rigidbody to the Sphere.
Create an empty game object called “AgentContainer” and place the sphere and the cube as child objects.

The reason we do this will become clear when we start scripting the agent.
Speaking of which, let’s assign all the necessary components to our agent. Create a folder called “Scripts” and create a new C# script called “BalllBalanceAgent.”


Assign this to our Cube Agent and then open it up in a text editor.

The very first thing we must do to this script is to make sure it is using “UnityEngine.MLAgents” and “UnityEngine.MLAgents.Sensors.”
using UnityEngine;
using Unity.MLAgents;
using Unity.MLAgents.Sensors;

public class BallBalanceAgent : MonoBehaviour
{
    // Start is called before the first frame update
    void Start()
    {

    }

    // Update is called once per frame
    void Update()
    {

    }
}
Next, we can delete it inheriting from MonoBehaviour and make it inherit from “Agent.”
using UnityEngine;
using Unity.MLAgents;
using Unity.MLAgents.Sensors;

public class BallBalanceAgent : Agent
{
    // Start is called before the first frame update
    void Start()
    {

    }

    // Update is called once per frame
    void Update()
    {

    }
}
This is super important and is at the heart of scripting ML-Agents. If you have a look at your agent in the Unity Editor, you’ll see that the “BallBalanceAgent” has been given a “MaxStep” slider. Essentially, this is how long an agent episode will last. An “episode” is a period of time where the agent can gain rewards and perform actions. For example, if the ball falls off the cube, we would want everything to reset so the agent can try again. Giving it an integer value will tell the agent how long to “do stuff” in the scene until everything resets and the agent tries again. A value of zero means an infinite number of steps which means an infinite amount of time. We’re going to be starting and ending the episode manually so we need this set to zero.
While we’re in the Unity Editor, there’s a couple of other components this agent needs. The first is a “Decision Requester.”

A Decision Requester does what its name implies, it requests a decision to be made based on the observations taken in. The “Decision Period” determines how many Academy steps must take place before a decision is requested. But what is an “Academy step” and what even is the “Academy?” We’ll look at each of these in more detail but for now, the Academy is basically a global singleton “brain” that runs basically everything in ML-Agents. An Academy step is basically a period of time that the Academy uses during training. The current value of 5 should be plenty for our project.
The next component our Agent needs is a “Behaviour Parameters” script.

This dictates how many observations we’re taking in and what sort of form the actions outputted will take. We’re going to be messing with this more as we start scripting our agent. So go back to your BallBalanceAgent script and delete the Start and Update methods to get ready to script this thing.
using UnityEngine;
using Unity.MLAgents;
using Unity.MLAgents.Sensors;

public class BallBalanceAgent : Agent
{

}
Scripting the Agent
Overview and setup
The Agent abstract contains five definitions of methods we are going to override. They are “Initialize”, “CollectObservations,” “OnActionReceived,” “Heuristic,” and “OnEpisodeBegin.”
using UnityEngine;
using Unity.MLAgents;
using Unity.MLAgents.Sensors;

public class BallBalanceAgent : Agent
{
    public override void Initialize()
    {
        base.Initialize();
    }

    public override void CollectObservations(VectorSensor sensor)
    {
        base.CollectObservations(sensor);
    }

    public override void OnActionReceived(float[] vectorAction)
    {
        base.OnActionReceived(vectorAction);
    }

    public override void Heuristic(float[] actionsOut)
    {
        base.Heuristic(actionsOut);
    }

    public override void OnEpisodeBegin()
    {
        base.OnEpisodeBegin();
    }
}
“Initialize” functions similar to the “Start” method except this is called a little bit earlier than “Start.” “CollectObservations” is where we send observations to the Academy and “OnActionReceived” is where we get an action from the academy. “OnEpisodeBegin” is called whenever a new episode starts (as its name implies). This leaves “Heuristic” as the only method without an explanation. To understand what “Heuristic” is, go back to the Unity Editor and have a look at the Behavior Parameters on the Agent.

As you can see, “Behaviour Type” has three options, “Heuristic Only”, “default”, and “Inference Only.” When set to Default, if a neural network has been generated, the agent will run “Inference Only” as it uses the neural network to make decisions. When no neural network is provided, it will use “Heuristic Only.” The Heuristic method can be thought of as the traditional approach to AI where a programmer inputs every possible command directly onto the object. When set to “Heuristic Only,” the agent will run whatever is in the Heuristic method. Go ahead and put these few lines of code in the Heuristic method:
 public override void Heuristic(float[] actionsOut)
    {
        actionsOut[0] = -Input.GetAxis("Horizontal");
        actionsOut[1] = Input.GetAxis("Vertical");
    }
Let’s jump back into the BallBalanceAgent script and set up the variables we’re going to need to use. We’re going to need access to both the position and the velocity of the ball. Create two variables, one of them public the other private. One of them of type Gameobject and one of type Rigidbody.
using UnityEngine;
using Unity.MLAgents;
using Unity.MLAgents.Sensors;

public class BallBalanceAgent : Agent
{
    public GameObject ball;
    Rigidbody ballRigidbody;

    public override void Initialize()
    {
        base.Initialize();
    }

    public override void CollectObservations(VectorSensor sensor)
    {
        base.CollectObservations(sensor);
    }

    public override void OnActionReceived(float[] vectorAction)
    {
        base.OnActionReceived(vectorAction);
    }

    public override void Heuristic(float[] actionsOut)
    {
        base.Heuristic(actionsOut);
    }

    public override void OnEpisodeBegin()
    {
        base.OnEpisodeBegin();
    }
}
Next, we’re going to need access to a data set on the Academy called “EnvironmentParameters.” We’ll use these to set and get the default size of the ball.
using UnityEngine;
using Unity.MLAgents;
using Unity.MLAgents.Sensors;

public class BallBalanceAgent : Agent
{
    public GameObject ball;
    Rigidbody ballRigidbody;
    EnvironmentParameters defaultParameters;
The “ball” variable will be assigned in the inspector but we still need to assign “ballRigidbody” and “defaultParameters.” We do this in the “Initialize” method like this:
using UnityEngine;
using Unity.MLAgents;
using Unity.MLAgents.Sensors;

public class BallBalanceAgent : Agent
{
    public GameObject ball;
    Rigidbody ballRigidbody;
    EnvironmentParameters defaultParameters;

    public override void Initialize()
    {
        ballRigidbody = ball.GetComponent<Rigidbody>();
        defaultParameters = Academy.Instance.EnvironmentParameters;
    }
Now, we’ve set up the variables we’re going to need, let’s start taking in observations and setting actions.
Taking Observations and Setting Actions
We already know what observations the agent needs so all we need is the syntax. In the “CollectObservations” method, type the following:
public override void CollectObservations(VectorSensor sensor)
    {
        sensor.AddObservation(ballRigidbody.velocity);
    }
What we have done is told the Academy to observe the values in this vector3. We’re going to keep seeing all these things the Academy does. Here, the Academy is collecting essentially three floats and sending them off to Python and Tensorflow. Just for information sake, there are several other ways to take in observations that do not use this method. This method is known as “Arbitrary Vector Observation.” It should also be noted that a “vector” in machine learning contexts means just floats stacked together. It’s a bit different than the conventional Unity understanding of vectors.
But this is not all the observations we need to make. We also need to add the position of the ball and the rotation of the cube agent.
public override void CollectObservations(VectorSensor sensor)
    {
        sensor.AddObservation(ballRigidbody.velocity);
        sensor.AddObservation(ball.transform.position);
        sensor.AddObservation(transform.rotation.z);
        sensor.AddObservation(transform.rotation.x);
    }
Now hit save and jump over to the Behaviour Parameter component and have a look at the “Vector Observation” and “Space Size.”

We need to make sure the observation space size matches our code. What it is essentially asking for is how many float inputs is the agent taking in? If add up all the vectors in the CollectObservations method, we see that we’re observing eight float values (2 Vector3s and 2 rotation values). Set the space size to 8.

The “StackedVectors” slider allows you to set how many vectors must be observed before it is sent to the Academy. For our project, this shouldn’t be more than 1.
Now we’ve got to configure what we’re going to do with whatever the neural network spits out. First off, we need to determine if we should have a “continuous” or “discrete” action space. A continuous action space spits out a value ranging from -1 to 1. A discrete action space spits out an integer value. For our project, it’s pretty obvious what we need. Set the “Space Type” in the Behaviour Parameter component to “continuous.”

Next, we need to determine how many actions we should demand from the neural network. In our case, we want the neural network to control the X and Z rotation of our agent. So set the “Space Size” to 2.

Now we can jump back into the BallBalanceAgent script and work on the agent actions. There are a couple of different approaches to this project. The way we’re going to approach it is to set the rotation of the agent equal to a special variable. This variable doubles whatever action is received from the neural network. But we’re only going to set the rotation of the agent if the agent isn’t rotated too far. This makes sure we don’t get any weird flipping. As I mentioned earlier, if you’re working on this project from scratch, this approach is probably not what you’re going to chose right off the bat Fortunately, you’re working through a tutorial that “knows all the answers” so to speak.
In the “OnActionsRecieved” method, write the following lines of code:
public override void OnActionReceived(float[] vectorAction)
    {
        var zangle = 2f * Mathf.Clamp(vectorAction[0], -1f, 1f);
        var xangle = 2f * Mathf.Clamp(vectorAction[1], -1f, 1f);

        if ((gameObject.transform.rotation.z < 0.25f && zangle > 0f) ||
            (gameObject.transform.rotation.z > -0.25f && zangle < 0f))
        {
            gameObject.transform.Rotate(new Vector3(0, 0, 1), zangle);
        }

        if ((gameObject.transform.rotation.x < 0.25f && xangle > 0f) ||
            (gameObject.transform.rotation.x > -0.25f && xangle < 0f))
        {
            gameObject.transform.Rotate(new Vector3(1, 0, 0), xangle);
        }
    }
As you can see, we’re only telling it to rotate if it hasn’t rotated more than 25 degrees in either direction on either axis.
Setting Rewards and Resetting Agents
Now we need to assign rewards to the agent. According to our plan, we were going to give the agent a small reward for keeping the ball up. We were also going to give it a -1 reward if the ball falls off. We also need to end the episode and restart if the ball falls off. Let’s start with the latter. Create a new method called “ResetScene” and put the following code in it:
void ResetScene()
    {
        ballRigidbody.mass = defaultParameters.GetWithDefault("mass", 1.0f);
        var scale = defaultParameters.GetWithDefault("scale", 1.0f);
        ball.transform.localScale = new Vector3(scale, scale, scale);
    }
This sets the mass and scale of the ball to its default size. Notice, it’s getting the value from the Academy’s environment parameters.
Next, we need to do a bit more resetting in the “OnEpisodeBegin” method. We need to reset the position and velocity of the ball, the rotation of the agent, and why not randomize it each episode?
public override void OnEpisodeBegin()
    {
        gameObject.transform.rotation = new Quaternion(0f, 0f, 0f, 0f);
        gameObject.transform.Rotate(new Vector3(1, 0, 0), Random.Range(-10f, 10f));
        gameObject.transform.Rotate(new Vector3(0, 0, 1), Random.Range(-10f, 10f));
        ballRigidbody.velocity = new Vector3(0f, 0f, 0f);
        ball.transform.position = new Vector3(Random.Range(-1.5f, 1.5f), 4f, Random.Range(-1.5f, 1.5f))
            + gameObject.transform.position;
        ResetScene();
    }

    void ResetScene()
    {
        ballRigidbody.mass = defaultParameters.GetWithDefault("mass", 1.0f);
        var scale = defaultParameters.GetWithDefault("scale", 0.5f);
        ball.transform.localScale = new Vector3(scale, scale, scale);
    }
Just as a double reset, let’s call “ResetScene” in the Initialize function:
public override void Initialize()
    {
        ballRigidbody = ball.GetComponent<Rigidbody>();
        defaultParameters = Academy.Instance.EnvironmentParameters;
        ResetScene();
    }
Now, we can assign rewards. We do this exclusively in the “OnActionRecieved” method. We can check if the ball has fallen off the agent by simply subtracting the transforms. If the ball is on, we give it a small reward each frame, if it is off, we subtract an entire point.
public override void OnActionReceived(float[] vectorAction)
    {
        var zangle = 2f * Mathf.Clamp(vectorAction[0], -1f, 1f);
        var xangle = 2f * Mathf.Clamp(vectorAction[1], -1f, 1f);

        if ((gameObject.transform.rotation.z < 0.25f && zangle > 0f) ||
            (gameObject.transform.rotation.z > -0.25f && zangle < 0f))
        {
            gameObject.transform.Rotate(new Vector3(0, 0, 1), zangle);
        }

        if ((gameObject.transform.rotation.x < 0.25f && xangle > 0f) ||
            (gameObject.transform.rotation.x > -0.25f && xangle < 0f))
        {
            gameObject.transform.Rotate(new Vector3(1, 0, 0), xangle);
        }
        if ((ball.transform.position.y - gameObject.transform.position.y) < -2f ||
            Mathf.Abs(ball.transform.position.x - gameObject.transform.position.x) > 3f ||
            Mathf.Abs(ball.transform.position.z - gameObject.transform.position.z) > 3f)
        {
            SetReward(-1f);
            EndEpisode();
        }
        else
        {
            SetReward(0.1f);
        }
    }
And we’re done scripting the agent! Now, we can save it, assign the ball object, and begin training.

Training the Agent
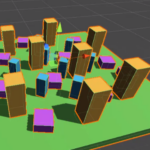
To make training go faster, duplicate it a couple of times.

Multiple agents can train in parallel which drastically decreases training time. Now, open up a command line and run this command
mlagents-learn --run-id=BallBalancingAI
When you see this in the command line:

You can simply hit play and let the agents train:

Saving the Neural Network
It’s a good sign when the rewards cross 4000.

Now, it’s just a matter of saving the neural network to your Unity Project. It is located in whatever directory your command line was pointed, in a folder called “results.” For me, this was located in C:\Users\MyUserName\results. They’ll be a folder named with the ID we assigned (“BallBalancingAI”) and inside will be the neural network called “My Behaviour.”

[all my previous attempts are visible lol]
Drag that network into your project files and assign it to your agents (deleting all but one and assigning would be much easier).


Now hit play and watch your agent balance the ball!

And just like that, you’ve made an AI using machine learning!
Conclusion
Though not ready for world domination, we have achieved what we set out to do: create an AI with the help of Unity’s ML-Agents.
With our simple ball balancing project, we hope you realize how much potential machine learning has. It can help us immensely in making AI in a more intuitive way – especially compared to hand-coding each behavior. It can be (as we’re sure you’ve seen from this tutorial), a bit involved, but it allows for much more diversity when it comes to artificial intelligence.
While we’ve just scratched the surface here, the skills provided can be expanded in numerous ways. So go forth, experiment with your own projects, and test the full limits of ML-Agents. Ultimately, this is simply a tool we hope you use to…
Keep making great games!