Every game has its unique, core mechanics, but one thing they all share in common is the player character.
Whether first-person or third-person, designing the movement and behavior of the player is one of the first processes that we need to go through when creating games. This is important as it’s what characterizes how the players are expected to interact with the objects and obstacles of the game. Thus, knowing how to create players is a core skill for game development that cannot be skipped!
In this tutorial, we’ll cover the creation of a player character in Godot from the start – ranging from how to create the player node and add it to the game scene to how to configure the player’s sprite and set up the properties of its collider component.
All that said, let’s dive in!
Table of contents
Project Files
You can download a copy of the final source code files for the project done in this tutorial here.

Creating the Player Sprite
Importing assets
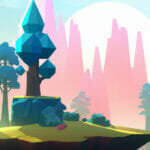
After having created a new project in Godot, you first have to download the project assets available here to your computer.
Next, select and right-click the root folder in FileSystem, then go to ‘Open in File Manager‘:

This will open up a window with the files of our project. Now, with another window open with the assets you’ve downloaded from the link above, drag and drop the Sprites folder into the project folder:

Or simply copy and paste them over so that they appear amongst the files of our project:

Creating a Node to be our Player
To create our player, let’s click on ‘Scene’ and then ‘New Scene‘:

Select the ‘Other Node‘ option and search for “KinematicBody2D” in the ‘Create New Node’ window:

Choose the ‘KinematicBody2D’ node and hit ‘Create’. The new node is now visible in the Scene window. Rename it to ‘Player‘ by double-clicking on it:

Adding a Sprite to the Player Node
Following, double-click the Sprites folder in the FileSystem to open it. Select the ‘Player_Idle‘ file and drag it into the viewport:

This creates a new node as a child of the Player node:

In the inspector, go to Transform then click on ‘Position’. Set both x and y to 0:

The sprite is now centered in the origin (0, 0). Hit Ctrl+S to save the scene:

Let’s also rename the sprite from ‘Player_Idle’ to ‘Sprite‘.
Adding a Collider to our Player
You’ll note that we’re having a node configuration warning next to our Player scene icon. It says that we need to add a collision child to define the shape of our KinematicBody node. To do that, right-click on the Player, and go ‘Add Child Node‘:

Double-click on ‘CollisionShape2D‘ to create it:

Go to Inspector and click on the arrow next to ‘Shape‘. Then select ‘New RectangleShape2D‘ as follows:

To change the size of the collider, drag the red dots around to adjust the size so that it aligns with the whole sprite:


Bringing the Player to the MainScene
At last, click on ‘MainScene‘. Go to FileSystem and drag the ‘Player.tscn‘ into the main scene:

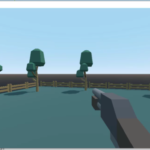
Save the scene and click on the ‘Play‘ button:

You’ll see that our player shows up in the game window:

Scripting our Player in Godot
Let us now start scripting our player sprite.
Go to Project then click on ‘Project Settings…‘, and go over to the Input Map tab:

Creating New Actions
We can create new actions for our sprite by adding in some new keys.
Write ‘move_left‘, ‘move_right‘ and ‘jump‘ then click on ‘Add‘ after each addition to include them to the list:

We now need to assign each action a unique key. Simply click on the ‘+‘ button next to each action and press the relevant key on your keyboard:

In this tutorial, we’re going to use the left and right keys to move to the left and to the right, and the up key to jump. After confirming your choices, you can close the project settings window.
With the Player node selected, go to the Script tab in the Inspector panel. Expand it and click on ‘[empty]’. Then select ‘New Script‘ in the dropdown:

Hit the ‘Create‘ button:

This will automatically open up a Scripting Interface as follows:

Declaring Variables
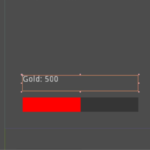
A variable is basically a container that can hold data. The value may change depending on conditions or on commands passed to the program. To create our first variable, type ‘var‘ and then enter a variable name. After that, we can give it an initial value of zero by entering ‘ = 0‘:
extends KinematicBody2D

var score = 0
So now the score variable has a data type of int. You can also add a type hint with a colon (:) after the name to keep it as an integer, which is a whole number:
extends KinematicBody2D

var score : int = 0
You can also set a different data type, such as Vector2 or Sprite. Vector2 holds two numeric values that represent the x, and y coordinates of a point:
extends KinematicBody2D

var score : int = 0

var speed : int = 200
var jumpForce : int = 600
var gravity : int = 800

var vel : Vector2 = Vector2()

var sprite : Sprite = $Sprite
Note that the dollar sign ($) operator is used in front of Sprite. This basically tells the script to look through all of the children nodes and find the node of whatever type is defined after the $, which is Sprite in this case.
The alternate syntax to the dollar sign ($) operator is to use the get_node function. Simply replace $Sprite with get_node(“Sprite”):
var sprite : Sprite = get_node("Sprite")We can also add a keyword called ‘onready‘ before ‘var’ to make sure the asset is ready when the scene loads:
onready var sprite : Sprite = get_node("Sprite")This delays the initialization of the variable until the node of Sprite is found.
Moving the Player
Next, we will implement the ability for the player to move around and jump. First, we need to apply gravity. This is going to be done inside of a function called _physics_process():
func _physics_process(delta):
This is a built-in function of Godot, which gets called 60 times a second to process physics. First, we want to set out velocity on the x value to 0 as follows:
func _physics_process(delta):

  vel.x = 0
Then we will check our movement inputs, that is, if the Input system detects ‘move_left’ action:
func _physics_process(delta):

  vel.x = 0

  #movement inputs
  if Input.is_action_pressed("move_left"):
Our velocity on the x should be equal to negative ‘speed’ when we press the “move_left” button, and positive ‘speed’ when we press “move_right”:
func _physics_process(delta):

  vel.x = 0

  #movement inputs
  if Input.is_action_pressed("move_left"):
     vel.x -= speed
  if Input.is_action_pressed("move_right"):
     vel.x += speed
When moving a KinematicBody2D, you should not set its position property directly. Rather you should use the move_and_collide() or move_and_slide() methods. (*Note that these methods should be used within the _physics_process() callback.)
The move_and_slide() method moves the body along a given vector, and if the body collides with another, it will slide along the other body. This is especially useful in platformers or top-down games.
To use the move_and_slide(), we need first to send over the velocity and the direction in which the floor is pointing. Since the ground will be below us, this would be Vector2.Up:
func _physics_process(delta):

  vel.x = 0

  #movement inputs
  if Input.is_action_pressed("move_left"):
     vel.x -= speed
  if Input.is_action_pressed("move_right"):
     vel.x += speed

  #applying the velocity
  move_and_slide(vel, Vector2.UP)
Flipping the Sprite
Now, we can assign it to our velocity and check which direction our player sprite should be facing:
func _physics_process(delta):

  vel.x = 0

  #movement inputs
  if Input.is_action_pressed("move_left"):
     vel.x -= speed
  if Input.is_action_pressed("move_right"):
     vel.x += speed

  #applying the velocity
  vel = move_and_slide(vel, Vector2.UP)

  #sprite direction
  if vel.x < 0:
     sprite.flip_h = true
  elif vel.x > 0:
     sprite.flip_h = false
Save the script and press Play:


You can now move the Player horizontally with arrow keys. The sprite will flip as the moving direction changes.
Applying Gravity
To implement gravity is pretty straightforward, we can simply add it directly onto our y velocity:
func _physics_process(delta):

  vel.x = 0

  #movement inputs
  if Input.is_action_pressed("move_left"):
     vel.x -= speed
  if Input.is_action_pressed("move_right"):
     vel.x += speed

  #applying the velocity
  vel = move_and_slide(vel, Vector2.UP)

  #gravity
  vel.y += gravity * delta

  #sprite direction
  if vel.x < 0:
     sprite.flip_h = true
  elif vel.x > 0:
     sprite.flip_h = false
When you add/subtract from the velocity, it needs to be multiplied by delta so that it accelerates at the correct speed:
#gravity

vel.y += gravity * delta
Jump Input
We need to check if the ‘jump’ key is detected, and we also need to check if the player is on the floor:
#jump input
if Input.is_action_just_pressed("jump") and is_on_floor():
We then want to apply the jump force in the opposite direction of gravity:
#jump input
if Input.is_action_just_pressed("jump") and is_on_floor():
  vel.y -= jumpForce
Make sure you have saved the script:
extends KinematicBody2D

var score : int = 0

var speed : int = 200
var jumpForce : int = 600
var gravity : int = 800

var vel : Vector2 = Vector2()

onready var sprite : Sprite = get_node("Sprite")

func _physics_process(delta):

  vel.x = 0

  #movement inputs
  if Input.is_action_pressed("move_left"):
    vel.x -= speed
  if Input.is_action_pressed("move_right"):
    vel.x += speed

  #applying the velocity
  vel = move_and_slide(vel, Vector2.UP)

  #gravity
  vel.y += gravity * delta

  #jump input
  if Input.is_action_just_pressed("jump") and is_on_floor():
    vel.y -= jumpForce

  #sprite direction
  if vel.x < 0:
    sprite.flip_h = true
  elif vel.x > 0:
    sprite.flip_h = false
* Note that if you press the play button now, the character will simply fall. That happens because there’s no ground for the player to interact with, as we’re not implementing it in this tutorial. You can think of this as a challenge for yourself!
Conclusion
Well done on completing this tutorial on how to create a player with Godot!
Although there’s much to expand here, you’ve already learned how to script your player in Godot and how to set up the player’s sprite and kinematic properties so it behaves as desired! You can now move on to coming up with your game’s level style and structure, besides some enemy logic or coin collection to make your game exciting.
Godot is also a great choice for beginners – as its node-based user interface makes it easy to create games while also facilitating access and project organization. Plus, the engine is open source and has a strong community backing the project, so there are constant updates and new features being released all the time.
We wish you all the best of luck with your game projects, and that you continue learning more each day!
Further Resources
Would you like to see more on Godot? Check out our recommendations to help you on your journey below:
- Godot 101 – Game Engine Foundations
- Learn the Godot Game Engine in 50 Minutes
- Godot 4 Game Development Mini-Degree by Zenva
- Godot Community Resources
Want to learn more about developing in Godot? Try our complete Godot 3 Game Development for Beginners course.
Did you come across any errors in this tutorial? Please let us know by completing this form and we’ll look into it! FINAL DAYS: Unlock coding courses in Unity, Godot, Unreal, Python and more.