You can access the full course here: Humanoid Animation Tools for Beginners
Table of contents
Part 1
Animator Component
In this lesson, we’ll be looking at the Animator component in Unity. Let’s start by creating a new Unity project. For this project, we’re going to be using some of Unity’s standard assets. These can be found on the Asset Store (Window > Asset Store). Search for Standard Assets and import that package from Unity Technologies.

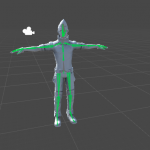
With the standard assets, let’s drag in the Ethan model (Standard Assets > Characters > ThirdPersonCharacter > Models). Then for a floor, let’s create a new cube (right click Hierarchy > 3D Object > Cube).

If we select the model in the scene, you’ll see that it has an Animator component attached.

- Controller: An animation controller which lays out the animations we can player, their relations/transitions between each other and the conditions to do so.
- Avatar: The rig or skeleton that can morph our model.
- Apply Root Motion: If disabled, animations that move like a run animation will not move.
- Update Mode: How the animation frames play.
- Normal: Updates every frame.
- Animate Physics: Based on physics time step (50 times per second).
- Unscaled Time: Normal, but not tied to Time.timeScale.
- Culling Mode: Determines if the animations should play off-screen.
- Always Animate: Always animate the entire character. Object is animated even when offscreen.
- Cull Update Transforms: Retarget, IK and write of Transforms are disabled when renderers are not visible.
- Cull Completely: Animation is completely disabled when renderers are not visible.
Learn more about the Animator component here.
For the next lesson, let’s create an Animation Controller which will contain our animation state machine. In the Project panel, right click the Hierarchy > Create > Animation Controller. Call it Ethan.

Now select the Ethan model in the scene and drag the controller into the Controller property.

In the next lesson, we’re going to be looking at animation state machines.
Part 2
States and Transitions
In this lesson, we’re going to be looking at and creating an animation state machine in Unity. This involves states and transitions.
- States: Animations that will play when they are transitioned to.
- Transitions: Conditions to transition from one state to another.
Let’s now go over to Unity and open up the Animator window (Window > Animator).
Let’s find an animation to drag into the animation controller. Search t:animationclip to find all the animation clips in the standard assets. Drag the HumanoidWalk animation into the Animator screen. It being orange, means that this is the default state. This will be played first when the object is initialized.

Let’s now drag in the HumanoidRun clip. You’ll see that this clip isn’t orange. We can make it the default clip by right clicking it and selecting Set as Layer Default State.

Let’s now make a transition between these two states. Select the HumanoidWalk and click Make Transition. Then click on HumanoidRun. This will create a new transition from the walk animation to the run animation. By default, this means that when the walk animation has finished playing, the run animation will play.

If we press play, the two animations will play. When the run animation is finished, nothing will happen. We can transition that into the Exit state, so that it loops back around to the Entry state.

A better method is to just have the run animation transition back into the walk animation.

States
Let’s select the humanoid walk state and have a look at the Inspector.

- Motion: Animation that the state will play.
- Speed: How fast the animation will play.
Transitions
Let’s select a transition and have a look at the Inspector. Transitions can allow an animation to fade into another. Here, we can modify when, how and how fast the transition takes place.

- Exit Time: When in the clip will we begin to transition into the next.
- Transition Duration: Duration of the transition.
Let’s now restructure our controller a bit and add in an idle animation for the default one.

In the next lesson, we’ll be going over the animator parameters and transitions.
Transcript 1
Hey guys! In this first lesson we’re going to look at the animator components, as this is what is going to control everything that we’re going to be doing for our characters. The component that’s responsible for handling the animations for our character, for handling which avatar is assigned to our character. And a few other settings that are going to be very important for animating our characters. So we’re gonna look at what an actual character avatar is, and then go over a few of the settings of the animator component.
And we’re gonna do this from a brand new project. I wanna create a new Unity project, using the latest version available to me, which is 2019.2 Beta 10. So let’s create a new project using this, and I’m gonna say, Humanoid Animation Course. And we’re gonna use 3-D, that looks good to me there. So create a new project.
So for the most part throughout this course, we’re going to be using the Unity-provided character controllers, that we can find if we go to Asset Store. And if you don’t have this layout, make sure you go up to layout and go down to default, so you get the default Layout, so we’re all working in the same workspace here. And I am gonna search for standard assets. It’s completely free and has all of the things that Unity provides for us.
But what we care about for this case is going to be the 3-D character controller, as that comes with a completely rigged character, that will allow us to play with animations and check out how we work with animations in Unity. Now to keep this simple, I’m simply going to import everything. But for this, all you need is the character folder. But I’m just gonna grab everything all at once here.
Alright, so I have the standard assets imported. I don’t want this sample scenes folder that it imported for me, though. I know I don’t care about all of that stuff in there. All I care about with this is going to be our models folder, inside of characters, third person, models, and we have Ethan in here. Which is gonna be the model we play with for the first bit of this. And then by the end of it, we’re going to get some third party models, and we’re going to do some cool animations. And share it between different models, and retarget it based on different avatars, and all kinds of fun stuff.
So for now though, we’re gonna look at the Ethan model. What I’m gonna do is, I wanna drag this guy out into my scene here, and just place him out in the world. And with him selected, if I hit the F key, I will center him. And also, just to make this look more like a scene, I’m gonna add a floor. So wanna create a cube, and I’m just going to scale this out, just like that. And then just bring it down under our guy there.
So now with our Ethan selected, now this is just a rigged model. There are no things on this model at the moment that help it move, even though it as an animator component, which we’ll get to here in a second. You can go to prefabs and grab a third person character controller, which already has a physics-based character controller on it, that you can move around in your game world. But we’re not doing that. We don’t care about all that. We’re just looking at animations and how we can use them on our characters. And especially how we an use them on multiple characters. And decide when certain animations are played, and all this fun stuff.
So with Ethan selected, I notice we have an animator component here, that has a controller field. Which has nothing on it, because we do not have an animator controller created and configured for this. Which we will get to in a bit. And then we have an avatar field, which has an Ethan avatar asset already applied to it. So with this selected, if I were to select my avatar here, it would show me this is a physical asset, in my assets folder. And if I select this, I can see in the inspector I have a configure avatar button. Now this is gonna take me to a different scene, so if you need to save your scene go ahead and do that.
Now there appears to be a lot going on here. But all this really is, is the system that Unity uses to understand which bones apply to which body parts. That way, if we were to use the same avatar on multiple different rigs, or different rigs on one avatar, it understands which bones should be moving and animated based on the motions. Because we have it set up and assigned. And Unity’s really good at doing this automatically. But as long as you have this set up well and correctly, you should have no problems retargeting animations and using the same animation across multiple rigs. As long as they are using a valid avatar, or at least, in this case, the same avatar.
Now if we go down to done here, it will take us out of this scene for this. And what I’m gonna do is go back and select my Ethan here. Frame him up again. We have apply root motion. Which is going to allow the animation to physically move the character in 3-D space, using what’s called root motion.
Now there’s a lot going on here that has to happen for this to work. If an animation has movement in a form of a vector, and it is physically moved in space, this will allow the animation to actually move your object in space. And we will be using this for our animations, because the animations can look a lot more realistic if they are actually in control of moving the character. Helps you avoid the skiing effect. Where you’re sliding across the ground, or it doesn’t look like you’re actually walking. As well as jumping is done really easily this way, because the actual animation handles the physical position of your object in the game world.
The same goes for if you were to do dodge rolls, or evades or anything like that. This is all handled, where it’s moved based on the animation. So it looks really good and it’s really easy to do, as long as you have proper animations.
And then we have update mode, which is going to determine if the animation should update on the physics time step, so as the physics simulation updates, every, 50 times per second in fact. This will do the same. Or if you should be not on scaled time, which means, the scale time let’s say is set to one. You’re gonna be running at the normal rate. If I set it to unscale time, this is not going to matter, what the normal rate is. So if I were to set my time scale to zero, which is something you would typically do if you were to stop a simulation every game, or pause the actual game. This animation would still run, even if you had done that. But typically, we’re gonna be just using normal for this.
And culling mode will determine if the objects renderer is off-screen, so it’s not in view of the camera or any camera, what should be happening. In this case, we are only going to be doing the basic animation so that we can get events fired back to us, if we cared about those. And that doesn’t happen all that much, anyway. Or you could say, “Always animate.” So the actual thing is always evaluating, always animating, and we’ll see what that does later, whenever we have conditional branches in our state machine.
But that would be something that we would typically leave on update transforms, being cold. Because if it’s off-screen, we don’t necessarily care if our character is animating properly. We just care that it still understands what is happening. And the last one is cold completely, which means nothing happens once it’s off-screen. And that can be good for some things, if you have a lot of statically animated objects.
So in the next lesson we’re gonna look at the actual state machine, which is going to use an animator controller asset to work. So what I’m gonna do is create one of those really quick. And we have a few from the assets that we imported. What I’m gonna do is inside of this, I’m gonna create an animator controller. And I’m gonna call it Ethan. And what I can do now is assign this to Ethan, as Ethan’s animator controller, and if we were to select this, double click on it, we get this. Now this is what we’re gonna check out in the next lesson, guys. A lot of fun stuff we’re gonna be able to do here. My name is Austin, and I will see you in the next lesson.
Transcript 2
Hey guys, welcome back. In this lesson we’re going to look at the state machine itself and check out states and transitions. The state machine is what is responsible for determining when and where, we transition into and out of individual animation. So we’re gonna check out what the actual state machine is, and kind of how it works and then look at individual states which are just in this case individual animations that the machine is responsible for determining when we go into these animations and we go out of those animations.
So we have a walk animation. Remember walk, when does that walk animation become a run animation? Oh, it becomes a run animation when going at this speed. But we don’t want to just jump into that new animation, we wanna transition into it, we wanna blend into it, so it doesn’t look like we abruptly started running. We want to kind of smoothly start running. And to do that, we’re going to look at a few different things later on, but for now we’re gonna look at transitions which is what allows us to define conditions to get from one animation or one state into another state.
So let’s check that out really quick in. Now we created our animated asset here, and that’s what we’re looking at, right here in this grid. Now if I hit Shift+Space, it will make everything that I had selected and focused on full screen so we can work in this, very nicely just like here. So what we have, first of all, are a few default states, or at least points that we can come into and go out of other states. And this whole grid represents an entire state machine itself. So any state, entry and exit.
So what I want to look at here first, before we go over these, is I want to grab animation, bring it in here and then check out what the state looks like, as it is represented in this state machine. So I wanna go down and I wanna just go search in the search bar here. I know the standard assets comes with a bunch of nice animations and again, later on, we’re gonna find some more third party animations to use. What I’m gonna do is say t:animation clip and that allows me to look at all of the animation clips and I’m going to, zoom out of this so we can actually read the words here.
What I wanna do just to look at this, let’s grab HumanoidWalk and I’ll drag that in. Now notice we have a line coming from entry over to HumanoidWalk. And we’ll get into that here in a second. And then maybe we’ll have HumanoidRun as well, and drag that in. Now this one’s gray and that one’s orange. And we have a line coming from that one.
So what’s going on here? Is entry is the starting point of this state machine. It’s where it comes from, to go into something else. To start the first state or to start the first animation. And now this one since it was the first animation I dragged in, is by default, the default starting active state. If I right-click on this, we can see it is already set as the layer default state, which means this will be the first animation to play whenever the state machine is activated, which if we keep in mind here, whenever this animator is instantiated, Ethan the controller is active.
So if I were to right-click on this one and say set as layer default state, now that line goes from entry up to that. And this line will later on represent what a transition is. But for now, it’s just saying, hey, you’ll come from entry, which can be the path between a different state machine and this state machine. Or it can just be the starting point of the only state machine. Which in this case is exactly what it is.
Now I could say we can come from any state, right-click Make transition, go up to HumanoidRun. Which means I would come in from any other state and go straight into HumanoidRun. Or if nothing else is happening, this will be the default state that is activated. And that gives me a transition, which we’ll get into here in a bit. But let’s just delete that for now. And see how this is going to work.
So let’s make our walk animation the default because want to start walking first. And we’re just gonna play around some animation to see what we can do with them. And I’m going to right-click HumanoidWalk and do make transition again, and say hey, we can go from HumanoidWalk straight into HumanoidRun. Now what we can do is defined conditions, that says if this condition is met, then we go into HumanoidRun. which is what we’re going to do later on, whenever we want to control it, say with input, or based on the speed or how where to hit the jump button, things like that would invoke a transition. But in this case, we don’t have that stuff set up. So we’re just gonna go straight from HumanoidWalk straight into HumanoidRun.
But what I wanna do is do that run out the gate. Once HumanoidWalk is complete, then go into HumanoidRun. So check this out, I’m gonna take my animator, drag it down here, so we can see what’s happening with it. And I’m also going to just click play right here. And we see, let’s get a better view of this. Click Play, go back into a scene view. And we see and start to walk and then go straight into running. And he’s just running indefinitely. Now that’s an animation and we can see that animation playing.
If I pause this here, we can see that animation playing and looping over and over from HumanoidRun. Now the reason it’s doing that, is because we have no exit from HumanoidRun. We go from walk certain to run, and then nothing else. What I could do, if we stop this, I could go from going from HumanoidRun straight into exit and so they have nothing else to do. All that’s going to do is loop back into entry. And just keep doing that over and over.
So let’s check that out. Let’s get up on him here. He walks then runs walks, walks then runs you can see what’s happening. goes choo, choo, choo, choo, choo, choo. And that’s what it’s doing, pretty cool. So we’re going into the exit there.
What about if we didn’t go to exit, but we just went back and forth? We can go up to run and then back down to walk and still having the entry because we have to start somewhere. Try this out. Doing the same thing, because we’re just looping back and forth. Now with HumanoidWalk selected, we can look at some of the properties that this stage has, and properties that apply to the animation clip as well.
So first of all, we have the animation clip that is HumanoidWalk. Notice we can add in these clips in there instead. But this one we wanna use, we can also rename it. I could just name it walk just like that, we have speed, which is pretty self explanatory. But if I were to speed this up, it’ll just speed it up times 10 In that case. So he’s just when he’s in that state, he’s really fast. Just speeds up the animation itself.
And we have a multiplier, which can be based on a parameter which we’ll get into in a bit, we don’t have parameters in use yet. Normalize time to be based on a parameter as well. Once again, we don’t have that. Mirror is simply going to mirror the animation from left to right for the back, whatever you’d like to do them. And there’s a bunch of stuff here, that we will simply not be using, for such as foot IK, inverse kinematics, which is good for accurate foot placement on different types of terrain and all that kind of stuff. But in this case, all we care about in here for now, it’s gonna be our list of transitions.
So I can transition out of walk into HumanoidRun, and then out of run back into walk. And what I can do is look at exactly how this is doing that. So if I go to the settings, of the transition out of walk into run, we see a bunch of stuff, you have has exit time. Which means we cannot transition out of walk, since we’re going out of here with this transition until the state is complete. Until the animation clip has completely play.
So what that means is, if I don’t have this, and there’s no conditions defined for transition, is always going to snap out of walk because there’s nothing keeping it there. But if I haven’t defined, I could say wait, no we could wait five seconds before we come out of that. And that’ll just walk for a while. And then five seconds later, we will transition out and then back in, and then five seconds later, you get the idea. Fixed duration is going to be the length the transition takes.
So if I were to set this up to be a higher speed, the transition between one to the next state will be a lot slower, so it will take us longer to transition. So if we had to have a be a snappy switch from walking to running, you’d want this to be a lower value. Whereas if you want it to be a slower transition, make it a higher value. Pretty simple stuff.
And the transition offset here, you can actually see that we can drag these actual handles around, and do this in here ourselves, and it will change the values for us. This is a nice representation of what it’s going to look like, in the end. Interruption Source is simply saying, what can interrupt this transition? The current states changing can interrupt it. The next states changing and interrupt it. If you go from the current state into the next state, or from the next state into the current state. Now these are more technically specific things that again, we won’t be using for this, but they are there if you need them.
So I could just drag an idol. Make it the default. Go from that to walk, from walk into that. And then from run back into walk, just drag this around here. So he goes some idle, into walk into run, idle, walk, run. Very cool, in the next lesson guys, we are going to, check out those animator parameters and also check out some of the conditions that we can use with those parameters. My name is Austin and I will see you next time.
Interested in continuing? Check out the full Humanoid Animation Tools for Beginners course, which is part of our Unity Game Development Mini-Degree.