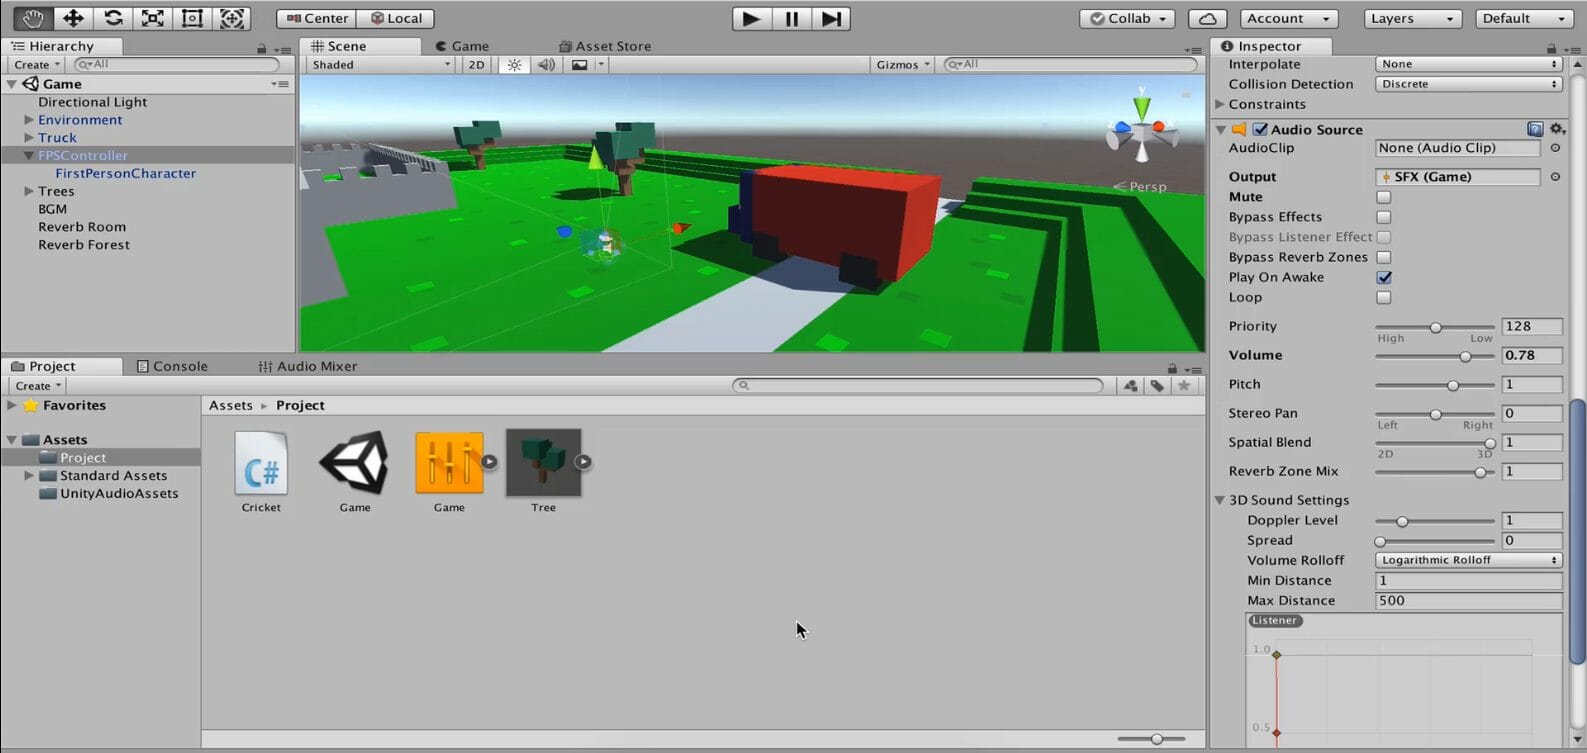
Beyond things like lighting and gameplay mechanics, there is something else to consider when creating video games: sound design.
Whether music or a sound effect, what and how you add audio to your games can make a huge difference for game feel as it alters the entire atmosphere of your game. Good sound design can also vastly increase immersion, hence why big game development studios have whole teams and time dedicated to just getting the audio correct!
In this tutorial, we’ll start you on the journey of video game sound design by going over Unity’s audio systems with an audio-centric project. This project is going to feature multiple areas that each exhibit something you can add to your own games:
- Reverb zones to add echos to your sounds
- The Doppler effect with a plane flying above
- Player footsteps when walking
- A campfire
- Crickets that stop making noise when you get close
- Music zones which fade music in and out when you enter the area
So, if you’re ready to explore game audio, let’s get started.

Table of contents
Project Files
For this tutorial, we’ll be needing some assets such as sounds, music and 3D models.
Want more guidance? Find the full course of this content here, available in the Unity Game Development Mini-Degree.
Project Setup
To begin, let’s create a new Unity project using the 3D template. First, we need to create some folders in the Project Browser.
- Audio
- Materials
- Models
- Prefabs
- Scripts
- Textures
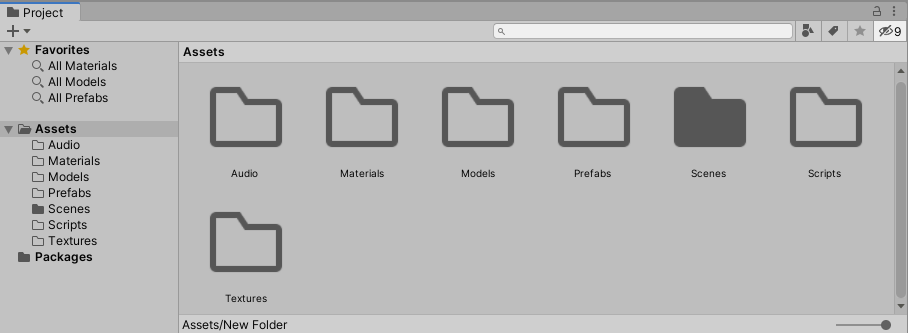
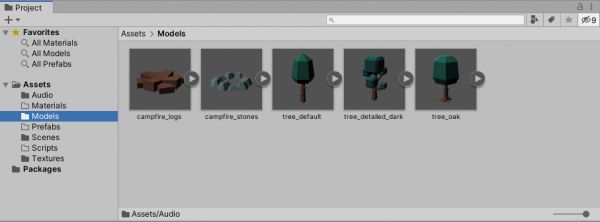
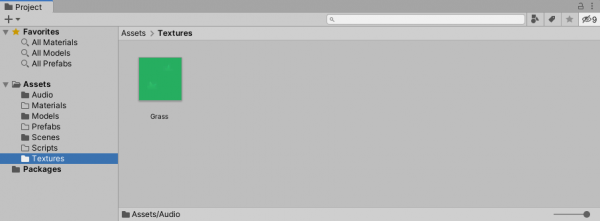
Next, download the required assets and extract the contents of the ZIP to somewhere on your PC. Inside, you’ll find three folders (Audio, Models and Textures). Drag the contents of those folders into their respective ones in your Unity project. Here’s what the folders should look like once you’ve imported the assets:
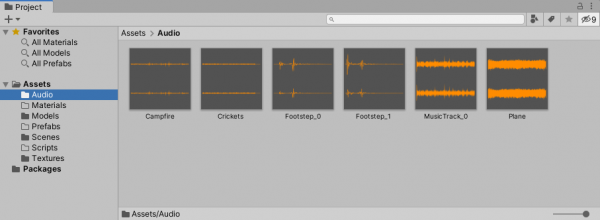
Setting up the Environment
In order to implement sounds, we first need an environment. Inside of our scene, let’s create an empty GameObject called _Environment. As a child of that, create a 3D plane with a scale of 10.

Then we can create a material for the ground, using the Grass texture we just imported.
- Create a new material in the Materials folder called Ground
- Set the Albedo Texture to Grass
- Set the Albedo Color to light green
- Set the Smoothness to 0
- Set the Tiling to 100, 100
- Drag the material onto our plane to apply it

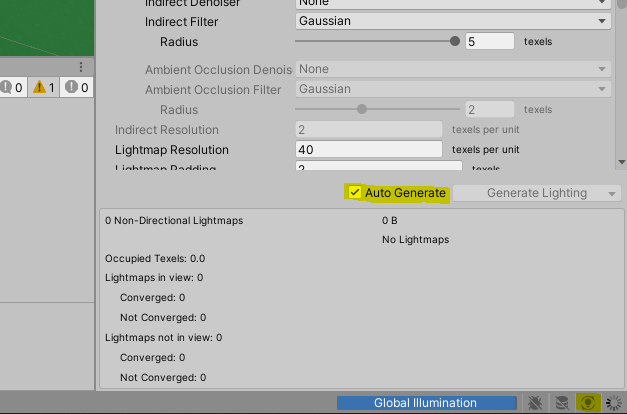
The lighting looks a bit weird so let’s fix it. At the bottom right corner of the screen, click on the Auto Generate Lighting button to open up the Lighting window. Enable Auto Generate to auto generate the lighting.
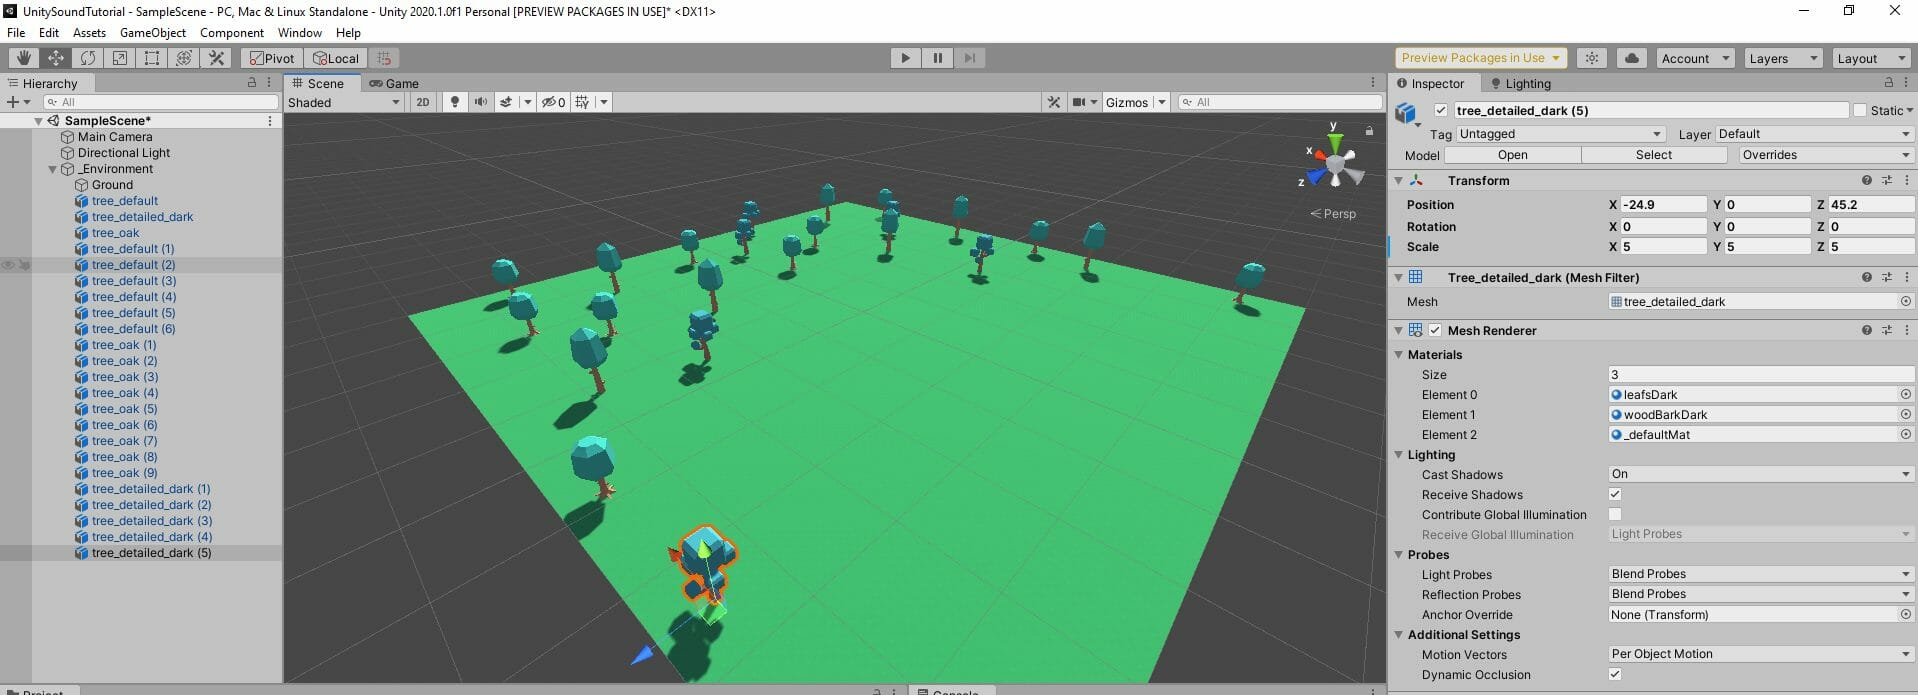
Now let’s make our environment look better. To begin we can go to our models folder and drag in some trees.
- Set their Scale to 5
- Copy and paste multiple trees around like in the image below

Next, we need to create some walls for when we test out audio reverb.
- Create a new 3D cube object
- Create a new material with a grey color and apply it
- Duplicate, scale and position it like in the image below
We want 2 walls with an alleyway in the middle.

Player Controller
To create our player, let’s first setup the GameObject.
- Create a new empty GameObject called Player
- Drag in the Main Camera as a child of that object
- Set the Position to 0, 1.8, 0
- Create a new 3D capsule as a child of the player
- Set the Position to 0, 0.9, 0
- Set the Scale to 0.5, 0.9, 0.5

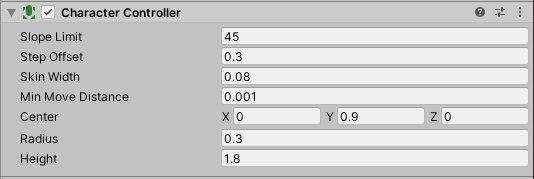
On our Player object, now need to add some components. First, we have the Character Controller component.
- Set the Center to 0, 0.9, 0
- Set the Radius to 0.3
- Set the Height to 1.8
Then we want to add an Audio Source component for the footsteps.
- Disable Play on Awake
- Set the Volume to 0.3
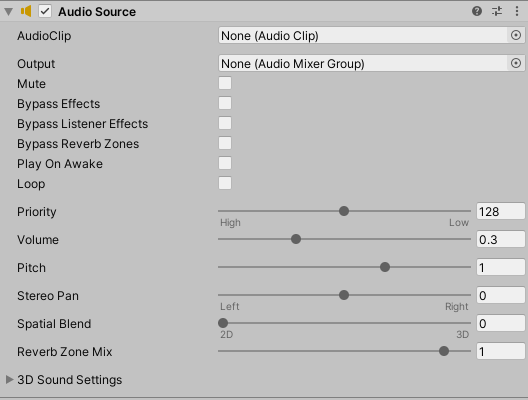
Player Movement
Create a new C# script called PlayerController attach it to the player object. This script is going to control movement and camera looking. First, we’ll create our variables.
public float moveSpeed;
public CharacterController controller;

public Transform cam;
public float lookSensitivity;
public float minXRot;
public float maxXRot;
private float curXRot;
Inside of the Update function, we’ll move the player with the keyboard.
void Update ()
{
    float x = Input.GetAxisRaw("Horizontal");
    float z = Input.GetAxisRaw("Vertical");

    Vector3 dir = transform.right * x + transform.forward * z;
    dir.Normalize();

    dir *= moveSpeed * Time.deltaTime;

    controller.Move(dir);
}
Then in the LateUpdate function, we’ll implement a camera look. We’re doing it in LateUpdate so that the player will move first before updating the camera rotation.
void LateUpdate ()
{
    float x = Input.GetAxis("Mouse X") * lookSensitivity;
    float y = Input.GetAxis("Mouse Y") * lookSensitivity;

    transform.eulerAngles += Vector3.up * x;

    curXRot += y;
    curXRot = Mathf.Clamp(curXRot, minXRot, maxXRot);

    cam.localEulerAngles = new Vector3(-curXRot, 0.0f, 0.0f);
}
Finally, to lock our cursor to the screen we can do this in the Start function:
void Start ()
{
    Cursor.lockState = CursorLockMode.Locked;
}
Save the script and return to the editor. Select the player so we can fill in the properties.
- Set the Move Speed to 5
- Set the Controller to our component
- Set the Cam to the main camera child
- Set the Look Sensitivity to 2
- Set the Min X Rot to -80
- Set the Max X Rot to 80
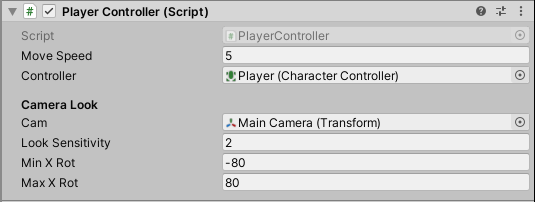
Press play and test it out!
Footstep Sounds
In many games, you’ll want your player to have footstep sound effects. For this, let’s create a script called Footsteps and attach it to our player object.
This script basically checks to see if our movement velocity is above a certain threshold. If so, every 0.4 seconds (or whatever we set the footstepRate variable to) we’ll play a footstep sound.
public AudioClip[] footstepClips;
public AudioSource audioSource;

public float footstepThreshold;
public float footstepRate;
private float lastFootstepTime;

public CharacterController controller;

void Update ()
{
    if(controller.velocity.magnitude > footstepThreshold)
    {
        if(Time.time - lastFootstepTime > footstepRate)
        {
            lastFootstepTime = Time.time;
            audioSource.PlayOneShot(footstepClips[Random.Range(0, footstepClips.Length)]);
        }
    }
}
Save that and return to the editor.
- Add both the footstep sounds effects to the Footstep Clips array
- Set the Audio Source to our component
- Set the Footstep Threshold to 0.3
- Set the Footstep Rate to 0.5
- Set the Controller to our component
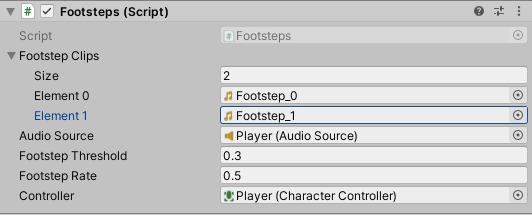
Press play and test it out!
Reverb Zones
In your games, you may want sounds to echo or be altered depending on the environment that the player is in. For us, we have a large stone alleyway, so let’s make all audio reverberate when we go in there.
In the Hierarchy, right-click and select Audio > Audio Reverb Zone to create a new Audio Reverb Zone object.
- Position it in the center of the alleyway
- Set the Min Distance to 16
- Set the Max Distance to 21
The min and max distance will allow us to transition into the reverb zone so that it doesn’t instantly kick in. We can also change the reverb preset, but for now we’ll just keep it on Generic.

Press play and walk over into the alleyway. You should then hear your footsteps echo!
Did you come across any errors in this tutorial? Please let us know by completing this form and we’ll look into it! FINAL DAYS: Unlock coding courses in Unity, Godot, Unreal, Python and more.
Doppler Effect
The doppler effect is where sounds moving towards you are more high pitch and sounds moving away from you are lower in pitch. This can be experienced in the real world when a car or plane moves past you. Why? Well when a fast-moving object is moving towards you, the sound waves it produces are closer together causing a higher pitch. While an object moving away will cause its sound waves to stretch, lowering the pitch. Unity has the doppler effect built-in by default, so let’s set up an example.
Here I’ve set up a basic plane model using cubes and a red material. Put these all into an empty Game Object called Plane.
On the plane object, add an Audio Source component.
- Set the Audio Clip to be Plane
- Enable Loop
- Set the Spatial Blend to 1
- Set the Doppler Level to 0.5
- Set the Volume Rolloff to Custom Rolloff
- Set the Max Distance to 1000
- Set the Rolloff Curve to look like the one in the image below

Now we need this plane to fly in a large circle, moving over our heads. Create an empty Game Object called PlaneRotator.
- Set the Position to 500, 25, 0
Then drag in the plane as a child of that.
- Set the Position to -500, 0, 0
- Set the Rotation to 0, 0, -35

On the PlaneRotator object, we want to create a new script called Rotator and attach it. This script will rotate the object around over time.
public Vector3 axis;
public float speed;

void Update ()
{
    transform.Rotate(axis, speed * Time.deltaTime);
}
Back in the editor, select the PlaneRotator and fill in the properties.
- Set the Axis to 0, 1, 0
- Set the Speed to 10

Press play and you should now hear the doppler effect as the plane flies by!
Campfire
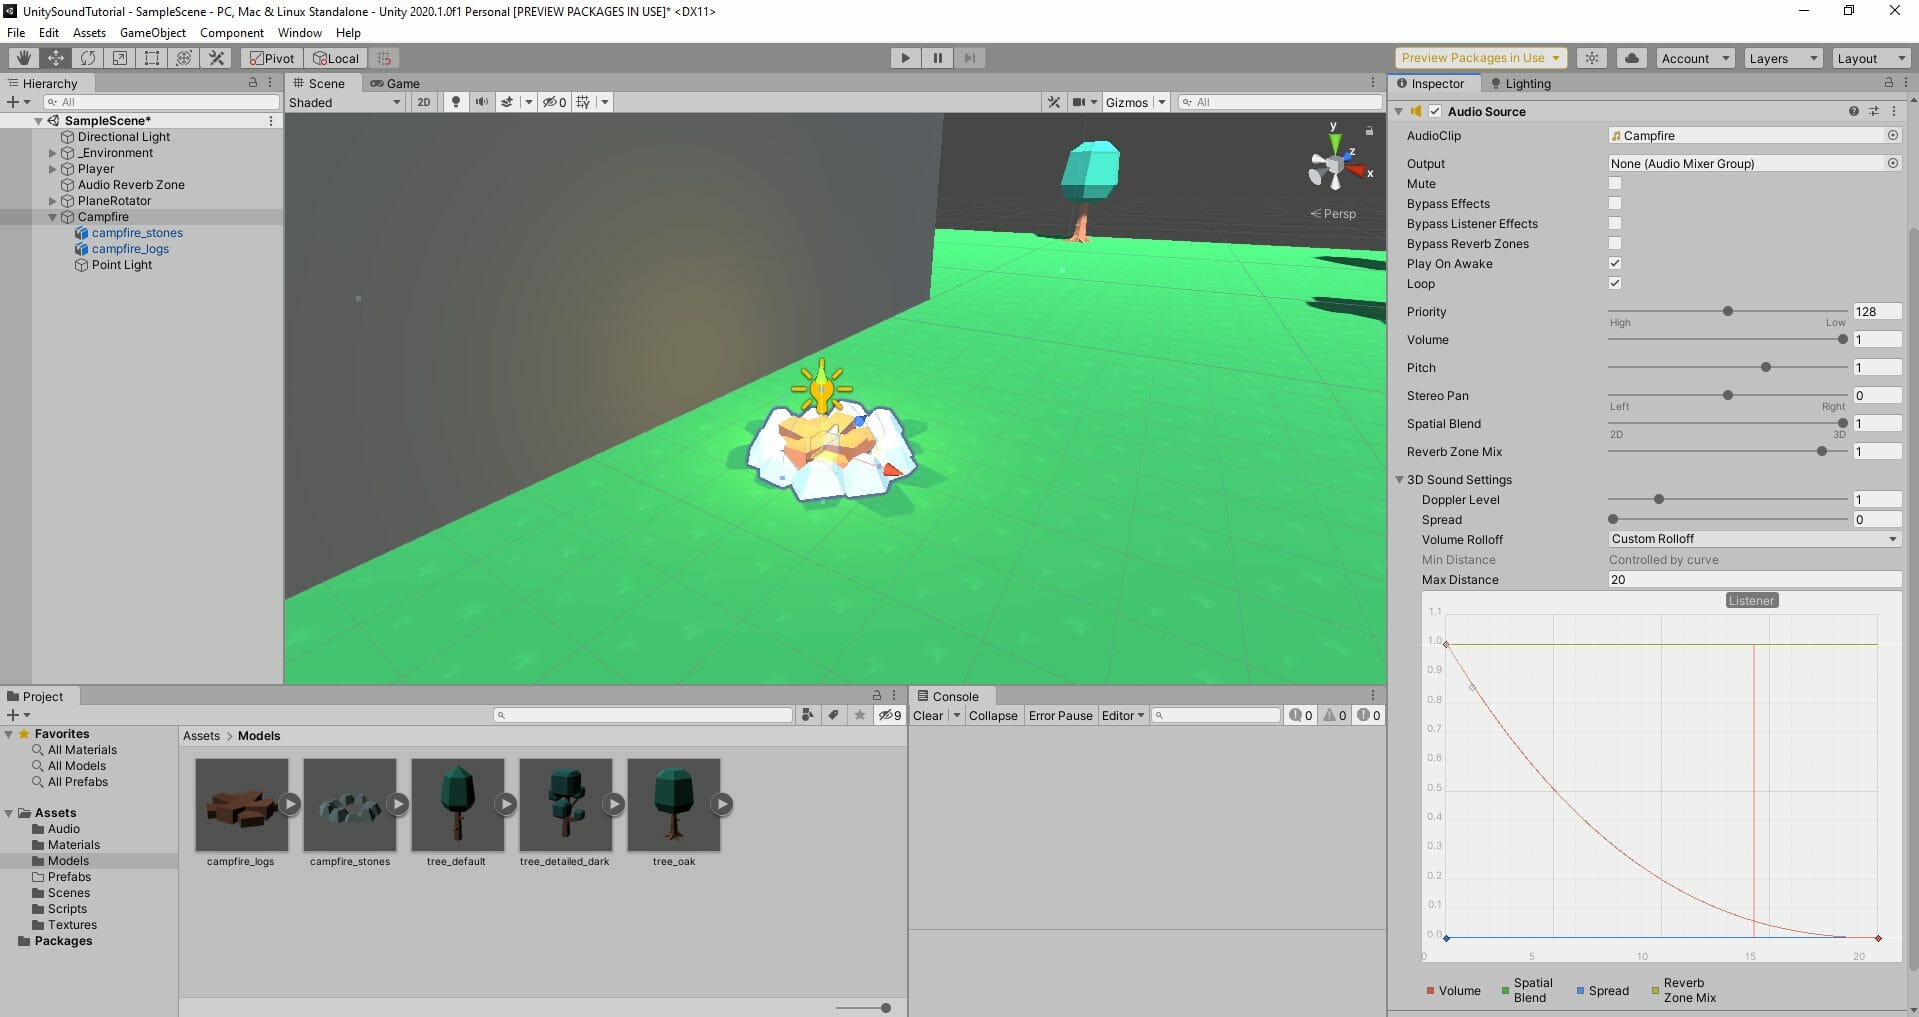
As a bit of a challenge, I want you to go ahead and try to create a campfire with the Campfire audio clip we have provided. Make a campfire using the 3D models and a point light. This fire should play the sound louder when you get closer but cut off at around 20 meters.
Here’s what the final result should look like:

Dynamic Crickets
You may want to enable or disable sounds in-script. For this example, let’s have a tree with crickets in it that chirp. When the player gets close, the crickets will stop.
- Create an empty GameObject called CricketTree
- Duplicate a tree model and make it the child
- Create a new Audio Source as the child of the tree
- Set the Audio Clip to Crickets
- Enable Loop
- Set the Spatial Blend to 1
- Set the Max Distance to 30
On the CricketTree GameObject, create and attach a new script called Crickets. This script basically checks the distance between the player and the tree each frame. If they’re below a specific distance, the audio will stop, otherwise it will continue to play.
public AudioSource audioSource;
public float stopDistance;

private Transform player;
private float defaultVolume;

void Start ()
{
    player = FindObjectOfType<PlayerController>().transform;
    defaultVolume = audioSource.volume;
}

void Update ()
{
    if(player == null)
        return;

    float dist = Vector3.Distance(transform.position, player.transform.position);

    if(dist > stopDistance)
        audioSource.volume = defaultVolume;
    else
        audioSource.volume = 0.0f;
    }
Back in Unity, let’s select the CricketTree and fill in the properties.
- Set the Audio Source to the child audio source
- Set the Stop Distance to 5

Press play and test it out!
Music Zones
Let’s now implement a system which will allow you to have different zones that play different music when you enter/exit them.
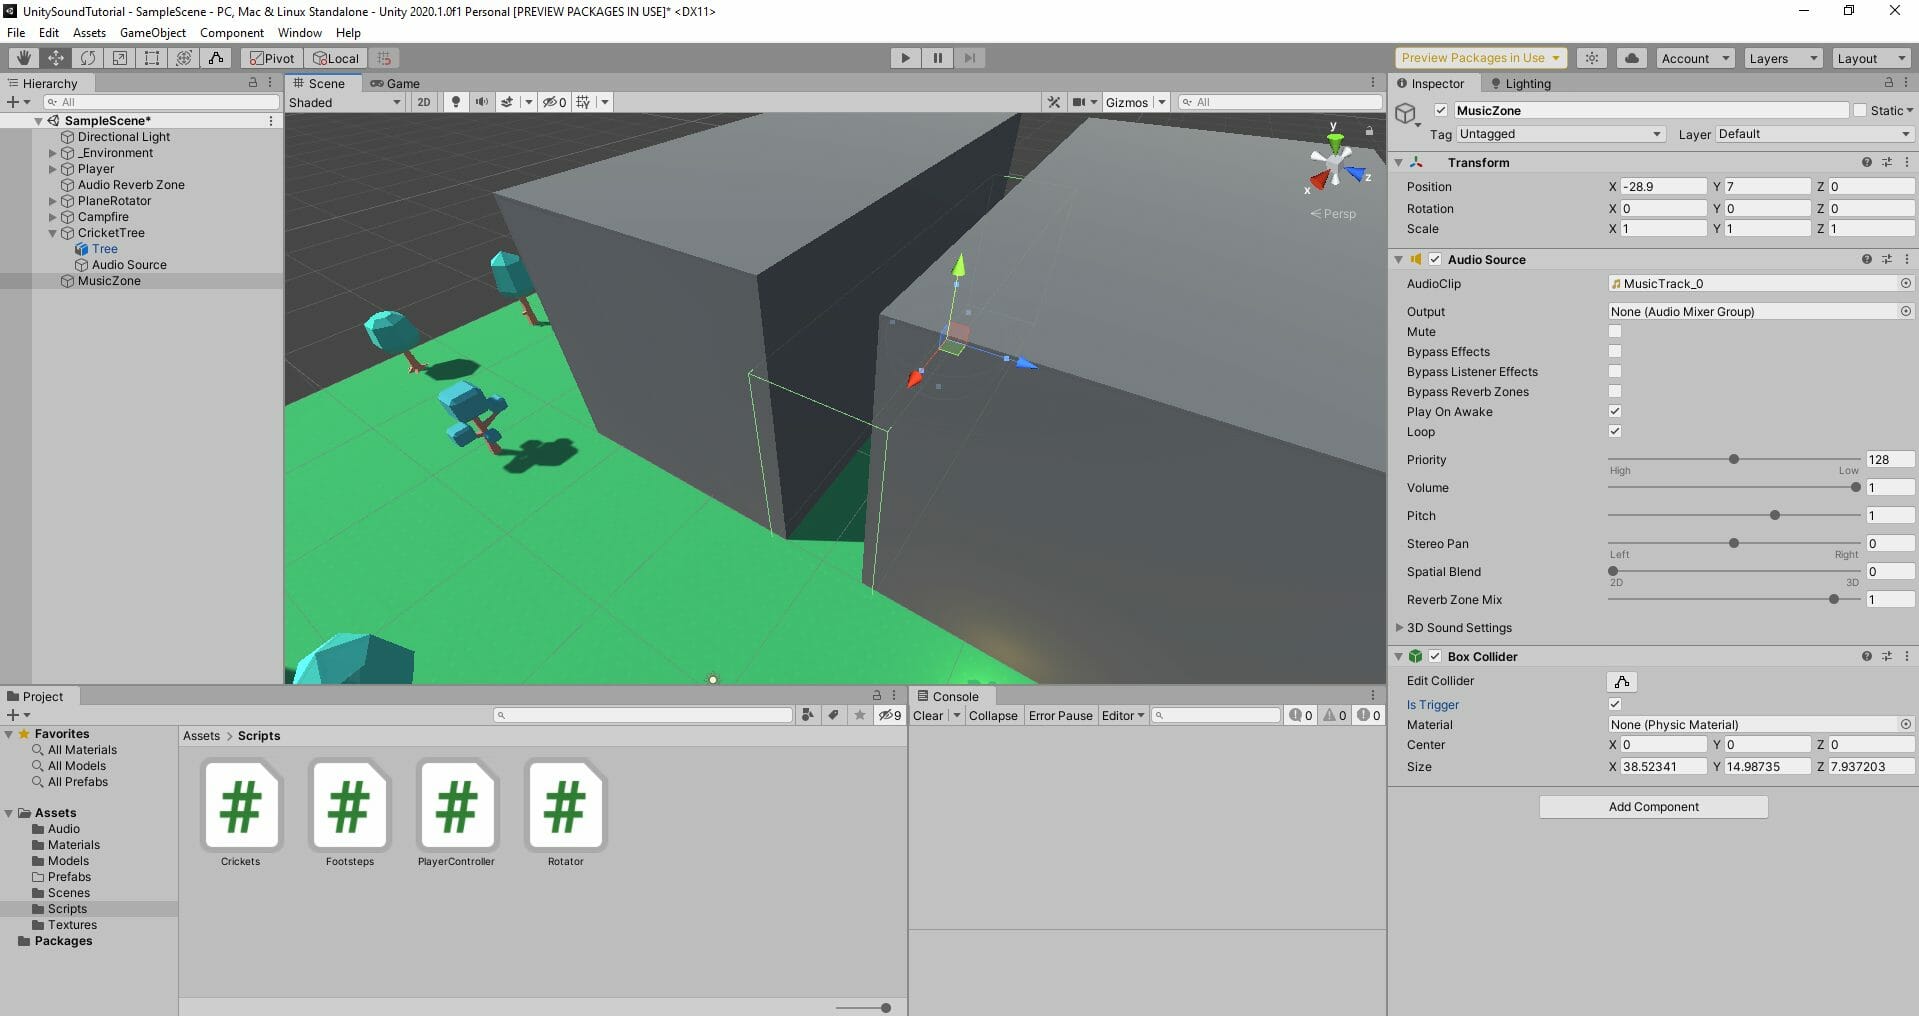
- Create a new empty GameObject called MusicZone
- Attach an Audio Source component
- Set the Audio Clip to MusicTrack_0
- Enable Loop
- Attach a Box Collider component
- Enable Is Trigger
- Resize it to fit the bounds of the alleyway like so:
Next, we need to select our Player object and set their GameObject tag to Player. This is needed for detecting the player.

Then, we can create a new C# script called MusicZone and attach it to the object.
public AudioSource audioSource;
public float fadeTime;
private float targetVolume;

void Update ()
{
    audioSource.volume = Mathf.MoveTowards(audioSource.volume, targetVolume, (1.0f / fadeTime) * Time.deltaTime);
}

void OnTriggerEnter (Collider other)
{
    if(other.CompareTag("Player"))
        targetVolume = 1.0f;
}

void OnTriggerExit(Collider other)
{
    if(other.CompareTag("Player"))
        targetVolume = 0.0f;
}
This script detects for when the player enters and exits the collider. When that’s done, the target volume is set to 1 or 0 respectively. Then every frame, we’ll smoothy transition the audio source’s volume to meet that target.
Back in the editor, let’s fill in the properties.
- Set the Audio Source to the audio source child
- Set the Fade Time to 1

Finally, let’s just select our audio source and set the default volume to 0, so it’s not playing when we start the game.
Press play and test it out!
Conclusion
So there we go – project finished!
Within our Unity game we just created, we’ve got a number of different examples and effects for our audio. We have zones that echo, music that fades in and out depending on player position, and even footsteps as our player walks. Each audio example also varies greatly in terms of atmosphere and feel – showing you the amazing power video game sound design possesses in creating unique experiences!
From here, you can implement these into your own games or experiment more with what Unity has to offer. After all, there are many settings you can adjust with Unity’s tools alone, offering endless amounts of customization. Sound design is not an exact science, so play around with it and find the audio settings that work for you!
Thank you for following with this tutorial, and I wish you the best of luck with your future games.
Need more help with game audio? Try out the full course: Game Audio Effects for Beginners
