You can access the full course here: Intro to Polybrush
Prefab Painting
In this lesson, we’re going to learn how to paint prefabs onto our mesh.
In Polybrush, we can attach prefabs automatically to a mesh’s surface. Before we proceed, however, let’s make our mesh look more like a planet. In the sculpting tab, create some hills and valleys:

Note that by holding down Control and using the scroll wheel of your mouse to increase/decrease it you can change the outer radius quicker.
To push the mesh inwards, you can hold down Control and then draw normally.
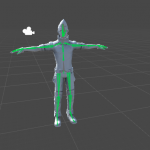
Next, go to the vertex colors to add some variation like so:

Now go over to the ‘Scatter Prefabs on meshes‘ tab and, from the Models folder, drag and drop the prefabs to the ‘Current Palette‘ window. Then click on the checkbox for each prefab so that they’ll appear on the ‘Brush Loadout‘ window too. From there, enable the ‘Use Pivot‘ option and start drawing the prefabs on top of the sphere:

You’ll notice that the sphere is looking small in comparison to the prefabs, so let’s scale it up a bit on the Inspector window:

To speed up the process of drawing the models onto the sphere, you can set the Strength of the brush to 1:

In order not to have two or more models overlapping, enable ‘Avoid Overlap‘:

And here’s our planet full of trees and bushes:

Feel free to add more models and prefabs to your Current Palette and Brush Loadout.
To edit a single prefab of your sphere, go to the Inspector window and then click on the prefab and apply the necessary changes.
You can see the list of all the prefab children that were added to the sphere in the Hierarchy window:

Transcript
Welcome back, everyone. In this lesson, we are going to be looking at how we can paint prefabs onto our mesh right here using Polybrush.
Now, normally inside of Unity, you will have to drag a mesh into the scene, position it, rotate it, and that can of course take quite a lot of time. Well, the great thing about Polybrush is that we can actually do this automatically and we can attach meshes or attach prefabs to a mesh’s surface.
So, first of all, before we continue, let’s make this look a bit more like a planet, okay. Let’s start by adding in some hills and maybe add in a bit of color variation, okay, to mix it up a bit.
So as a bit of a challenge, I want you to go to the Sculpt Settings here, and I want you to create some hills and valleys and I’ll be right back to see how you’ve done.
All right, some quick tips is that in order to change the outer radius really quick, you can hold down Control and use the scroll wheel in order to increase and decrease it. And in order to actually reduce from the mesh, so in order to not pull, but push, you can hold down Control and then draw, like so, okay.
So, holding left mouse drags the vertices out, holding Control and left mouse pushes them in like that. So there we go. I’ve just gone ahead and modified and sculpted this mesh a bit.
Next up, what we can do is go to our vertex colors and we can just start painting on some vertex colors to make it look a bit different. And there we go, I’ve just added in some color variation. So now let’s go over to the Scatter Prefabs on meshes tab right here.
And what we can do is, as you can see, exact same brush settings as normal, but down here in the Prefab Scatter Settings, we have a few things. First of all, down here, we have the Brush Loadout.
So let’s go over to our models folder and drag in these prefabs down to the current palette down here, okay. We’ll drag them all in like so, and then what we can do is click on the little check mark to bring it up to the Brush Loadout.
And the Brush Loadout is basically what models we are going to be painting on, okay, what prefabs we’re gonna be painting on. So just like before, select our mesh, and click to paint on some models, just like that. As you can see, there is a distance between them here.
So in order to avoid that, what we want to do is enable Use Pivot. And this will basically make the pivot point be the position at which we are attaching it to the mesh here. So as we can start dragging around like so, as you can see, it’s painting on the models.
Now you may notice that these models are quite large, and the reason why is because this sphere isn’t that big. So what we’re gonna do is we’re just going to delete these here, and I’m just gonna go to the Inspector and I’m gonna scale this mesh up a tiny bit, okay.
Back into Polybrush, we can now paint them on and they look about to scale. But what we’re doing here is we’re just clicking them one by one. I’m actually gonna switch back over to normal shaded. We’re clicking them one by one and you know, that can be quite annoying.
So how do we actually speed this process up? Well, we can, of course, increase the radius. We can increase the strength. And if we have a strength right at one, you’ll see here that we are actually drawing them quite often, like so, okay.
Now there is some problem in the fact that we do have overlapping meshes right here, overlapping prefabs. Now that might be something you want, but for us, we don’t really want trees inside of each other.
So to fix that we can enable Avoid Overlap right here. And once we start drawing them in, you’ll see here that they are no longer overlapping each other, which is pretty nice, okay. So we can make our brush bigger. We can then start painting them along here and wherever you wish.
So this is really good if you have maybe some terrain that isn’t using Unity’s inbuilt terrain editor. You no longer have to go in and manually import these prefabs and position them, or just place them where they’re needed, rather, you can just fire up Polybrush and paint it on as easily as this.
And as you can see right now, we’ve already got a planet with all these various different trees and bushes. And if you did have more models and prefabs, you can of course chuck them into the current palette and add them to the Brush Loadout, okay?
The Brush Loadout is basically an array of prefabs and each time you draw, it picks a random one. Now let’s say you wanna go in and you want to modify a tree. Now maybe a tree is not in exactly the position you want. Well, then what you can do is just open up the objects children, and you can see they are all here.
So if we actually go back to the Inspector, click off this HDSphere, just like normal Unity, we can click on an object, there we go, this tree might look a bit off since the rotation isn’t correct. So we can just get the rotation tool here and fix it up just like that, okay.
These objects aren’t being sort of combined into the mesh, rather, they are still prefabs that are just being placed and rotated, okay.
So we can of course modify them in whatever way we wish afterwards. So yeah, that is how we can paint prefabs onto meshes using Polybrush. Thanks for watching.
Interested in continuing? Check out our all-access plan which includes 250+ courses, guided curriculums, new courses monthly, access to expert course mentors, and more!