Today’s focus will be on shaders. You may be curious as to why we went from talking about the Editor, how to write code in Unity, and building a game to Shaders.
The answer is simple, shaders are a very important aspect of the graphics pipeline. It allows you to customize how the landscape and characters are portrayed in the game.
You can get the 3D model used from Adobe Mixamo, his name is Knight_D_Pelegrini.
The 2D sprite was obtained from the Temple Run pack available on Opengameart.com
Download the project zip file here
become a professional vr game developer with unity
Pre-Order The Complete Virtual Reality Game Development with Unity and learn to create immersive games and experiences by building 10 VR games. The course assumes no prior Unity or VR experience – We’ll teach you C#, Unity and 3D programming from the ground-up
Check it out on Zenva Academy and get Early Access!
Table of contents
Intro to Shaders
To give an example of what I mean, you can import any 3D model into Unity. Let’s take a look at the Jet from the game we built.

As you can see from the image above, we used the same jet as before and it looks the same. Let’s look a bit deeper and look at the inspector pane. You can see underneath where it says Materials that we are allowing the use of light probes and using a blend probe for reflections. If we look just under that, it is where the shader is.
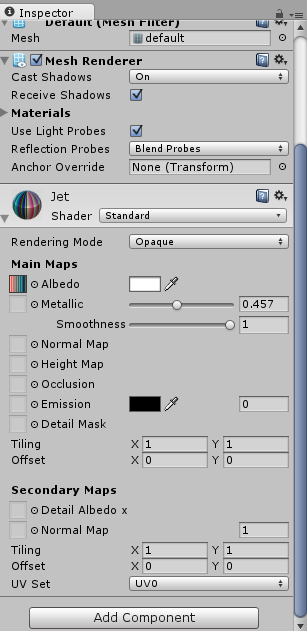
We can see that we are using a standard shader and it gives us many options that we can modify with it. We have rendering mode, main maps for albedo, metallic, smoothness, normal maps, height maps, occlusion, emission, detail task, tiling, offset. Secondary maps which has Detail albedo x, normal map, tiling, offset, and UV Set.
Each type of shader available to us allows us to have different properties that we can manipulate to fit our needs. To illustrate this, lets change from the Standard shader to the Unlit/ Texture shader. To do this, click on the shader box, highlight unlit, and then select Texture.
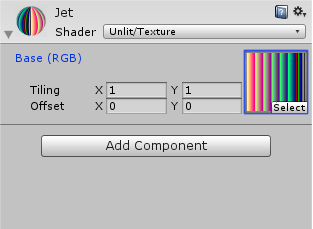
As we can see, the only properties we have with this one is selecting which texture to use for the object along with tiling and offset. We can also see that the way the Jet is rendered is very different from before with the standard shader.
Let’s take a look at some other shaders to get a better understanding of how they work.
A deeper look into shaders
Shaders come in a wide variety of flavors right out of the box with Unity and it does an excellent job of handling most of your day to day game development needs. So, to illustrate what I mean; We will look at a 2D sprite and 3D model for how the shaders affect each one.
To begin, let’s set up a 2D and 3D scene for this. In the 2D scene, change the camera from 3D to 2D and the camera rendering mode to be Orthographic. Next up, create a new material by right clicking on the folder should create called Materials, select Materials. Name that material Temple Material.

Now let’s take a look at what the Unity documentation states about what each shader type is meant to accomplish.
In addition to the Standard Shader, there are a number of other categories of built-in shaders for specialized purposes:
- FX: Lighting and glass effects.
- GUI and UI: For user interface graphics.
- Mobile: Simplified high-performance shader for mobile devices.
- Nature: For trees and terrain.
- Particles: Particle system effects.
- Skybox: For rendering background environments behind all geometry
- Sprites: For use with the 2D sprite system
- Toon: Cartoon-style rendering.
- Unlit: For rendering that entirely bypasses all light & shadowing
- Legacy: The large collection of older shaders which were superseded by the Standard Shader
We can see that each type of shader has a specific purpose, and sadly Toon is not part of the built in shaders as of the latest version of Unity presently. So, to avoid confusion, below is a screenshot of all the shaders present in Unity.
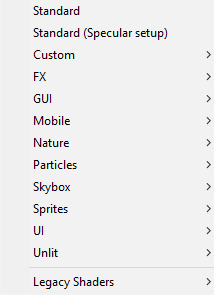
(Note: We can omit Custom from the built in shaders list because those are shaders I have built that we will delve into later.)
Most of the shaders that are typically used are the Standard Shader, Mobile Shaders, and Sprite shaders. The standard shader is built to give a fairly realistic view of the model although you will have no proper transparency effect on 2D sprites. Same pretty much goes for the Mobile Shaders which are your typical diffuse and bumped diffuse, specular mapping, and a particle renderer; These shaders are optimized for mobile usage although can be used on PC. Lastly, we have the sprite shaders. They have a diffuse and default option. These shaders are optimized for 2D sprites if you so choose to use a shader for 2D art.
Let’s view how the standard shader works on both 2D and 3D models.
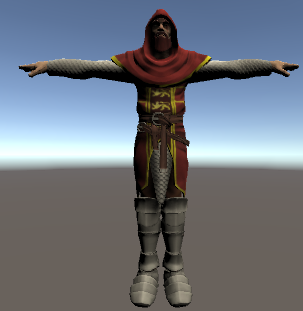
As we can see, the 3D model showcases all of the folds and lighting to the model appropriately with very nice shading. It also looks fairly realistic in terms of not looking extremely cartoony.
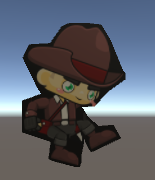
The 2D sprite, however, looks appropriate except for what looks like transparency bleeding through. We see a very unnatural border around the sprite and we have no way to remove it.
Next up, is the mobile bumped diffuse shader.
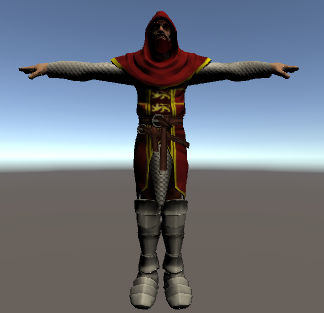
The mobile bumped diffuse shader on a 3D model looks almost exactly like the standard shader and that is exactly how it was designed. It was modeled after the standard shader but optimized for mobile devices.
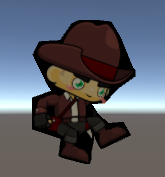
Again, we see the same results for the 2D sprite as with the standard shader.
Mobile bumped with specular mapping.
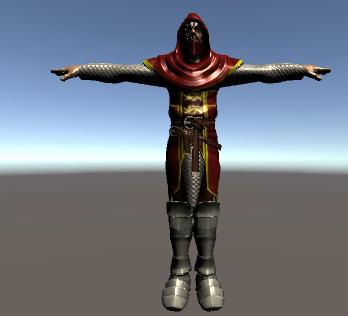
This shader adds some very shiny lighting to the model. The higher you have the shininess property, the more it seems to distort the face of the model.
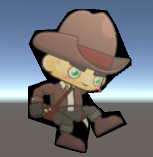
With the 2D sprite, it still has the border around the sprite but the sprite also has some very nice shininess to it.
Sprites Default shader
![]()
Now we see some unexpected results for the 3D model. It seems to render the 3D model as a 2D sprite and blended the face to be part of the hood. The coloring has also changed to be a vibrant version of the colors instead of the darker ones we are used to.
![]()
Now the 2D sprite no longer has that nasty border around it and has rendered appropriately.
Sprites Diffuse shader.
![]()
It again renders the 3D model as a 2D sprite and blended the face to be part of the hood. The coloring has also changed to be the darker colors we are more used to.
![]()
The sprite again renders appropriately, and the color scheme is darker than the default version.
Building our own Shader
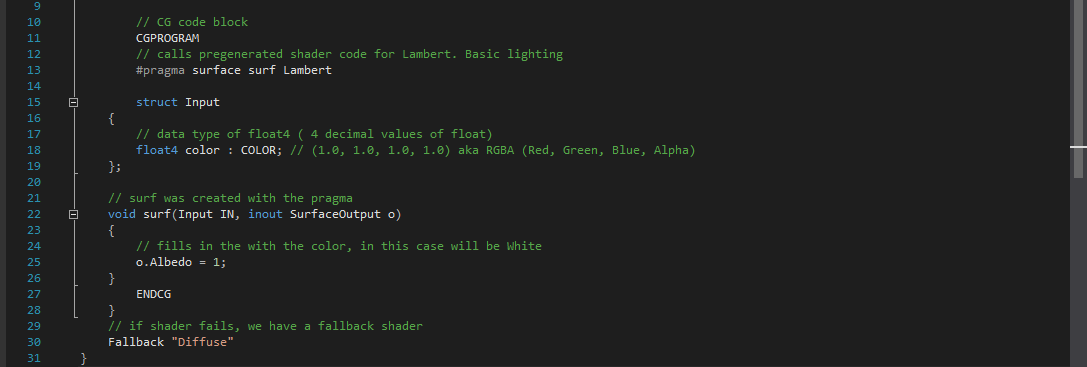
Why would we want to build our own shader? Let’s take for example that we want a very specific outcome for how the character or model should be displayed and none of the default shaders will produce the results we want. We would need to roll our own shader to produce those results. To get into the mindset for building shaders, let’s build the most basic shader there is, Albedo mapping or as I like to call it, White Out. The code has been commented to give a brief overview of how it is set up and we will go more in depth after this to understand what is going on.
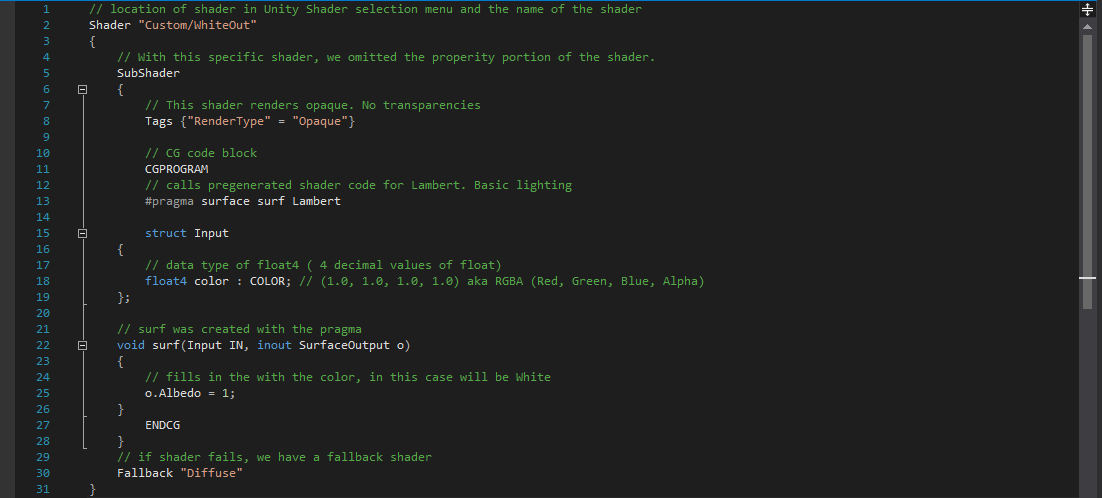
We won’t be going in depth with the shader syntax in this portion of the tutorial, don’t worry, that’s next. For now, we will talk about how this specific shader works.

First part of the code is Specifying where we want our shader to live inside the Unity editor. Which is all that line 2 is doing. Line 5 which only has the word Sub Shader is where the rest of our code lives. The Tag specifies how we want our object to be rendered.
CGProgram at line 11 designates that this is the portion of the code that was built by NVIDIA. The pragma directive states we want to use a specific portion of shader code prebuilt for us and allows us to write a method over it to give more control over what it does.
The struct allows us to put values inside of it that we can manipulate in the method as well. Finally, we get to the method it should have the name surf because of the pragma directive. We have two parameters for the method, Input and inout or what we want to output.
We don’t need to call the input because it is inferred with what we want to do. We do call output and set it to Albedo which is an NVIDIA keyword and we set it to the float value of 1. This will fill in the color which in this case is white.
ENDCG is the designation of that we are ending the CGPROGRAM code. Then we set a fallback which states that if the code cannot be run on a specific piece of hardware that it should go ahead and use the shader named instead.
Breaking down Shader Syntax:
The shader syntax is relatively simple to remember and I will do my best to explain it. Just remember, Unity has excellent documentation if you can find it that goes over every value type that a shader can have as well as how you could manipulate a shader in C# code in a limited fashion.
Another thing I feel that I should point out, if you haven’t noticed already, is that there is no code completion for writing Shader files. You can find a very simple one in the Visual Studio Gallery, although I can guarantee that you won’t find it that helpful.
Shader "MyShaderName" { Properties { // ... properties here ... } SubShader { // ... subshader for graphics hardware A ... // ... You only need one SubShader, but you can have more if needed Pass { // ... pass commands ... } // ... more passes if needed ... } SubShader { // ... subshader for graphics hardware B ... } // ... Optional fallback ... FallBack "Fallback to another shader if needed"}
Shader "List of Commonly used settings" {


Properties {

_Color ("Main Color", Color) = (1,1,1,0.5)

_SpecColor ("Spec Color", Color) = (1,1,1,1)

_Emission ("Emmisive Color", Color) = (0,0,0,0)

_Shininess ("Shininess", Range (0.01, 1)) = 0.7

_MainTex ("Base (RGB)", 2D) = "white" { }

}

SubShader {        Pass {            Material {                Diffuse [_Color]                Ambient [_Color]                Shininess [_Shininess]                Specular [_SpecColor]                Emission [_Emission]            }             Lighting On            SeparateSpecular On            SetTexture [_MainTex] {                constantColor [_Color]                Combine texture * primary DOUBLE, texture * constant            }                sampler2D _MainTex;               sampler2D _BumpMap;              struct v2f {                float4 pos : SV_POSITION;                fixed3 color : COLOR0;            };             struct SurfaceOutput            {               fixed3 Albedo;  // diffuse color               fixed3 Normal;  // tangent space normal, if written               fixed3 Emission;               half Specular;  // specular power in 0..1 range               fixed Gloss;    // specular intensity               fixed Alpha;    // alpha for transparencies             };            struct SurfaceOutputStandardSpecular            {               fixed3 Albedo;      // diffuse color               fixed3 Specular;    // specular color               fixed3 Normal;      // tangent space normal, if written               half3 Emission;               half Smoothness;    // 0=rough, 1=smooth               half Occlusion;     // occlusion (default 1)               fixed Alpha;        // alpha for transparencies            };            void surf (Input IN, inout SurfaceOutput o) {               o.Albedo = 1;               o.Alpha = 1;               o.Normal = UnpackNormal (tex2D (_BumpMap, IN.uv_BumpMap));       }             v2f vert (appdata_base v)            {                v2f o;                o.pos = mul (UNITY_MATRIX_MVP, v.vertex);                o.color = v.normal * 0.5 + 0.5;                return o;            }             fixed4 frag (v2f i) : SV_Target            {                return fixed4 (i.color, 1);            }

ENDCG

}

Fallback "Diffuse"

}
To break this down, let’s talk about what each item is doing.
_Color = sets the color of the object
_SpecColor = Is the specularity color of the object
_Emission = the emissive color of the object
_Shininess = How much light is reflected off the object
_MainTex = The texture being manipulated
Lighting = is an option that you can have on or off
SeparateSpecular = an option that you can have on or off
Sampler2D = how you would access a texture in your method
fixed3 Albedo = diffuse color
fixed3 Normal = tangent space normal, if written
fixed3 Emission = the emissive color of the object
half Specular = specular power in 0..1 range
fixed Gloss = specular intensity
fixed Alpha = alpha for transparencies
half Smoothness = 0=rough, 1=smooth
half Occlusion = occlusion (default 1)
o.Albedo = 1 or tex2D (_MainTex, IN.uv_MainTex));
o.Alpha = 1 or tex2D (_MainTex, IN.uv_MainTex));
o.Normal = UnpackNormal (tex2D (_BumpMap, IN.uv_BumpMap));
float2 = Uv direction of the object
float3 = r, g, b values
float4 = r, g, b, a values
fixed2 = Uv direction of the object
fixed3 = r, g, b values
fixed4 = r, g, b, a values
This is not by any stretch of the imagination the complete list of variables available with Shaders. There are many more and are specific to certain actions within a constructed shader. The next tutorial, we will go into more depth and build more shaders to handle more specific tasks. Until next time, this is Jesse and may your code be bug free.
