Although we’re not always aware of all the different sounds present in a game, they play a huge role in immersing us and providing interactive feedback. Ranging from the simple sound of footsteps to ambient music, sounds can make us relax or grow tense while we’re playing.
That said – would it surprise you to learn that balancing audio is hard and not everyone wants that gushing waterfall overriding the character dialogue? This is why, for many players, having sound settings is super important so they can customize the experience to their needs.
In this Unity tutorial, we’ll go through how to set up sound settings for the master volume, as well as the volumes for sound effects and music. For that, we’ll take a look at the audio mixers in Unity, its different groups, and how to create a canvas with sliders for each group that the players can adjust to their liking.
Let’s get started!
Table of contents
Project Files
You can download a copy of the source code files for the project done in this tutorial here. This tutorial requires good familiarity with Unity and C# scripting.
Audio Mixers
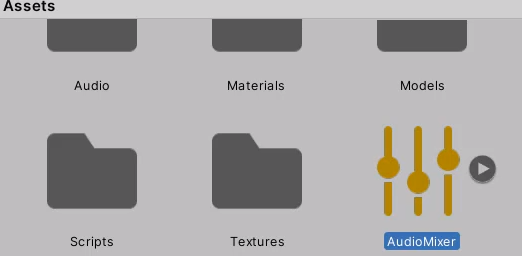
The Audio Mixer feature of Unity allows you to mix various audio sources, apply effects to them, and perform mastering. It is an asset that we can create by going Right-click > Create > Audio Mixer:
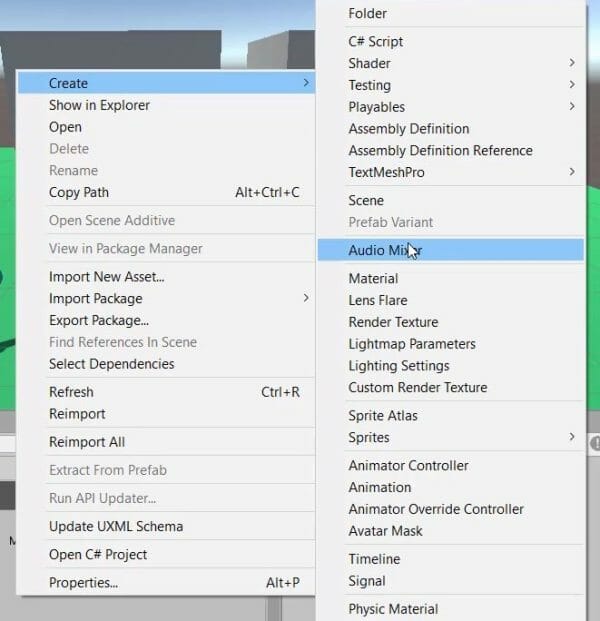
You can double-click on the icon to open up the Audio Mixer window:
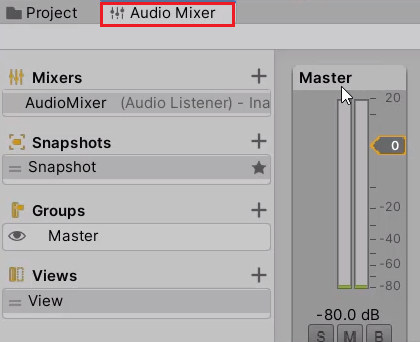
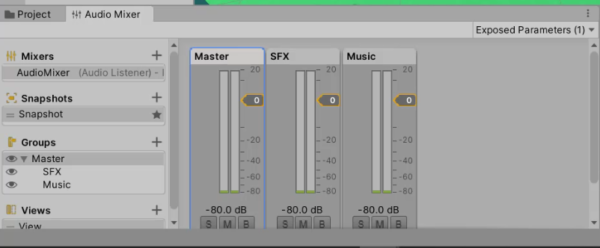
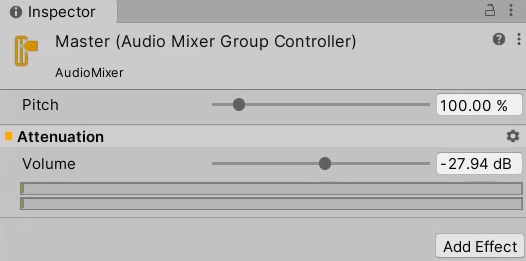
By default, we have the Master group, which overrides every single audio source in the game. This allows us to adjust the Pitch and the Volume of the overall audio of the game in the Inspector:
Modifying Audio in Script
In order to modify the volume in a script, we need to right-click and select ‘Expose Volume (or pitch) to script‘:
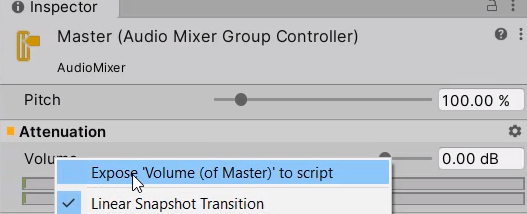
Now it will appear in the Exposed Parameter dropdown list:

Audio Mixer Group
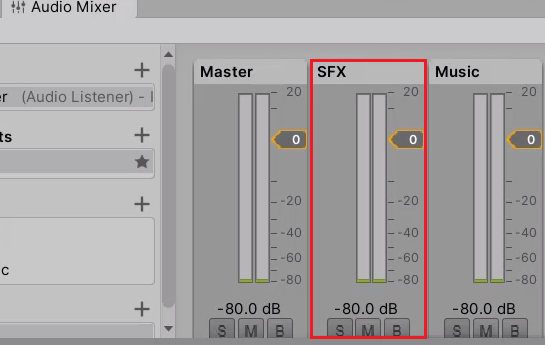
To create a new group, you can click on the + button in the Groups section. We’re going to create two new groups, which are Music and SFX for sound effects:


Now that we have SFX and music as children of the master group, we need to assign these to specific audio sources. For example, if you select the Player object of your project, you’ll see there is a property called Output inside the Audio Source component. This is where our Audio Mixer Group is going to be sending the modified audio in:

If you assign this to the SFX group, you will be able to modify the output inside of the Audio Mixer window:

Volume Settings
Next, we’re going to be setting up the visual UI (User Interface) for volume settings.
Creating UI Canvas
First of all, we’re going to create a new GameObject called Canvas, which contains all of the UI elements.
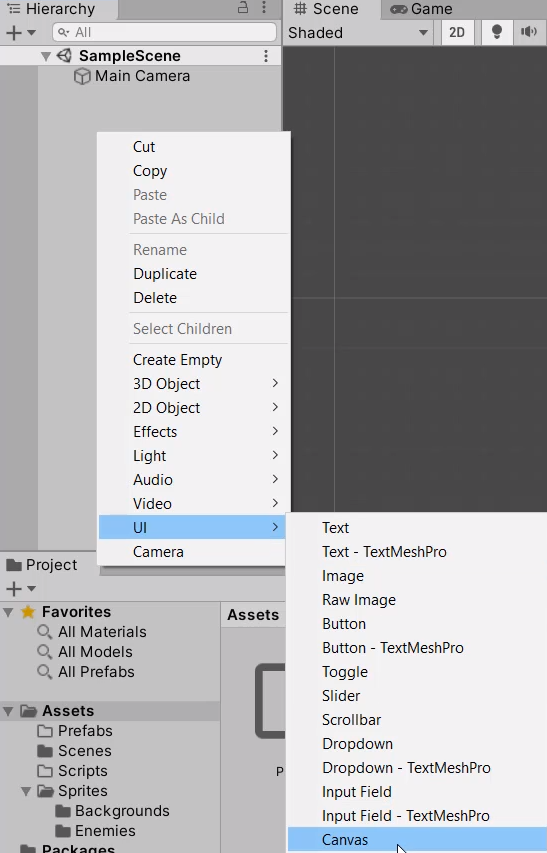
To create a canvas, right-click on the Hierarchy > UI > Canvas:
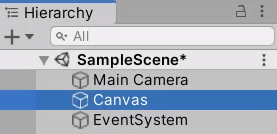
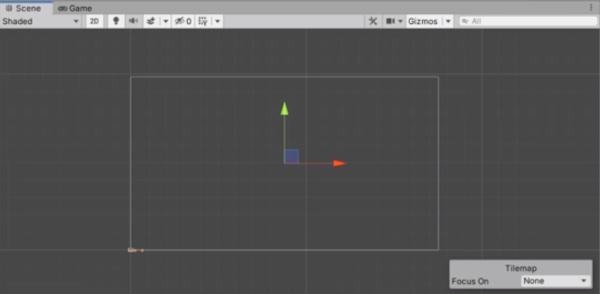
If you select the Canvas and press F, the screen will be zoomed out to focus on it:
Adding Image To Canvas
To add an Image object to the Canvas, we’re going to right-click on Canvas and go to UI > Image:
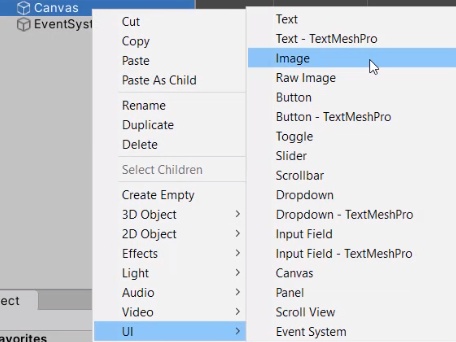
As you can see, it has created a brand new Image object, which is a child of Canvas:
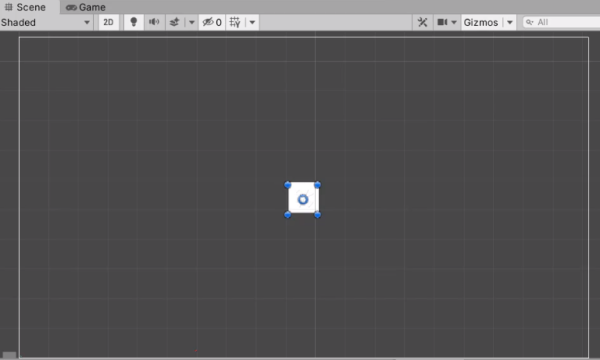
Let’s rename this Image to ‘VolumeSettings‘:
![]()
Resizing Canvas Components
To change the size of the element, you can drag it around with the Rect tool selected:
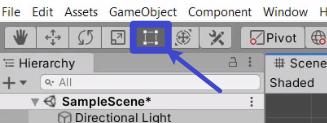
You can then click and drag on the blue circles to change the size of the image:
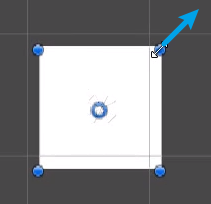
Or you can click and drag on the sides to resize them along that specific axis:
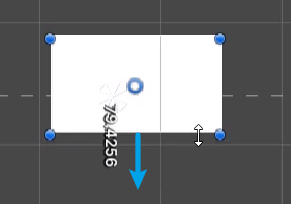
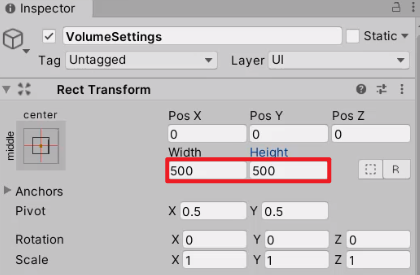
Alternatively, you can set the specific Width and Height using Rect Transform in the Inspector:
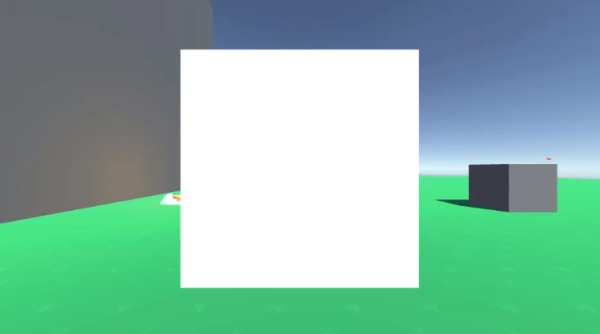
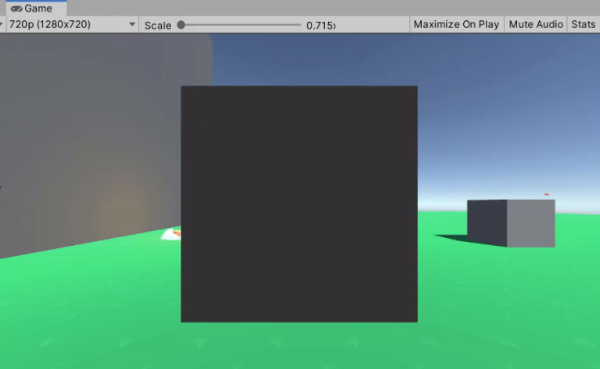
We’re going to click on the Color property of the Image component and change it from white to black:

Adding Text
We recommend you use TMP (TextMeshPro) instead of Unity’s default Text because it provides more flexibility in font settings:
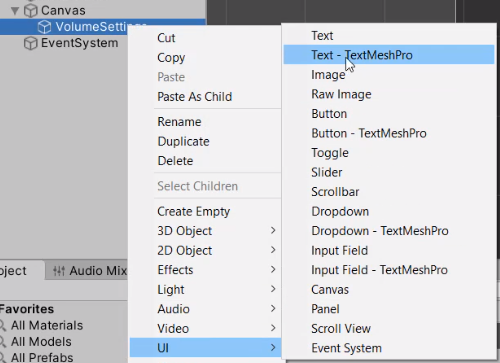
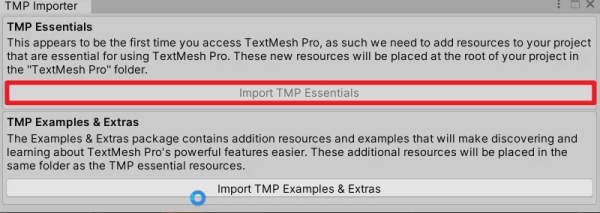
You can import the package when adding the first TMP object to the scene (Right-click > UI > Text – TextMeshPro):
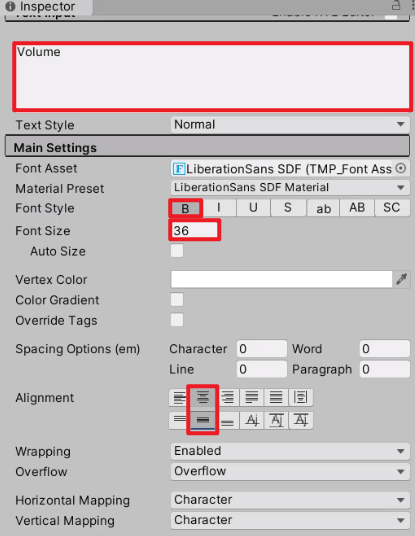
Once that’s complete, you can give it a new name (e.g. ‘HeaderText‘), type in a header (e.g. ‘Volume‘), and modify the font settings in the Inspector:

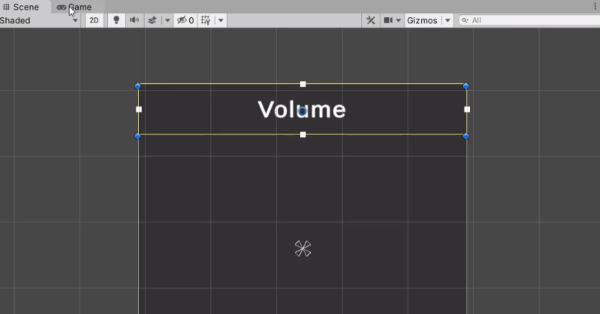
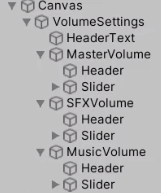
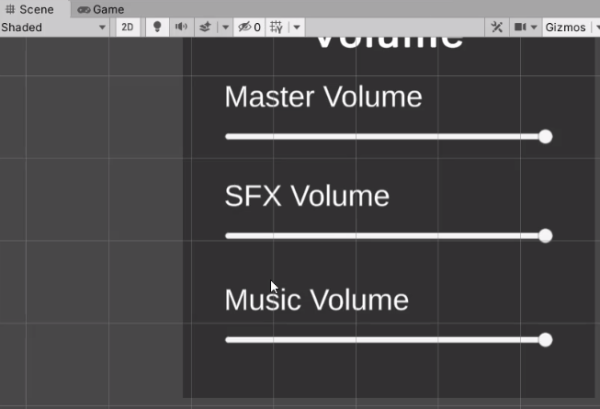
What we’re going to do now is create three separate sliders for adjusting the Master Volume, the SFX Volume, and the Music volume as follows:
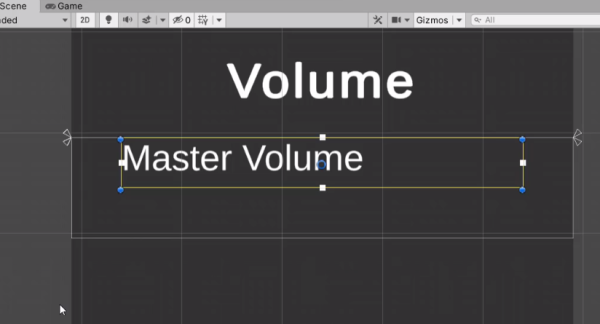
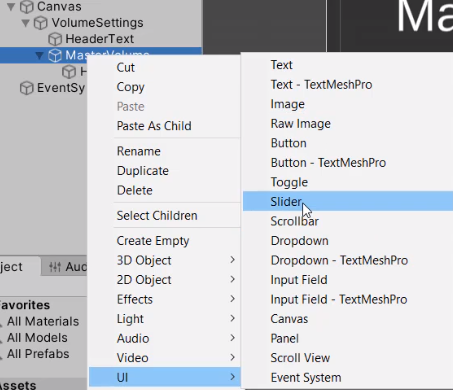
To create a new Slider, right-click on the sub-heading (e.g. “Master Volume”) and select UI > Slider:
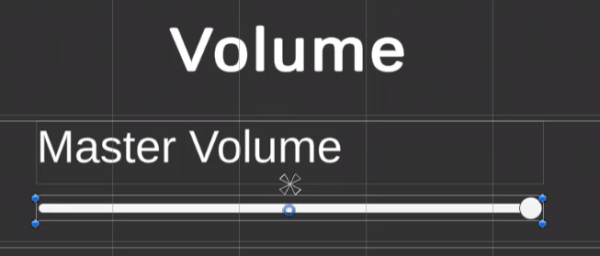
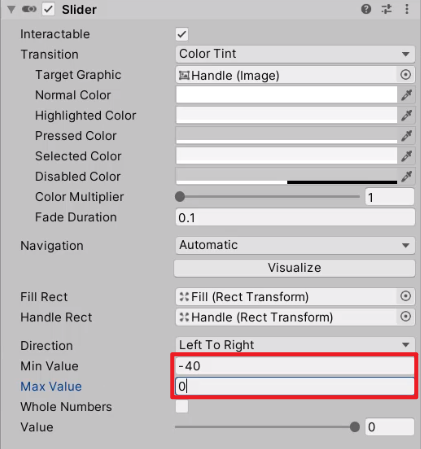
You can then scroll down to the Slider component in the Inspector to set the Min Value and the Max Value of the slider. Since we’re working with dB (decibels), the maximum value would be the original volume of the audio clip, which is 0 dB, and the minimum value would be -40 dB:
We can then duplicate this by pressing Ctrl + D (or Cmd + D):
Scripting The UI
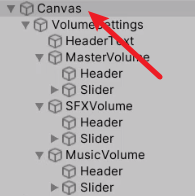
Now that the UI objects are all set up, let’s create a new C# script called “Volume UI” and attach it to the parent Canvas object:

Inside the script, first of all, we need to import the TMPro, Audio, and UI library at the top of our script to be able to utilize these features in our script:
using TMPro;
using UnityEngine.Audio;
using UnityEngine.UI;
And then we’re going to declare a few public variables so we can access and modify the UIs that we created earlier:
public class VolumeUI : MonoBehaviour
{
    public AudioMixer mixer;
    public GameObject window;
    public Slider masterSlider;
    public Slider sfxSlider;
    public Slider musicSlider;
}
Then we need to create a new function called “SetSliders” to load the saved volume settings (float) from PlayerPrefs, for instance.
PlayerPrefs is an easy way to store and access important data between game sessions. For more information, refer to the documentation: https://docs.unity3d.com/2020.1/Documentation/ScriptReference/PlayerPrefs.html
// called at the start of the game
// set the slider values to be the saved volume settings
void SetSliders ()
{
    masterSlider.value = PlayerPrefs.GetFloat("MasterVolume");
    sfxSlider.value = PlayerPrefs.GetFloat("SFXVolume");
    musicSlider.value = PlayerPrefs.GetFloat("MusicVolume");
}
This function is going to be called at the start of the game, so the player doesn’t have to reset the volume settings every time they open up the application. That being said, if there is any saved volume property found in PlayerPrefs (HasKey), then we need to set the mixer volume levels based on the saved PlayerPrefs before setting the sliders:
void Start ()
{
    // do we have saved volume player prefs?
    if(PlayerPrefs.HasKey("MasterVolume"))
    {
        // set the mixer volume levels based on the saved player prefs
        mixer.SetFloat("MasterVolume", PlayerPrefs.GetFloat("MasterVolume"));
        mixer.SetFloat("SFXVolume", PlayerPrefs.GetFloat("SFXVolume"));
        mixer.SetFloat("MusicVolume", PlayerPrefs.GetFloat("MusicVolume"));
        SetSliders();
    }
    // otherwise just set the sliders
    else
    {
        SetSliders();
    }
}
Now what we need to do is set up a new function for when we modify the master slider value:
// called when we update the master slider
public void UpdateMasterVolume ()
{
}
The UpdateMasterVolume function is going to be called whenever we modify the master volume slider. Inside here, we’re going to set the MasterVolume exposure parameter to be the masterSlider‘s value. Then we can save it in PlayerPrefs using SetFloat (which is similar to saving data, whereas GetFloat is similar to loading data):
// called when we update the master slider
public void UpdateMasterVolume ()
{
    mixer.SetFloat("MasterVolume", masterSlider.value);
    PlayerPrefs.SetFloat("MasterVolume", masterSlider.value);
}
We can do the exact same thing with the SFX volume and the Music volume:
// called when we update the master slider
public void UpdateMasterVolume ()
{
    mixer.SetFloat("MasterVolume", masterSlider.value);
    PlayerPrefs.SetFloat("MasterVolume", masterSlider.value);
}

// called when we update the sfx slider
public void UpdateSFXVolume()
{
    mixer.SetFloat("SFXVolume", sfxSlider.value);
    PlayerPrefs.SetFloat("SFXVolume", sfxSlider.value);
}

// called when we update the music slider
public void UpdateMusicVolume()
{
    mixer.SetFloat("MusicVolume", musicSlider.value);
    PlayerPrefs.SetFloat("MusicVolume", musicSlider.value);
}
Toggling A Window
Now what we need to do is make it so that whenever we press a certain key (e.g. V), we’re able to toggle this window open. To detect a key press, we can use the Input.GetKeyDown function:
void Update ()
{
    // toggle the window when we press V
    if(Input.GetKeyDown(KeyCode.V))
    {
    }
}
When the window is active in the hierarchy, window.activeInHierarchy will return true, otherwise, it will return false. We can utilize this to activate/deactivate the window:
void Update ()
{
    // toggle the window when we press V
    if(Input.GetKeyDown(KeyCode.V))
    {
        window.SetActive(!window.activeInHierarchy);
    }
}
If the window is active, we want to enable the mouse cursor (CursorLockMode.None) so the player can click and drag the sliders.
Otherwise, if we’re disabling the window, we’re going to lock the cursor again (CursorLockMode.Locked):
void Update ()
{
    // toggle the window when we press V
    if(Input.GetKeyDown(KeyCode.V))
    {
        window.SetActive(!window.activeInHierarchy);
        // enable or disable the cursor
        if(window.activeInHierarchy)
            Cursor.lockState = CursorLockMode.None;
        else
            Cursor.lockState = CursorLockMode.Locked;
    }
}
We also don’t want our camera to be able to look around when we’re in the volume settings, so inside the Update function of the PlayerController script, we’re going to run the Look function only if the cursor is locked:
void Update ()
{
    Move();
    if(Cursor.lockState == CursorLockMode.Locked)
        Look();
}
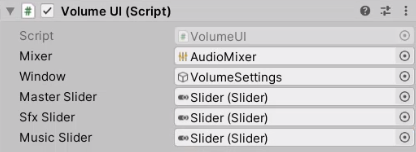
Make sure to save the script and drag all the UI objects into the corresponding fields:
Adding Script Events To Buttons
We need to link each of those sliders to the VolumeUI script. To do that, we need to select each slider and add an On Value Changed event by clicking on the + icon:

Inside here, we’re going to drag in the Canvas object and select the Update (Master/SFX/Music) Volume function as the function to be called whenever the slider value changes:

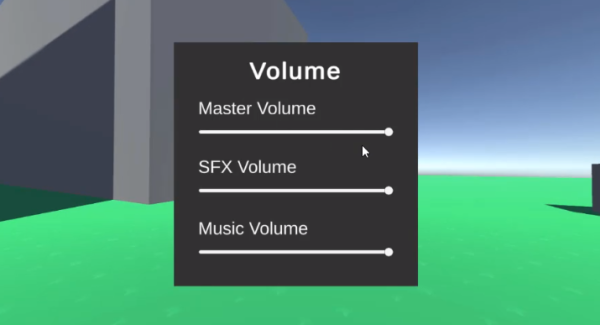
The volume settings window shouldn’t be open at the beginning of the game, so we can deactivate it for now, and press V to open it up in Play mode:

And here we have it:
Conclusion
Well done on reaching the end of this tutorial!
With this tutorial, you’ve learned how to allow your players to have much finer control over the audio channels of your game in Unity. Whether for user satisfaction or accessibility, this can sometimes make or break your game depending on how needed sounds are for an optimal experience.
However, the learning doesn’t stop here. Feel free to practice by adding more audio channels to the canvas we’ve created. For instance, if your game has dialogues, maybe it’d be interesting for your players to change the volume of that as well. Or, you may want to add a slider for UI sound effects, and so on.
That said, we do encourage you to dive even deeper into more advanced topics and wish you the best of luck in your projects!
Want to learn more about audio in Unity? Try our complete Game Audio Effects for Beginners course.
Did you come across any errors in this tutorial? Please let us know by completing this form and we’ll look into it! FINAL DAYS: Unlock coding courses in Unity, Godot, Unreal, Python and more.
