Introduction
In this second tutorial, we’ll be creating a multi-indicator system based on the core methods we employed in Part 1. This upgraded project will include a custom dynamic link library, multiple indicator control, and user definable UI sprites.
Tutorial Requirements
To complete this tutorial, you’ll require a basic understanding of Unity and Visual Studio workflow.
Asset Package
To avoid unnecessary repetition, the new asset package contains a preconfigured scene and several additional components. You can download the assets here. Unzip the package, making a note of the location.
Asset Usage
The components are released under the ‘Creative Commons 0’ license.
Did you come across any errors in this tutorial? Please let us know by completing this form and we’ll look into it! FINAL DAYS: Unlock coding courses in Unity, Godot, Unreal, Python and more.
The Unity Project
We’ll begin by creating a new Unity project named ‘Indicator_System_Part_2’

Next we’ll import the asset package you downloaded earlier…
- Right click inside the ‘Project /Assets’ pane
- Select ‘Import Package / Custom Package’
- Navigate to and select the ‘IndicatorSystem_02_Assets’ package
- Click ‘Open’ to display the ‘Import Unity Package’ window
- Click ‘Import’

Now we’ll open the preconfigured scene…
- Open the ‘Project / Assets / Scenes’ folder
- Double click on the ‘IndicatorSystem’ scene

To finish the scene set up we’ll align the scene view to match the Main Camera view…
- Select the ‘Main Camera’ in the ‘Hierarchy’ pane
- Open the ‘GameObject’ menu and select ‘Align View to Selected’
And finally, we’ll remove the redundant default scene…
- Open the ‘Assets /Scenes’ folder
- Right click on the ‘SampleScene’ and select ‘Delete’
- Click ‘Yes’ to confirm
- Save the scene
You can close Unity as we’ll be switching to Visual Studio to create the dynamic link library.
The Dynamic Link Library
You can think of dynamic link libraries as portable containers for functions, instructions and resources. Aside from their inherent ease of deployment, they offer several additional advantages when compared to static link libraries.
- Portable modular format
- Memory efficient
- Reduced disk space requirements
- Reusable across projects
- Simultaneous process access
Visual Studio Installation
We’ll be using Visual Studio to create our DLL. If it’s not present on your computer, you can install it via the Unity installer list.

Creating The Visual Studio Project
Before you open Visual Studio, create a parent folder for our library…
- Create a folder named ‘Net Libraries’ in an accessible location such as your desktop
Now we can begin to create the VS project…
- Launch Visual Studio
- [BP] Open the ‘File’ menu and select ‘New / Project’

To ensure compatibility with earlier Unity releases, we’ll be using a NET Framework class.
- Select the ‘Visual C# / Class Library (.NET Framework)’ option
- Enter ‘IndicatorSystem’ in the name field
- Click the location ‘Browse’ button
- Navigate to the ‘Net Libraries’ folder you created earlier
- Click ‘Select Folder’
- Set the ‘Framework’ field to ‘.NET Framework 3.5’
- Click ‘OK’ to create the project

Visual Studio will create the new project in your ‘Net Libaries’ folder and open the class script window…

- Save the project
Adding Unity References
We’ll need to add a couple of Unity references to the project…
- Open the ‘Project’ menu and select ‘Add Reference’
If you’ve accessed the Unity Engine and Unity UI libraries before, they’ll be listed in the Reference Manager list. If not, you’ll need add to each component manually…

- Click the Reference Manager ‘Browse’ button
- Navigate to each location in turn
- Click ‘OK’ to add each reference
Once both libraries appear in the the Reference Manager list, you can add them to your project…
- Select both libraries and click ‘OK’
- Save the project

Class Export Settings
Before we begin scripting, we’ll set the class export settings…
- Open the ‘Build’ menu and select ‘Configuration Manager’
- Set the ‘Active solution configuration’ field to ‘Release’
- Set the ‘Configuration’ type to ‘Release’
- Click ‘Close’
- Save the project

The Indicator Library Script
The ‘Indicator’ library script handles the on screen UI indicators by tracking the position of the player object in relation to each target position. Canvas point conversion is handled by the ‘UpdatePosition’ function which also updates each target’s enabled status and UI position.
- Delete the existing class code
- Enter the following script
using System;
using UnityEngine;
using UnityEngine.UI;

namespace IndicatorSystem {
    // Create Objective Class
    [Serializable]
    public class IndicatorClass {
        [HideInInspector]
        public Image indicator;
        [HideInInspector]
        public Text label;
        public Transform target;
        public Sprite sprite;
        public Color color;
        public bool enabled;
    }
    // --
    public static class Indicator {
        // Declare Alignment Vector
        private static Vector3 alignmentVector;

        // -- Update Function
        public static void UpdatePosition(Transform player, IndicatorClass[] oc) {
            // Recurse Objective Class Elements
            foreach (IndicatorClass element in oc) {
                element.indicator.gameObject.SetActive(RelativePosition(player, element.target, element.enabled));
                // Set Indicator Status
                if (element.indicator.gameObject.activeInHierarchy) {
                    element.label.text = LinearDistance(player.position, element.target.position) + "m";
                    // Convert Target Position To Viewport Point
                    alignmentVector = element.indicator.rectTransform.anchorMin;
                    alignmentVector.x = Camera.main.WorldToViewportPoint(element.target.position).x;
                    // Update Indicator Position
                    element.indicator.rectTransform.anchorMin = alignmentVector;
                    element.indicator.rectTransform.anchorMax = alignmentVector;
                }
            }
        }
        // --
        private static float LinearDistance(Vector3 playerPosition, Vector3 targetPosition) {
            // Zero YAxis Coordinates
            playerPosition.y = 0;
            targetPosition.y = 0;
            // Return Linear Distance
            return Mathf.Round(Vector3.Distance(playerPosition, targetPosition));
        }
        // --
        private static bool RelativePosition(Transform player, Transform target, bool status) {
            // Return On Null Player / Null Target / Disabled Element
            if (!player || !target || !status) {
                return false;
            }
            // Return Relative Position Boolean
            return Vector3.Dot(Vector3.forward, player.InverseTransformPoint(target.position).normalized) > 0;
        }
        // --
        public static bool PopulateClass(Canvas canvas, Image indicator, IndicatorClass[] oc) {
            // Return On Null Canvas / Null Indicator / Null Class
            if (!canvas || !indicator) {
                return false;
            }
            /// Instantiate Indicator Components/
            foreach (IndicatorClass element in oc) {
                Image indicatorClone = UnityEngine.Object.Instantiate(indicator, canvas.GetComponentInChildren<RectTransform>());
                indicatorClone.color = element.color;
                indicatorClone.sprite = element.sprite;
                // Populate Objective Class Elements
                element.label = indicatorClone.GetComponentInChildren<Text>();
                element.indicator = indicatorClone;
            }
            // Return Structure Validation
            return true;
        }
    }
}
- Save the project
Building The Library
Once you’ve entered the code and saved the project it’s time to build the library…
- Open the ‘Build’ menu and select ‘Build IndicatorSystem’
- The ‘Output’ window will open to display the build progress
Once the project has been compiled you should receive the following confirmation…

If you receive an error message, compare your code with the original script, amend as necessary and repeat the build process. But all being well, you’ve successfully created the dynamic link library.
- Save the project
- Close Visual Studio
Importing The Library
The dynamic link library you’ve created will be the core of the Unity project so it should be imported before we create scripts which rely on the custom functions.
- Launch Unity
- Open your ‘Indicator_System_Part_2’ project
Now we’ll create a new asset folder…
- Right click inside the ‘Assets’ pane
- Select ‘Create / Folder’
- Rename the folder to ‘Plugins’
The DLL can be imported using the standard method…
- Right click on the ‘Plugins’ folder
- Select ‘Import New Asset’
- Navigate to your ‘Net Libraries’ folder
- Drill down to the ‘obj / Release’ folder
- Select the ‘IndicatorSystem.dll’ component
- Click ‘Import’
- The DLL import settings pane will be displayed

The Project Scripts
The project requires scripts for the camera, player and indicator manager. All scripts include descriptive comments.
The Camera Script
- Open the ‘Assets / Scripts / Camera’ folder
- Double click the ‘FollowCam’ script to open your script editor
- Delete the existing code
- Enter the following code…
using UnityEngine;

public class FollowCam : MonoBehaviour {
    // Public Declarations
    public Transform targetObject;
    public float cameraDistance = 12.0f;
    public float cameraHeight = 3.0f;
    public int heightDamping = 3;
    public int rotationDamping = 3;
    // Private Declarations
    private float currentHeight;
    private float currentAngle;
    private Quaternion currentRotation;

    // --
    void LateUpdate() {
        if (!targetObject) return;
        // Increment Camera Height & Angle
        currentHeight = Mathf.Lerp(transform.position.y, targetObject.position.y + cameraHeight, heightDamping * Time.deltaTime);
        currentAngle = Mathf.LerpAngle(transform.eulerAngles.y, targetObject.eulerAngles.y, rotationDamping * Time.deltaTime);
        // Populate Rotation Quaternion
        currentRotation = Quaternion.Euler(0, currentAngle, 0);
        // Set Camera Position
        transform.position = targetObject.position;
        transform.position -= currentRotation * Vector3.forward * cameraDistance;
        transform.position = new Vector3(transform.position.x, currentHeight, transform.position.z);
        // Look At Target
        transform.LookAt(targetObject);
    }
}- Save the script
- Drag the ‘FollowCam’ onto the ‘Main Camera’ game object
We’ll need to add a ‘Player’ object reference to the ‘FollowCam’ script…
- Select the ‘Main Camera’ object
- Click the ‘Inspector / FollowCam / Target Object’ select icon
- Double click on the ‘Player’ game object

The Player Script
- Open the ‘Assets / Scripts / Player’ folder
- Double click the ‘PlayerMotion’ script to open your script editor
- Delete the existing code
- Enter the following code…
using UnityEngine;

public class PlayerMotion : MonoBehaviour {
    // Private Declarations
    private float verticalInput;
    private float horizontalInput;
    // Public Declarations
    public float motionSpeed = 10.0f;
    public float rotateSpeed = 90.0f;

    //--
    void Update() {
        // Assign User Input
        verticalInput = Input.GetAxis("Vertical") * Time.deltaTime * motionSpeed;
        horizontalInput = Input.GetAxis("Horizontal") * Time.deltaTime * rotateSpeed;
        // Apply Motion / Rotation
        if (!horizontalInput.Equals(0) || !verticalInput.Equals(0)) {
            transform.Translate(0, 0, verticalInput);
            transform.Rotate(0, horizontalInput, 0);
        }
    }
}- Save the script
- Drag the ‘PlayerMotion’ script onto the ‘Player’ game object

The Target Manager Script
The target manager script references the ‘IndicatorSystem.dll’ and serializes the user configuration inspector pane.
- Open the ‘Assets / Scripts / Manager’ folder
- Double click the ‘TargetManager’ script to open your script editor
- Delete the existing code
- Enter the following code…
using UnityEngine;
using UnityEngine.UI;
using IndicatorSystem;

public class TargetManager : MonoBehaviour {
    // Public Declarations
    public Canvas canvasReference;
    public Image indicatorReference;
    public Transform playerReference;
    // Class Reference
    public IndicatorClass[] indicatorClass;
    // Private Declarations
    private bool classValidated;

	// --
void Start () {
        // Populate Indicator Class / Return Validation
        classValidated = Indicator.PopulateClass(canvasReference, indicatorReference, indicatorClass);
	}
	// --
    void LateUpdate () {
        // Invoke Update Function
        if (classValidated) {
            Indicator.UpdatePosition(playerReference, indicatorClass);
        }
    }
}- Save the script
- Drag the ‘TargetManager’ script onto the ‘Targets’ game object
- Select the ‘Targets’ game object
- Set the ‘Inspector / Target Manager / Indicator Class’ size to ‘4’
- Open each ‘Indicator Class’ element

Target Manager Configuration
We need to add references to the the target manager script. The indicator system will not operate if it encounters a null reference.
Canvas Reference
- Click the ‘Canvas Reference’ selection icon
- Double click to select the ‘Canvas’ game object
Indicator Reference
- Drag the ‘Assets / Prefabs / Indicator’ prefab to the ‘Indicator Reference’ slot
Player Reference
- Click the ‘Player Reference’ selection icon
- Double click to select the ‘Player’ game object
Target References
- Click each ‘Element / Target’ selection icon
- Double click to select the corresponding ‘Target’ game object
Sprite References
- Click each ‘Element / Sprite’ selection icon
- Double click to select your choice of indicator sprite
- Save the scene
The Custom Color Palette
The ‘Assets / Editor’ contains an ‘IndicatorPalette’ component which contains a selection of example colors for use with the UI sprites.
- Click on the ‘Element 0 / Color’ field to open the ‘Color Selector’
- Left click the ‘Palette Selector’
- Select the ‘IndicatorPalette (Project)’ option
- Choose a color for each element

Indicator Enabled Option
- Activate all ‘Element / Enabled’ options
- Save the scene

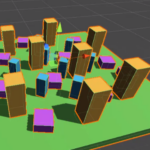
Testing The Scene
Having made it through this final tutorial, you’ll be pleased to know that we’re now ready to test the project!
- Press the Unity ‘Play’ icon
- Use the arrow keys to move the player object around the scene
If the 4 objective indicators are visible and the distance information is valid, then you’ve succeeded. If there are no visible indicators, check the ‘Target Manager’ script references to ensure that they are correctly assigned.
System Deployment
Once configured, the indicator system operates on an automatic basis, but you can set any indicator’s enabled status from script.
‘indicatorClass[index].enabled = true / false’
Please refer to the ‘Target Manager’ script comments for full deployment information.
Conclusion
So that’s it for now: we have now finished this project allowing you to create a fully portable multi-indicator system for use in your own creations. We upgraded it from the core methods employed last time, to include a custom dynamic link library, multiple indicator control, and user definable UI sprites. Hope you enjoyed this tutorial, found it helpful, and that it will prove useful for your games. Please feel free to share your thoughts in the comments down below – otherwise, until next time.
This post was written by software developer and Unity creator Paul Boyce.