Table of contents
Introduction
Objective indicators are widely used in modern games as they offer the player a clear indication of their next target. In this tutorial we’ll create a basic method of guiding our player through a looping set of target positions. In the second part of this tutorial we’ll build upon this starter project to create an advanced game-ready asset.
To complete this project you will need a basic understanding of the Unity’s interface and workflow.
Asset Package
Before you begin, please download the related asset package here.
When the download is complete, unzip the package and make a note of the location.

Asset Usage
The original project assets are supplied under the Creative Commons 0 license.
Getting Started
Launch Unity and create a 3D project named ‘Indicator_System

Once the project has loaded we’ll begin to set up the scene. If you’re using a legacy version of Unity, you need to create a ‘Scenes’ folder containing a new scene named ‘IndicatorSystem’. For recent versions you can simply rename the default scene.

Preparing The Scene
Before we get started we’ll adjust a few settings to suit the current project…
- Open the Lighting Settings and set the Skybox to ‘None
- Set Environment Lighting Source to ‘Color’
- Deselect the Lightmap Settings ‘Auto Generate’ checkbox

- Save Your Scene
Importing The Asset Package
The supplied asset package contains a selection of basic components designed to get you up and running quickly. To install the package, right click on the ‘Assets’ folder and select ‘Import Package / Custom Package’ then navigate to the file you unzipped earlier.
Asset Package Contents…
- Ground plane object
- Ground material
- Ground texture
- Player cuboid object
- Player material
- Target object
- Target material
- Target texture
- Indicator UI image

Adding Game Objects To The Scene
An empty scene is hardly inspiring, so let’s add some game objects. As mentioned above, the asset package contains three prefabs which have been designed to drop directly into the scene. We’ll start by dragging the ‘Ground’ and ‘Player ‘prefabs to the hierarchy window.

Adding The First Target Prefab
Before we add the ‘Target (0)’ prefab, we need to create an empty game object named ‘Targets’. This will be the target parent folder.
- Right click inside the Hierarchy window and select ‘Create Empty’
- Rename the empty object to ‘Targets’
- Set the ‘Targets’ object position to 0, 0, 0
Now we can drag the ‘Target (0)’ prefab into the new ‘Targets’ object

Creating Multiple Targets
We’ll be needing more than one target in the scene so we’ll create three copies using the duplicate function…
- Right click on the ‘Target (0)’ game object and select ‘Duplicate’
- Repeat until you have four, sequentially numbered target objects

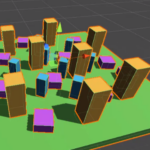
Setting The Target Object Positions
If we left the target objects in their default locations the objective system would be virtually redundant, so we’ll need to move each one to a different position on the ground plane. In the example images the targets are positioned at equal distances around the player, but you can decide for yourself where they should be.

Main Camera Setup
Later in this tutorial we’ll be creating a camera script, but first we’ll need to position the main camera behind the player object and set it’s culling mask…
- Select the Main Camera and set it’s position to 0, 3, -12
- Set the ‘Clear Flags’ value to ‘Solid Color’
- Open the ‘GameObject’ menu and select ‘Align View to Selected’

Main Camera Settings
Now we’ll set the main camera’s culling mask by removing the ‘UI’ layer from the render list…
- Open the Main Camera ‘Culling Mask’ menu and deselect the ‘UI’ layer

The UI Camera
We’ll be using a second camera to display the UI canvas elements, so right click inside the Hierarchy window and select ‘Camera’. Rename the new camera to ‘UICamera’ and set it’s position to 0, 0, 0

We’ll need to set the UICamera culling mask to render just the UI layer…
- Set the UICamera ‘Clear Flags’ option to ‘Depth Only’
- Set the UICamera ‘Culling Mask’ option to ‘Nothing’
- Reselect ‘Culling Mask’ menu and select ‘UI’

At this point you should save the scene.
Adding The Canvas Component
Now we need to add a Canvas component which will be used to display the indicator element. To do this, right click inside the hierarchy window and select ‘UI / Canvas’. Feel free to delete the accompanying ‘Event System’ component as it’s unnecessary for this project.

Next we need to assign our UICamera by setting the Canvas ‘Render Mode’ to ‘Screen Space – Camera’ and dragging the UICamera to the ‘Render Camera’ slot.

We now have a main camera which will display the default layer and a secondary camera which will display the UI elements.
Next, we’ll add the indicator image and text component…
UI Indicator Components
- Right click on the Canvas game object and select ‘UI / Image’
- Rename the image to ‘Indicator’
- Right click on the ‘Indicator’ image and select ‘UI / Text’
- Rename the text object to ‘Label’

Indicator Image Settings
- Select the Indicator object
- Click the ‘Source Image’ circle icon and select ‘IndicatorTX’
- Set the ‘Color’ value to hexadecimal E5D44D
- Set the ‘Rect Transform’ width and height values to 32

We also need to set the indicator anchor point using the ‘Anchor Presets’ options…
- Left click the ‘Inspector / Indicator’ anchor icon and select ‘Top Center’

- Close the anchor preset panel
- Set the ‘Rect Transform’ position to 0, -22, 0

Indicator Text Settings
Now we’ll set up the text label which will be used to display the distance between the player object and the current target position…
- Set the ‘Label’ object anchor point to ‘Top Center’
- Set the position to 0, -42, 0
- Set the width to 100 and the height to 20

And we’ll adjust the text properties…
- Change the ‘Text’ text to ‘0m’
- Set the paragraph alignment to ‘Center / Top’
- Change the text color to hexadecimal CCCCCC

At this point you should save the scene.
Script Folder Structure
We’ll store the project scripts in easily identifiable subfolders. This is a good habit to adopt as it improves readability, especially when creating larger projects.
Let’s start by creating a parent script folder…
- Right click on the Assets folder and select ‘Create / Folder’
- Rename the folder to ‘Scripts’

Now we’ll add the subfolders…
- Create three subfolders and rename them ‘Camera’, ‘Manager’ and ‘Player’ respectively

The Player Script
The player script allows the user to control the player with a standard keyboard, joystick or gamepad. In practice, axis input is multiplied by a preset speed factor and uses frame sync to smooth the movement.
- Right click on the ‘Player’ subfolder and select ‘Create / C# Script’
- Name the script ‘PlayerControl’
- Double click the script to open your code editor
Enter the following code into your ‘PlayerControl’ script…
using UnityEngine;

public class PlayerControl : MonoBehaviour {
    // Private Declarations
    private float verticalInput;
    private float horizonatlInput;
    private float playerSpeed;
    private float rotationSpeed;

	// --
	void Start () {
        // Set Default Values
        playerSpeed = 10.0f;
        rotationSpeed = 1.0f;
	}
	// --
	void Update () {
        // Get User Input From Keyboard / Game Controller
        verticalInput = Input.GetAxis("Vertical");
        horizonatlInput = Input.GetAxis("Horizontal");
        // Update Player Position
        transform.Translate(0, 0, verticalInput * playerSpeed * Time.deltaTime);
        // Update Player Rotation
        transform.Rotate(0, horizonatlInput * rotationSpeed, 0);
	}
}- Save the script and wait for Unity to compile the code
- Drag the script onto the Player object
- Save the scene
The Main Camera Script
The main camera script aligns the main camera using preset distance and height values. The smooth nature of the camera movement is achieved by framed synced interpolation.
- Create a new C# script in the ‘Scripts / Camera’ folder
- Rename the script to ‘FollowCam’
- Double click the script to open your code editor
Enter the following code into your ‘FollowCam’ script…
using UnityEngine;

public class FollowCam : MonoBehaviour {
    // Public Declarations
    public Transform targetObject;
    public float cameraDistance = 12.0f;
    public float cameraHeight = 3.0f;
    public int heightDamping = 3;
    public int rotationDamping = 3;
    // Private Declarations
    private float currentHeight;
    private float currentAngle;
    private Quaternion currentRotation;

    // --
    void LateUpdate() {
        if (!targetObject) return;
        // Increment Camera Height & Angle
        currentHeight = Mathf.Lerp(transform.position.y, targetObject.position.y + cameraHeight, heightDamping * Time.deltaTime);
        currentAngle = Mathf.LerpAngle(transform.eulerAngles.y, targetObject.eulerAngles.y, rotationDamping * Time.deltaTime);
        // Populate Rotation Quaternion
        currentRotation = Quaternion.Euler(0, currentAngle, 0);
        // Set Camera Position
        transform.position = targetObject.position;
        transform.position -= currentRotation * Vector3.forward * cameraDistance;
        transform.position = new Vector3(transform.position.x, currentHeight, transform.position.z);
        // Look At Target
        transform.LookAt(targetObject);
    }
}- Save the script and wait for Unity to compile the code
- Drag the script onto the Main Camera object
- Drag the Player object to the FollowCam ‘Target Object’ slot

- Save the scene
The Target Manager Script
The target manager script controls the UI based indicator using vector to viewport point conversion. Linear distance is calculated by a custom integer function whilst the relative position calculation is returned as a boolean which is used to control the indicator active status.
- Create a new C# script in the ‘Scripts / Manager’ folder
- Rename the script to ‘TargetManager’
- Double click the script to open your code editor
Enter the following code into your ‘TargetManager’ script…
using UnityEngine;
using UnityEngine.UI;
using System.Collections.Generic;

public class TargetManager : MonoBehaviour {
    // Public Declarations
    public Transform playerReference;
    public Image indicatorReference;
    public List<Transform> targetList;
    // Private Declarations
    private Vector3 indicatorVector;
    private Text textReference;
    private int targetRange;
    private int targetIndex;
    private bool targetValidated;

	// --
	void Awake () {
        // Store Indicator Text Object Reference
        textReference = indicatorReference.GetComponentInChildren<Text>();
	}
	// --
	void Start () {
        // Set Default Values
        targetIndex = 0;
        targetRange = 5;
        // Validate Target List Count
        targetValidated = targetList.Count > 0;
	}
    // --
    void LateUpdate() {
        // Check Player Status
        if (targetValidated) {
            if (LinearDistance(playerReference.position, targetList[targetIndex].position) < targetRange) {
                targetIndex = (targetIndex + 1) % targetList.Count;
            }
            // Update Indicator Position
            UpdateTargetSystem(targetIndex);
        }
    }
	// --
	public void UpdateTargetSystem (int index) {
        if (targetValidated) {
            // Set Indicator Status
            indicatorReference.gameObject.SetActive(RelativePosition(playerReference, targetList[index]));
            // Check Indicator Active Flag
            if (targetList[index].gameObject.activeInHierarchy) {
                // Update Distance Text
                textReference.text = LinearDistance(playerReference.position, targetList[index].position) + "m";
                // Update Indicator Rect Transform Position
                indicatorVector = indicatorReference.rectTransform.anchorMin;
                indicatorVector.x = Camera.main.WorldToViewportPoint(targetList[index].position).x;
                indicatorReference.rectTransform.anchorMin = indicatorVector;
                indicatorReference.rectTransform.anchorMax = indicatorVector;
            }
        }
	}
    // --
    public int LinearDistance(Vector3 playerPosition, Vector3 targetPosition) {
        // Zero YAxis
        playerPosition.y = 0;
        targetPosition.y = 0;
        // Return Linear Distance
        return Mathf.RoundToInt(Vector3.Distance(playerPosition, targetPosition));
    }
    // --
    private bool RelativePosition(Transform player, Transform target) {
        // Calculate Relavtive Position
        return Vector3.Dot(Vector3.forward, player.InverseTransformPoint(target.position).normalized) > 0;
    }
}- Save the script and wait for Unity to compile the code
- Drag the script onto the ‘Targets’ game object
Now we’ll add component references to the Target Manager script…
- Drag the ‘Player’ object to the ‘Player Reference’ slot
- Drag the UI ‘Indicator’ object to the ‘Indicator Reference’ slot
- Left click to open the ‘Target List’ field and set the size to 4
- Drag each target to the corresponding ‘Target List’ slot

- Save the scene
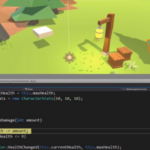
Testing The Project
To check that everything’s working as expected, click the ‘Play’ button and use the arrow keys to move the player towards the target indicator. When you’re within range of the current target the indicator will switch to the next objective. The target indicator will loop through the available target objects.

Conclusion
In Part 2 of this tutorial series, we’ll be upgrading the project with code optimisation, multiple indicators, user defined waypoints and custom dynamic link libraries. The finished project will allow you to create a fully portable system for use in your own creations
This post was written by software developer and Unity creator Paul Boyce.