You can access the full course here: Language Recognition AI with Unity and Azure
Table of contents
Part 1
Language Understanding (LUIS)
The first of two Microsoft Cognitive Services we’re going to be using is LUIS. LUIS allows us to send a query (e.g. Move forwards) and it will calculate an intent and entities. The intent is what you’re trying to do (in our case move). The entities are the actions (in our case move direction = forwards).
Navigate to the LUIS website at www.luis.ai.
The homepage has a few examples, for example Book me a flight to Cairo.
- Intent: BookFlight
- Entity: Location (cairo)
To begin, let’s click on the Login / Sign up button.

Either login to your Microsoft account, or create a new one.
Creating the App
This will take you to the My Apps page. This is a list of all your LUIS apps. Since we don’t have any, let’s create a new one by pressing the Create new app button.

This will open the Create new app popup. Enter the name for your app and a description (optional). Culture is the language that the app will learn your app with. Once you’re done click on the Done button.

Intents
Click on your new app and it will take you to the Intents page. Here, we want to create a new intent.

We’re going to call our intent Move.

Now we’re able to enter in example phrases. We need to do this in order to train the app – letting it know what to look for. Yet before we do that, let’s create our entities. Click on the Entities button to go to the Entities screen.

Entities
Click on the Create new entity button and we can begin. The first entity we want to make is MoveDirection. We’ll be checking for words such as left, right, forwards and back.

The second entity is MoveDistance. This will check for numbers such as 3, 4 meters, 12, 6 meters.

Example Phrases
Once that’s done, let’s go back to our Intents page and start to enter in example phrases for the Move intent. The first one will be can you move backwards.

As it is, the phrase is quite useless. We need to tell the app which words relate to which entities. Click on the word backwards and select the MoveDirection entity. This will tell the app that the word backwards is a MoveDirection entity.

Enter in another phase of can you move left 5 meters. Here, we want to assign the MoveDirection entity and for the number 5, assign that to the MoveDistance entity.

Create around a dozen or so (the more the better) phrases that differ from each other. Try and mention the directions: left, right, forwards, backwards, back a few times each so the app knows they are MoveDirection entities. Try also creating phrases that are worded differently, e.g. move left 5 and please move 3 meters backwards. The more unique the better.

Training the App
In order to use the app now, we have to train it. At the top right of the screen, click on the Train button. This will take around 10-20 seconds.

Once that’s done, let’s click on the Test button to try it out.

We can enter in a phrase such as please move 5 meters forwards and this will calculate a result. As you can see, the intent is Move, as well as the 2 entities which we expected.

Publishing the App
With everything done, let’s publish our app. This will allow us to connect to the API and send requests. Click on the Publish button.

Keep the Environment on Production and click Publish.

Now that our app’s published, let’s find out the url and other info we need to connect to it. Click on the Manage button in the top right of the screen.

What we want to do is click on the Key and Endpoints button to go to that screen and copy 2 things.
- The Authoring Key is our unique key to connect to our app
- The Endpoint is the URL which we’ll send and receive data from

Part 2
Download Postman
Before we hop into Unity, we can test out our API using Postman. Go to the Postman website and navigate to the downloads page and download your OS’ respective installer.

When that’s downloaded, you can install the app and sign in with either your Google account or create a new Postman account.
Creating our Request
Our Endpoint URL that we got on our LUIS app, needs to be segmented as there are separate parameters we need.
- The main URL
- verbose is true if we want all of the intents, false if we just want the top scoring one
- timezoneOffset is an offset to the hosting server timezone
- subscription-key is your Authoring Key
- q is the query/phrase we want to calculate

Put the main URL in the URL bar at the top and fill in the parameters underneath. Our phrase we’re going to test (q) is going to be can you move back 5 meters. Once that’s done, let’s click on the Send button.

Underneath, we’ll see the JSON output. Showing the intents and entities.

Transcript 1
Welcome everyone, to the voice recognition and AI course for Unity. I’m gonna be your course instructor, Daniel Buckley. So let’s get started.
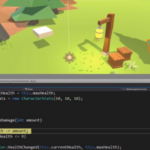
This is what we’re gonna be creating. We’re gonna be creating an app that is gonna sorta simulate the landing of a Mars rover and you’ll be able to command where it moves based on talking into the mic. So for example, you go to press Enter, say move left three meters, press it again and then the cube will move left three meters. Let’s have a look at it. Move left five meters. Move forwards three meters. And as you can see, it looks great. You’re able to control where it goes, which direction and how far. So what are we gonna be learning?
Well, first of all we’re gonna be learning about the Microsoft Cognitive Services and these are gonna be two different things. First of all LUIS, which is the language and understanding. And what that basically is, is it’s gonna allow us to send over a message to this service and it is gonna be able to pick up intents and entities from that.
So for example, when we say move right, it’ll pick up the intent of move and the entity of the direction which is right. And it’ll be able to then send us back a JSON file with all this information that we can analyze. Then we’re gonna be using Speech to Text to convert our audio from our microphone into text which we can then send to the LUIS system. We’re gonna be also using the Postman API Developer Environment to test out our LUIS program, our app and this is basically a free to download program which allows you to input various different things to send to API’s and that is what we’re gonna be using to test it out.
We’re also gonna be learning the Unity canvas and UI Elements, putting them together and then scripting them to connect them up to the rest of the app and the rest of the systems. And we’re also gonna be using the Unity’s build and networking to send and receive web requests. We’re gonna be sending over the information such as the phrase we spoke and we’re gonna be receiving back the information of what we should do with that. And finally, we’re also gonna be creating a Mover object. This is gonna be an object that is gonna take the results from what we spoke and it is going to analyze it and move depending on the results.
ZENVA is an online learning academy with over 350,000 students. We feature a wide range of courses for people who are just starting out or for people who just wanna try something they don’t already know. The course is also very versatile, allowing you to view them whenever you want and we’ve included project files you can follow along or just soak up the information. Thank you for watching. Now let’s get started on the project.
Transcript 2
Hey everyone, and welcome to the course. We’re going to be learning how to create a voice-controlled game inside of Unity using Microsoft’s cognitive services. The first service we’re gonna be using is LUIS, and this is basically a language-understanding AI, which means that we can say, for example to the game, can you move forward and what it will do is it’ll take from that an intent and an entity. The intent being move, and the entity being the move direction, which is forward.
We can see here, on the LUIS website, which is just LUIS.ai, or www.LUIS.ai. If we scroll down, we can have an example here. We have Book me a flight to Cairo, and what this does is, it gets the intent, which is book flight, and down here in our entities, we have entity type location, which is Cairo. So from Book me a flight to Cairo, it can get from that that you want to book a flight, and the location is Cairo, and with that you can then do other services and many other things. For example, we’re gonna keep it quite simple, we’re just gonna have one intent, of move, and two entities, actually, of move direction and move distance. So you can say to the game, for example, “Move left five meters” and it will know that you wanna move left, and it will then know that you wanna move left five meters.
So to get, let’s go to the LUIS website here, at LUIS.ai, and we just want to Login / Sign up. If you’ve got an account, if you go to Microsoft Account, you can just log on to that, but if you don’t, you can easily create one. All right, once that’s done, it should take you to the LUIS applications page, and what we wanna do here, is we wanna simply click on Create new app. The name, it doesn’t really matter what the name is, because what’s important is actual IDs and codes that we’ll be using, but for the name, let’s just call this TestApp. Culture, which is basically the language, we’ll just have that as English, and the description we’ll just have this VoiceControlledGame. Okay, click Done, and then it should take you over to the My Apps page here.
Let’s click on our test app, open it up, and here we can start entering in our information. Now for our intents, we wanna click on Create new intent, and for this, we’ll call this intent Move. Click on Done, and once we’re here, now here on this screen, we can actually enter in phrases, ’cause what we have to do is you have to train the app. For the app to be able to know what it’s looking for and what sort of phrases it should detect, you have to enter in examples.
We’re gonna do that soon, but first of all we’re gonna be creating our entities. So let’s go over here to the left, to Entities, and we wanna create two Entities, so Create new Entity, and we’ll call this one MoveDirection, keep that as Simple, click Done and this is gonna be basically be forwards, backwards, back, left, right. Let’s create another Entity, and call this MoveDistance, it’s just gonna be a number, and click Done.
Now, at the moment, the app doesn’t actually know what these are, or what they should be, and that is why we train. So let’s go back to Intents, click on our Move intent, and we can start entering some examples, and then assigning the Entities to those examples. So for example, let’s go can you move backwards, click Enter, wait for it to load, there it is, and what we can do now is, if we hover over the text, we can see that it actually pops up with these brackets. So, what we can do is, we can click on backwards, and select MoveDirection, so now it knows that backwards is a MoveDirection, and what we can then do now is enter in some more Intents. So let’s go, can you move left five meters, enter that in, and what we can do then, let’s assign left to the MoveDirection and five to the MoveDistance.
Now what’s important when doing this, is that you wanna have very varied messages. So, try putting the MoveDistance ahead of the MoveDirection, so here he could go, move six meters forwards, it’ll create it, and let’s assign six to either distance and the forwards to the direction. Now you wanna do this for each of the move directions, for us, we’re gonna be having forwards, backwards, back, which is basically the same thing as backwards, but some people say it differently, and left and right. So try and have around three, I’d say, for each of those, and with very different distances, different numbers, put in meters, don’t put in meters, see, let’s go for that now.
Okay, I got around a dozen or so, I’d say, and what we wanna do now is we wanna go up here and click on the Train button. This will train our app, it’ll go through the machine learning and try and understand what our intents and entities actually are. So lets click on that, shouldn’t take too long, it probably takes around 10 or so seconds, I’d say, at the moment it’s just queuing, now it’s training it, and there we go, it’s finished, easy as that. Now what we can actually do inside of the web page is actually test it out. So let’s click on the Test button up here, and this will open up a little panel over here, and we can enter in a test utterance. An utterance is basically a phrase that we’re gonna say. So let’s go, move left, and you can click on Inspect, and as you can see, Entities, the move direction is, left.
We can also then do something a bit more complex, we’ll go please move five meters forwards, see if this actually does it, we might have to enter a few more, example phrases, if this doesn’t. Click Inspect, and as you can see, MoveDistance, five, and MoveDirection, forwards. So, basically, just go over this and enter in a few examples, making them quite complex maybe, if you want, and if you see they’re not really lining up the correct Entities, or if they’re missing Entities, just enter in more varied phrases here, in the examples area.
So great, once we’re done with that, we can actually publish the app, so let’s go over up here, to Publish, click on that, and yep, we want to Production, click Publish, and there we go, it’s finished. What we wanna do now is go over to Manage, ’cause we wanna actually get a few things that we will need to actually link to the API. And for that, we need to get our, skip part of this here, and so click on Manage, and this’ll take you to the Application Settings. We need to go down here, to Keys and Endpoints, and all we really need is this Authoring Key, so basically you just copy that, and we also need the Endpoint here. So just keep those two things on hand as we continue through the project.
Transcript 3
Alright, welcome back everyone. In this lesson we’re gonna be testing out our API, before we hop in Unity ’cause since in Unity we need to write up all the scripts and connect up in that way, using something called Postman is going to help us out in this. Postman is basically a program you can download where you can test out APIs really easily and quick. So what you wanna do is you wanna go to getpostman.com, sign up or sign in if you already have an account.
You can also scroll right to the bottom here and click on downloads to download it here for Windows and we can just select which version of Windows you have or if you’re on MAC OS or Linux, you can download it from here. Once the download’s finished, and you’ve opened up the program, you can just sign in, here I’m just going to sign in with Google, and we are in. Okay what we wanna do now is get our endpoint link that we actually copied when we were creating the app. And what we wanna do is we wanna separate this up, ’cause in here there are different parameters that are being sent.
First of all, wherever you see a question mark, that is the beginning of, that is where the parameters begin. And so the first one is verbose=true. Now what this means is that will it return just the top-scoring intent ’cause when you actually send over a request with your phrase, it will send over a JSON file, and inside of that will be a list of all the different intents that it got from it. Since we only have one intent, there’s no real purpose to try and get multiple so we’ll just keep that at true.
The timezone offset, when we created the app, it gave us a sort of region, ours was west US, we’re just gonna keep that for now, if you are in a different region, you can try and find, you can try and set it up so it’s different, but we’ll just keep it on west US for now, and that’s just the offset from that timezone. Subscription key is the authoring key that we had on the site, and the Q is just our actual phrase, a question.
So in here what we’re gonna do, is before we open, is you want to copy this all the way up to the first question mark, so just before the question mark, we just wanna copy that, and inside of Postman here, we should have a get request, we just wanna enter it in here, into the enter request URL, and you want to enter in that URL we entered. There we go.
Now up here in our parameters, we wanna start entering our keys. So first of all, verbose is true, so let’s enter in verbose with a value of true, we have our timezone offset 360, we also have our subscription key, which is this number here, so let’s just copy that. And enter in subscription key, paste that in, and finally, we have our Q, which is our question. And for our Q, let’s just say can you move forward five meters? Can you move back five meters? And once we have that, let’s press on the send button and see what we get in return. And as you can see, we got a JSON file back. With our intents here, we got the intent of move, which is the top-scoring one of .98, so it’s basically moving.
And down here in our entities, we got a MoveDirection of back, and a MoveDistance of five. So we can actually set verbose to false, since I actually had it the wrong way around. Value set false, click send. And yep, we only get the top-scoring intent which is what we want. So if verbose is false, timezone offset 360, it doesn’t really matter what you sent your timezone offset to, subscription key, it has to be that authoring key from the site, and the Q can be whatever question you wanna ask.
Alright so we know it now works and it’s connected, we can now begin setting it up inside Unity.
Interested in continuing? Check out the full Language Recognition AI with Unity and Azure course, which is part of our EdTech Mini-Degree.