In Part One of this tutorial we created the world scene together with a player moving on it. Now we are going to make the battle scene, where the player units will fight the enemies.
Table of contents
Learning Goals
- Scene management in Phaser 3
- Processing keyboard input to navigate through the user interface
- Using custom events
- Inheriting Phaser 3 classes
- Creating basic Battle Scene logic
- Use timers
Source code
You can download the files for tutorial here.
Assets
All assets used in this tutorial are CC0 licensed. You can download them from here:
Player characters – https://opengameart.org/content/rpg-character-sprites
Enemies – https://opengameart.org/content/dragon-1
Did you come across any errors in this tutorial? Please let us know by completing this form and we’ll look into it! FINAL DAYS: Unlock coding courses in Unity, Godot, Unreal, Python and more.
Creating the Scenes
We will start with an empty game and later on we will merge it with the code from part one. Two Scenes will do all the work – BattleScene, where the players will fight and UIScene for the interface.
var BootScene = new Phaser.Class({

    Extends: Phaser.Scene,

    initialize:

    function BootScene ()
    {
        Phaser.Scene.call(this, { key: 'BootScene' });
    },

    preload: function ()
    {
        // load resources
        this.load.spritesheet('player', 'assets/RPG_assets.png', { frameWidth: 16, frameHeight: 16 });
        this.load.image('dragonblue', 'assets/dragonblue.png');
        this.load.image('dragonorrange', 'assets/dragonorrange.png');
    },

    create: function ()
    {
        this.scene.start('BattleScene');
    }
});

var BattleScene = new Phaser.Class({

    Extends: Phaser.Scene,

    initialize:

    function BattleScene ()
    {
        Phaser.Scene.call(this, { key: 'BattleScene' });
    },
    create: function ()
    {
        // Run UI Scene at the same time
        this.scene.launch('UIScene');
    }
});

var UIScene = new Phaser.Class({

    Extends: Phaser.Scene,

    initialize:

    function UIScene ()
    {
        Phaser.Scene.call(this, { key: 'UIScene' });
    },

    create: function ()
    {

    }
});

var config = {
    type: Phaser.AUTO,
    parent: 'content',
    width: 320,
    height: 240,
    zoom: 2,
    pixelArt: true,
    physics: {
        default: 'arcade',
        arcade: {
            gravity: { y: 0 }
        }
    },
    scene: [ BootScene, BattleScene, UIScene ]
};

var game = new Phaser.Game(config);
In the above code, the most interesting part is in the BattleScene create method. Here we don’t use scene.start, but scene.launch to run the UIScene.
When you run the game now, you won’t see anything special, but keep in mind that both scenes are active at the same time. To visualize that better I will add a graphics object to UI Scene and will draw a simple background for the interface.
First add this row to BattleScene create method:
this.cameras.main.setBackgroundColor('rgba(0, 200, 0, 0.5)');This is a simple trick to make the scene background green without adding an actual image for it. Now add this code to the UIScene create method:
        this.graphics = this.add.graphics();
        this.graphics.lineStyle(1, 0xffffff);
        this.graphics.fillStyle(0x031f4c, 1);
        this.graphics.strokeRect(2, 150, 90, 100);
        this.graphics.fillRect(2, 150, 90, 100);
        this.graphics.strokeRect(95, 150, 90, 100);
        this.graphics.fillRect(95, 150, 90, 100);
        this.graphics.strokeRect(188, 150, 130, 100);
        this.graphics.fillRect(188, 150, 130, 100);
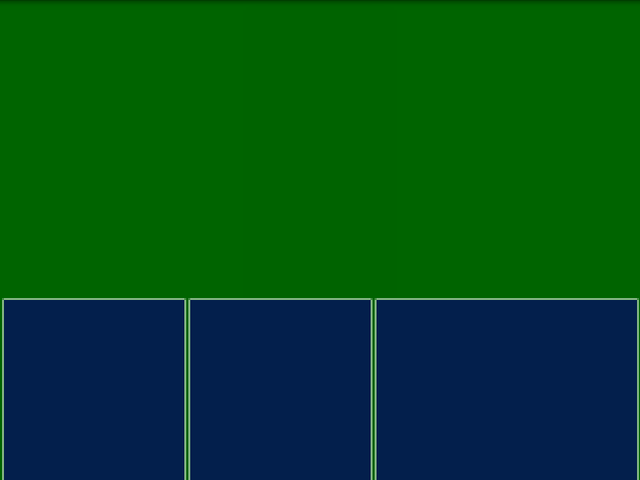
When you run the game now, you should see the green background of the BattleScene and the three blue rectangles of the UIScene:
Now we need to create a concept for the units – both enemies and player heroes. I will create the base class Unit like this:
Add this code somewhere outside the Scenes code, for example at the top of the project:
var Unit = new Phaser.Class({
    Extends: Phaser.GameObjects.Sprite,

    initialize:

    function Unit(scene, x, y, texture, frame, type, hp, damage) {
        Phaser.GameObjects.Sprite.call(this, scene, x, y, texture, frame)
        this.type = type;
        this.maxHp = this.hp = hp;
        this.damage = damage; // default damage
    },
    attack: function(target) {
        target.takeDamage(this.damage);
    },
    takeDamage: function(damage) {
        this.hp -= damage;
    }
});
And now we will create the Enemy like this:
var Enemy = new Phaser.Class({
    Extends: Unit,

    initialize:
    function Enemy(scene, x, y, texture, frame, type, hp, damage) {
        Unit.call(this, scene, x, y, texture, frame, type, hp, damage);
    }
});
And the Player:
var PlayerCharacter = new Phaser.Class({
    Extends: Unit,

    initialize:
    function PlayerCharacter(scene, x, y, texture, frame, type, hp, damage) {
        Unit.call(this, scene, x, y, texture, frame, type, hp, damage);
        // flip the image so I don't have to edit it manually
        this.flipX = true;

        this.setScale(2);
    }
});
As I am a bit lazy, I will use this spritesheet without the characters looking left. To make them turn left in game I will use the property flipX of Phaser3 Sprite.
For our first battle I will hardcode both the player heroes and the enemy dragons. In the next part of this tutorial we will create them according to the game flow.
Change the BattleScene create method to this:
create: function ()
    {
        // change the background to green
        this.cameras.main.setBackgroundColor('rgba(0, 200, 0, 0.5)');

        // player character - warrior
        var warrior = new PlayerCharacter(this, 250, 50, 'player', 1, 'Warrior', 100, 20);
        this.add.existing(warrior);

        // player character - mage
        var mage = new PlayerCharacter(this, 250, 100, 'player', 4, 'Mage', 80, 8);
        this.add.existing(mage);

        var dragonblue = new Enemy(this, 50, 50, 'dragonblue', null, 'Dragon', 50, 3);
        this.add.existing(dragonblue);

        var dragonOrange = new Enemy(this, 50, 100, 'dragonorrange', null,'Dragon2', 50, 3);
        this.add.existing(dragonOrange);

        // array with heroes
        this.heroes = [ warrior, mage ];
        // array with enemies
        this.enemies = [ dragonblue, dragonOrange ];
        // array with both parties, who will attack
        this.units = this.heroes.concat(this.enemies);

        // Run UI Scene at the same time
        this.scene.launch('UIScene');
    }
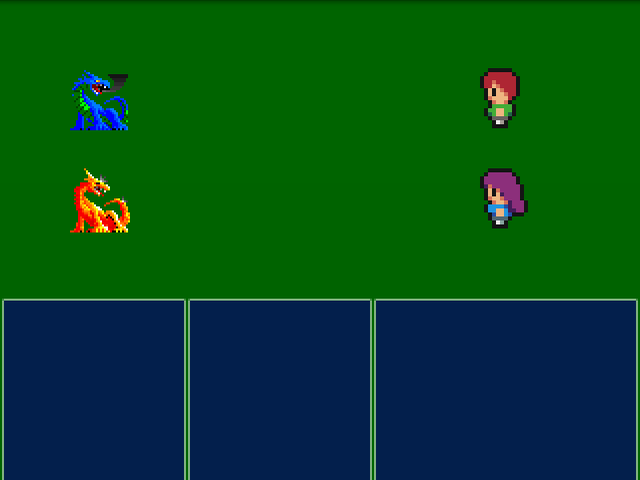
Now when you run the game, you should see something like this:
Its time to add the user interface. We will have three menus – Heroes Menu, Enemies Menu and Actions Menu. All of them will inherit common Menu class. The Menu class will be a container for MenuItem objects and I will use Phaser.GameObjects.Container as its base class.
Lets start with the MenuItem class. It will extend Phaser.GameObjects.Text andit will have only two methods – select and deselect. The first one will turn the text yellow and the second will return it to white.
var MenuItem = new Phaser.Class({
    Extends: Phaser.GameObjects.Text,

    initialize:

    function MenuItem(x, y, text, scene) {
        Phaser.GameObjects.Text.call(this, scene, x, y, text, { color: '#ffffff', align: 'left', fontSize: 15});
    },

    select: function() {
        this.setColor('#f8ff38');
    },

    deselect: function() {
        this.setColor('#ffffff');
    }

});
Now we need to create the Menu class. It will be a bit more complex. It needs methods to be selected and deselected as a whole (for example when the player need to choose an enemy to attack, the whole Enemies menu is selected). It also needs methods to add menu items.
var Menu = new Phaser.Class({
    Extends: Phaser.GameObjects.Container,

    initialize:

    function Menu(x, y, scene, heroes) {
        Phaser.GameObjects.Container.call(this, scene, x, y);
        this.menuItems = [];
        this.menuItemIndex = 0;
        this.heroes = heroes;
        this.x = x;
        this.y = y;
    },
    addMenuItem: function(unit) {
        var menuItem = new MenuItem(0, this.menuItems.length * 20, unit, this.scene);
        this.menuItems.push(menuItem);
        this.add(menuItem);
    },
    moveSelectionUp: function() {
        this.menuItems[this.menuItemIndex].deselect();
        this.menuItemIndex--;
        if(this.menuItemIndex < 0)
            this.menuItemIndex = this.menuItems.length - 1;
        this.menuItems[this.menuItemIndex].select();
    },
    moveSelectionDown: function() {
        this.menuItems[this.menuItemIndex].deselect();
        this.menuItemIndex++;
        if(this.menuItemIndex >= this.menuItems.length)
            this.menuItemIndex = 0;
        this.menuItems[this.menuItemIndex].select();
    },
    // select the menu as a whole and an element with index from it
    select: function(index) {
        if(!index)
            index = 0;
        this.menuItems[this.menuItemIndex].deselect();
        this.menuItemIndex = index;
        this.menuItems[this.menuItemIndex].select();
    },
    // deselect this menu
    deselect: function() {
        this.menuItems[this.menuItemIndex].deselect();
        this.menuItemIndex = 0;
    },
    confirm: function() {
        // wen the player confirms his slection, do the action
    }
});
Now we will create all separate menus:
var HeroesMenu = new Phaser.Class({
    Extends: Menu,

    initialize:

    function HeroesMenu(x, y, scene) {
        Menu.call(this, x, y, scene);
    }
});

var ActionsMenu = new Phaser.Class({
    Extends: Menu,

    initialize:

    function ActionsMenu(x, y, scene) {
        Menu.call(this, x, y, scene);
        this.addMenuItem('Attack');
    },
    confirm: function() {
        // do something when the player selects an action
    }

});

var EnemiesMenu = new Phaser.Class({
    Extends: Menu,

    initialize:

    function EnemiesMenu(x, y, scene) {
        Menu.call(this, x, y, scene);
    },
    confirm: function() {
        // do something when the player selects an enemy
    }
});
And now we need to add the menus to the UIScene. Add this code at the bottom of the UIScene create method:
        // basic container to hold all menus
        this.menus = this.add.container();

        this.heroesMenu = new HeroesMenu(195, 153, this);
        this.actionsMenu = new ActionsMenu(100, 153, this);
        this.enemiesMenu = new EnemiesMenu(8, 153, this);

        // the currently selected menu
        this.currentMenu = this.actionsMenu;

        // add menus to the container
        this.menus.add(this.heroesMenu);
        this.menus.add(this.actionsMenu);
        this.menus.add(this.enemiesMenu);
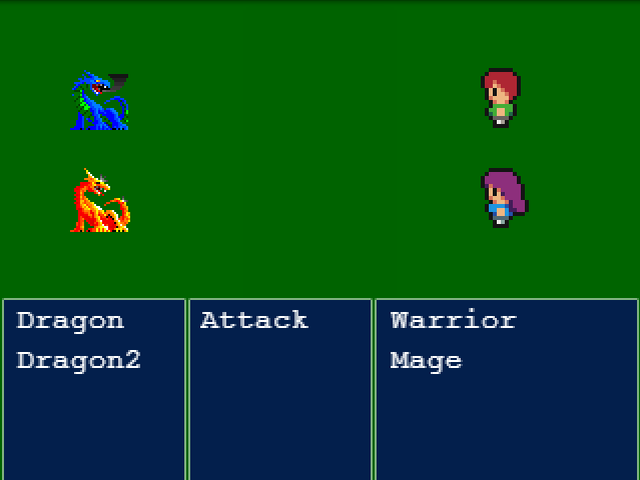
Now you will see that only the actions menu has something in it (because we hardcoded the action Attack). HeroesMenu and EnemiesMenu both are empty. We need to get the data for them from the BattleScene. To access the BattleScene from the UIScene we need to add the following code to its create method:
this.battleScene = this.scene.get('BattleScene');First I will change the Menu. I will add functionality to clear all MenuItems from it and then add new. First metthod will be called clear and will remove all menu items from the menuItems array. The second will receive an array of units and will add them as MenuItems through addMenuItem. Add this two methods to the Menu class:
clear: function() {
        for(var i = 0; i < this.menuItems.length; i++) {
            this.menuItems[i].destroy();
        }
        this.menuItems.length = 0;
        this.menuItemIndex = 0;
    },
    remap: function(units) {
        this.clear();
        for(var i = 0; i < units.length; i++) {
            var unit = units[i];
            this.addMenuItem(unit.type);
        }
    }
And we need methods to call this functions for the menus. Add this code to the UIScene:
remapHeroes: function() {
        var heroes = this.battleScene.heroes;
        this.heroesMenu.remap(heroes);
    },
    remapEnemies: function() {
        var enemies = this.battleScene.enemies;
        this.enemiesMenu.remap(enemies);
    },
And we need to call this functions. Add this at the end of the UIScene create method:
        this.remapHeroes();
        this.remapEnemies();
Now your game should look like this:
But our game is way too idle. We need to make it move. The next thing on our list is to handle the user input. A player will move through the menu with the arrow keys and will select an item on the menu by pressing space.
To listen for keyboard events, add this row at the bottom of UIScene create method:
this.input.keyboard.on('keydown', this.onKeyInput, this);And now we need to add onKeyInput to UIScene:
    onKeyInput: function(event) {

    },
We will have an active menu, and all commands will be executed on it (currentMenu). So lets write the body of onKeyInput like this:
    onKeyInput: function(event) {
        if(this.currentMenu) {
            if(event.code === "ArrowUp") {
                this.currentMenu.moveSelectionUp();
            } else if(event.code === "ArrowDown") {
                this.currentMenu.moveSelectionDown();
            } else if(event.code === "ArrowRight" || event.code === "Shift") {

            } else if(event.code === "Space" || event.code === "ArrowLeft") {
                this.currentMenu.confirm();
            }
        }
    },
Its time to implement the turns. For now we will use an array with all units in the BattleScene. We will keep the index of the currently active unit and if it is a player, it will wait on user input, else the game will pick random player hero and the enemy will attack it.
Add this row at the end of BattleScene create method:
this.index = -1;
This index will show us the currently active unit in the units array. Now we need the nextTurn function. Add this code to BattleScene:
    nextTurn: function() {
        this.index++;
        // if there are no more units, we start again from the first one
        if(this.index >= this.units.length) {
            this.index = 0;
        }
        if(this.units[this.index]) {
            // if its player hero
            if(this.units[this.index] instanceof PlayerCharacter) {
                this.events.emit('PlayerSelect', this.index);
            } else { // else if its enemy unit
                // pick random hero
                var r = Math.floor(Math.random() * this.heroes.length);
                // call the enemy's attack function
                this.units[this.index].attack(this.heroes[r]);
                // add timer for the next turn, so will have smooth gameplay
                this.time.addEvent({ delay: 3000, callback: this.nextTurn, callbackScope: this });
            }
        }
    },
Here we send the custom event “PlayerSelect”. We will wait for it in UIScene.
The other interesting part here is after the enemy’s unit turn we use a timed event to call nextTurn with 3 seconds delay. This way we will have the time to see what is going on on the screen.
In Phaser3 you can listen for events from one Scene on another Scene. Add this row at the bottom of UIScene create method to listen for ‘PlayerSelect’:
this.battleScene.events.on("PlayerSelect", this.onPlayerSelect, this);And then we need to create UIScene onPlayerSelect method.
    onPlayerSelect: function(id) {
        this.heroesMenu.select(id);
        this.actionsMenu.select(0);
        this.currentMenu = this.actionsMenu;
    },
Its relatively simple logic, we select the id-th element from the heroesMenu. Then we select the first element in the actionsMenu and it becomes the currently active menu. Now we need to add confirm methods to the menus. The user will interact with the actions menu first, then he will confirm his selection with spacebar and then he should choose an enemy to perform the action (attack) on. When an enemy is selected, we need to inform the BattleScene.
Now change the ActionsMenu to this:
var ActionsMenu = new Phaser.Class({
    Extends: Menu,

    initialize:

    function ActionsMenu(x, y, scene) {
        Menu.call(this, x, y, scene);
        this.addMenuItem('Attack');
    },
    confirm: function() {
        this.scene.events.emit('SelectEnemies');
    }

});
On confirm we will send custom event ‘SelectEnemies’. Now add this to the end of the UIScene create method:
this.events.on("SelectEnemies", this.onSelectEnemies, this);And now we need to create the UIScene onSelectEnemies method:
    onSelectEnemies: function() {
        this.currentMenu = this.enemiesMenu;
        this.enemiesMenu.select(0);
    },
Its relatively simple, we just make the enemiesMenu active and we select the first enemy.
Now change the confirm method of EnemiesMenu to this:
    confirm: function() {
        this.scene.events.emit("Enemy", this.menuItemIndex);
    }
And then add this row at the bottom of UIScene create method:
this.events.on("Enemy", this.onEnemy, this);And the onEnemy method will deselect all menus and then will send data to the BattleScene:
    onEnemy: function(index) {
        this.heroesMenu.deselect();
        this.actionsMenu.deselect();
        this.enemiesMenu.deselect();
        this.currentMenu = null;
        this.battleScene.receivePlayerSelection('attack', index);
    },
We are almost ready. We will start the first turn from the UIScene create method. This way we will have both scenes ready before starting the fight. Add this row to the bottom of UIScene create method:
this.battleScene.nextTurn();
You can play a bit with the game and you can see that the player selection is not received by the BattleScene.
Add this method to BattleScene:
    receivePlayerSelection: function(action, target) {
        if(action == 'attack') {
            this.units[this.index].attack(this.enemies[target]);
        }
        this.time.addEvent({ delay: 3000, callback: this.nextTurn, callbackScope: this });
    },
Here we get an action and a target. We use the currently active unit to attack the target. Then we used a timer event to call the next turn.
Now the game is playable but it needs messages to inform the player what is going on. Here is a simple Message class, that you can use:
var Message = new Phaser.Class({

    Extends: Phaser.GameObjects.Container,

    initialize:
    function Message(scene, events) {
        Phaser.GameObjects.Container.call(this, scene, 160, 30);
        var graphics = this.scene.add.graphics();
        this.add(graphics);
        graphics.lineStyle(1, 0xffffff, 0.8);
        graphics.fillStyle(0x031f4c, 0.3);
        graphics.strokeRect(-90, -15, 180, 30);
        graphics.fillRect(-90, -15, 180, 30);
        this.text = new Phaser.GameObjects.Text(scene, 0, 0, "", { color: '#ffffff', align: 'center', fontSize: 13, wordWrap: { width: 160, useAdvancedWrap: true }});
        this.add(this.text);
        this.text.setOrigin(0.5);
        events.on("Message", this.showMessage, this);
        this.visible = false;
    },
    showMessage: function(text) {
        this.text.setText(text);
        this.visible = true;
        if(this.hideEvent)
            this.hideEvent.remove(false);
        this.hideEvent = this.scene.time.addEvent({ delay: 2000, callback: this.hideMessage, callbackScope: this });
    },
    hideMessage: function() {
        this.hideEvent = null;
        this.visible = false;
    }
});
I will add the message object to the UIScene as it is part of the interface. Add this to the UIScene create method:
        this.message = new Message(this, this.battleScene.events);
        this.add.existing(this.message);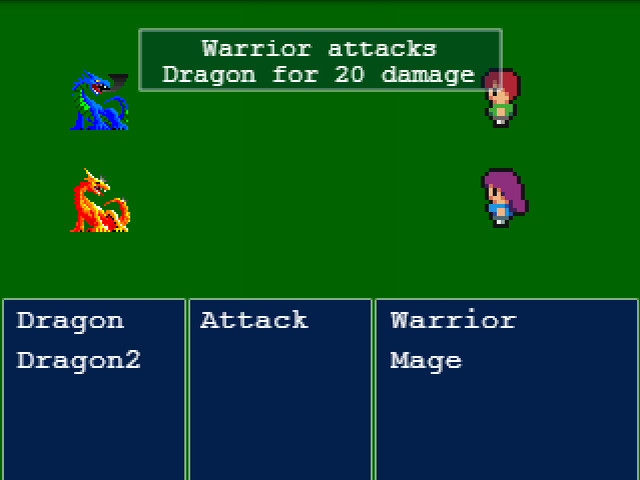
And with this Part Two of the tutorial is complete. Check out Part Three to learn how to combine the WorldScene and BattleScene into a working game.
