Have you ever played a game where you met with a blank, black screen while things loaded?
Sometimes, there isn’t getting around loading screens for your game, especially as your game gets larger and larger. Loading screens exist to provide players with important feedback – not only to indicate what the game is doing but also so players don’t think the game crashed.
In this tutorial, we’re going to cover how to make a loading screen for Phaser 3 games – an important skill considering these games loading are at the will of your internet connection.
If you’re ready to provide better UI-based user experiences, let’s start learning.
Table of contents
Intro and Projects Files
One of the things that almost all games have in common is a loading screen, which can be used to inform the player how long they must wait to play the game. Even though no one likes waiting to play a game, a loading screen is a valuable tool. Instead of having players stare at a blank screen, the loading screen can be used to inform the player how much longer they have to wait, or at minimum let the player know the game is doing something.
In Phaser, before you can use any assets, you must first load them in preload function of the scene. If you load a large number of assets, it can take some time for all of the assets to be loaded into the game, and this is where a preloader really makes a difference.
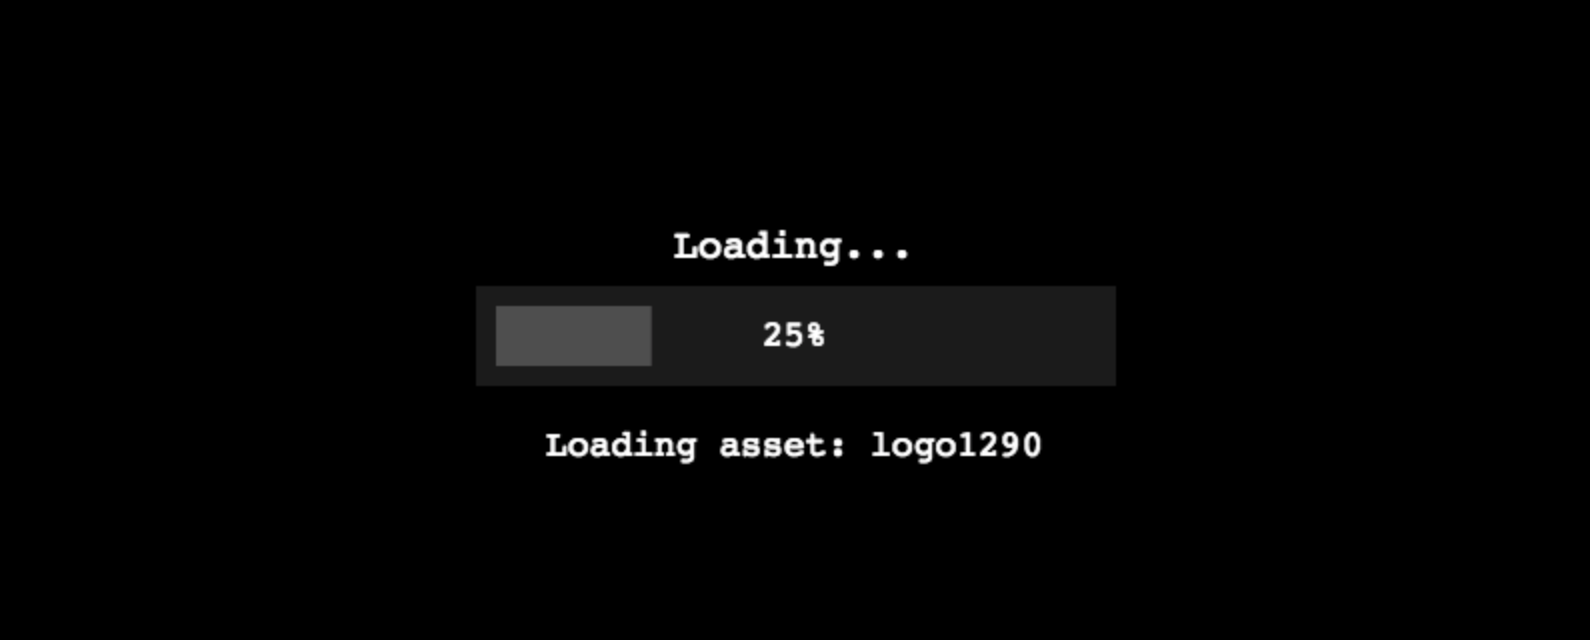
The goal of this tutorial is to teach you the basics of creating a preloading screen by creating a progress bar that will dynamically update as the game loads the assets. You can see what we will be creating below:
You can download all of the files associated with the source code here:
Did you come across any errors in this tutorial? Please let us know by completing this form and we’ll look into it!

FINAL DAYS: Unlock coding courses in Unity, Godot, Unreal, Python and more.
Learn Phaser 3 with our newest Mini-Degree
The Phaser Mini-Degree is now available for Pre-Order on Zenva Academy. Learn to code and make impressive games with JavaScript and Phaser 3!
Project Setup
In order to run your Phaser game locally, you will need a web server for running your game. If you don’t already have this setup, you can read how to do that here: Getting Start With Phaser. You will also need an IDE or Text Editor for writing your code. If you don’t already have one, I would recommend the Brackets editor since it is easy to use, and it has a feature called Live Preview that will allow you to run your Phaser game without installing a web server.
Once you have these setup, we will setup the basic code for our game. Open your IDE, and create a new file called index.html. We are going to create a basic html page, add a reference to Phaser, and create our Phaser game object. In index.html, add the following code:
<!DOCTYPE html>
<html>

<head>
    <meta charset="utf-8">
</head>

<body>
    <script src="//cdn.jsdelivr.net/npm/[email protected]/dist/phaser.min.js"></script>
    <script type="text/javascript">
        // The game config that is used by Phaser
        var config = {
            type: Phaser.AUTO,
            parent: 'phaser-example',
            width: 800,
            height: 600,
            scene: {
                preload: preload,
                create: create
            }
        };

        // Create a new Phaser Game object
        var game = new Phaser.Game(config);

        function preload() {
        }

        function create() {
        }

    </script>
</body>

</html>
Let’s review the code we just added:
- We created the configuration that will be used for our Phaser game.
- In the config object, in the type field, we set the renderer type for our game. The two main types are Canvas and WebGL. WebGL is a faster renderer and has better performance, but not all browsers support it. By choosing AUTO for the type, Phaser will use WebGL if it is available, otherwise it will use Canvas.
- In the config object, the parent field is used to tell Phaser to render our game in an existing <canvas> element with that id if it exists. If it does not exists, then Phaser will create a <canvas> element for us.
- In the config object, we specify the width and height of the viewable area of our game.
- In the config object, we embedded a scene object which will use the preload and create functions we defined.
- Lastly, we passed our config object to Phaser when we created the new game instance.
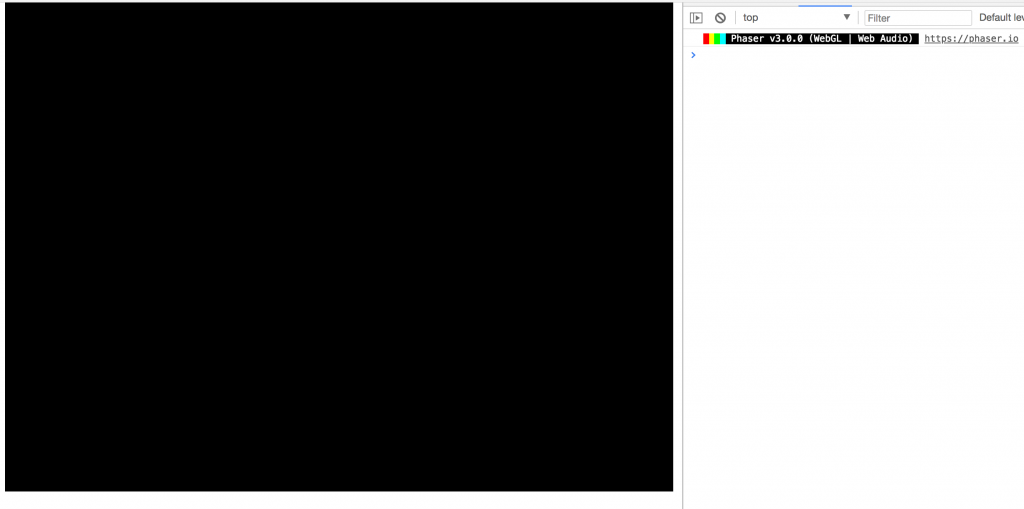
If you try running your game, you should see a black screen, and if you open the console in the developer tools, you should see a log with the version of Phaser your game is running.
Loading Our Assets
Now that our project is setup, we can get started. Before we can create our preloader, we will need to load some assets into our game. To keep things simple, we are going to use one image and reload it a few times to simulate loading a large number of assets. The asset for the game can be downloaded here.
You will need to place the image in same folder as index.html.
To load our image and display it in our game, you will need to update the preload and create functions in index.html:
function preload() {
    this.load.image('logo', 'zenvalogo.png');
    for (var i = 0; i < 500; i++) {
        this.load.image('logo'+i, 'zenvalogo.png');
    }
}

function create() {
    var logo = this.add.image(400, 300, 'logo');
}
If you reload your game in the browser, you should see the logo appear in your game.
Creating the Preloader
With our assets loaded, it is time to create our preloader. In the preload function, add the following code:
this.load.on('progress', function (value) {
    console.log(value);
});

this.load.on('fileprogress', function (file) {
    console.log(file.src);
});

this.load.on('complete', function () {
    console.log('complete');
});
This code creates a few event listeners that will listen for the progress, fileprogress, and complete events that are emitted from Phaser’s LoaderPlugin. The progress and fileprogress events will be emitted every time a file has been loaded, and the complete event will only be emitted once all the files are done loading.
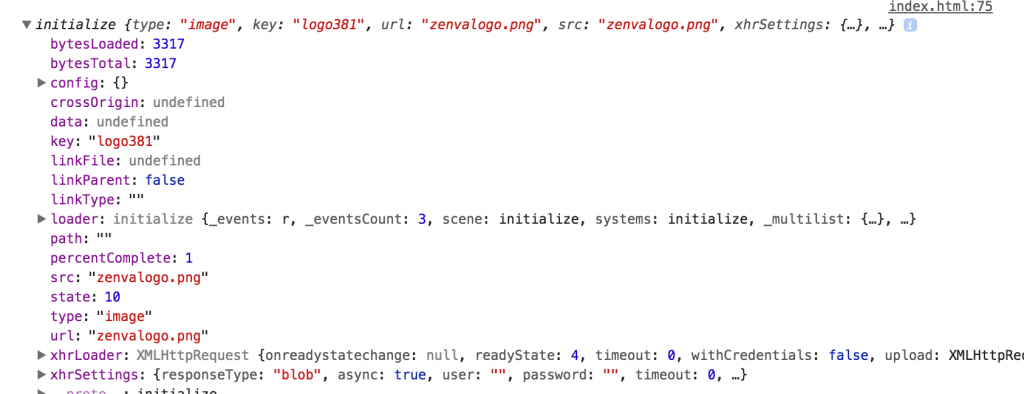
When the progress event is emitted, you will also receive a value between 0 and 1, which can be used track the overall progress of the loading process. When the fileprogress event is emitted, you will also receive an object containing information on the file that was just loaded. Both of these can be used to create custom preloader with the information that is provided.
Here is an example of the data that is sent:
For the preloader, we will use Phaser’s GameObject.Graphics to create the progress bar. In the preload function, add the following code at the top of the function, above the code you already added:
var progressBar = this.add.graphics();
var progressBox = this.add.graphics();
progressBox.fillStyle(0x222222, 0.8);
progressBox.fillRect(240, 270, 320, 50);
Then, update the progress event listener in the preload function with the following code:
this.load.on('progress', function (value) {
    console.log(value);
    progressBar.clear();
    progressBar.fillStyle(0xffffff, 1);
    progressBar.fillRect(250, 280, 300 * value, 30);
});
In the code above, we are creating two separate rectangles, progressBar and progressBox. The progressBox rectangle is going to be used as a border/container around the progressBar, and the progressBar will be used to track the overall percentage of the assets being loaded. We are doing this by calculating the width of the rectangle to be based on the progress value we are receiving. So, every time we receive the progress event, we should see the rectangle grow.
If you reload the game, you should see a nice progress bar that fills up as the assets are being loaded. However, there is one problem with it. When the all of the assets are loaded, the preloader is staying on the screen, and the logo image is being loaded over top of it. To fix this, we can update the complete event listener to destroy our preloader once all assets are loaded.
In the complete event listener, add the following code below the console.log():
progressBar.destroy();
progressBox.destroy();
Now, if you reload your game, the progress bar should disappear before the logo image is displayed on the screen.
Adding Some Text
We have the main part of our preloader done, but we can easily enhance the preloader by adding some additional text to it. First, we will add a simple ‘Loading…’ message to the preloader. In the preload function, add the following code below the progressBox lines:
var width = this.cameras.main.width;
var height = this.cameras.main.height;
var loadingText = this.make.text({
    x: width / 2,
    y: height / 2 - 50,
    text: 'Loading...',
    style: {
        font: '20px monospace',
        fill: '#ffffff'
    }
});
loadingText.setOrigin(0.5, 0.5);
Then, in the complete event listener, add the following code:
loadingText.destroy();
Let’s review what we just added:
- We created two new variables, width and height. These variables are getting the width and height of the current viewable area of our game.
- We created a new Phaser Text GameObject called loadingText. This game object is using the width and height variables we just created, and we set the style and default text of the game object.
- We set the origin of the game object to be (0.5, 0.5), which will help center our game object.
- Lastly, we updated the complete event listener to destroy our loading text once all the games assets were loaded.
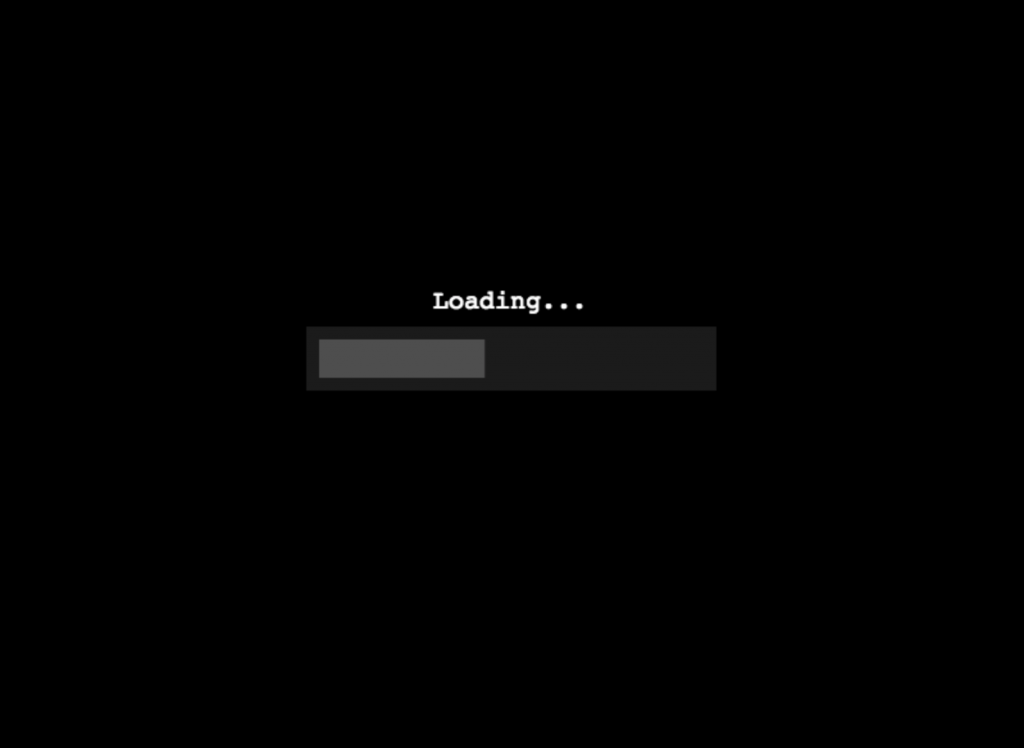
If you reload your game, your screen should look like this:
Next, we are going to add some additional text that will display the percent of the loading bar. To do this, we just need to create another text game object, and update the text to use the value that is being sent to the progress event listener. In the preload function add the following code below the loadingText code:
var percentText = this.make.text({
    x: width / 2,
    y: height / 2 - 5,
    text: '0%',
    style: {
        font: '18px monospace',
        fill: '#ffffff'
    }
});
percentText.setOrigin(0.5, 0.5);
Now, in the progress event listener, add the following code above the progressBar code:
percentText.setText(parseInt(value * 100) + '%');
Lastly, in the complete function add the following code:preload
percentText.destroy();
Here is a quick summary of what we just did:
- Created a new Phaser Text GameObject called percentText.
- We set the origin to (0.5, 0.5) to help center the object.
- In the progress event listener, we are updating the text of the object, every time a file is loaded. We are multiplying the value by 100 since the value that is emitted is between 0 and 1.
- Lastly, we updated the complete event listener to destroy the object.
If you reload your game, you should see the progress bar percentage update as the progress bar fills up.
With the progress bar now showing the percentage, we will now add some text to display which asset has been loaded. Once again, we will create another text game object and we will update the text of the game object with the file data that is being sent to the fileprogress event listener. In the preload function add the following code below the percentText code:
var assetText = this.make.text({
    x: width / 2,
    y: height / 2 + 50,
    text: '',
    style: {
        font: '18px monospace',
        fill: '#ffffff'
    }
});
assetText.setOrigin(0.5, 0.5);
Then, in the fileprogress event listener, add the following code:
assetText.setText('Loading asset: ' + file.key);
Lastly, in the complete function add the following code:
assetText.destroy();
Now, if you reload your game, you should see the asset text being updated as each asset is loaded.
For this example, we ended up outputting the asset key instead of the file name since we are only loading the one image. If you want to output the file name, you can update the following line:
assetText.setText('Loading asset: ' + file.key);
to be:
assetText.setText('Loading asset: ' + file.src);
Here is the completed index.html file:
<!DOCTYPE html>
<html>

<head>
    <meta charset="utf-8">
</head>

<body>
    <script src="//cdn.jsdelivr.net/npm/[email protected]/dist/phaser.min.js"></script>
    <script type="text/javascript">
        var config = {
            type: Phaser.AUTO,
            parent: 'phaser-example',
            width: 800,
            height: 600,
            scene: {
                preload: preload,
                create: create
            }
        };

        var game = new Phaser.Game(config);

        function preload() {
            var progressBar = this.add.graphics();
            var progressBox = this.add.graphics();
            progressBox.fillStyle(0x222222, 0.8);
            progressBox.fillRect(240, 270, 320, 50);

            var width = this.cameras.main.width;
            var height = this.cameras.main.height;
            var loadingText = this.make.text({
                x: width / 2,
                y: height / 2 - 50,
                text: 'Loading...',
                style: {
                    font: '20px monospace',
                    fill: '#ffffff'
                }
            });
            loadingText.setOrigin(0.5, 0.5);

            var percentText = this.make.text({
                x: width / 2,
                y: height / 2 - 5,
                text: '0%',
                style: {
                    font: '18px monospace',
                    fill: '#ffffff'
                }
            });
            percentText.setOrigin(0.5, 0.5);

            var assetText = this.make.text({
                x: width / 2,
                y: height / 2 + 50,
                text: '',
                style: {
                    font: '18px monospace',
                    fill: '#ffffff'
                }
            });

            assetText.setOrigin(0.5, 0.5);

            this.load.on('progress', function (value) {
                percentText.setText(parseInt(value * 100) + '%');
                progressBar.clear();
                progressBar.fillStyle(0xffffff, 1);
                progressBar.fillRect(250, 280, 300 * value, 30);
            });

            this.load.on('fileprogress', function (file) {
                assetText.setText('Loading asset: ' + file.key);
            });

            this.load.on('complete', function () {
                progressBar.destroy();
                progressBox.destroy();
                loadingText.destroy();
                percentText.destroy();
                assetText.destroy();
            });

            this.load.image('logo', 'zenvalogo.png');
            for (var i = 0; i < 5000; i++) {
                this.load.image('logo'+i, 'zenvalogo.png');
            }
        }

        function create() {
            var logo = this.add.image(400, 300, 'logo');
        }

    </script>
</body>

</html>
You can download the completed example here.
Conclusion
With the asset text now being displayed, this brings this tutorial to a close. As you can see, adding a preloader to your game is a great solution when you will be loading a large number of assets, and you want to keep the players informed of the games current state. With Phaser, it is really easy to add a simple preloader and you can easily extend these examples to create a more complex preloader.
I hoped you enjoyed this tutorial and found it helpful. If you have any questions, or suggestions on what we should cover next, let us know in the comments below.
