You can access the full course here: Create and Manage Huge Worlds
Table of contents
Part 1
Creating our Terrain
For this project, we’re going to be needing a terrain to test out the chunk system with. The program L3DT is what we’re going to use. This is a free program which can generate terrains with various different properties and options. Download L3DT from http://www.bundysoft.com/L3DT.
Download the program, install it, then open it up. To create our terrain, we can click on the new terrain icon.

Make sure you have Designable map selected, then click on the Next button.

Keep clicking next until you get to the Calculation queue screen. Here, we want to select all of the options.

Keep clicking next and then the map will begin to generate. It will take around 30 seconds to a minute or so. When this is done, we can see our finished terrain. There are two of these maps we need. The first is the Texture map. This is the texture which will be applied to the terrain.

Then we’ll need the Heightfield. This is what we’ll apply to our terrain in Unity to automatically generate the mesh. It will the whiteness of each pixel. The whiter the pixel is, the higher that point on the terrain will be.

Let’s start by exporting the Texture map. Right click on the tab and select Export layer.
- Set File format to PNG
Make sure you have a new (or existing) Unity project and create a new folder inside the asset folder called Terrain. Here’s were we want to set the File name, calling the texture TerrainTexture.

We’ll also export the Heightfield.
- Set File format to RAW
- Set File name to the terrain folder, calling the file TerrainHeightmap

In the next lesson, we’ll be hopping in Unity to setup our terrain object.
Part 2
Importing the Assets we Need
Before we start on our project, we’ll need import some assets that will help us with our project. The first asset is a terrain splitting tool. This will allow us to but our terrain into chunks. Download this from http://kostiantyn-dvornik.blogspot.com/2013/12/unity-split-terrain-script.html.

This will download as a .unitypackage, which will allow us to simply drag the file into the project. When the import window opens, disable everything but the SplitTerrain script. Then click on the import button.

The next asset is an FPS controller so we can walk around the map. You can use what ever one you want, but we’re going to use a free one from GitHub: https://github.com/kinifi/Unity-FPS-Controller.

We just need to drag the FPS script into our project. While we’re at it, let’s create a new folder called Scripts and drag the FPS script inside of it.

Finally, we have a few tree assets for our terrain. These, along with all the other assets are in the course project files. The trees are from Unity’s Standard Assets from the Asset Store. In the next lesson, we’ll be creating our terrain.
Transcript 1
Hey, everyone. My name is Daniel Buckley, and I will be your instructor for this course. When creating large-scale games, the very big problem is figuring out how to further improve performance. You’ll constantly be improving minor things and tweaking things to make it so that the end-user can get the smoothest performance possible. This is very prominent when creating huge worlds, and it’s something that we’ll be going over in this course.
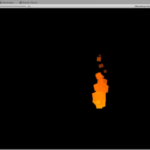
A large problem with huge worlds is actually the world itself. If you have a large map, that means you have a lot of terrain elements, probably a lot of other elements such as trees, vehicles, buildings, all sorts of stuff that can really tank the performance. So something we can do to increase the performance is to make it so that we can divide the world up into chunks, as you can see in the images here. We can divide it up into chunks, and pretty much what we can do then is just enable or disable them depending on how far away the player is from that chunk.
Many games do this, many large-scale games. The most obvious one is probably Minecraft, as it does have very obvious chunk pop-ins. But if you don’t want that to pop in all of a sudden, what we’re also gonna do is add in some fog. And this can hide or mask basically the size of the world, and it can, in many ways, make the world feel even larger. Many old games actually also use this method, since they wouldn’t actually be able to render that far out from the camera, so they would put fog in to make it seem like the world is larger.
So we’ll be going over, first of all, how to create a terrain, how to import into Unity, how to split it up, how to make the different chunks load in and load out depending on the player distance, and then we’ll be going over a few other minor different details, like level of detail, and adding in fog.
Zenva is an online learning academy with over 400,000 students. We feature a wide range of courses for people who are just starting out, for people who just want to learn something new. The courses are also very versatile, allowing you to view them whenever and wherever you want. You can choose to follow along with the video courses or even read the lesson summaries. With the included project files, you can also follow along with the projects as you make them throughout the course.
I’ll see you all in the first lesson, where we begin to create our terrain.
Transcript 2
Welcome back, everyone. In this lesson, we are going to be starting to create our terrain. This is just gonna be a basic terrain that we can put inside of Unity, and then split up, okay?
So the program we are gonna be using for this is called L3DT, and this is just a terrain creation program that you can download free online, and this is gonna allow us to quickly create a detailed terrain like the one you can see in the image there. Alternatively, if you do want a more advanced solution, you could use World Machine, but we’re just gonna go with L3DT for now.
So, I’m gonna hop on the website, and show you how you can download it. Here I am on the website. It’s www.bundysoft.com/L3DT, and when we’re on here we just wanna go up to the downloads button here, to downloads screen, and we just wanna download the standard edition here. So just download the current stable release right here, and after this you have to go through a bit of an installer. It’s just like any other installer, and when that’s done you should be able to start the program.
All right, so my download has finished and I have the program open now, all right. So, what we’re gonna do is we’re just gonna create a basic terrain. We’re not gonna go too advanced in all the different options and settings, we’re just gonna create a terrain that we can easily put into Unity and use, all right.
So, first thing we’re gonna do is go and click on this button here which is the create new terrain button. Click on that, and here we just want to select the designable map. So we’ll click next. We’ll click next. Now, these options we don’t really need to go through in detail, we can just skip through all these.
So we can just go next, next, and here in the calculation queue what we want to have is the heightfield, and the texture map. So lets just enable– Actually we’ll just enable all these just so I can show you too, but the one’s we do need is the heightfield so we can actually have a height map which can then generate the actual terrain model, inside of Unity, and the texture map to of course apply a texture to the terrain.
So, you can click next, next, next, next, next, next, and okay, and it should then begin to generate our map. This can take a bit of time. It’ll probably take under a minute hopefully, but it can take around a minute or so, so we’ll get back to you when it’s finished.
Okay, here we are. My map has generated, and here in the texture map we can actually see what it looks like, and because for each of these different tabs here we can see the salinity map, the attributes map, you can even see the terrain normals to have like a normal map of where the mountains are, where all the valleys in there are. We also have a height map, which is one of the things that we do need. There are these colored lines though, in the image but when we do import it into Unity there won’t be those.
So just think of a height map as pretty much showing you where the terrain is high and where it is low. So, the darker the terrain is, the lower down it is, yet the whiter it is, the higher it is, and so when we put this inside of Unity, into our terrain, it can calculate pretty much each pixel, see how it ranges from 0 being black, and 1 being totally white. How it ranges between them, and then set that at its certain height depending on how bright it is, and so then we can actually have a quite, a detailed terrain that way, and then after that we’ll apply our texture map on top of that, so we can have a pretty good looking, detailed texture.
Okay, so how do we actually import these into Unity? Well, what we need to do is, right-click on texture map here, and just click on export layer. We’ll actually save this file format as a PNG, and then we’ll save it inside of our Unity Project. So, just locate your Unity Project, and inside of the assets, inside of the assets folder, I’m just gonna create a new folder here and call it our Terrain, and inside here I’m just– oops, not there, inside our Terrain folder, I’m just gonna name this our Terrain Texture.
Save that, and make sure that the width and height is 1-0-2-4, and then we’ll click okay, and with that saved, we then want to go and save our height map. So we can right-click on that, go export layer, but, thing is with this, we don’t want to save it as a PNG, and that is because the new Unity terrain, it actually uses the RAW format. So we’ll click on RAW for the file format, and we’ll save it in the exact same folder, in our Terrains folder here, and I’m just going to save it as our Terrain Height Map.
Save that, click okay, and that is it. We have our map generated, we have it saved, and now we can actually hop into Unity, set up our project, import all the assets we need and begin to create our terrain.
And here it is inside of our project, ready to go. And up here you can even see there’s the button here, Terrain, Split Terrain, and this is the tool we will be using.
And the next asset that we’ll be needing is just any old sort of FPS controller. You can really use whatever FPS controller you want. I’m just gonna be using this one, ’cause it is a fairly lightweight one and it’s free to download over on GitHub. Again this link will be down inside of the lesson summaries. So you can download it from there. Or you can download it from the project files included in the course.
So, to download stuff on GitHub, you can choose to clone the repository, but we’re not gonna do that. We’re just gonna click on Download ZIP right here. So it’ll download a .zip file. We can open that up inside of whatever sort of .zip program you have. I’ve got WinRAR. And we’ve here, we just want to have this FPS.cs script. So we can first of all just extract that. We can just click on the FPS script here. Click Extract To And we then want to just find our project and export it into the assets folder.
So when that’s done, you should see we now have the FPS script here inside of our project. I’m actually going to create a new folder called Scripts and this is where we’re gonna be storing our scripts. We have this FPS script, but we’re also gonna be having two new scripts that we’re gonna make, that is going to manage all of the loading of the chunks and of the dynamic objects in the scene.
Transcript 3
Welcome back, everyone. In this lesson, we are going to be importing a few of the assets that we’ll need to create this project. So make sure you just have a new Unity project open or that you have downloaded the existing project files from the course. If you have done that, then this lesson isn’t that necessary. We’re just gonna go revert where to find and install these assets that we’ll be needing. And of course all of these will be included inside of the project files, so if you do wish to download it from there, you can.
So the first asset we’ll be needing is this terrain splitting tool. This is just a script that will allow us to split the terrain, here, pretty much just subdivide up the terrain. And we’ll be doing this a couple of times, so we do have quite a few different chunks that we can load. So just go to this website here. It will be linked in the lesson summary. And we just want to scroll down to the download link. It is a Dropbox download, so we just click on that. And then we again just click on the Download button here and just Direct download.
And what will be downloaded is actually a .unitypackage file. So with this we can just drag it inside of our Unity project here. Drop it inside the project folder. And it should then start to import all the assets we need. You might see here that we do have quite a lot of stuff that we can import, but all we’re gonna be importing is the split terrain script so we can pretty much just disable everything else here, as we only want the split terrain script. So, we’ll click Import. Wait for that to finish.
And with that, the final thing we’ll need is just some tree assets that we’re gonna be using to populate the terrain. These aren’t necessary but they will be used by us and you can just download those inside of the course project files or you can go in the Unity Asset Store. Download the Standard Assets and inside the Standard Assets they have a lot of various terrain assets that we can use.
But we’re just gonna be dragging in our environment folder here. We’ll just drag that in here. Load it up. And all this is here is just some SpeedTree assets. We just have some various different trees that we can use for our terrain, to populate our terrain. I’m also going to be going over level of detail with these models later on, okay?
So with that all done, that is our project set up and ready to go. So in the next lesson, we’ll be starting to actually import our terrain into Unity and set it up with the existing terrain tools, all right? So see you all then in the next lesson.
Interested in continuing? Check out the full Create and Manage Huge Worlds course, which is part of our Unity Game Development Mini-Degree.