You can access the full course here: Intro to Pixel Art with Photoshop
Table of contents
Pixel Art Background
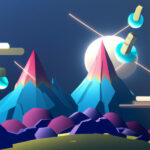
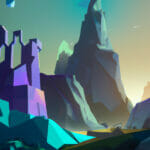
In this lesson, we will be looking at setting up a background for a game in a pixel-art style.
Background Setup
Let’s start by setting up the background sky by filling the default layer with blue color and renaming the layer to “Sky.”

Now what we want to do is set up our maintains. Let’s create a new layer by pressing Ctrl + Shift + N (or Cmd + Shift + N) and name it “Mountains”.

We will first draw mountains with the Pencil tool on the Mountains layer and fill it with the Paint Bucket tool.


Adding Details
Next, we’re going to add highlights and shadows to the mountains. But, first, let’s select the mountains with the Magic Wand tool to draw inside the mountain.

![]()


Make sure to always keep in mind the direction of the sunlight. The shadows should consistently appear on the opposite side of the highlights.


Once you have added the highlights and shadows to the mountains, deselect the mountains by pressing Ctrl + D (or Cmd + D) to no longer be bound to the selected area.
Adding A Gradient Color
The sky looks a bit too bland now, so we want to add some gradient to the sky. A gradient is a gradual change in color, shade, or level of brightness.

To do this, we’re going to create a new layer called “Sky Haze” and put it between the Mountains layer and the Sky layer.

To add a gradient to the layer, hold down the left mouse button on the Paint Bucket tool and select the Gradient Tool option.

You can change the gradient’s color by clicking on the Gradient Setting at the top corner of the screen.

This will open up the Gradient Editor window, where you can modify the gradient by double-click on one of the color stops.

You can also set the opacity of the color stops so that it fades out to a transparent color. For example, we’ll set both colors to white, the start opacity to 100%, and the final opacity to 0%.

Next to the gradient color button is where we can set the gradient shape. Let’s change this to linear.

We can now click on the bottom of the screen and drag it upwards to add a gradient to the sky.


To make the gradient look more pixellated, we can apply a Mosaic filter by going to Filter > Pixelate > Mosaic.


Finally, we want to make the sky look more wavy and natural by warping the layer. Press Ctrl + T (or Cmd + T), right-click > select Warp.

We can now modify the shape by dragging the control points.

Note that clicking on an anchor point lets you edit the control points surrounding that anchor. This is similar to modifying a curved segment of a vector graphic.


Transcript
Welcome back everyone. In this lesson, we are going to be looking at setting up a background for a game that we might wanna create. Okay, it’s gonna have some mountains at the bottom and a nice sky up in the air.
So, let’s go file, new, it’s gonna have a width of 300 pixels and a height of 168, okay? We’re gonna click on create and here we are in our new document. Now to begin, let’s start by setting up the background sky, okay, so I’m gonna rename this layer here to be sky and I’m gonna select a bluish color here that we’re gonna be using. We’ll select the paint bucket tool and just click to color in everything.
Now what we want to do is set up our mountains. So I’m gonna go control, shift, N, call this one mountains and we are now on a new layer. Now for our mountains, we wanna select a greenish color, something like this and inside of here, we can then start by drawing in our mountains and how we might want them to look. Okay, so for this I’m just simply going to begin drawing them in like so. Okay, something like that.
Next what we want to do is fill it in so that we don’t see any of the blue down here. So we’ll go to the paint bucket tool, color these in like so. But the problem here is that the mountains look kinda bland, okay, they don’t really look that good at all. So how do we fix this? Well, what we want to do is add highlights and shadows to these mountains.
Now to do that, we need to figure out, okay, what sort of direction is the sun going to be facing? So let’s say the sun is facing the top right corner of the screen here, down. So that means these sides of the mountains are going to be brighter than the other side of the mountains, which are gonna have shadows.
So, what I’m gonna do is make it so that we can only draw on this mountain because right now, if I select the brush tool and I go to draw highlights with a lighter green, you’ll notice that I can go off the edge here, which is something we don’t want, okay? We want to only be able to draw inside of this mountain range. So to do that, I’m gonna select the wand tool and I’m going to click on our mountains.
So now we have the mountains selected, if I go to my brush tool and begin drawing, you’ll notice that I can only draw on the highlighted pixels, which is great. So let’s go through each of our mountains here and just start drawing in the highlights. And there we go. Now next up, what we need to do is draw in the shadows. So for the shadows I’m gonna select a darker green here and I’m gonna go in and just start laying those out as well.
Now, I’m gonna follow the mountains topography here so I’m gonna select this and just go down like that, okay? And as you can see, if I go control H to get rid of the grid and the outline, that’s what it looks like. So, I can then maybe add a shadow here. And there we go. Something like this where we have the highlights and the shadows of the mountain. You can, of course, make it a lot better, but this is just a rough, quick done version of this, okay?
So, we’ve got our sky, but the sky doesn’t look realistic, okay, so how do we make our sky look realistic? Well, if you look out in the real world, you’ll notice that, at the horizon, it is much brighter than it is the higher up you go, okay? As you look down the horizon, you’re seeing more of the atmosphere, whereas if you look up, you’re seeing basically less of the atmosphere, okay, and you’re seeing more into space.
So, what we need to do is I’m gonna create a new layer here and I’m gonna call this one our sky haze. I’m gonna put this below the mountains, but above the sky, and to do this, we are gonna be using a gradient. Now a gradient is basically a thing we can draw out which basically transitions from one color to another.
So if we go over here to our paint bucket tool and hold down left mouse, you’ll see that we can select the gradient tool and before we do that, we actually need to go to our move tool, right click on the mountains, deselect those so we’re no longer drawing inside the mountains, go back to our gradient tool, click and drag and as you can see, a gradient has now been formed, okay?
So, at the top corner of the screen here we have all the gradient settings, we can choose basically the color of the gradient here by double clicking on it to open up the gradient editor.
Now for us, we’re gonna have a go from white to transparent, so I’m gonna double click on this icon down here to change the first color to white, click on the end node here to change that color to white as well, and I’m gonna click on these black boxes which allow us to change the opacity. It’s gonna go from 100% down to 0%, okay? And as you can see, it fades out as it goes along. Hit okay, and now if I click and drag, you’ll see that it’s this white fade, like so.
We’re gonna change it from radial to a linear gradient so it is much more straight, like so, and at the bottom of the screen, I’m going to click and drag upwards, like that, and there we go, that is our gradient pretty much done, but one thing you may notice is that it’s not pixelar, okay? This is a smooth color transition from one to another, whereas down here, we have rigid colors.
So how do we convert this gradient to a more pixely looking image? Well, the way we can do that is by going up to filter, then we want to go to pixelate and then we want to click on mosaic.
And what mosaic does is it basically pixelizes an image. Okay, it gets your image and it basically splits it up into cells and each cell can only have one single color and right now each cell is five pixels big and if we increase this number, you’ll see the cells are getting bigger and bigger and if we bring it down, it gets smaller and smaller.
So, let’s set our cells down to five, click okay and you’ll notice that it now looks a lot more pixely. But it looks too uniform and that’s a bit of a problem. So the way we can make it look a bit more wavy and natural is by going control T, right clicking and clicking on warp and what warp allows us to do is click and drag to move this image around in various different ways, okay?
So, we can just warp this image around so it looks a bit different, like so, all right? We can then hit enter and there we go, that is our atmosphere done, and in fact, we might want to make this warp actually curve down a bit at the edges here. Hit okay and there we go.
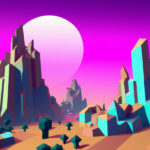
So that is our pixely horizon right here looking nice. You can, of course, go ahead, you can change the sky color, you can change the haze color. That is entirely up to you, but this is just our mountain range right here, set up and ready to be added to a game.
Interested in continuing? Check out our all-access plan which includes 250+ courses, guided curriculums, new courses monthly, access to expert course mentors, and more!