Making a game, but feel your game characters are missing that spark? Or simply looking to learn a new skill? Fret no more with GIMP pixel art.
In this tutorial, we will walk you through the process of creating your own pixel art monsters using GIMP – a cube slime, and a ghoul. Drawing can be a daunting process, especially with pixel art where each pixel counts. So, we aim to demonstrate tips and tricks that will help you design your monsters in a simplified yet effective way.
You should be fairly comfortable with using your computer and should have GIMP installed. Prior experience in pixel art is not required as we’ll be starting from the basics. Follow along and by the end of this lesson, you will have two whimsical pixel art monsters to flaunt!
Table of contents
Project Files
The project files include the raw GIMP files and final png outputs for the pixel art monsters created, which you can review to better understand the process of creating GIMP pixel art. You can download them here:
Download Project Files Here
Pixel Art Monsters
In this lesson, we’ll use GIMP to make 2 monsters: a cube slime, and a ghoul.

Tips
- Avoid using black and white – nothing is truly black or white in nature, so it doesn’t look realistic.
- Remember that things can look a bit odd when creating pixel art because you’re looking at it in detail. Hide the grid and zoom out to see what your artwork will actually look like.
- Don’t worry about getting things ‘perfect’ – try out ideas, get things wrong and experiment! This is the fastest and best way to learn to make good GIMP pixel art.
- While we only cover using GIMP for pixel art, you can virtually use any tool you’re comfortable (such as Photoshop or Aseprite).
The Cube Slime
When making monsters, start with a good idea of what you’d like it to look like. We want it to be cube-shaped and green, and have a cute face.
Open GIMP and start a new image (File, New…, with an Image Size of 32 x 32). Make sure the canvas is a comfortable size (by zooming in) and has the grid enabled (View, Show Grid).
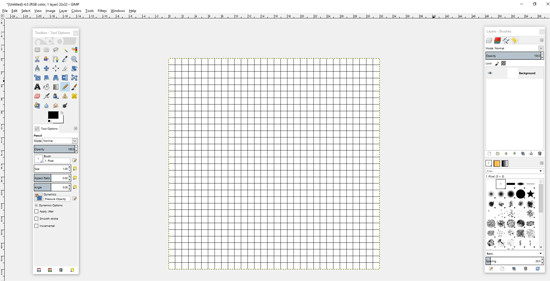
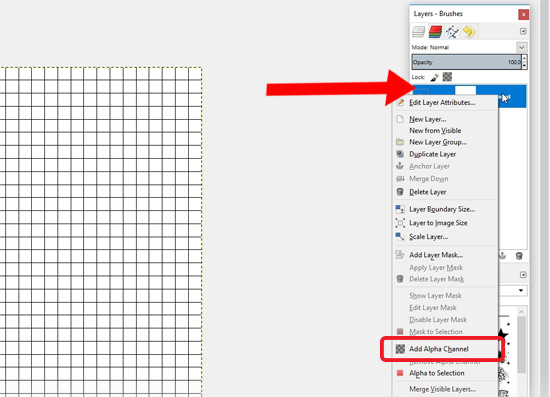
Before anything else, we need to make the background transparent. This way, when the monster’s in the game the game’s background will show through around it. If we don’t do this, our monster will be in a white box!
Right click the Background layer, click Add Alpha Channel and press Delete.
Now we want to outline the monster, so we’ll select the Pencil and draw a cube. If you hold Shift, you’ll be able to draw in a straight line.
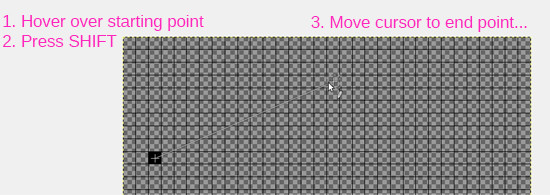
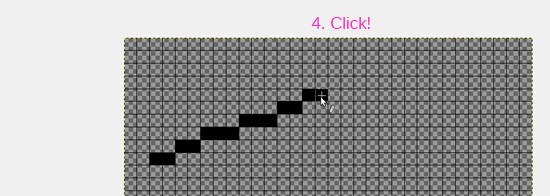
Draw a cube shape – try to make sure the top level is lined up with the bottom level.
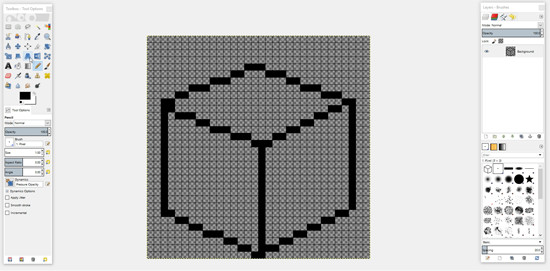
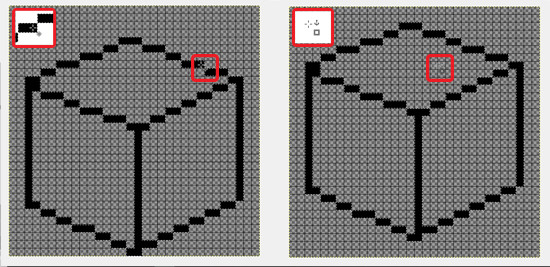
You may want to move the cube at this point. If so, select the Rectangle-Select tool, click and drag to select the cube, cut it (Ctrl + X) and paste it back (Ctrl + V).
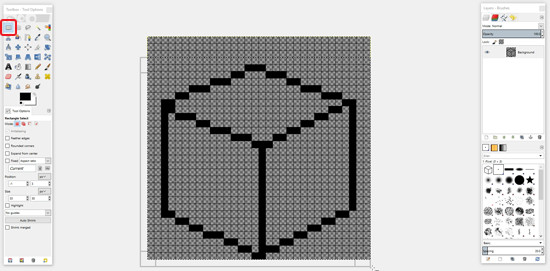
Now if you hover over one of the lines you’ll see a cross symbol. This means you can move it – click and drag it into position. Now if you hover over a transparent area you’ll see an anchor symbol. This means that if you click here, it will drop the selected image into place.
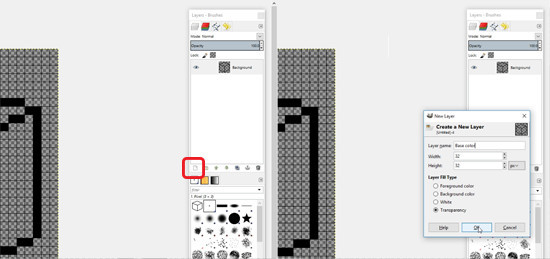
Now we can start coloring! Make a new layer and name it base color.
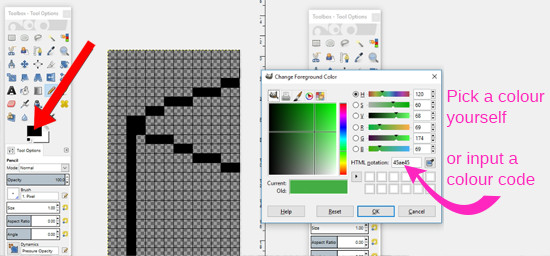
Select the green you want the slime to be (we’ve used 45ae45).
Now color in the cube. The fastest way to do this is to use the Pencil to make a green outline, then use the Bucket tool (Shift + B) to fill it in.
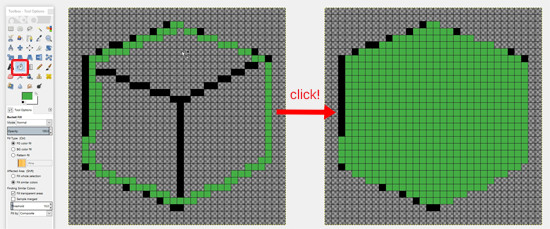
Move the outline layer above this one. If needed, use the Eraser to remove any stray pixels.
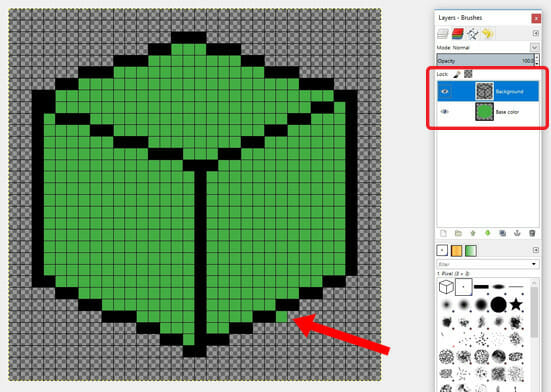
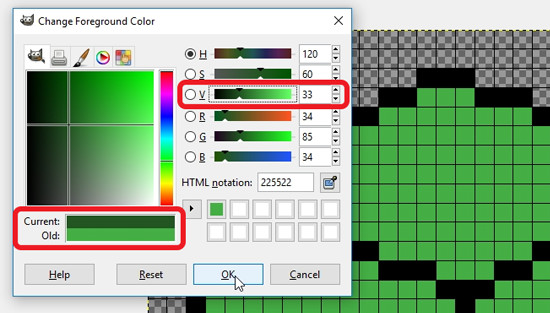
Now we want to draw the actual outline – the first was just a guide and is too bold to look natural. Click the green and make it darker (we’re using 255e25).
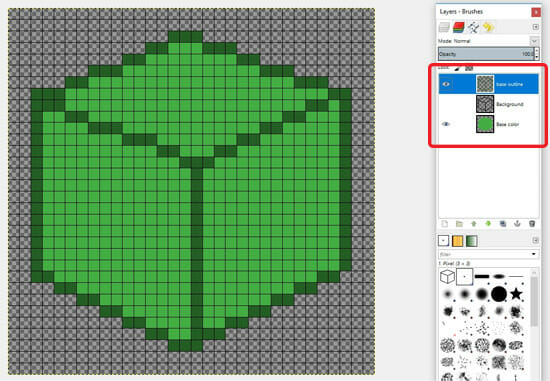
Now we’ll draw the new outline over the old one on a new layer (called base outline, making sure it’s above the base color layer). Once done, click the eye symbol next to the old outline layer to hide it.
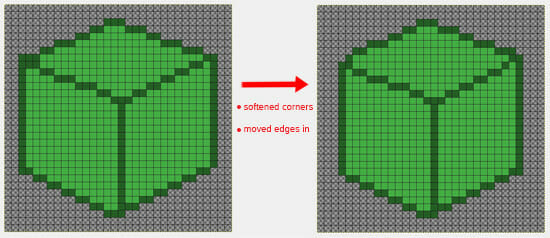
We can now clean up anything that looks out of place. If one area looks too big or too sharp, erase and re-draw until it looks about right.
Now we want to add shadows and highlights.
First we need to consider a light source – we can add a yellow area to indicate where we imagine the light’s coming from. The area of the cube closest to the light source will look brighter and warmer, and the opposite side will be in the dark.
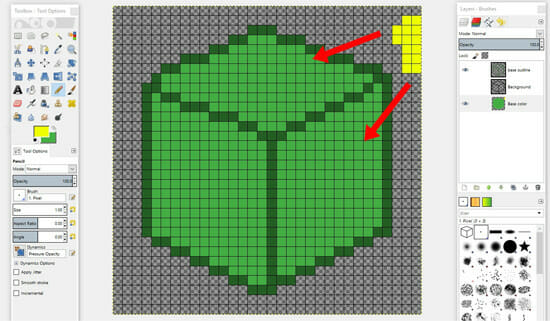
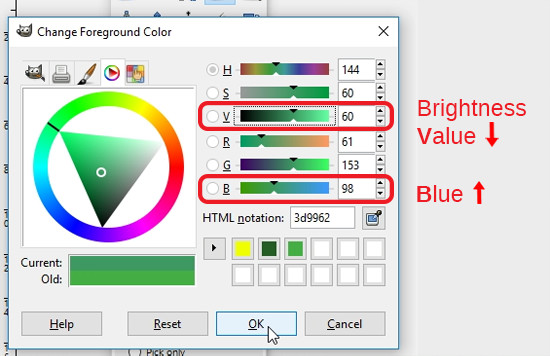
Now we’ll choose our shade color. Select the base color and make it darker and colder (more blue).
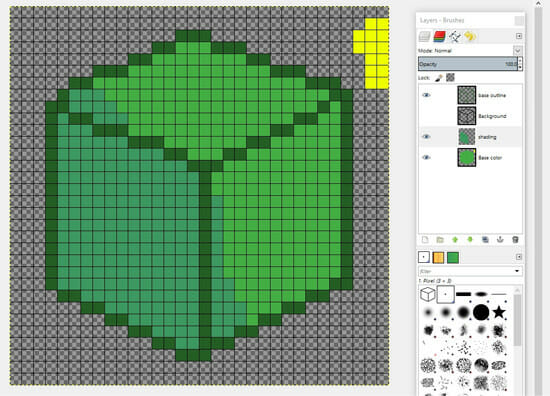
In a new layer (called shading, below the outline), color in the dark side of the cube, then add a little overflow.
To make it more realistic, let’s add another layer of an even darker and bluer color in the darkest corner.
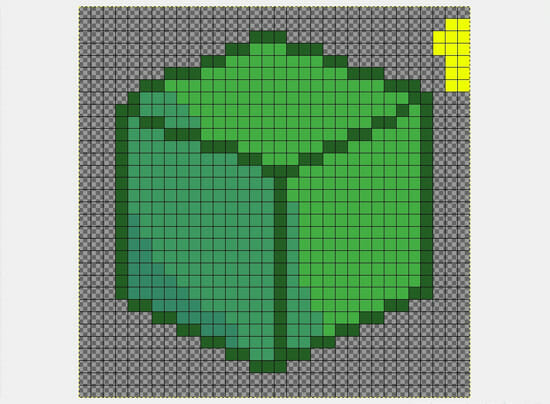
Now let’s add some highlights. Select the base green and make it lighter and more yellow. Add color to the parts of the cube nearest the light source, then go brighter and highlight some more. We can now remove the yellow marker.
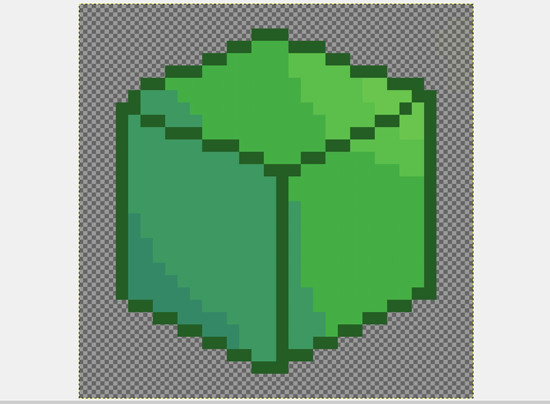
Next we’ll use a technique called dithering to give the appearance of gradual shading. Have a go erasing and adding pixels to make a checkboard pattern. The more you dither, the smoother it’ll look.
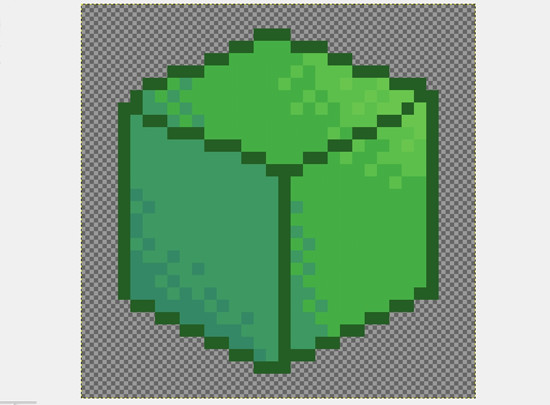
Lastly, we add shading to the outline. Select the outline color and create a new layer (called shading outline) above the outline. Do the same thing, using lighter and yellower colors for highlights and darker and bluer for shadows, with some dithering.
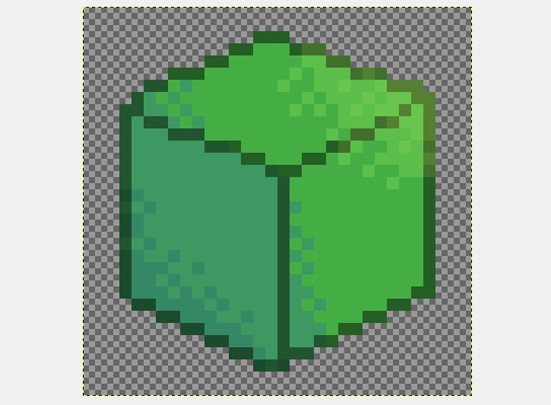
Now we can start adding details to our GIMP pixel art. Lining up eyes is difficult, so in a new layer on top of everything we’re going to make a guide. In a different color, draw over the top line of the cube’s face and select your new line with the Rectangle-Select tool. Cut the line, paste and move it to where you’d like the top of the eyes to be, then paste and move again to mark the bottom of the eyes.
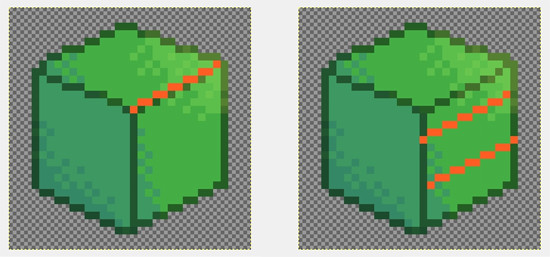
Starting with the base outline color on a new layer (called face), draw the eyes between the guiding lines.
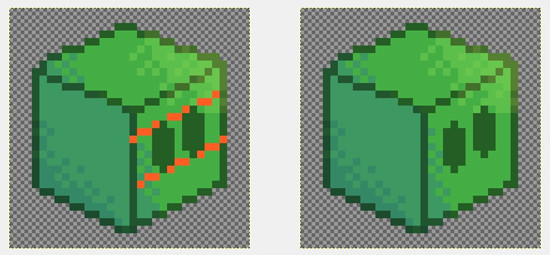
The furthest eye doesn’t look quite right – make it smaller and move it further away to account for perspective. Lastly, we add the mouth.
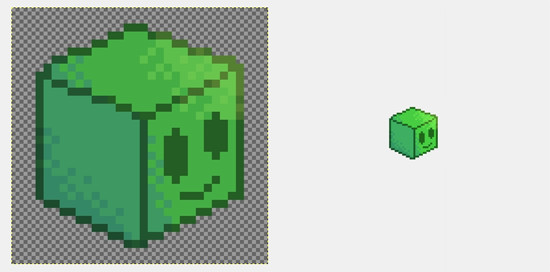
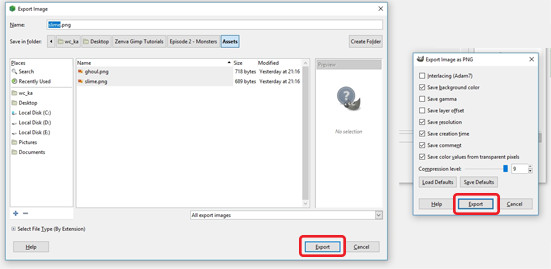
To export the finished image, press Ctrl + E, choose a location and click Export. In the next menu, make sure it’s saving at the highest quality (compression level 9) and click Export. This saves it as a png, an image file which saves any transparency, making sure our monster appears seamlessly in the game world without a block of color around it.
The Ghoul
Now it’s time to make our GIMP pixel art ghoul.
Make a new image, 32 x 32, add an alpha channel and delete it, and enable the grid.
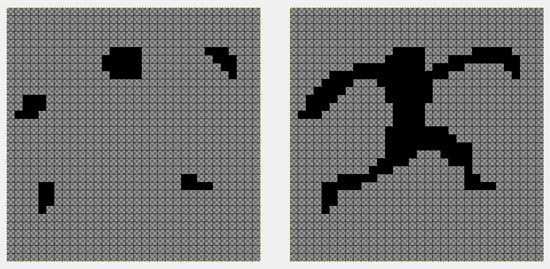
Our starting ideas for the ghoul: It’ll have blue skin and be wearing a red body suit. As before, let’s start by making an outline. Very simply map out where it’s various parts will go, thinking about things like how thin it might be, its posture, etc.
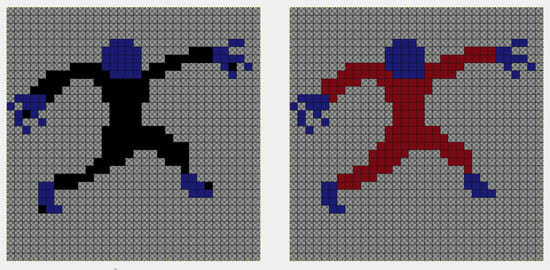
Make a new layer. Select your base blue and start coloring in the head, hands and feet, then select a good red and do the same for the body. Hide the guide layer when you’re done.
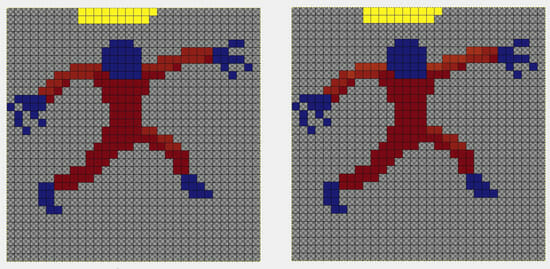
Next is highlighting and shading: make a new layer and add a light source. Select the base red and make it lighter and more yellow, coloring in where you expect the light would hit it. Add another level of highlighting for the parts nearest the source.
Now do the reverse for the shadows, and finish it all off with some dithering (if you can – this ghoul’s a bit thin for it!).
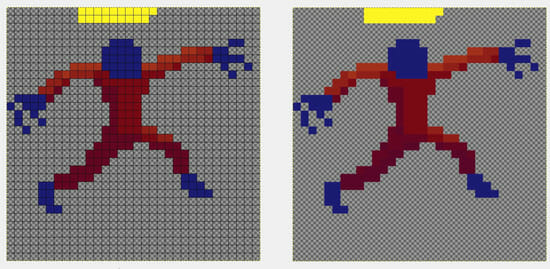
Now let’s do the same for the blue. Select the blue, then go lighter and more green for the highlights. For the shadows, go darker and more purple.
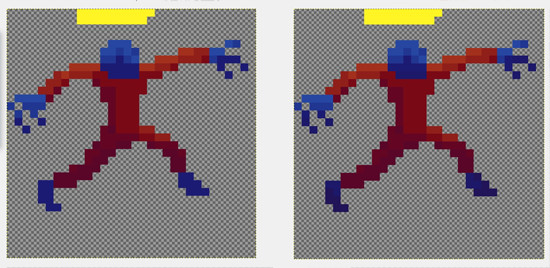
Now we can delete the lighting layer and give it some eyes – no need for a guide. We can add a little highlighting to the eyes too.
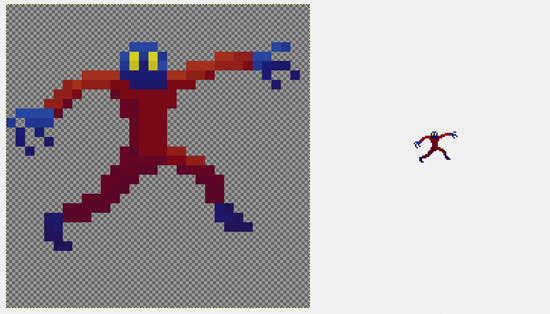
Export it as a png, and you’re done making your GIMP pixel art!
GIMP Pixel Art Conclusion
Congratulations! You’ve successfully added two new members to your gang of pixel monsters. Take a moment here to appreciate your newly acquired skill in GIMP pixel art. The Cube Slime and The Ghoul are just beginnings. With the methods and tips provided to you in this tutorial, you’ll understand that pixel art doesn’t have to be an intimidating process. There is a lot of room to experiment and be creative with your designs. You can now explore and invent new characters. Remember, practice makes perfect. So don’t stop here, continue practicing, and creating!
You can get more practicing resources and detailed guidance with Zenva’s diverse selection of relevant courses. Don’t forget to keep this tutorial on hand for the times you get stuck or need help with creating your game characters.
We wish you luck with your journey in pixel art and can’t wait to see the monsters you create!
Want to learn more? Try our complete PIXEL ART WITH GIMP FOR BEGINNERS course.
Did you come across any errors in this tutorial? Please let us know by completing this form and we’ll look into it!
FINAL DAYS: Unlock coding courses in Unity, Godot, Unreal, Python and more.
