You can access the full course here: INTRO TO UI/UX DESIGN
Table of contents
Introduction
Welcome to this comprehensive guide on UX design and design methodologies. As you’ll come to understand, the process of designing a UI/UX involves a systematic approach that goes from idea generation to testing and eventual production. While there are various specific methodologies, this tutorial will focus on a more general methodology that can be applied across different UI design projects.
Our UX design tutorial is split into ten key steps, starting from research and culminating in documentation. Each step will be delved into in detail, highlighting the key components that need to be considered at every phase.
Project Files
To supplement your understanding of this UX design tutorial, we have provided project files that can be downloaded:
Download Project Files Here
Design Methodology
The methodology of designing a user interface (UI) with user experience (UX) in mind can be very complicated. So, in this UX design tutorial, we will be taking a deeper dive into the other steps of the methodology. The design methodology is a term for the workflow of coming up with an idea, developing it, creating it, and testing it for production. There are many specific methodologies that can be used, however, in this lesson, we will cover a more general methodology that will be useful for many different UI design projects.
Our UI and UX design workflow can be split into ten steps, all the way from research to documentation. We will go through each section step-by-step and focus on what needs to be done at each stage of the methodology.

Research
Research is one of the most important steps in the methodology for UX design. If you are going to develop a UI for a certain demographic, you need to know as much as you can about the people that will be using the UI. The research phase can be used to define the target audience, what they want, and their behaviors. This can be done through surveys, interviews, or gathering data through other forms. You will also want to develop user stories and user personas in this stage, as they tie directly into the target audience research that you are doing.
Design Goals
In the UX design goals stage, we want to define the goals and objectives of the project. This will be a set of criteria for what the final product needs to achieve.
Wireframes
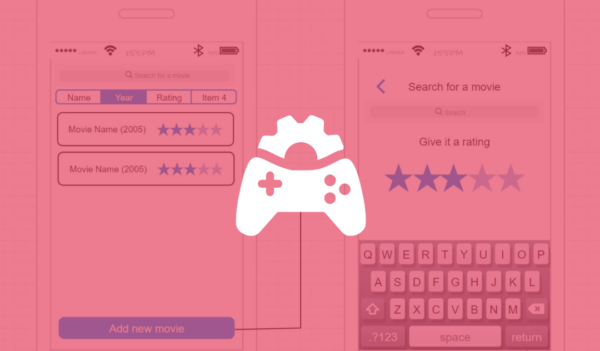
Wireframes are low-fidelity versions of the user interface, that can be used to outline the structure and functionality of the app. This can be done using basic shapes to outline the general position of elements in an app or go as far as using fonts, colors, and images. It is also extremely helpful to have arrows going between elements and screens to show what each element is meant to do.

Visual Design
The next phase is the visual design stage. This is where you start developing the visual aesthetics of the interface (which is more UI than UX design), such as choosing the color scheme or finding images you want to use. This is where you take the wireframe a step further and start styling it to your liking, to design not just the functionality, but a specific look for the interface.
Interaction Design
Interaction UX design is where we nail down what interactions are in our interface. Here you will focus on how the user interacts with your interface, including buttons, menus, or sliders. Make sure to document everything, so that when the app begins development, the people building the app know the behavior of every interactable element in the interface.
Prototyping
Prototyping is the stage where your UX design truly begins coming to life. This is where we develop a very simple working version of the app. It may not necessarily be done in the final development software, but instead using a dedicated prototyping tool to create a quick example of what the app will be. Alternatively, prototyping can be done using web development tools to create the prototype as a basic website. This allows you to get a great overview of how the interface is going to really work.
Iterative Design
With a finished prototype, you are ready to start the iterative UX design phase. Iterative design can of course be performed at any step, like how we performed it on our wireframes, however, it is often done after the prototyping phase where you can iterate on the prototype. With a prototype, you can begin testing the interface with actual people, such as users from your target demographic, which can be extremely helpful for finding issues and feedback that you may not have noticed. This can be done by interviewing users of the app, or by recording their screens, while they use the app, and using this footage to find any problems with the UI.

Implementation
The implementation phase is where you finally collaborate with developers in order to implement the interface into an app. As a UI or UX designer, you will likely not have too much involvement in this phase, as this is generally where the coding and software implementation takes place.
Testing
With the interface in its complete form, you are ready to bring back the iterative UX design process to test the product. By this point, you will likely not be looking for issues with the design, but instead performance issues or bugs in the program that may come up with further testing of the product. It is important to gather as much user feedback as possible in this phase so that you can make the best possible final product.
Documentation
The final phase of the UX design methodology is the documentation phase. This is where you will finalize the interface’s documentation, covering the interface itself, and any guidelines or stylesheets. This allows you to have a complete overview of the project, which later on can be given to someone else, allowing them to continue the development or replicate it from the documentation. If this person has any questions they can refer to the documentation which will outline everything.
That covers the entire design workflow. This of course isn’t a rigid format that you must follow, however, it covers a general workflow to get you from the research phase to the testing and documentation phases.
UX Design Methodology Wrap-Up
We have come to the end of our extensive guide on the design methodology involving the creation of a user interface with user experience as a key consideration. We have covered every step from the preliminary research on your target audience, to prototyping, and scaling up to the final product, inclusive of stages like wireframing, visual design, interaction design, implementation, testing, to the wrap up with documentation.
This tutorial provides a broad guideline, the specific steps can be tailored to fit your individual project needs. Through this deeper understanding and real-world application of these phases, we believe you can now design a compelling UI/UX. We hope this guide has been informative and we look forward to assisting you in your future UI/UX design efforts.
Did you come across any errors in this tutorial? Please let us know by completing this form and we’ll look into it! FINAL DAYS: Unlock coding courses in Unity, Godot, Unreal, Python and more.
Transcript
Hey everyone, and welcome. In this lesson we are going to be looking at the design methodology of UI and UX design. So basically this is a general workflow from the process of coming up with an idea, developing it all the way over to actually creating it and testing it out and putting it in production. Okay?
Now there are many different types of workflows that you can follow, but this is just a general one, which has all of the main steps listed out. So let’s have a look at that. So this is our UI design workflow right here. You can see there are 10 steps all the way from research to documentation. And we are going to go step by step to look at what each of these mean and how we can implement them.
First of all, we have the research. Research is important because if you’re gonna develop an app or create a UI for a certain demographic, you probably want to know about the people that are going to be using this UI. This is going to involve conducting user research to define the target audience and what they want and how they behave generally when using similar apps. You can do this through conducting surveys, interviews, or gathering data.
This is also the step where you are going to develop your user stories and user personas so that you can have much finer control over who is going to be using this UI so that when you start developing, the design decisions are going to be informed based off that. Once you have completed your research, you can move on to stage two, which is your design goals.
Design goals are basically the goals and objectives of your project, and include a set of criteria for what your interface needs to achieve, what you are trying to do with this interface, and how should you expect your users to interact with it.
After you have developed an idea of that, we can then move on to step three, which is wire framing. This is where you create a low fidelity wire frame of the interface. Its main functionality is to outline the structure and the overview of how the app is going to work. You can do this in draw io like we’ve done with our app, and you can just use basic shapes.
This is just to outline or create a wire frame of what you want to develop. You should be able to easily go in and change things around if it is needed. Like we’ve done with our iterative design. You should also have arrows pointing to what each thing does. For example, when we click on the add new movie button, you can see it has an arrow going to the next page. If you were to give this to someone, they’ll be able to look at it, have an overview of, okay, this is what this does. From there they can provide feedback or even go ahead and develop it.
Next we have our visual design. The visual design step is where we start developing our visual aesthetic for the interface. This involves everything from color schemes to images, to fonts. This is where we actually start implementing the more stylized aspects that you wouldn’t include in the wire frame.
Once that’s done, we move onto interaction design. Interaction design is where we basically nail down what each interaction or the different types of interactions are in our interface. Everything from buttons to menus to dropdowns to sliders.
We need to document all of this because once we send this off over to the people who are actually going to be implementing this inside of software, they need to know where does this button go to? What does this slider adjust? What happens if the user drags down from the top of the screen? Is that going to refresh or is that going to pull down some sort of dropdown menu? Every single interaction that can happen with your interface needs to be defined.
Next is prototyping. This is where we actually develop a very simple prototype of our app. This isn’t generally going to be done in your final software of choice, but generally this will be done using a dedicated prototyping tool, or this can be done in HTML and CSS.
When you click on a button, that’s going to take you to the next page. When you scroll the mouse wheel, let’s go into move up and down. And this is just so we can get an overview and a general flow of how the interface is going to work. Once you have your prototype done, this is when you can start your iterative design.
Iterative design can be done in any step; it can be done during the wireframe stage or during the interaction design. You may think of an idea that you want to go back and reintroduce in the visual design phase. If you’re developing a visual aspect of your app, such as maybe a font, but maybe you then show it to someone who is a user of that app or follows along with the user story and they might go, oh, I don’t really like that font. It doesn’t really suit the feel of the app.
You can then go ahead, change it, show ’em again, and you can see how this iterative design process can be done in any step of the process.
Once the interface is told complete, you should start actually testing the interface with real people and continuously improve upon the design. This can be done by giving the prototype to some test users and getting feedback via interviews at the end, or for them to complete a survey. Even just watching them or recording their screen while they’re doing that can be really useful.
You can then see how they interact, what buttons they press, what sort of interaction they might try and do that you might not actually have in the app. And with that knowledge, you can then go ahead and improve upon the design even further.
After iterative design, we have the implementation phase, and this is when you finally collaborate with developers in order to implement the interface. If you are a UI or UX designer, you’re probably not going to have too much involvement in this phase because this is generally where the coding will take place and they’ll start implementing into the software.
Once that is done, of course we need to do some testing. Like before, the iterative design process comes back once again. You now have your interface, in its complete form, and this is when you can start testing it once again, not necessarily for design focused issues, but more for performance focused issues and bugs that may occur.
Having real world people actually use the app and use the interface, is going to be far better than you trying to think of on the spot, what is a user going to like? What is a user going to need? Every interaction that can happen with your interface needs to be tested.
Then onto the final phase, documentation. You should finalize the interface documentation, the guidelines, the style sheets. This is because later on, if you were to give it to someone else, they will be able to continue on with development or even replicate it pretty much exactly as you have done.
If there is a bug in the future, or if there is a question someone has about why is this design feature in there, they can revert to the documentation, which is going to outline everything. Documenting your process as you go along is very important, as at the end of the day, if you are working for a company or working on a large project, documentation is almost necessary.
And that is our UI design workflow. We walked through all 10 steps from research to design goals, to the wire frame, to visual design, interaction design, prototyping, iterative design, implementation, testing, and documentation. This isn’t completely rigid and you don’t necessarily have to follow it step by step, but this is just a general workflow of going from the research phases to the developing phases, all the way up to documentation.
So it just shows you the general process of how you should go about coming out with an idea to then implementing it. Thank you for watching.
Interested in continuing? Check out our all-access plan which includes 250+ courses, guided curriculums, new courses monthly, access to expert course mentors, and more!


