Sometimes in a game you want to be aware of events that occur in your game the whole time, wether it would be to save game statistics or to build an achievement system. For example, your game may need to know when an enemy is killed to save the number of killed enemies, or because there is an achievement when the player kills a given number of enemies.
In this tutorial I will show how to use Phaser.Signal to listen to events in your game in order to save game statistics. We will implement it in a simple space shooter game. At the end, I will briefly explain how to extend this concept to create an achievement system. In order to read this tutorial it is important that you are familiar with the following concepts:
- Javascript and object-oriented concepts.
- Basic Phaser concepts, such as: states, sprites, groups and arcade physics.
Table of contents
Learn Phaser by building 15 games
If you want to master Phaser and learn how to publish Phaser games as native games for iOS and Android feel free to check Zenva‘s online course The Complete Mobile Game Development Course – Build 15 Games.
Source code files
You can download the tutorial source code files here.
Game states
We’re going to keep the game data in a JSON file as shown below. This file describes the game assets that must be loaded, the groups that must be created and the prefabs. We are going to create three game states to handle this JSON file: BootState, LoadingState and LevelState.
{
    "world": {
        "origin_x": 0,
        "origin_y": 0,
        "width": 360,
        "height": 640
    },
    "assets": {
        "space_image": { "type": "image", "source": "assets/images/space.png" },
        "ship_image": { "type": "image", "source": "assets/images/player.png" },
        "bullet_image": { "type": "image", "source": "assets/images/bullet.png" },
        "enemy_spritesheet": { "type": "spritesheet", "source": "assets/images/green_enemy.png", "frame_width": 50, "frame_height": 46, "frames": 3, "margin": 1, "spacing": 1 }
    },
    "groups": [
        "ships",
        "player_bullets",
        "enemies",
        "enemy_bullets",
        "enemy_spawners",
        "hud"
    ],
    "prefabs": {
        "ship": {
            "type": "ship",
            "position": {"x": 180, "y": 600},
            "properties": {
                "texture": "ship_image",
                "group": "ships",
                "velocity": 200,
                "shoot_rate": 5,
                "bullet_velocity": 500
            }
        },
        "enemy_spawner": {
            "type": "enemy_spawner",
            "position": {"x": 0, "y": 100},
            "properties": {
                "texture": "",
                "group": "enemy_spawners",
                "spawn_interval": 1,
                "enemy_properties": {
                    "texture": "enemy_spritesheet",
                    "group": "enemies",
                    "velocity": 50,
                    "shoot_rate": 2,
                    "bullet_velocity": 300
                }
            }
        }
    }
}
BootState and LoadingState codes are shown below. The first one simply loads this JSON file and calls LoadingState with the level data. LoadingState, by its turn, loads all game assets calling the correct Phaser method according to the asset type (for example, calling “this.load.image” to load an image).
var SignalExample = SignalExample || {};

SignalExample.BootState = function () {
    "use strict";
    Phaser.State.call(this);
};

SignalExample.BootState.prototype = Object.create(Phaser.State.prototype);
SignalExample.BootState.prototype.constructor = SignalExample.BootState;

SignalExample.BootState.prototype.init = function (level_file, next_state, extra_parameters) {
    "use strict";
    this.level_file = level_file;
    this.next_state = next_state;
    this.extra_parameters = extra_parameters;
};

SignalExample.BootState.prototype.preload = function () {
    "use strict";
    this.load.text("level1", this.level_file);
};

SignalExample.BootState.prototype.create = function () {
    "use strict";
    var level_text, level_data;
    level_text = this.game.cache.getText("level1");
    level_data = JSON.parse(level_text);
    this.game.state.start("LoadingState", true, false, level_data, this.next_state, this.extra_parameters);
};
var SignalExample = SignalExample || {};
SignalExample.LoadingState = function () {
"use strict";
Phaser.State.call(this);
};
SignalExample.LoadingState.prototype = Object.create(Phaser.State.prototype);
SignalExample.LoadingState.prototype.constructor = SignalExample.LoadingState;
SignalExample.LoadingState.prototype.init = function (level_data, next_state, extra_parameters) {
"use strict";
this.level_data = level_data;
this.next_state = next_state;
this.extra_parameters = extra_parameters;
};
SignalExample.LoadingState.prototype.preload = function () {
"use strict";
var assets, asset_loader, asset_key, asset;
assets = this.level_data.assets;
for (asset_key in assets) { // load assets according to asset key
if (assets.hasOwnProperty(asset_key)) {
asset = assets[asset_key];
switch (asset.type) {
case "image":
this.load.image(asset_key, asset.source);
break;
case "spritesheet":
this.load.spritesheet(asset_key, asset.source, asset.frame_width, asset.frame_height, asset.frames, asset.margin, asset.spacing);
break;
case "tilemap":
this.load.tilemap(asset_key, asset.source, null, Phaser.Tilemap.TILED_JSON);
break;
}
}
}
};
SignalExample.LoadingState.prototype.create = function () {
"use strict";
this.game.state.start(this.next_state, true, false, this.level_data, this.extra_parameters);
};LevelState, by its turn, is responsible for creating the game groups and prefabs, as shown below. In the “create” method it starts by creating a Phaser.TileSprite to represent the background space. Then it creates all game groups from the JSON file. Finally, it creates all prefabs by iterating through all prefabs described in the JSON file calling the “create_prefab” method.
var SignalExample = SignalExample || {};

SignalExample.LevelState = function () {
    "use strict";
    Phaser.State.call(this);

    this.prefab_classes = {
        "ship": SignalExample.Ship.prototype.constructor,
        "enemy_spawner": SignalExample.EnemySpawner.prototype.constructor
    };
};

SignalExample.LevelState.prototype = Object.create(Phaser.State.prototype);
SignalExample.LevelState.prototype.constructor = SignalExample.LevelState;

SignalExample.LevelState.prototype.init = function (level_data) {
    "use strict";
    this.level_data = level_data;

    this.scale.scaleMode = Phaser.ScaleManager.SHOW_ALL;
    this.scale.pageAlignHorizontally = true;
    this.scale.pageAlignVertically = true;

    // start physics system
    this.game.physics.startSystem(Phaser.Physics.ARCADE);
    this.game.physics.arcade.gravity.y = 0;
};

SignalExample.LevelState.prototype.create = function () {
    "use strict";
    var group_name, prefab_name;

    this.space = this.add.tileSprite(0, 0, this.game.world.width, this.game.world.height, "space_image");

    // create groups
    this.groups = {};
    this.level_data.groups.forEach(function (group_name) {
        this.groups[group_name] = this.game.add.group();
    }, this);

    // create prefabs
    this.prefabs = {};
    for (prefab_name in this.level_data.prefabs) {
        if (this.level_data.prefabs.hasOwnProperty(prefab_name)) {
            // create prefab
            this.create_prefab(prefab_name, this.level_data.prefabs[prefab_name]);
        }
    }
};

SignalExample.LevelState.prototype.create_prefab = function (prefab_name, prefab_data) {
    "use strict";
    var prefab;
    // create object according to its type
    if (this.prefab_classes.hasOwnProperty(prefab_data.type)) {
        prefab = new this.prefab_classes[prefab_data.type](this, prefab_name, prefab_data.position, prefab_data.properties);
    }
};
The “create_prefab” method creates the correct prefab according to its type. Notice that this can be done because all prefabs have the same constructor, extended by the generic Prefab class shown below. Also, there is a “prefab_classes” property (in LevelState constructor) that maps each prefab type to its corresponding constructor.
var SignalExample = SignalExample || {};

SignalExample.Prefab = function (game_state, name, position, properties) {
    "use strict";
    Phaser.Sprite.call(this, game_state.game, position.x, position.y, properties.texture);

    this.game_state = game_state;

    this.name = name;

    this.game_state.groups[properties.group].add(this);
    this.frame = +properties.frame;

    if (properties.scale) {
        this.scale.setTo(properties.scale.x, properties.scale.y);
    }

    if (properties.anchor) {
        this.anchor.setTo(properties.anchor.x, properties.anchor.y);
    }

    this.game_state.prefabs[name] = this;
};

SignalExample.Prefab.prototype = Object.create(Phaser.Sprite.prototype);
SignalExample.Prefab.prototype.constructor = SignalExample.Prefab;
The GameStats plugin
Now we are going to create a Phaser plugin to save game statistics by listening to phaser signals. To create a Phaser plugin we have to create a class that extends Phaser.Plugin, as shown below. The “init” method is called when the plugin is added to the game, and we use it to save all the plugin properties, such as the game stats position, text style and which signals the plugin will listen to. All this data will be loaded from the JSON level file and will be represented with the following structure:
"game_stats_data": {
    "position": {"x": 180, "y": 300},
    "text_style": {"font": "28pt Arial", "fill": "#FFFFFF"},
    "game_stats": {
        "shots_fired": {"text": "Shots fired: ", "value": 0},
        "enemies_spawned": {"text": "Enemies spawned: ", "value": 0}
    },
    "listeners": [
        {"group": "ships", "signal": "onShoot", "stat_name": "shots_fired", "value": 1},
        {"group": "enemy_spawners", "signal": "onSpawn", "stat_name": "enemies_spawned", "value": 1}
    ]
}
The “listen_to_events” method is responsible for making the plugin to listen game events. It iterates through all listeners descriptions (saved in the “init” method) and creates the listeners for each one. Notice that each listener describes the group the plugin have to listen, then the plugin has to iterate through all sprites in that group to listen to each one separately. The callback of all events is the “save_stat” method, which receives as parameters the sprite that dispatched the event, the stat name and the value to be increased. This method simply increases the correct game stat with the given value. Notice that the “game_stats” object was already initialized in the “init” method with the initial values from “game_stats_data”.
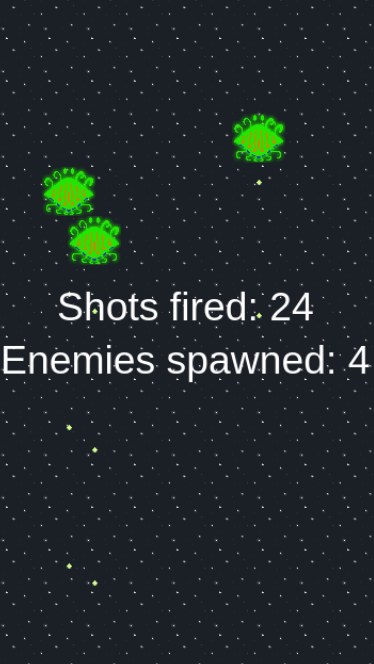
Finally, we are going to add a “show_stats” method, which will be called in the end of the game to show the final values. This method iterates through all game stats creating a Phaser.Text to each one that shows the final value. Notice that the initial position of the texts and their style were saved in the “init” method, while its final text is the text of the game stat and its final value.
var Phaser = Phaser || {};
var SignalExample = SignalExample || {};

SignalExample.GameStats = function (game, parent) {
    "use strict";
    Phaser.Plugin.call(this, game, parent);
};

SignalExample.GameStats.prototype = Object.create(Phaser.Plugin.prototype);
SignalExample.GameStats.prototype.constructor = SignalExample.GameStats;

SignalExample.GameStats.prototype.init = function (game_state, game_stats_data) {
    "use strict";
    // save properties
    this.game_state = game_state;
    this.game_stats_position = game_stats_data.position;
    this.game_stats_text_style = game_stats_data.text_style;
    this.game_stats = game_stats_data.game_stats;
    this.listeners = game_stats_data.listeners;
};

SignalExample.GameStats.prototype.listen_to_events = function () {
    "use strict";
    this.listeners.forEach(function (listener) {
        // iterate through the group that should be listened
        this.game_state.groups[listener.group].forEach(function (sprite) {
            // add a listener for each sprite in the group
            sprite.events[listener.signal].add(this.save_stat, this, 0, listener.stat_name, listener.value);
        }, this);
    }, this);
};

SignalExample.GameStats.prototype.save_stat = function (sprite, stat_name, value) {
    "use strict";
    // increase the corresponding game stat
    this.game_stats[stat_name].value += value;
};

SignalExample.GameStats.prototype.show_stats = function () {
    "use strict";
    var position, game_stat, game_stat_text;
    position = new Phaser.Point(this.game_stats_position.x, this.game_stats_position.y);
    for (game_stat in this.game_stats) {
        if (this.game_stats.hasOwnProperty(game_stat)) {
            // create a Phaser text for each game stat showing the final value
            game_stat_text = new Phaser.Text(this.game_state.game, position.x, position.y,
                                             this.game_stats[game_stat].text + this.game_stats[game_stat].value,
                                            Object.create(this.game_stats_text_style));
            game_stat_text.anchor.setTo(0.5);
            this.game_state.groups.hud.add(game_stat_text);
            position.y += 50;
        }
    }
};
Now that we have the GameStats plugin created, we have to add it to our game. We do that by calling “this.game.plugins.add” in the end of LevelState “create” method. The parameters of this method are the plugin class, the game state and the game stats data, obtained from the JSON level file.
this.game_stats = this.game.plugins.add(SignalExample.GameStats, this, this.level_data.game_stats_data);
Game prefabs
To verify if our GameStats plugin is working correctly, we have to create the prefabs for our game. In this tutorial I will test this plugin in a simple space shooter game, but feel free to implement it in your own game.
The prefabs we are going to create are the Ship, Bullet, Enemy and EnemySpawner. All of them extends the Prefab class shown before.
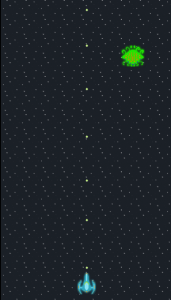
The Ship prefab will allow the player to move the ship left and right, and will constantly shoot bullets at its enemies. The constructor initializes a timer that calls the “shoot” method according to the shoot rate. This method, by its turn, starts by checking if there is already a dead bullet that can be reused. If there is one, it just resets its position to the current ship position. Ohterwise, it creates a new bullet.
The “update” method is responsible for moving the ship. The ship moves according to the mouse pointer. If the player clicks on the screen the ship moves towards the mouse cursor position. This is done by getting the “activePointer” position and setting the ship velocity according to it.
var SignalExample = SignalExample || {};

SignalExample.Ship = function (game_state, name, position, properties) {
    "use strict";
    SignalExample.Prefab.call(this, game_state, name, position, properties);

    this.anchor.setTo(0.5);

    this.game_state.game.physics.arcade.enable(this);
    this.body.setSize(this.width * 0.3, this.height * 0.3);

    this.velocity = properties.velocity;
    this.bullet_velocity = properties.bullet_velocity;

    // create and start shoot timer
    this.shoot_timer = this.game_state.game.time.create();
    this.shoot_timer.loop(Phaser.Timer.SECOND / properties.shoot_rate, this.shoot, this);
    this.shoot_timer.start();
};

SignalExample.Ship.prototype = Object.create(Phaser.Sprite.prototype);
SignalExample.Ship.prototype.constructor = SignalExample.Ship;

SignalExample.Ship.prototype.update = function () {
    "use strict";
    var target_x;
    this.game_state.game.physics.arcade.overlap(this, this.game_state.groups.enemy_bullets, this.kill, null, this);

    this.body.velocity.x = 0;
    // move the ship when the mouse is clicked
    if (this.game_state.game.input.activePointer.isDown) {
        // get the clicked position
        target_x = this.game_state.game.input.activePointer.x;
        if (target_x < this.x) {
            // if the clicked position is left to the ship, move left
            this.body.velocity.x = -this.velocity;
        } else if (target_x > this.x) {
            // if the clicked position is right to the ship, move right
            this.body.velocity.x = this.velocity;
        }
    }
};

SignalExample.Ship.prototype.kill = function () {
    "use strict";
    Phaser.Sprite.prototype.kill.call(this);
    // stop shoot timer
    this.shoot_timer.stop();
    // if the ship dies, it is game over
    this.game_state.game_over();
};

SignalExample.Ship.prototype.shoot = function () {
    "use strict";
    var bullet, bullet_position, bullet_name, bullet_properties;
    // check if there is a dead bullet to reuse
    bullet = this.game_state.groups.player_bullets.getFirstDead();
    bullet_position = new Phaser.Point(this.x, this.y);
    if (bullet) {
        // if there is a dead bullet reset it to the current position
        bullet.reset(bullet_position.x, bullet_position.y);
    } else {
        // if there is no dead bullet, create a new one
        bullet_name = this.name + "_bullet" + this.game_state.groups.player_bullets.countLiving();
        bullet_properties = {texture: "bullet_image", group: "player_bullets", direction: -1, velocity: this.bullet_velocity};
        bullet = new SignalExample.Bullet(this.game_state, bullet_name, bullet_position, bullet_properties);
    }
};
Also, in the update method we have to check when the ship overlaps with enemy bullets and, if so, kill it. When the ship is killed, the game should end, which is done in the “kill” method. The “game_over” method is shown below, and it simply show the final game statistics from the GameStats plugin.
SignalExample.LevelState.prototype.game_over = function () {
    "use strict";
    //this.game.state.start("BootState", true, false, "assets/levels/level1.json", "LevelState");
    this.game_stats.show_stats();
};
The Bullet prefab is very simple, as shown below. It simply creates the bullet physical body and sets its velocity.
var SignalExample = SignalExample || {};

SignalExample.Bullet = function (game_state, name, position, properties) {
    "use strict";
    SignalExample.Prefab.call(this, game_state, name, position, properties);

    this.anchor.setTo(0.5);

    this.game_state.game.physics.arcade.enable(this);

    this.body.velocity.y = properties.direction * properties.velocity;
};

SignalExample.Bullet.prototype = Object.create(Phaser.Sprite.prototype);
SignalExample.Bullet.prototype.constructor = SignalExample.Bullet;
The Enemy prefab is similar to the Ship, where the main difference is that it only moves vertically in the screen. It sets its velocity in the constructor and creates the shoot timer, like the Ship. Its “shoot” method is almost the same as the Ship one, except the bullets are from the “enemy_bullets” group, and they have different direction and velocity. In the “update” method it only has to check for overlaps with player bullets.
var SignalExample = SignalExample || {};

SignalExample.Enemy = function (game_state, name, position, properties) {
    "use strict";
    SignalExample.Prefab.call(this, game_state, name, position, properties);

    this.anchor.setTo(0.5);

    this.game_state.game.physics.arcade.enable(this);

    this.velocity = properties.velocity;
    this.body.velocity.y = this.velocity;

    this.checkWorldBounds = true;
    this.outOfBoundsKill = true;

    this.bullet_velocity = properties.bullet_velocity;

    // create and start shoot timer
    this.shoot_timer = this.game_state.game.time.create();
    this.shoot_timer.loop(Phaser.Timer.SECOND / properties.shoot_rate, this.shoot, this);
    this.shoot_timer.start();
};

SignalExample.Enemy.prototype = Object.create(Phaser.Sprite.prototype);
SignalExample.Enemy.prototype.constructor = SignalExample.Enemy;

SignalExample.Enemy.prototype.update = function () {
    "use strict";
    // die if touches player bullets
    this.game_state.game.physics.arcade.overlap(this, this.game_state.groups.player_bullets, this.kill, null, this);
};

SignalExample.Enemy.prototype.kill = function () {
    "use strict";
    Phaser.Sprite.prototype.kill.call(this);
    // stop shooting
    this.shoot_timer.pause();
};

SignalExample.Enemy.prototype.reset = function (x, y) {
    "use strict";
    Phaser.Sprite.prototype.reset.call(this, x, y);
    this.body.velocity.y = this.velocity;
    this.shoot_timer.resume();
};

SignalExample.Enemy.prototype.shoot = function () {
    "use strict";
    var bullet, bullet_position, bullet_name, bullet_properties;
    // check if there is a dead bullet to reuse
    bullet = this.game_state.groups.enemy_bullets.getFirstDead();
    bullet_position = new Phaser.Point(this.x, this.y);
    if (bullet) {
        // if there is a dead bullet reset it to the current position
        bullet.reset(bullet_position.x, bullet_position.y);
    } else {
        // if there is no dead bullet, create a new one
        bullet_name = this.name + "_bullet" + this.game_state.groups.enemy_bullets.countLiving();
        bullet_properties = {texture: "bullet_image", group: "enemy_bullets", direction: 1, velocity: this.bullet_velocity};
        bullet = new SignalExample.Bullet(this.game_state, bullet_name, bullet_position, bullet_properties);
    }
};
Notice that in the Enemy prefab “kill” method we have to pause the shoot timer, and in the “reset” method we have to resume it and set the enemy velocity again. This happens because in our game enemies will be constantly spawning, and we want to reuse dead enemies, so we have to properly handle timers and the physical body when they are reused.
Finally, the EnemySpawner is shown below. In the constructor it starts a loop event that calls the “spawn” method. This method is responsible for creating enemies using the same strategy we are using to create the bullets: first, it checks if there is a dead enemy to reuse and if so, resets it to the desired position. Otherwise, it creates a new enemy. The main difference here is that the position is random between 10% and 90% of the game world width. We generate this random position using Phaser RandomDataGenerator (you can check the documentation if you are not familiar with it).
var SignalExample = SignalExample || {};

SignalExample.EnemySpawner = function (game_state, name, position, properties) {
    "use strict";
    SignalExample.Prefab.call(this, game_state, name, position, properties);

    this.enemy_properties = properties.enemy_properties;

    // start spawning event
    this.game_state.game.time.events.loop(Phaser.Timer.SECOND * properties.spawn_interval, this.spawn, this);
};

SignalExample.EnemySpawner.prototype = Object.create(Phaser.Sprite.prototype);
SignalExample.EnemySpawner.prototype.constructor = SignalExample.EnemySpawner;

SignalExample.EnemySpawner.prototype.spawn = function () {
    "use strict";
    var enemy, enemy_position, enemy_name, enemy_properties;
    // check if there is a dead enemy to reuse
    enemy = this.game_state.groups.enemies.getFirstDead();
    // spawn enemy in a random position inside the world
    enemy_position = new Phaser.Point(this.game_state.game.rnd.between(0.1 * this.game_state.game.world.width, 0.9 * this.game_state.game.world.width), this.y);
    if (enemy) {
        // if there is a dead enemy reset it to the current position
        enemy.reset(enemy_position.x, enemy_position.y);
    } else {
        // if there is no dead enemy, create a new one
        enemy_name = this.name + "_enemy" + this.game_state.groups.enemies.countLiving();
        enemy = new SignalExample.Enemy(this.game_state, enemy_name, enemy_position, this.enemy_properties);
    }
};
By now, you can try playing the game without the events, so it will work but the game statistics won’t be saved. This way you can check if everything is working before moving on to add the game signals.
Adding the signals
We are going to create two signals to save game statistics: onShoot, dispatched when the ship shoots, and onSpawn, dispatched when the EnemySpawner spawns an enemy.
The onShoot signal is created in the Ship constructor, and is dispatched in the “shoot” method, as shown below. The onSpawn signal, by its turn is created in the constructor of EnemySpawner, and dispatched in the “spawn” method. Notice that both signals have to send the sprite as a parameter dispatching the event, since the GameStats plugin is expecting it.
SignalExample.Ship = function (game_state, name, position, properties) {
    "use strict";
    SignalExample.Prefab.call(this, game_state, name, position, properties);

    this.anchor.setTo(0.5);

    this.game_state.game.physics.arcade.enable(this);
    this.body.setSize(this.width * 0.3, this.height * 0.3);

    this.velocity = properties.velocity;
    this.bullet_velocity = properties.bullet_velocity;

    // create and start shoot timer
    this.shoot_timer = this.game_state.game.time.create();
    this.shoot_timer.loop(Phaser.Timer.SECOND / properties.shoot_rate, this.shoot, this);
    this.shoot_timer.start();

    // creating shooting event to be listened
    this.events.onShoot = new Phaser.Signal();
};

SignalExample.Ship.prototype.shoot = function () {
    "use strict";
    var bullet, bullet_position, bullet_name, bullet_properties;
    // check if there is a dead bullet to reuse
    bullet = this.game_state.groups.player_bullets.getFirstDead();
    bullet_position = new Phaser.Point(this.x, this.y);
    if (bullet) {
        // if there is a dead bullet reset it to the current position
        bullet.reset(bullet_position.x, bullet_position.y);
    } else {
        // if there is no dead bullet, create a new one
        bullet_name = this.name + "_bullet" + this.game_state.groups.player_bullets.countLiving();
        bullet_properties = {texture: "bullet_image", group: "player_bullets", direction: -1, velocity: this.bullet_velocity};
        bullet = new SignalExample.Bullet(this.game_state, bullet_name, bullet_position, bullet_properties);
    }

    // dispatch shoot event
    this.events.onShoot.dispatch(this);
};
SignalExample.EnemySpawner = function (game_state, name, position, properties) {
"use strict";
SignalExample.Prefab.call(this, game_state, name, position, properties);
this.enemy_properties = properties.enemy_properties;
// start spawning event
this.game_state.game.time.events.loop(Phaser.Timer.SECOND * properties.spawn_interval, this.spawn, this);
// create spawn event to be listened
this.events.onSpawn = new Phaser.Signal();
};
SignalExample.EnemySpawner.prototype.spawn = function () {
"use strict";
var enemy, enemy_position, enemy_name, enemy_properties;
// check if there is a dead enemy to reuse
enemy = this.game_state.groups.enemies.getFirstDead();
// spawn enemy in a random position inside the world
enemy_position = new Phaser.Point(this.game_state.game.rnd.between(0.1 * this.game_state.game.world.width, 0.9 * this.game_state.game.world.width), this.y);
if (enemy) {
// if there is a dead enemy reset it to the current position
enemy.reset(enemy_position.x, enemy_position.y);
} else {
// if there is no dead enemy, create a new one
enemy_name = this.name + "_enemy" + this.game_state.groups.enemies.countLiving();
enemy = new SignalExample.Enemy(this.game_state, enemy_name, enemy_position, this.enemy_properties);
}
// dispatch spawn event
this.events.onSpawn.dispatch(this);
};Finally, we call the “listen_to_events” method from the plugin after adding it to LevelState, so it will add the listeners described in the JSON file (shown before), which will be called when the new signals are dispatched.
this.game_stats.listen_to_events();
By now, you can already try playing the game with the game statistics. Check if all statistics are being correctly saved, and try adding different signals.
Creating an achievement system
Before finishing the tutorial, I would like to briefly show how easily you can change the GameStats plugin to an GameAchievements plugin. There are two main differences between those plugins:
- For the GameAchievements plugin it would be interesting to have listeners to specific prefabs, not only groups. For example, the game might have an achievement when a given boss is defeated, so it should be listened to that specific boss.
- The callback of the listeners in the GameAchievements plugin would be more complex than simply saving a game statistic, so it will probably be necessary to have different callbacks for different achivements.
Apart from those two differences, the signals and listeners can be created the same way. Try creating achievements for your game, and see how they work!
