In this tutorial we will start building a Bomberman game. We will add the basic structure in this tutorial and keep adding content in the following tutorials. In this tutorial, I will cover the following content:
- Reading a Tiled map
- Creating a player that moves in four directions and drop bombs
- Creating a bomb that explodes when its animation ends
- Creating epxlosions when a bomb explodes that kills the player and enemies
- Creating an enemy that walks in one axis (horizontal or vertical)
To read this tutorial, it is important that you are familiar with the following concepts:
- Javascript and object-oriented concepts.
- Basic Phaser concepts, such as: states, sprites, groups and arcade physics
- Creating maps using Tiled map editor
Table of contents
Learn Phaser by building 15 games
If you want to master Phaser and learn how to publish Phaser games as native games for iOS and Android feel free to check Zenva‘s online course The Complete Mobile Game Development Course – Build 15 Games.
Assets copyright
The assets used in this tutorial were created by Cem Kalyoncu/cemkalyoncu and Matt Hackett/richtaur and made available by “usr_share” through the creative commons license, wich allows commercial use under attribution. You can download them in http://opengameart.org/content/bomb-party-the-complete-set or by downloading the source code.
Source code files
You can download the tutorial source code files here.
JSON level file
Although our map is created by Tiled, we will still use a JSON level file to describe the assets we need (including the map file), the groups of our game and the map properties. The JSON level file we are going to use is shown below. Notice that we describe each asset according to its type, the group names and the map key and tilesets.
{
    "assets": {
        "map_tiles": {"type": "image", "source": "assets/images/bomberman_spritesheet.png"},
        "player_spritesheet": {"type": "spritesheet", "source": "assets/images/player_spritesheet.png", "frame_width": 16, "frame_height": 16},
        "bomb_spritesheet": {"type": "spritesheet", "source": "assets/images/bomb_spritesheet.png", "frame_width": 16, "frame_height": 16},
        "enemy_spritesheet": {"type": "spritesheet", "source": "assets/images/enemy_spritesheet.png", "frame_width": 16, "frame_height": 16},
        "explosion_image": {"type": "image", "source": "assets/images/explosion.png"},

        "level_tilemap": {"type": "tilemap", "source": "assets/maps/level1_map.json"}
    },
    "groups": [
        "explosions",
        "bombs",
        "enemies",
        "players"
    ],
    "map": {
        "key": "level_tilemap",
        "tilesets": ["map_tiles"]
    }
}
Creating the map
In this tutorial I will focus on building the game by using a Tiled map, and not in creating the map. So, feel free to create your own map or to use the one provided in the source code. Some details are important because of the way we’re going to read this map:
- For each collidable layer, you have to add a collision property that is equals true
- For each object you have to properly define it’s type (it will be used to instantiate the correct prefab) and add at least properties with its texture and group
- The map must be saved in JSON format
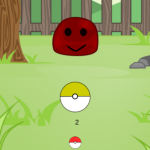
The image below shows the map I’m going to use:

Game states
We will use the following states to run our game:
- Boot State: loads a json file with the level information and starts the Loading State
- Loading Sate: loads all the game assets, and starts the next State
- Tiled State: loads a tiled map file
The BootState code is shown below. It is only responsible for loading the JSON level file and call the LoadingState.
var Bomberman = Bomberman || {};

Bomberman.BootState = function () {
    "use strict";
    Phaser.State.call(this);
};

Bomberman.BootState.prototype = Object.create(Phaser.State.prototype);
Bomberman.BootState.prototype.constructor = Bomberman.BootState;

Bomberman.BootState.prototype.init = function (level_file, next_state) {
    "use strict";
    this.level_file = level_file;
    this.next_state = next_state;
};

Bomberman.BootState.prototype.preload = function () {
    "use strict";
    this.load.text("level1", this.level_file);
};

Bomberman.BootState.prototype.create = function () {
    "use strict";
    var level_text, level_data;
    level_text = this.game.cache.getText("level1");
    level_data = JSON.parse(level_text);
    this.game.state.start("LoadingState", true, false, level_data, this.next_state);
};
The LoadingState is responsible for loading all the assets that will be used in this level, as shown below. As it can be seen, the “preload” method iterate through all assets defined in the JSON level file and load it calling the corresponding method. After all assets are loaded, it calls the next state, which will be TiledState.
var Bomberman = Bomberman || {};

Bomberman.LoadingState = function () {
    "use strict";
    Phaser.State.call(this);
};

Bomberman.LoadingState.prototype = Object.create(Phaser.State.prototype);
Bomberman.LoadingState.prototype.constructor = Bomberman.LoadingState;

Bomberman.LoadingState.prototype.init = function (level_data, next_state) {
    "use strict";
    this.level_data = level_data;
    this.next_state = next_state;
};

Bomberman.LoadingState.prototype.preload = function () {
    "use strict";
    var assets, asset_loader, asset_key, asset;
    assets = this.level_data.assets;
    for (asset_key in assets) { // load assets according to asset key
        if (assets.hasOwnProperty(asset_key)) {
            asset = assets[asset_key];
            switch (asset.type) {
            case "image":
                this.load.image(asset_key, asset.source);
                break;
            case "spritesheet":
                this.load.spritesheet(asset_key, asset.source, asset.frame_width, asset.frame_height, asset.frames, asset.margin, asset.spacing);
                break;
            case "tilemap":
                this.load.tilemap(asset_key, asset.source, null, Phaser.Tilemap.TILED_JSON);
                break;
            }
        }
    }
};

Bomberman.LoadingState.prototype.create = function () {
    "use strict";
    this.game.state.start(this.next_state, true, false, this.level_data);
};
Reading the Tiled map
We will read the Tiled map in the TiledState, which the source code is shown below. First, in the init method we add the tilemap by using the asset described in the JSON file. Then, for each tileset image described in the JSON file, the state adds it to the map. In our game, we will use only one tileset image.
var Bomberman = Bomberman || {};

Bomberman.TiledState = function () {
    "use strict";
    Phaser.State.call(this);

    this.prefab_classes = {
        "player": Bomberman.Player.prototype.constructor,
        "enemy": Bomberman.Enemy.prototype.constructor
    };
};

Bomberman.TiledState.prototype = Object.create(Phaser.State.prototype);
Bomberman.TiledState.prototype.constructor = Bomberman.TiledState;

Bomberman.TiledState.prototype.init = function (level_data) {
    "use strict";
    var tileset_index;
    this.level_data = level_data;

    this.scale.scaleMode = Phaser.ScaleManager.SHOW_ALL;
    this.scale.pageAlignHorizontally = true;
    this.scale.pageAlignVertically = true;

    // start physics system
    this.game.physics.startSystem(Phaser.Physics.ARCADE);
    this.game.physics.arcade.gravity.y = 0;

    // create map and set tileset
    this.map = this.game.add.tilemap(level_data.map.key);
    tileset_index = 0;
    this.map.tilesets.forEach(function (tileset) {
        this.map.addTilesetImage(tileset.name, level_data.map.tilesets[tileset_index]);
        tileset_index += 1;
    }, this);
};

Bomberman.TiledState.prototype.create = function () {
    "use strict";
    var group_name, object_layer, collision_tiles;

    // create map layers
    this.layers = {};
    this.map.layers.forEach(function (layer) {
        this.layers[layer.name] = this.map.createLayer(layer.name);
        if (layer.properties.collision) { // collision layer
            collision_tiles = [];
            layer.data.forEach(function (data_row) { // find tiles used in the layer
                data_row.forEach(function (tile) {
                    // check if it's a valid tile index and isn't already in the list
                    if (tile.index > 0 && collision_tiles.indexOf(tile.index) === -1) {
                        collision_tiles.push(tile.index);
                    }
                }, this);
            }, this);
            this.map.setCollision(collision_tiles, true, layer.name);
        }
    }, this);
    // resize the world to be the size of the current layer
    this.layers[this.map.layer.name].resizeWorld();

    // create groups
    this.groups = {};
    this.level_data.groups.forEach(function (group_name) {
        this.groups[group_name] = this.game.add.group();
    }, this);

    this.prefabs = {};

    for (object_layer in this.map.objects) {
        if (this.map.objects.hasOwnProperty(object_layer)) {
            // create layer objects
            this.map.objects[object_layer].forEach(this.create_object, this);
        }
    }
};

Bomberman.TiledState.prototype.create_object = function (object) {
    "use strict";
    var object_y, position, prefab;
    // tiled coordinates starts in the bottom left corner
    object_y = (object.gid) ? object.y - (this.map.tileHeight / 2) : object.y + (object.height / 2);
    position = {"x": object.x + (this.map.tileHeight / 2), "y": object_y};
    // create object according to its type
    if (this.prefab_classes.hasOwnProperty(object.type)) {
        prefab = new this.prefab_classes[object.type](this, object.name, position, object.properties);
    }
    this.prefabs[object.name] = prefab;
};

Bomberman.TiledState.prototype.game_over = function () {
    "use strict";
    localStorage.clear();
    this.game.state.restart(true, false, this.level_data);
};
In the create method, we create the layers, groups and prefabs. First, we iterate through all layers in the map object, creating and saving it. If a layer has a collision property we set it as collidable, by looking for all valid tile indices on it. To create the groups, we just iterate through all groups in the JSON file, creating them.
To create the prefabs, first we will define a generic Prefab class, as shown below. It extends Phaser.Sprite and is responsible for adding itself to its group. So, it is important that the properties parameter contain the texture and group information.
var Bomberman = Bomberman || {};

Bomberman.Prefab = function (game_state, name, position, properties) {
    "use strict";
    Phaser.Sprite.call(this, game_state.game, position.x, position.y, properties.texture);

    this.game_state = game_state;

    this.name = name;

    this.game_state.groups[properties.group].add(this);
    this.frame = +properties.frame;

    this.game_state.prefabs[name] = this;
};

Bomberman.Prefab.prototype = Object.create(Phaser.Sprite.prototype);
Bomberman.Prefab.prototype.constructor = Bomberman.Prefab;
Finally, to create the prefabs we iterate through the objects in the objects layer. There are three important things to notice in the “create_object”: 1) Tiled coordinate system starts in the bottom left corner, while in Phaser it starts in the top left corner. As a consequence, we have to change the y coordinate accordingly. 2) We instantiate the correct prefab by accessing a “prefab_classes” map with the object type. This is possible only because all prefabs have the same constructor. 3) Since our generic Prefab class requires a texture and group properties, those properties must be defined in the Tiled map objects.
Creating the player
Our player prefab can walk in the four directions and drop bombs. First, in the constructor we have to set its properties, such as walking speed and bomb duration, and create the animations for walking in each direction.
In the update method, we check for the cursors for movement and the spacebar for dropping bomb. For each direction, we check if its corresponding cursor key was pressed and if the player is not already moving in the opposite direction. If that’s the case, we set its velocity accordingly. If the player just started moving, we start playing its corresponding walking animation. Also, since we’re using the same animation for both left and right directions, we have to set the prefab scale properly.
At the end of the update method, if the player velocity is 0 in both axis we stop the current animation and set the stopped frame according to the facing property of its physical body (the facing property is automatically updated by the physics engine. For more information, you can check the documentation).
To drop bombs, we check for the spacebar key, and if it is pressed we call the “drop_bomb” method. To keep the player from dropping multiple bombs at the same time, when one bomb is dropped, we set a “dropping_bomb” variable to true, and don’t allow other bomb to be dropped. We only set this variable to false again when the spacebar key is released.
In the “drop_bomb” method we will use a pool of objects to avoid creating unnecessary objects. The idea is to keep a group with all the game bombs and, when we need a new one, we get the first dead object from this group. If there is not a dead object, we create a new one. If there is one, we just reuse it, avoiding to keep creating new objects unnecessarily. Also, since this is a method we will use in different places, I put it in a Utils file, receiving as a parameter the pool, the prefab constructor and its constructor parameters.
var Bomberman = Bomberman || {};

Bomberman.Player = function (game_state, name, position, properties) {
    "use strict";
    Bomberman.Prefab.call(this, game_state, name, position, properties);

    this.anchor.setTo(0.5);

    this.walking_speed = +properties.walking_speed;
    this.bomb_duration = +properties.bomb_duration;
    this.dropping_bomb = false;

    this.animations.add("walking_down", [1, 2, 3], 10, true);
    this.animations.add("walking_left", [4, 5, 6, 7], 10, true);
    this.animations.add("walking_right", [4, 5, 6, 7], 10, true);
    this.animations.add("walking_up", [0, 8, 9], 10, true);

    this.stopped_frames = [1, 4, 4, 0, 1];

    this.game_state.game.physics.arcade.enable(this);
    this.body.setSize(14, 12, 0, 4);

    this.cursors = this.game_state.game.input.keyboard.createCursorKeys();
};

Bomberman.Player.prototype = Object.create(Bomberman.Prefab.prototype);
Bomberman.Player.prototype.constructor = Bomberman.Player;

Bomberman.Player.prototype.update = function () {
    "use strict";
    this.game_state.game.physics.arcade.collide(this, this.game_state.layers.collision);
    this.game_state.game.physics.arcade.collide(this, this.game_state.groups.bombs);
    this.game_state.game.physics.arcade.overlap(this, this.game_state.groups.explosions, this.kill, null, this);
    this.game_state.game.physics.arcade.overlap(this, this.game_state.groups.enemies, this.kill, null, this);

    if (this.cursors.left.isDown && this.body.velocity.x <= 0) {
        // move left
        this.body.velocity.x = -this.walking_speed;
        if (this.body.velocity.y === 0) {
            // change the scale, since we have only one animation for left and right directions
            this.scale.setTo(-1, 1);
            this.animations.play("walking_left");
        }
    } else if (this.cursors.right.isDown && this.body.velocity.x >= 0) {
        // move right
        this.body.velocity.x = +this.walking_speed;
        if (this.body.velocity.y === 0) {
            // change the scale, since we have only one animation for left and right directions
            this.scale.setTo(1, 1);
            this.animations.play("walking_right");
        }
    } else {
        this.body.velocity.x = 0;
    }

    if (this.cursors.up.isDown && this.body.velocity.y <= 0) {
        // move up
        this.body.velocity.y = -this.walking_speed;
        if (this.body.velocity.x === 0) {
            this.animations.play("walking_up");
        }
    } else if (this.cursors.down.isDown && this.body.velocity.y >= 0) {
        // move down
        this.body.velocity.y = +this.walking_speed;
        if (this.body.velocity.x === 0) {
            this.animations.play("walking_down");
        }
    } else {
        this.body.velocity.y = 0;
    }

    if (this.body.velocity.x === 0 && this.body.velocity.y === 0) {
        // stop current animation
        this.animations.stop();
        this.frame = this.stopped_frames[this.body.facing];
    }

    if (!this.dropping_bomb && this.game_state.input.keyboard.isDown(Phaser.Keyboard.SPACEBAR)) {
        this.drop_bomb();
        this.dropping_bomb = true;
    }

    if (this.dropping_bomb && !this.game_state.input.keyboard.isDown(Phaser.Keyboard.SPACEBAR)) {
        this.dropping_bomb = false;
    }
};

Bomberman.Player.prototype.drop_bomb = function () {
    "use strict";
    var bomb, bomb_name, bomb_position, bomb_properties;
    // get the first dead bomb from the pool
    bomb_name = this.name + "_bomb_" + this.game_state.groups.bombs.countLiving();
    bomb_position = new Phaser.Point(this.x, this.y);
    bomb_properties = {"texture": "bomb_spritesheet", "group": "bombs", bomb_radius: 3};
    bomb = Bomberman.create_prefab_from_pool(this.game_state.groups.bombs, Bomberman.Bomb.prototype.constructor, this.game_state, bomb_name, bomb_position, bomb_properties);
};
You can already create a map with your player and see if it’s walking correctly.

Creating the bomb
The Bomb prefab will start with an exploding animation and when the animation is done it will explode. For this, we set a bomb radius property in the constructor and create its animation, making it call the kill method when the animation is complete.
To create the explosions, we have to overwrite the kill method. In the new kill method we start creating an explosion in the bomb position, and then we call the “create_explosions” method to create them in each of the four directions. This method’s parameters are an initial index, final index, step and axis. By iterating through those indices, we create new explosions in a position given by the current index and the axis. If a wall tile is found during this process, we stop it. To do this, we use the “getTileFromXY” from Phaser.Tilemap, which returns a tile given a position in the world (you can check the documentation for more information). Notice that, to allow negative indices we must compare the absolute values of “index” and “final_index”. Also, we’re using a pool of objects for the explosion, since we will be creating a lot of them.
There is one last thing we have to do in the Bomb prefab. In the reset method we have to restart the exploding animation, otherwise it would not play when we reused a bomb object from the bombs pool.
var Bomberman = Bomberman || {};

Bomberman.Bomb = function (game_state, name, position, properties) {
    "use strict";
    Bomberman.Prefab.call(this, game_state, name, position, properties);

    this.anchor.setTo(0.5);

    this.bomb_radius = +properties.bomb_radius;

    this.game_state.game.physics.arcade.enable(this);
    this.body.immovable = true;

    this.exploding_animation = this.animations.add("exploding", [0, 2, 4], 1, false);
    this.exploding_animation.onComplete.add(this.kill, this);
    this.animations.play("exploding");
};

Bomberman.Bomb.prototype = Object.create(Bomberman.Prefab.prototype);
Bomberman.Bomb.prototype.constructor = Bomberman.Bomb;

Bomberman.Bomb.prototype.reset = function (position_x, position_y) {
    "use strict";
    Phaser.Sprite.prototype.reset.call(this, position_x, position_y);
    this.exploding_animation.restart();
};

Bomberman.Bomb.prototype.kill = function () {
    "use strict";
    Phaser.Sprite.prototype.kill.call(this);
    var explosion_name, explosion_position, explosion_properties, explosion;
    explosion_name = this.name + "_explosion_" + this.game_state.groups.explosions.countLiving();
    explosion_position = new Phaser.Point(this.position.x, this.position.y);
    explosion_properties = {texture: "explosion_image", group: "explosions", duration: 0.5};
    // create an explosion in the bomb position
    explosion = Bomberman.create_prefab_from_pool(this.game_state.groups.explosions, Bomberman.Explosion.prototype.constructor, this.game_state,
                                                      explosion_name, explosion_position, explosion_properties);

    // create explosions in each direction
    this.create_explosions(-1, -this.bomb_radius, -1, "x");
    this.create_explosions(1, this.bomb_radius, +1, "x");
    this.create_explosions(-1, -this.bomb_radius, -1, "y");
    this.create_explosions(1, this.bomb_radius, +1, "y");
};

Bomberman.Bomb.prototype.create_explosions = function (initial_index, final_index, step, axis) {
    "use strict";
    var index, explosion_name, explosion_position, explosion, explosion_properties, tile;
    explosion_properties = {texture: "explosion_image", group: "explosions", duration: 0.5};
    for (index = initial_index; Math.abs(index) <= Math.abs(final_index); index += step) {
        explosion_name = this.name + "_explosion_" + this.game_state.groups.explosions.countLiving();
        // the position is different accoring to the axis
        if (axis === "x") {
            explosion_position = new Phaser.Point(this.position.x + (index * this.width), this.position.y);
        } else {
            explosion_position = new Phaser.Point(this.position.x, this.position.y + (index * this.height));
        }
        tile = this.game_state.map.getTileWorldXY(explosion_position.x, explosion_position.y, this.game_state.map.tileWidth, this.game_state.map.tileHeight, "collision");
        if (!tile) {
            // create a new explosion in the new position
            explosion = Bomberman.create_prefab_from_pool(this.game_state.groups.explosions, Bomberman.Explosion.prototype.constructor, this.game_state, explosion_name, explosion_position, explosion_properties);
        } else {
            break;
        }
    }
};
You can already try placing bombs to see if its working. Since we still didn’t create the Explosion prefab yet, you can just comment this part of the code or create a dummy prefab for now.

Creating explosions
The Explosion prefab will have a duration, which will define how long it will last until it disappears. This property is set in the constructor, and it is used when creating a timer which calls the kill method when completed. So, when the number of seconds defined by the duration property elapses, the Explosion prefab is killed.
Notice that we have to set the “autoDestroy” property of “kill_timer” (in “this.game_state.time.create”) to false, so it won’t be destroyed when its event finishes. Then, in the “reset” method we add another kill event, so it will keep working when an explosion is reused from the pool.
var Bomberman = Bomberman || {};

Bomberman.Explosion = function (game_state, name, position, properties) {
    "use strict";
    Bomberman.Prefab.call(this, game_state, name, position, properties);

    this.anchor.setTo(0.5);

    this.duration = +properties.duration;

    this.game_state.game.physics.arcade.enable(this);
    this.body.immovable = true;

    // create the kill timer with autoDestroy equals false
    this.kill_timer = this.game_state.time.create(false);
    this.kill_timer.add(Phaser.Timer.SECOND * this.duration, this.kill, this);
    this.kill_timer.start();
};

Bomberman.Explosion.prototype = Object.create(Bomberman.Prefab.prototype);
Bomberman.Explosion.prototype.constructor = Bomberman.Explosion;

Bomberman.Explosion.prototype.reset = function (position_x, position_y) {
    "use strict";
    Phaser.Sprite.prototype.reset.call(this, position_x, position_y);
    // add another kill event
    this.kill_timer.add(Phaser.Timer.SECOND * this.duration, this.kill, this);
};
Now you can try playing again to see if the explosions are being created and killed properly.

Creating the enemy
Our enemy will keep walking in a single axis (horizontal or vertical) and will switch direction when it reaches a maximum walked distance or it collides with something, like a wall or a bomb. To do this, we start by setting its walking speed, walking distance, direction and axis in the constructor. We also creates the enemy animations and start its velocity in the initial direction.
In the update method we manage the animations according to its velocity in each direction, in a similar way we did with the player. However, since it will always walk in a single direction at once, we don’t have to check if it isn’t already walking in another direction.
After starting or stopping animations, we check if it has reached its maximum distance, by subtracting the current position by the position in the beginning of the movement. If this value is greater or equal than the maximum distance to walk, we have to switch its direction. The “switch_direction” method only reverts the velocity and saves the new initial position.
var Bomberman = Bomberman || {};

Bomberman.Enemy = function (game_state, name, position, properties) {
    "use strict";
    Bomberman.Prefab.call(this, game_state, name, position, properties);

    this.anchor.setTo(0.5);

    this.walking_speed = +properties.walking_speed;
    this.walking_distance = +properties.walking_distance;
    this.direction = +properties.direction;
    this.axis = properties.axis;

    this.previous_position = (this.axis === "x") ? this.x : this.y;

    this.animations.add("walking_down", [1, 2, 3], 10, true);
    this.animations.add("walking_left", [4, 5, 6, 7], 10, true);
    this.animations.add("walking_right", [4, 5, 6, 7], 10, true);
    this.animations.add("walking_up", [0, 8, 9], 10, true);

    this.stopped_frames = [1, 4, 4, 0, 1];

    this.game_state.game.physics.arcade.enable(this);
    if (this.axis === "x") {
        this.body.velocity.x = this.direction * this.walking_speed;
    } else {
        this.body.velocity.y = this.direction * this.walking_speed;
    }
};

Bomberman.Enemy.prototype = Object.create(Bomberman.Prefab.prototype);
Bomberman.Enemy.prototype.constructor = Bomberman.Enemy;

Bomberman.Enemy.prototype.update = function () {
    "use strict";
    var new_position;
    this.game_state.game.physics.arcade.collide(this, this.game_state.layers.collision, this.switch_direction, null, this);
    this.game_state.game.physics.arcade.overlap(this, this.game_state.groups.bombs, this.switch_direction, null, this);
    this.game_state.game.physics.arcade.overlap(this, this.game_state.groups.explosions, this.kill, null, this);

    if (this.body.velocity.x < 0) {
        // walking left
        this.scale.setTo(-1, 1);
        this.animations.play("walking_left");
    } else if (this.body.velocity.x > 0) {
        // walking right
        this.scale.setTo(1, 1);
        this.animations.play("walking_right");
    }

    if (this.body.velocity.y < 0) {
        // walking up
        this.animations.play("walking_up");
    } else if (this.body.velocity.y > 0) {
        // walking down
        this.animations.play("walking_down");
    }

    if (this.body.velocity.x === 0 && this.body.velocity.y === 0) {
        // stop current animation
        this.animations.stop();
        this.frame = this.stopped_frames[this.body.facing];
    }

    new_position = (this.axis === "x") ? this.x : this.y;
    if (Math.abs(new_position - this.previous_position) >= this.walking_distance) {
        this.switch_direction();
    }
};

Bomberman.Enemy.prototype.switch_direction = function () {
    "use strict";
    if (this.axis === "x") {
        this.previous_position = this.x;
        this.body.velocity.x *= -1;
    } else {
        this.previous_position = this.y;
        this.body.velocity.y *= -1;
    }
};
You can already try playing with the enemy prefab, to see if it’s working. Don’t forget to properly add the collisions in the prefabs update method.

Finishing the game
And now our game is complete! In the next tutorials we will add some content to it. To learn more about game development Phaser, please support our work by checking out our Phaser Mini-Degree.