In this tutorial series, we will create a game similar to the popular Pokemon GO. First, we will create a Phaser state to catch Pokemon. Then, we will add a world state where the player can navigate in order to find Pokemon. We are also going to add features of the Pokemon GO game such as: different Pokemon, different pokeballs, pokestops to get pokeballs. In the end we are going to save the player pokedex in an online database.
In this first tutorial I will cover the following content:
- Creating a catch state where the player can catch Pokemon
- Using Phaser P2 physics engine for throwing pokeballs and catching Pokemon
- Creating message boxes that interact with the player to call methods from the game state
- Creating a world state, which reads a Tiled map with the current Pokemon
To read this tutorial, it is important that you are familiar with the following concepts:
- Javascript and object-oriented concepts.
- Basic Phaser concepts, such as: states, sprites, groups and arcade physics
- Creating maps using Tiled
Table of contents
Learn Phaser by building 15 games
If you want to master Phaser and learn how to publish Phaser games as native games for iOS and Android feel free to check Zenva‘s online course The Complete Mobile Game Development Course – Build 15 Games.
Source code files
You can download the tutorial source code files here.
Level file and game states
In this tutorial we are going to use JSON files like the one below in order to load assets, create groups and prefabs in our game.
{
    "assets": {
        "background_image": {"type": "image", "source": "assets/images/background.png"},
        "message_box_image": {"type": "image", "source": "assets/images/message_box.png"},
        "pokeball_image": {"type": "image", "source": "assets/images/pokeball.png"},
        "pokemon_spritesheet": {"type": "spritesheet", "source": "assets/images/pokemon.png", "frame_width": 98, "frame_height": 85}
    },
    "groups": [
        "background",
        "pokemons",
        "pokeballs",
        "hud"
    ],
    "collision_groups": [
        "pokemons",
        "pokeballs"
    ],
    "prefabs": {
        "background": {
            "type": "background",
            "position": {"x": 0, "y": 0},
            "properties": {
                "texture": "background_image",
                "group": "background"
            }
        },
        "pokeball": {
            "type": "pokeball",
            "position": {"x": 0.5, "y": 0.8},
            "properties": {
                "texture": "pokeball_image",
                "group": "pokeballs",
                "anchor": {"x": 0.5, "y": 0.5},
                "pokeball_speed": 300,
                "catching_rate": 0.3
            }
        },
        "pokemon": {
            "type": "pokemon",
            "position": {"x": 0.5, "y": 0.6},
            "properties": {
                "texture": "pokemon_spritesheet",
                "group": "pokemons",
                "anchor": {"x": 0.5, "y": 0.5},
                "frame": 1,
                "fleeing_rate": 1.0
            }
        }
    }
}
The Phaser states we are going to use are:
- BootState: responsible for loading the level file
- LoadingState: responsible for loading all level assets
- CatchState: represents the screen where the player can catch a Pokemon
- WorldState: represents the world where the player can navigate in order to find Pokemon. In this first tutorial WorldState will simply show the current Pokemon to catch.
BootState and LoadingState are the simpler ones, and their codes are shown below. As mentioned earlier, BootState simply loads a level file, and send its content as a parameter to LoadingState.
var Pokemon = Pokemon || {};

Pokemon.BootState = function () {
    "use strict";
    Phaser.State.call(this);
};

Pokemon.BootState.prototype = Object.create(Phaser.State.prototype);
Pokemon.BootState.prototype.constructor = Pokemon.BootState;

Pokemon.BootState.prototype.init = function (level_file, next_state) {
    "use strict";
    this.level_file = level_file;
    this.next_state = next_state;
};

Pokemon.BootState.prototype.preload = function () {
    "use strict";
    // load the level file
    this.load.text("level1", this.level_file);
};

Pokemon.BootState.prototype.create = function () {
    "use strict";
    var level_text, level_data;
    // parse the level file as a JSON object and send its data to LoadingState
    level_text = this.game.cache.getText("level1");
    level_data = JSON.parse(level_text);
    this.game.state.start("LoadingState", true, false, level_data, this.next_state);
};
LoadingState, by its turn, iterates through all assets in the level data loading the correct asset for each one. Notice that we use a property called type in order to identify the correct asset to load, and an asset key to save it.
var Pokemon = Pokemon || {};

Pokemon.LoadingState = function () {
    "use strict";
    Phaser.State.call(this);
};

Pokemon.LoadingState.prototype = Object.create(Phaser.State.prototype);
Pokemon.LoadingState.prototype.constructor = Pokemon.LoadingState;

Pokemon.LoadingState.prototype.init = function (level_data, next_state) {
    "use strict";
    this.level_data = level_data;
    this.next_state = next_state;
};

Pokemon.LoadingState.prototype.preload = function () {
    "use strict";
    var assets, asset_loader, asset_key, asset;
    assets = this.level_data.assets;
    for (asset_key in assets) { // load assets according to asset key
        if (assets.hasOwnProperty(asset_key)) {
            asset = assets[asset_key];
            switch (asset.type) {
            case "image":
                this.load.image(asset_key, asset.source);
                break;
            case "spritesheet":
                this.load.spritesheet(asset_key, asset.source, asset.frame_width, asset.frame_height, asset.frames, asset.margin, asset.spacing);
                break;
            case "tilemap":
                this.load.tilemap(asset_key, asset.source, null, Phaser.Tilemap.TILED_JSON);
                break;
            }
        }
    }
};

Pokemon.LoadingState.prototype.create = function () {
    "use strict";
    this.game.state.start(this.next_state, true, false, this.level_data);
};
CatchState code is shown below. First, in the “init” method we need to start the Physics engine. Notice that in this tutorial series we are going to use P2 Physics in order to have rounded collision shapes.
The “create” method from CatchState is responsible for creating groups, collision groups (for the physics engine) and the prefabs. Groups and collision groups can be easily created by iterating through their respective arrays and creating them on Phaser or P2. In order to create the prefabs we are going to iterate through all prefabs described in the JSON file and call a “create_prefab” method.
var Pokemon = Pokemon || {};

Pokemon.CatchState = function () {
    "use strict";
    Phaser.State.call(this);

    this.prefab_classes = {
        "background": Pokemon.Prefab.prototype.constructor,
        "pokeball": Pokemon.Pokeball.prototype.constructor,
        "pokemon": Pokemon.Pokemon.prototype.constructor
    };
};

Pokemon.CatchState.prototype = Object.create(Phaser.State.prototype);
Pokemon.CatchState.prototype.constructor = Pokemon.CatchState;

Pokemon.CatchState.prototype.init = function (level_data) {
    "use strict";
    this.level_data = level_data;

    this.scale.scaleMode = Phaser.ScaleManager.SHOW_ALL;
    this.scale.pageAlignHorizontally = true;
    this.scale.pageAlignVertically = true;

    // start physics system
    this.game.physics.startSystem(Phaser.Physics.P2JS);
    this.game.physics.arcade.gravity.y = 0;
};

Pokemon.CatchState.prototype.create = function () {
    "use strict";
    var group_name, prefab_name;

    // create groups
    this.groups = {};
    this.level_data.groups.forEach(function (group_name) {
        this.groups[group_name] = this.game.add.group();
    }, this);

    this.collision_groups = {};
    this.level_data.collision_groups.forEach(function (collision_group_name) {
        this.collision_groups[collision_group_name] = this.game.physics.p2.createCollisionGroup();
    }, this);

    // create prefabs
    this.prefabs = {};
    for (prefab_name in this.level_data.prefabs) {
        if (this.level_data.prefabs.hasOwnProperty(prefab_name)) {
            // create prefab
            this.create_prefab(prefab_name, this.level_data.prefabs[prefab_name]);
        }
    }
};

Pokemon.CatchState.prototype.create_prefab = function (prefab_name, prefab_data) {
    "use strict";
    var prefab_position, prefab;
    // create object according to its type
    if (this.prefab_classes.hasOwnProperty(prefab_data.type)) {
        if (prefab_data.position.x > 0 && prefab_data.position.x <= 1) {
            // position as percentage
            prefab_position = new Phaser.Point(prefab_data.position.x * this.game.world.width,
                                              prefab_data.position.y * this.game.world.height);
        } else {
            // position as absolute number
            prefab_position = prefab_data.position;
        }
        prefab = new this.prefab_classes[prefab_data.type](this, prefab_name, prefab_position, prefab_data.properties);
    }
    return prefab;
};

Pokemon.CatchState.prototype.return_to_world = function () {
    "use strict";
    this.game.state.start("BootState", true, false, "assets/levels/world_level.json", "WorldState");
};
The “create_prefab” method starts by calculating the prefab position. This can be an absolute or percentage position. If the position is defined as number between zero and one (e.g: 0.5), its position will be calculated as a percentage of the world dimensions. Otherwise it will simply be the position defined in the JSON file. After defining the prefab position, we create it by calling the appropriate constructor with any custom properties declared in the JSON level file. Notice that we do that by saving the prefab constructors in a “prefab_classes” property, indexed by the prefab type. This is possible because all prefabs have the same constructor, defined in a generic Prefab class (shown below) which all Prefabs must extend.
var Pokemon = Pokemon || {};

Pokemon.Prefab = function (game_state, name, position, properties) {
    "use strict";
    Phaser.Sprite.call(this, game_state.game, position.x, position.y, properties.texture);

    this.game_state = game_state;

    this.name = name;

    this.game_state.groups[properties.group].add(this);
    this.frame = +properties.frame;
    if (properties.anchor) {
        this.anchor.setTo(properties.anchor.x, properties.anchor.y);
    }

    this.game_state.prefabs[name] = this;
};

Pokemon.Prefab.prototype = Object.create(Phaser.Sprite.prototype);
Pokemon.Prefab.prototype.constructor = Pokemon.Prefab;
Now let’s create our last state for this tutorial: WorldState. This state loads a Tiled map like the one shown below. Since the focus of this tutorial is not on Tiled, you’re free to use the same map provided in the source code, or create your own map. The only things you must be careful is that the objects in the map must have at least their group and texture defined in their properties.

Besides the Tiled map, WorldState will also going to use a JSON level file to load the assets, the map and create the groups, like the one shown below:
{
    "assets": {
        "map_tileset": {"type": "image", "source": "assets/images/open_tileset.png"},
        "pokemon_spritesheet": {"type": "spritesheet", "source": "assets/images/pokemon.png", "frame_width": 98, "frame_height": 85},

        "world_tilemap": {"type": "tilemap", "source": "assets/maps/world.json"}
    },
    "groups": [
        "spawns"
    ],
    "map": {
        "key": "world_tilemap",
        "tilesets": ["map_tileset"]
    }
}
This is the code for WorldState. Similarly to CatchState it starts P2 physics engine in the “init” method. However, it also has to create the tilemap, using the data provided by the JSON level file. Then, in the “create” method it creates the map layers, game groups and prefabs. The map layers and groups are created similarly to what we’ve done in CatchState, but in order to create prefabs we have to iterate through the object layers in the Tiled map and call a “create_object” method for each object.
var Pokemon = Pokemon || {};

Pokemon.WorldState = function () {
    "use strict";
    Phaser.State.call(this);

    this.prefab_classes = {
        "pokemon_spawn": Pokemon.PokemonSpawn.prototype.constructor
    };
};

Pokemon.WorldState.prototype = Object.create(Phaser.State.prototype);
Pokemon.WorldState.prototype.constructor = Pokemon.WorldState;

Pokemon.WorldState.prototype.init = function (level_data) {
    "use strict";
    var tileset_index;
    this.level_data = level_data;

    this.scale.scaleMode = Phaser.ScaleManager.SHOW_ALL;
    this.scale.pageAlignHorizontally = true;
    this.scale.pageAlignVertically = true;

    // start physics system
    this.game.physics.startSystem(Phaser.Physics.P2JS);
    this.game.physics.arcade.gravity.y = 0;

    // create map and set tileset
    this.map = this.game.add.tilemap(level_data.map.key);
    tileset_index = 0;
    this.map.tilesets.forEach(function (tileset) {
        this.map.addTilesetImage(tileset.name, level_data.map.tilesets[tileset_index]);
        tileset_index += 1;
    }, this);
};

Pokemon.WorldState.prototype.create = function () {
    "use strict";
    var group_name, object_layer, collision_tiles;

    // create map layers
    this.layers = {};
    this.map.layers.forEach(function (layer) {
        this.layers[layer.name] = this.map.createLayer(layer.name);
    }, this);
    // resize the world to be the size of the current layer
    this.layers[this.map.layer.name].resizeWorld();

    // create groups
    this.groups = {};
    this.level_data.groups.forEach(function (group_name) {
        this.groups[group_name] = this.game.add.group();
    }, this);

    this.prefabs = {};

    for (object_layer in this.map.objects) {
        if (this.map.objects.hasOwnProperty(object_layer)) {
            // create layer objects
            this.map.objects[object_layer].forEach(this.create_object, this);
        }
    }
};

Pokemon.WorldState.prototype.create_object = function (object) {
    "use strict";
    var object_y, position, prefab;
    // tiled coordinates starts in the bottom left corner
    object_y = (object.gid) ? object.y - (this.map.tileHeight / 2) : object.y + (object.height / 2);
    position = {"x": object.x + (this.map.tileHeight / 2), "y": object_y};
    // create object according to its type
    if (this.prefab_classes.hasOwnProperty(object.type)) {
        prefab = new this.prefab_classes[object.type](this, object.name, position, object.properties);
    }
    this.prefabs[object.name] = prefab;
};
The “create_object” method starts by calculating the prefab position because we want the anchor point of the sprites to be their centers, while Tiled use it as the bottom left corner of the object. Then, we instantiate the correct prefab using the “prefab_classes” property exactly the same way we did in CatchState.
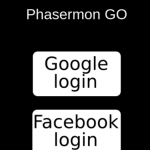
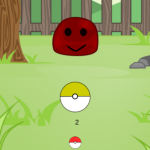
By now, you can try starting both CatchState and WorldState to see if they are correctly creating the Prefabs. In order to do that you have to add all prefabs in the “prefab_classes” property, even if they’re not doing anything yet. You should see the following screens:


PokemonSpawn prefab
We are going to start by creating the PokemonSpawn prefab, which will show a Pokemon in the world, and allow the player to catch it. This prefab will be used in WorldState, so be sure to change your code to start with WorldState in order to test it.
The code for PokemonSpawn is shown below. In the constructor we need to appropriately set the anchor point and scale. Then, we enable input for it, as well as add an onInputDown event. This event will call the “try_catching” method, which will simply start CatchState.
var Pokemon = Pokemon || {};

Pokemon.PokemonSpawn = function (game_state, name, position, properties) {
    "use strict";
    Pokemon.Prefab.call(this, game_state, name, position, properties);

    this.anchor.setTo(0.5);
    this.scale.setTo(0.5);

    // add input event to try catching this Pokemon
    this.inputEnabled = true;
    this.events.onInputDown.add(this.try_catching, this);
};

Pokemon.PokemonSpawn.prototype = Object.create(Pokemon.Prefab.prototype);
Pokemon.PokemonSpawn.prototype.constructor = Pokemon.PokemonSpawn;

Pokemon.PokemonSpawn.prototype.try_catching = function () {
    "use strict";
    // start CatchState
    this.game_state.game.state.start("BootState", true, false, "assets/levels/catch_level.json", "CatchState");
};
By now, you can try clicking on the Pokemon in WorldState and check if it properly starts CatchState.
Pokemon and Pokeball prefabs
Now we are going to create the prefabs for the Pokemon and the Pokeball, since those two prefabs will work together in order to allow the player to catch Pokemon.
First, let’s create the Pokemon constructor as below. The constructor will simply save the Pokemon fleeing rate from is properties (defined in the JSON file), and will start its physical body. For the physical body we need to define it as static, since we don’t want it to move, define its collision body as a circle, set its collision group and tell the engine which groups collides with it (the pokeballs group, in our case).
var Pokemon = Pokemon || {};

Pokemon.Pokemon = function (game_state, name, position, properties) {
    "use strict";
    Pokemon.Prefab.call(this, game_state, name, position, properties);

    this.BODY_RADIUS = 30;

    this.fleeing_rate = properties.fleeing_rate;

    // initialize Pokemon physical body
    this.game_state.game.physics.p2.enable(this);
    this.body.static = true;
    this.body.setCircle(this.BODY_RADIUS);
    this.body.setCollisionGroup(this.game_state.collision_groups.pokemons);
    this.body.collides([this.game_state.collision_groups.pokeballs]);
};

Pokemon.Pokemon.prototype = Object.create(Pokemon.Prefab.prototype);
Pokemon.Pokemon.prototype.constructor = Pokemon.Pokemon;
Now that we have our collidable Pokemon, let’s go to the Pokeball prefab. In the constructor (shown below) we need to save some properties that will be used later and create input events. We will use two input events:
- when the player clicks on the pokeball it will start dragging it
- when the player releases the pokeball it should throw it
var Pokemon = Pokemon || {};

Pokemon.Pokeball = function (game_state, name, position, properties) {
    "use strict";
    var rotate_tween;
    Pokemon.Prefab.call(this, game_state, name, position, properties);

    this.TWEEN_DURATION = 0.5;
    this.THROW_THRESHOLD = 50;

    this.pokeball_speed = properties.pokeball_speed;
    this.catching_rate = properties.catching_rate;

    this.dragging = false;

    this.initial_position = {x: this.x, y: this.y};

    // add input events to drag and throw the pokeball
    this.inputEnabled = true;
    this.events.onInputDown.add(this.drag, this);
    this.events.onInputUp.add(this.throw, this);
};

Pokemon.Pokeball.prototype = Object.create(Pokemon.Prefab.prototype);
Pokemon.Pokeball.prototype.constructor = Pokemon.Pokeball;
So, let’s implement the methods for those two input events. First, the “drag” method will simply set the “dragging” property to true. Then, we need to change the “update” method to change the pokeball position to be the same as the active pointer if it is being dragged.
Pokemon.Pokeball.prototype.drag = function () {
    "use strict";
    this.dragging = true;
};

Pokemon.Pokeball.prototype.update = function () {
    "use strict";
    // if the pokeball is being dragged, update its position to follow the active pointer
    if (this.dragging) {
        this.x = this.game_state.game.input.activePointer.x;
        this.y = this.game_state.game.input.activePointer.y;
    }
};
The “throw” method, by its turn, will start by setting the “dragging” property to false. Then, it calculates the distance that the pokeball was dragged, from its distance to the initial position. If it was dragged above a pre-defined threshold, then we should throw the pokeball by initializing its physical body and changing its velocity on both x and y directions.
Pokemon.Pokeball.prototype.throw = function () {
    "use strict";
    var distance_to_initial_position;

    // stop draggin the pokeball
    this.dragging = false;

    // throw the pokeball if the distance to the initial position is above the threshold
    distance_to_initial_position = new Phaser.Point(this.x - this.initial_position.x, this.y - this.initial_position.y);
    if (distance_to_initial_position.getMagnitude() > this.THROW_THRESHOLD) {
        distance_to_initial_position.normalize();
        // initialize the pokeball physical body
        this.init_body();
        this.body.velocity.x = -distance_to_initial_position.x * this.pokeball_speed;
        this.body.velocity.y = -distance_to_initial_position.y * this.pokeball_speed;
    } else {
        this.reset(this.initial_position.x, this.initial_position.y);
    }
};
Now let’s implement the “init_body” method. The pokeball physical body will be similar to the Pokemon one, except that it won’t be static and we are going to add a callback (“start_catching”) to when it collides with a Pokemon.
Pokemon.Pokeball.prototype.init_body = function () {
    "use strict";
    this.game_state.game.physics.p2.enable(this);
    this.body.setCircle(this.width / 2);
    this.body.setCollisionGroup(this.game_state.collision_groups.pokeballs);
    this.body.collides([this.game_state.collision_groups.pokemons]);
    // start catching a Pokemon when the pokeball collides with it
    this.body.onBeginContact.add(this.start_catching, this);
};
The “start_catching” method starts by destroying the physical body, since we don’t need it anymore and will make the Pokemon invisible. Then, it will play a rotate tween animation to simulate the catching process. When the tween animation is done it will call a “try_catching” method, which will check if the Pokemon was succesfully caught.
The “try_catching” method will generate a random number between 0 and 1 and compare it with the pokeball catching rate. If the generated number is lower than the catching rate the Pokemon was succesfully caught, and we need to kill the pokeball. Otherwise, we still need to check if the Pokemon will flee. If so, we also need to kill the pokeball and return to WorldState, so that the player can not throw it anymore. Otherwise, we just make the pokemon visible again and reset the pokeball to its initial position.
Pokemon.Pokeball.prototype.start_catching = function (body_b) {
    "use strict";
    var pokemon, pokemon_position, rotate_tween;
    this.body.destroy();

    pokemon = body_b.sprite;
    pokemon.visible = false;

    // play a rotate animation to simulate the catching process
    rotate_tween = this.game_state.game.add.tween(this);
    rotate_tween.to({angle: "-45"}, Phaser.Timer.SECOND * this.TWEEN_DURATION);
    rotate_tween.to({angle: "+90"}, Phaser.Timer.SECOND * this.TWEEN_DURATION * 2);
    rotate_tween.to({angle: "-45"}, Phaser.Timer.SECOND * this.TWEEN_DURATION);
    rotate_tween.onComplete.add(this.try_catching.bind(this, pokemon), this);
    rotate_tween.start();
};

Pokemon.Pokeball.prototype.try_catching = function (pokemon) {
    "use strict";
    var random_number;
    // check if the pokemon was caught
    random_number = this.game_state.rnd.frac();
    if (random_number < this.catching_rate) {
        pokemon.catch();
        this.kill();
    } else {
        // check if the pokemon has fled
        if (!pokemon.fled()) {
            pokemon.visible = true;
            this.reset(this.initial_position.x, this.initial_position.y);
        } else {
            this.kill();
            this.game_state.return_to_world();
        }
    }
};
Now we need to implement the “catch” and “fled” methods in the Pokemon prefab.
The first method will simply kill the Pokemon and print a message in the console and go back to WorldState. The second method will start by generating a random number between 0 and 1. If this number is lower than the Pokemon fleeing rate, then it successfuly fled. Then, we will simply print a message in the console if the Pokemon has fled and will return is result in the end of the method.
Pokemon.Pokemon.prototype.catch = function () {
    "use strict";
    // kill the Pokemon and show the catch message box
    this.kill();
    console.log("Gotcha!");
    this.game_state.return_to_world();
};

Pokemon.Pokemon.prototype.fled = function () {
    "use strict";
    var flee_chance, fled;
    // check if the Pokemon will flee
    flee_chance = this.game_state.rnd.frac();
    fled = flee_chance < this.fleeing_rate;
    if (fled) {
        // kill the Pokemon and show the fled message box
        this.kill();
        console.log("You lost it!");
    }
    return fled;
};
Finally, we only need to implement the “return_to_world” method in CatchState. This method will simply start WorldState with the world JSON file.
Pokemon.CatchState.prototype.return_to_world = function () {
    "use strict";
    this.game.state.start("BootState", true, false, "assets/levels/world_level.json", "WorldState");
};
By now you can already try catching a Pokemon. Try changing the catch and fleeing rates in order to test different outcomes.

MessageBox prefab
In the end of this tutorial we are going to show message boxes when a Pokemon is caught or when it flees. Those message boxes will have input events to call methods from the game state.
Let’s start by creating the MessageBox prefab. This prefab will simply create a TextPrefab to show its message and add an input event. The input event will call a method from the game state defined in the “callback” property from the properties parameter.
var Pokemon = Pokemon || {};

Pokemon.MessageBox = function (game_state, name, position, properties) {
    "use strict";
    Pokemon.Prefab.call(this, game_state, name, position, properties);

    // create TextPrefab to show the message
    this.message_text = new Pokemon.TextPrefab(this.game_state, this.name + "_text", Object.create(this.position), properties.text_properties);
    this.message_text.anchor.setTo(0.5);

    // add input event to call game state method
    this.inputEnabled = true;
    this.events.onInputDown.add(this.game_state[properties.callback], this.game_state);
};

Pokemon.MessageBox.prototype = Object.create(Pokemon.Prefab.prototype);
Pokemon.MessageBox.prototype.constructor = Pokemon.MessageBox;
Now let’s change the Pokemon prefab to show the message boxes when the Pokemon is caught or when it flees.
First, we are going to add a “MESSAGE_PROPERTIES” property in the Pokemon prefab constructor, which will be used to create the message boxes. Notice that the callback for the message boxes will be the “return_to_world” method in game state. Then, we can change the “catch” method to, instead of printing a message in the console, it will show a message box. Next we are going to change the “fled” method to also create a message box instead of printing a message in the console.
var Pokemon = Pokemon || {};

Pokemon.Pokemon = function (game_state, name, position, properties) {
    "use strict";
    Pokemon.Prefab.call(this, game_state, name, position, properties);

    this.BODY_RADIUS = 30;
    this.MESSAGE_PROPERTIES = {
        texture: "message_box_image",
        group: "hud",
        anchor: {x: 0.5, y: 0.5},
        callback: "return_to_world",
        text_properties: {
            text: "",
            group: "hud",
            style: {
                font: "32px Arial",
                fill: "#000"
            }
        }
    };

    this.fleeing_rate = properties.fleeing_rate;

    // initialize Pokemon physical body
    this.game_state.game.physics.p2.enable(this);
    this.body.static = true;
    this.body.setCircle(this.BODY_RADIUS);
    this.body.setCollisionGroup(this.game_state.collision_groups.pokemons);
    this.body.collides([this.game_state.collision_groups.pokeballs]);
};

Pokemon.Pokemon.prototype = Object.create(Pokemon.Prefab.prototype);
Pokemon.Pokemon.prototype.constructor = Pokemon.Pokemon;

Pokemon.Pokemon.prototype.catch = function () {
    "use strict";
    var catch_message;
    // kill the Pokemon and show the catch message box
    this.kill();
    catch_message = new Pokemon.MessageBox(this.game_state, "catch_message", {x: this.game_state.game.world.centerX, y: this.game_state.game.world.centerY}, this.MESSAGE_PROPERTIES);
    catch_message.message_text.text = "Gotcha!";
};

Pokemon.Pokemon.prototype.fled = function () {
    "use strict";
    var flee_chance, fled, flee_message;
    // check if the Pokemon will flee
    flee_chance = this.game_state.rnd.frac();
    fled = flee_chance < this.fleeing_rate;
    if (fled) {
        // kill the Pokemon and show the fled message box
        this.kill();
        flee_message = new Pokemon.MessageBox(this.game_state, "flee_message", {x: this.game_state.game.world.centerX, y: this.game_state.game.world.centerY}, this.MESSAGE_PROPERTIES);
        flee_message.message_text.text = "You lost it!";
    }
    return fled;
};
Finally, we need to remove the calls to “return_to_world” that we added in the Pokemon and Pokeball prefabs.
By now you can try catching a Pokemon again to see if the message boxes are being correctly displayed, as well as if the callback is being properly called.


And we finished the first part of this tutorial series. In the next tutorial we are going to allow the player to navigate the world in order to find Pokemon, which will be randomly spawned. We are also going to add different Pokemon, and a Pokedex menu where the player can see which Pokemon were already caught