Angular 4 is a complete and flexible application framework, mainly maintained by Google and a very active community. This version, commonly known just as Angular, was completely rewritten in TypeScript and is drastically different from its previous version, AngularJS; to the point of being considered in practice as two different frameworks. This new version has fixed many flaws found by the community over 5 years and has been improved in many factors like a better architecture, modern development tools, mobile by design, speed and performance.
Angular applications can be developed using TypeScript, Dart or JavaScript. For this tutorial we will be using TypeScript, initially having a brief introduction to it and a first contact with some of the basic elements that compose an Angular application.
You only need to have Node.js and Npm (Node.js Package Manager) installed, as well as the IDE / text editor of your choice; Visual Studio Code is highly recommended.
Did you come across any errors in this tutorial? Please let us know by completing this form and we’ll look into it!

FINAL DAYS: Unlock coding courses in Unity, Godot, Unreal, Python and more.
The versions for Node.js and Npm can be checked using the following command:
$ node -v
v6.11.2
$ npm -v
3.10.10
You need to have at least Node.js 6.9.x and Npm 3.x.x in order for this tutorial to work fine.
Table of contents
Introduction to Typescript
TypeScript is a programming language designed for large-scale application development. It’s a typed superset of JavaScript, meaning that it allow us to use features from the most recent ECMAScript versions and even some features that are not even in the scope of the standard yet. This is possible because when it’s compiled, its **transpiler** produces JavaScript in a cross-platform safe version.
The commmand-line TypeScript compiler can be installed using Npm:
$ npm install -g typescript
The version can be checked using the following command:
$ tsc -v
Version 2.5.2
Types
JavaScript counts with dynamic types, so when you declare a variable, you don’t define the type because it will be inferred during execution. This feature allows a variable to have different types, making the programming and debugging activities way more complex in the long run.
TypeScript adds optional static types, so when you declare a typed variable, its type will be enforced to be the same during the development process thanks to the type checking at compile time.
let foo: string = 'Hello TypeScript!';
foo = 0; // Error: Type "number" is not assignable to type "string"
The available basic types are: boolean, number, string, array, tuple, enum, any, void, undefined, null and never. It’s also possible to create custom types, check the handbook for further details.
Functions
Functions are the buildings blocks upon which JavaScript applications are built, so they play a key role in TypeScript as well. You can add types to named functions or anonymous functions:
// Named function
function add(x: number, y: number): number {
return x + y;
}

// Anonymous function
let myAdd = function(x: number, y: number): number {
return x+y;
};
More on functions can be found in the handbook.
Classes
Object-oriented programming (OOP) has been a very popular programming paradigm during the last decades mostly because of its level of scalability and modularity. Traditional JavaScript supports this paradigm but it uses prototypes for inheritance instead of classes, however latest versions of the standard introduced the possibility to use a class-oriented approach.
This new approach can be considered as syntactical sugar because it doesn’t change the existing prototype-based inheritance model, but allows a simpler way to create objects and manage inheritance. TypeScript allows us to use these techniques now without having to wait for the browsers to support them.
In general, a class is composed of a name, attributes and methods. The syntax to create a simple class looks like this:
class Person {
  private name: string;

  constructor(name : string) {
    this.name = name;
  }

  greet() {
    console.log("Hi! I'm " + this.name);
  }
}
This class is named Person and contains one attribute (name) and two methods (constructor and greet).
When an object is created by the constructor of a specific class, this object is called an instance of the class.
let person: Person = new Person("John Doe");Now that you have created person, you can use the behaviour implemented in the class. In this case, the greet method:
person.greet();
The console output is: Hi! I’m John Doe.
Finally, one of the main features in OOP paradigm is the possibility to create new classes based on others using inheritance. For instance, it’s possible to extend a basic Calculator class into a more advanced ScientificCalculator class that inherits all the properties and methods existing in the parent class by using the keyword extends:
class Calculator {
  model: string;
  constructor(model : string) {
    this.model = model;
  }
  add(x: number, y: number): number {
    return x + y;
  }
  subtract(x: number, y: number): number {
    return x - y;
  }
  multiply(x: number, y: number): number {
    return x * y;
  }
  divide(x: number, y: number): number {
    return x / y;
  }
}

class ScientificCalculator extends Calculator {
  constructor(model : string) {
    super(model);
  }
  pow(base: number, exp: number): number {
    return base**exp;
  }
  sin(rad: number): number {
    return Math.sin(rad);
  }
  cos(rad: number): number {
    return Math.cos(rad);
  }
}
Interfaces
One of the most important principles in TypeScript is type-checking, and this focuses on the shape. In many scenarios you might need to implement a custom type instead of just using the primitive ones.
An interface in object-oriented languages is a an abstract type that defines behaviours as method signatures. It can be considered as a code contract, in order to implement it you need to follow its rules.
For instance, you can create an interface called LabelledValue, this would be a custom type that assigns a label to a value:
interface LabelledValue {
label: string;
value: number;
}

let lv: LabelledValue = { label: "Label X", value: 1001 };
In case of not following the contract, in this case by not providing the required elements:
let lve: : LabelledValue = { label: "Label Y" };The transpiler would alert of this error with a message like: Type “{ label: string }” is not assignable to type “LabelledValue”. Property “value” is missing in type “{ label: string }”.
Decorators
Decorators are a new way to add annotations and a meta-programming syntax for class declarations, methods, accessors, properties or parameters. They are an experimental feature proposed for future versions of JavaScript that can be enabled in TypeScript.
Decorators have a special syntax using a prefixed @ symbol and followed by an expression that must evaluate to a function that will be called at runtime. This means that at the basic level, they are functions that can augment a class, a parameter, a method or a property.
For now, you only need to identify them and to know that they are widely used to manage Angular architecture under the hood. For example, one very common decorator is the `Component` decorator, applied in this case to the MyComponent class declaration:
@Component()
class MyComponent {
}
Modules
Modules can be seen as containers, these help to separate the code in a way that helps to optimize organization, re-usability, and encapsulation. These allow to separate code and data into files that isolate features, in other languages they are called libraries, packages, etc.
Modules are executed within their own scope, this means that variables, functions, classes, interfaces, etc. declared in a module are not visible outside the module unless they are explicitly exported. Any declaration (such as a variable, function, class, type alias, or interface) can be exported by adding the export keyword.
Creating a basic Angular application
With the previously acquired understanding of TypeScript, it’s possible to get hands on creating a very basic Angular application.
Setup
In order to simplify the setup process and save some time, we are gonna use Angular CLI. This is a command line interface tool with an extense set of features, but for now we will use it just to setup our Angular project.
You can use the following command in order to install Angular CLI globally:
npm install -g @angular/cli
Now we are gonna generate a new project with the application skeleton:
ng new my-app
After everything as been setup and all the dependencies have been installed, you will see something like this:
installing ng
  create .editorconfig
  create README.md
  create src/app/app.component.css
  create src/app/app.component.html
  create src/app/app.component.spec.ts
  create src/app/app.component.ts
  create src/app/app.module.ts
  create src/assets/.gitkeep
  create src/environments/environment.prod.ts
  create src/environments/environment.ts
  create src/favicon.ico
  create src/index.html
  create src/main.ts
  create src/polyfills.ts
  create src/styles.css
  create src/test.ts
  create src/tsconfig.app.json
  create src/tsconfig.spec.json
  create src/typings.d.ts
  create .angular-cli.json
  create e2e/app.e2e-spec.ts
  create e2e/app.po.ts
  create e2e/tsconfig.e2e.json
  create .gitignore
  create karma.conf.js
  create package.json
  create protractor.conf.js
  create tsconfig.json
  create tslint.json
Installing packages for tooling via npm.
Installed packages for tooling via npm.
Successfully initialized git.
Project 'my-app' successfully created.
Angular CLI configures a lot of elements commonly used when developing Angular applications. Now we can go inside my-app directory:
cd my-app
It’s possible to start the application with the following command:
$ ng serve --open
This will open your browser in http://localhost:4200/ and if everything is working fine you should see a basic page with the Welcome to app! title.
Besides launching the application, Angular CLI also watches the files, and rebuilds the app as we make changes to those files.
Angular CLI created a lot of files that may be overwhelming for a first contact, but for the moment we are only interested in the src directory, and particularly in the app directory inside src.
src
|-app
|-app.component.css
|-app.component.html
|-app.component.spec.ts
|-app.component.ts
|-app.module.ts
Components
Components could be considered as the most important concept behind Angular applications, these might be seen as the building blocks of our project and are defined in the official documentation as: “A component controls a patch of screen called a view.”
We separate our application in different components, each one of them will be composed by the component’s logic and the view that will be visible to the user.
An Angular application can be modeled as a tree of these components, each one of them having its own selector.
For instance, in our boilerplate application we already have one component called app-root that will be, as expected, the root component of our application.
Component structure
let’s start by checking the file called app.component.ts, this contains a class called AppComponent and some other elements:
import { Component } from '@angular/core';

@Component({
  selector: 'app-root',
  templateUrl: './app.component.html',
  styleUrls: ['./app.component.css']
})
export class AppComponent {
  title = 'app';
}
In order to have an Angular component, we need to import Component from Angular. After this, we can use a class decorator in order to extend the AppComponent class with component behaviour. Decorators in general have a @ prefix and in this case we see the @Component decorator before our class
The view is placed inside the class decorator and the component logic inside the class.
Component selector
Our application can be modeled as a tree of components, where each one of them has its own selector.
A selector is the way to use our component, because it will tell Angular to create an instance of the particular component. In this case, AppComponent uses the app-root selector. This is accomplished in the class decorator with the selector property:
selector: 'app-root'
At the moment we only have one component, app-root, but after some work we could end up with a tree like this:
<app-root>
<my-search></my-search>
<my-list>
<my-list-item></my-list-item>
<my-list-item></my-list-item>
<my-list-item></my-list-item>
</my-list>
</app-root>
Component template
The component’s template refers to the content that will be loaded where the selector has been placed. This is very similar to traditional HTML and almost all HTML syntax is valid template syntax, but we have the ability to extend the HTML vocabulary of our templates with other components, directives, pipes, etc.
A very basic template for our component could be set with the template property inside our class decorator.
import { Component } from '@angular/core';

@Component({
  selector: 'app-root',
  template: '<h1>My First Angular App</h1>'
})
export class AppComponent {
}
Angular CLI has gone one step further, and created our component template in a file called app.component.html. That is then linked in the class decorator with the templateUrl property.
import { Component } from '@angular/core';

@Component({
  selector: 'app-root',
  templateUrl: './app.component.html',
  styleUrls: ['./app.component.css']
})
export class AppComponent {
  title = 'app';
}
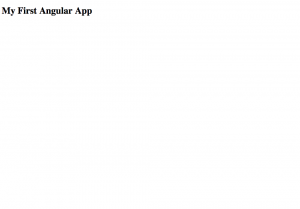
Let’s clean the app.component.html file and just leave the following template:
<h1>My First Angular App</h1>
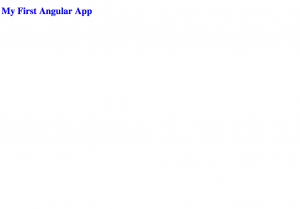
We can also add some basic style in our app.component.css:
h1 {
  color: blue;
}
Now we have understood how a basic component works, but this component isn’t dynamic at all, its template is completely static and there is no logic defined yet.
Interpolation
We would like to leave behind static data and move into dynamic data, and with Angular we can display data by binding controls in our template to properties of our component that can be changed according our component’s logic.
We will start by learning how to use interpolation, the first form of data binding, in order to add dynamic behavior to our component.
We already have a class property called title with the string app, let’s change it to My First Angular App. Let’s also add a property called subtitle in our class with the string using interpolation!:
import { Component } from '@angular/core';

@Component({
  selector: 'app-root',
  templateUrl: './app.component.html',
  styleUrls: ['./app.component.css']
})
export class AppComponent {
  title = 'My First Angular App';
  subtitle = 'using interpolation!';
}
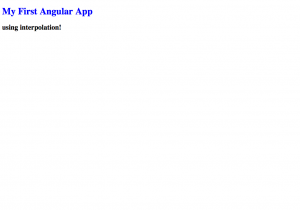
We use double-curly braces, {{ }}, in order to use interpolation in our template. Inside the braces we have the name of our component property, being app or subtitle. By doing this, Angular is able to replace {{ property }} with the corresponding string value.
<h1>{{ title }}</h1>
<h2>{{ subtitle }}</h2>
Now our component renders like this:
Directives
Angular templates have been very simple so far, just using basic h1 and h2 tags, but we can use directives to transform the way they are rendered by adding dynamic behaviour.
We can categorize directives in two types: structural and attribute directives.
A component could be considered as a directive with a template, but taking into account their central and distinctive role, they are separated from structural and attribute directives.
We will see that a component is the most common of the three directives and we write lots of them as we build our application.
Structural directives
Structural directives alter our layout by adding, removing, and replacing elements in DOM. They tend to appear within an element tag as attributes do, sometimes by name but more often as the target of an assignment or a binding.
Attribute directives
Attribute directives change the appearance or behavior of an element, but they don’t affect the template.
As an initial tutorial, we will one of the most common structural directives, known as NgIf.
NgIf
NgIf is a structural directive that renders components or elements based on the evaluation of a condition. It takes the condition result, true or false, and makes an entire chunk of DOM appear or disappear.
Let’s suppose we add another property to our AppComponent called showMessage, it would look like this:
import { Component } from '@angular/core';

@Component({
  selector: 'app-root',
  templateUrl: './app.component.html',
  styleUrls: ['./app.component.css']
})
export class AppComponent {
  title = 'My First Angular App';
  subtitle = 'using interpolation and directives!';
  showSubtitle = false;
}
We could then use this property and NgIf directive to decide when to show our subtitle with the syntax *ngIf=”condition” in the h2 element.
<h1>{{ title }}</h1>
<h2 *ngIf="showSubtitle">{{ subtitle }}</h2>
In this case our app would look like follows:
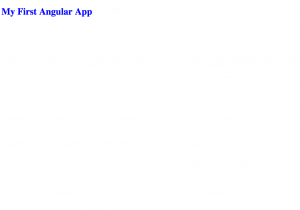
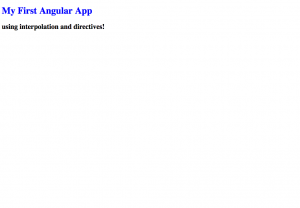
But if we change showSubtitle = false; to showSubtitle = true;, it would render our element:
Pipes
Most of applications deal in some point with a common task: get data, transform them, and show them to users. Angular provides a way to transform data called pipes, providing the most frequent transformations out of the box, as well as giving us the option to create our own custom pipes.
A pipe takes in data as input and transforms it to a desired output. They can be used directly in our template, what makes them very useful and convenient when developing an application.
The common template syntax to use a pipe with some input data is: {{ data | pipe }}.
Built-in pipes
Angular comes with a stock of pipes such as date, uppercase, lowercase, currency, etc. These are all immediately available for use in any template.
Let’s use a pipe to transform the title property in this AppComponent component:
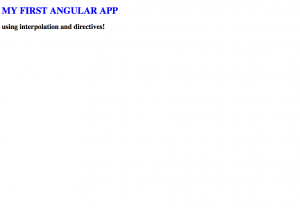
<h1>{{ title | uppercase }}</h1>
<h2 *ngIf="showSubtitle">{{ subtitle }}</h2>
Our app would look like this:
This post was authored by Pablo Velazques, full-stack web developer with extensive experience using the Angular framework, among many other technologies.

