You can access the full course here: DEVELOP AN IDLE CLICKER FROM SCRATCH IN GAMEMAKER
Table of contents
Introduction
In this tutorial, we’ll be diving into the process of creating a GameMaker idle game. We’ll go step-by-step through creating the enemy sprite, setting up an object for it, and implementing essential functions for interactions, such as taking damage when clicked.
This tutorial also covers how to add more immersive gameplay features like randomizing enemy sprites, managing global variables, and even changing the game background dynamically. You can also review our full course, Develop an Idle Clicker from Scratch in GameMaker which covers GameMaker in-depth and mastering common mechanics like auto-clickers that can be used across many projects.
To follow along, it’s helpful to have some familiarity with:
- Basic game object creation and sprite management
- GameMaker language scripting for object behaviors
Project Files
To facilitate easy learning, we’re providing you with a downloadable set of assets used in the tutorial. But remember, the essence to fully understand how to make a GameMaker idle game lies in doing it hands-on.
Download Project Files via this link

Enemy Setup
Welcome to the first part of our GameMaker idle game tutorial! In this session, we will start creating the enemy in our game. We will cover the basic setup required to get our enemy up and running. Let’s dive right in.
Creating the Enemy Sprite
First, we need to create a sprite for our enemy. Follow these steps:
- Right-click in the asset browser and select “Create Sprite.”
- Name the sprite
SPR_enemy_0.
Creating the Enemy Object
Next, we need to create an object for our enemy:
- Right-click in the asset browser and select “Create Object.”
- Name the object
obj_enemy. - Drag and drop the
SPR_enemy_0sprite into theobj_enemyobject.
Setting Up the Enemy in the Game Room
Now, let’s place the enemy in the game room and adjust its properties:
- Go to the game room.
- Drag and drop the
obj_enemyobject into the room. - Double-click the enemy object to open its properties.
- Scale the enemy to 2 to make it larger.
- Disable the grid and center the enemy in the room.
Initializing Health Variables
We need to initialize the health variables for our enemy. Follow these steps:
- Open the
obj_enemyobject. - Add a “Create” event.
- In the “Create” event, add the following code to initialize the health variables:
initial_health = 10;
current_health = initial_health;
Handling Enemy Clicks
Next, we need to handle what happens when the enemy is clicked. After all, what would a GameMaker idle game be without that?
- Add a “Left Pressed” event to the
obj_enemyobject. - In the “Left Pressed” event, add the following code to call the
take_damagefunction:
/// @description Enemy clicked
take_damage(false);
Creating the take_damage Function
Now, let’s create the take_damage function to handle the logic when the enemy is clicked:
- In the “Create” event of the
obj_enemyobject, add the following code to define thetake_damagefunction:
function take_damage(_autoclicker)
{
    current_health -= 1;

    // After decreasing the health, check if the enemy is dead
    if (current_health == 0)
    {
        current_health = initial_health;
        // Additional functionality will be added here in future lessons
    }

    // Show debug message
    show_debug_message("Current Health: " + string(current_health));
}
Testing the Enemy Health
Finally, let’s test the enemy health by clicking on the enemy and observing the debug messages:
- Run the game.
- Click on the enemy and observe the debug messages in the output window.
- The current health should decrease by 1 with each click and reset to the initial health when it reaches 0.
That’s it for this section of our GameMaker idle game tutorial! We have set up the basic structure for our enemy, including initializing health variables, handling clicks, and creating a function to take damage.
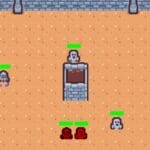
Change Sprite
In this next part of our GameMaker idle game tutorial, we will be changing the enemy sprites when an enemy is defeated. Let’s dive into the steps required to achieve this.
Preparing the Sprites
First, we need to prepare the sprites that will be used for the enemies. We will create copies of the existing sprite and organize them into a group for better management.
- Create copies of the enemy sprite by pressing
CTRL + D. - Right-click and create a new group called “enemies”.
- Drag and drop all the enemy sprites into this new group.
Creating the Change Sprite Function
Next, we will create a function called changeSprite that will handle the logic for changing the enemy sprite to a random one. This function will be called when an enemy’s health reaches zero.
function change_sprite()
{
    var _random_sprite = noone;

    // Update the sprite
    sprite_index = _random_sprite;
}
Integrating the Change Sprite Function
We will integrate this function into the existing take_damage function. This function is called when the enemy takes damage. When the enemy’s health reaches zero, we will call the change_sprite function to change the enemy’s sprite.
function take_damage(_autoclicker)
{
    current_health -= 1;
    // After decreasing the health, check if the enemy is dead
    if (current_health == 0)
    {
        current_health = initial_health;

        change_sprite();
    }
}
Testing the Functionality
To test the functionality, we will temporarily decrease the enemy’s initial health to 3. This will allow us to quickly see the sprite change when the enemy is defeated in our GameMaker idle game.
initial_health = 3;
After testing, we will reset the initial health back to 10 to maintain the game’s difficulty.
initial_health = 10;
Ensuring Unique Sprites
To ensure that the new sprite is different from the current sprite, we will use a do...until loop. This loop will keep choosing a random sprite until it finds one that is different from the current sprite.
do
{
    _random_sprite = choose(spr_enemy_0, spr_enemy_1, spr_enemy_2);
} until (_random_sprite != sprite_index);
Randomizing the Sprite Selection
Finally, we need to ensure that the sprites are chosen in a random order. This will prevent the sequence of sprites from being the same every time. However, this requires creating a manager object, which we will cover in a future lesson.
That’s it for this section of our GameMaker idle game tutorial! You have successfully implemented the functionality to change enemy sprites when they are defeated. Keep practicing and exploring the code to deepen your understanding.
Manager
Welcome to the next part of our GameMaker idle game tutorial! In this part, we will discuss manager objects, their purposes, and how to implement them. Manager objects are crucial for various tasks, such as randomizing game elements and managing global variables. Let’s dive into the details.
Understanding Manager Objects
Manager objects serve multiple purposes in game development. One of their key functions is to randomize game elements, ensuring that each game session provides a unique experience. For instance, if you have a sequence of enemies appearing in a game, a manager object can randomize their order to avoid repetition.
Creating a Manager Object
To create a manager object, follow these steps:
- Right-click in the objects panel and select “Create Object.”
- Name the object “obj_manager.”
This object will manage global variables and randomization for your game.
Randomizing Game Elements
To randomize game elements, you need to set a random seed in the manager object’s script. This ensures that each game session produces different results. Here’s how to do it:
- Open the manager object’s script.
- In the “Create” event, add the randomize function to generate a new random seed.
// Randomize the seed to have different random values in different game sessions
randomize();
This will ensure that the sequence of enemies or other game elements changes with each new game session of our GameMaker idle game
Using Global Variables
Global variables are essential for storing data that needs to be accessed and modified from various parts of the game. For example, you might use a global variable to track the number of enemies killed. Here’s how to declare a global variable:
- In the manager object’s script, use the syntax
global.variable_nameto declare a global variable. - Initialize the variable with a default value. For example,
global.enemies_killed = 0.
Global variables are useful for game over conditions, storing important game data, and managing game state.
Advantages of Using a Manager Object
- Centralizes important game logic, making it easier to manage and access.
- Prevents cluttering individual objects with too many variables.
- Ensures consistency and organization in larger projects.
Conclusion
Manager objects are a powerful tool in game development, allowing you to randomize game elements and manage global variables efficiently. By following the steps outlined in this GameMaker idle game tutorial, you can create and utilize manager objects to enhance your game’s functionality and organization.
Change Background
In this final section of our GameMaker idle game tutorial, we will be changing the background of our game. To achieve this, we need to follow a series of steps. Let’s dive into the process.
Preparing the Background Sprites
First, we need to have different sprites for our backgrounds. Similar to how we handled enemy sprites, we will create a new folder named backgrounds and place our background sprites inside it. For this lesson, we will use a total of five background sprites.
- Create a new folder named
backgrounds. - Duplicate the background sprites and place them inside the
backgroundsfolder.
Importing the Background Sprites
Next, we need to import these background sprites into our project. Follow these steps:
- Import
background_0. - Import
background_1. - Import
background_2. - Import
background_3. - Import
background_4.
Creating the ChangeBackground Function
Now, we will create a new function called change_background to handle the background change logic. This will be similar to how we did the change_sprite function:
- First we set up a variable to hold our background
- Then, we create a do-while loop to make sure we don’t repeat the background. Note that we also need to add a variable to store our current background (which we’ll initialize as background_1
- Next, to update the background, we need to get the ID of the background layer and set the new sprite.
- Finally, we need to store this background as our new current last_background for the next iteration.
last_background = spr_background_1;
function change_background()
{
    var _random_background = noone;

    // Avoid having a repeated background
    do
    {
        _random_background = choose(spr_background_0, spr_background_1, spr_background_2, spr_background_3, spr_background_4);
    } until (_random_background != last_background);

    // Update the background
    layer_background_sprite(layer_background_get_id("Background"), _random_background);

    // Store the last background used
    last_background = _random_background;
}
Changing the Background After Killing Enemies
We want to change the background every time we kill five enemies. To achieve this, we will update the global.enemies_killed variable and check if it reaches five. If it does, we reset the variable and change the background.
// After decreasing the health, check if the enemy is dead
if (current_health == 0)
{
  current_health = initial_health;

  global.enemies_killed += 1

  change_sprite();

  if (global.enemies_killed == 5)
  {
    global.enemies_killed = 0;
    change_background();
  }
With these steps, we have successfully implemented the background change functionality in our game. Now, every time we kill five enemies, the background will change to a new one. This adds more dynamism to our game and makes it more engaging for the players.
GameMaker Idle Game Wrap-Up
That wraps up this GameMaker idle game tutorial! By following these steps, you now have a robust enemy setup, complete with interactive mechanics, sprite randomization, and dynamic background changes to enrich the gameplay. We’ve covered some essential elements of game development that add both functionality and polish to your project.
As you continue, consider expanding your game with additional features like unique attack patterns, sound effects, or even new enemy types to further enhance the player experience. This project provides a great foundation for your future games and coding portfolio – whether you’re looking to make a GameMaker idle game or something completely different.
For more in-depth lessons on game development topics, check out Zenva’s extensive course library, which offers tutorials on various genres, tools, and techniques. We hope you’ve enjoyed this tutorial and wish you the best in your game development journey!
Did you come across any errors in this tutorial? Please let us know by completing this form and we’ll look into it! FINAL DAYS: Unlock coding courses in Unity, Godot, Unreal, Python and more.
Transcript – Enemy Setup
Hi there, and welcome to a new lesson. In this one, we’ll start off actually creating the enemy. So we’re going to be doing the basic, basic setup.
In order to do this, we will need the sprites for the enemy. Remember that we’re going to be having lots of sprites that are going to be able to be used, but we’ll start off with just one. So I will right-click here, create sprite. And I will call this one SPR underscore enemy underscore zero, okay?
And then I will also need the corresponding object. So I’m going to be calling this OBJ enemy. Okay, exactly like this. Now inside of here, the enemy object, I will drag and drop the corresponding enemy. Then I will open this enemy sprites app and import it as well. Let me look for enemy 0, okay, so it’s this kind of animal over there.
Let me go to the game room, and first of all, let me just modify quickly; then we’ll get to backgrounds, okay? But just to make the game, the room, to avoid being so, so bright, inside of the Intensity Layer, I will drag and drop the object here. But well, it is maybe a little bit small right now, so I’m going to double-click it and then scale it to 2, so now it is going to be much, much bigger. I’ll basically disable the grid here and center it, okay? It’s the same thing that I did with the play button.
Once this is done, I can actually go ahead inside of my enemy object. First of all, I want to create my initial health and my current health so we can decrease the health when we press the object. So I will add the create event here. And I will declare these two variables.
We call the first one initial health, which is going to be equal to 10 initially. This is going to be the health that initially every single enemy will have. Then we’ll have the current health, which is going to be the health that the enemy currently has. This is the value that, for example, is going to be modified if we click on it, and this should be equal to the initial health. So if you want here to set your initial health to, I don’t know, 15, then the current health will be updated as it should.
Then I want to detect when I am pressing on the enemy. So as we did with the play button, I will add the left pressed event. For the description, I will write something like enemy click. Now to handle everything in terms of this logic, I will create a new function.
Basically, functions allow you to store information, to store lines of code that you can then execute. The idea, at least for the exact usage we are doing here, is that we’re going to be able to divide the code a little bit better. We will have this take damage function that will only focus on actually taking the damage. Then, for example, we’re going to have a function to change the enemy sprite, so it’s like a way of having the code a little bit more separated instead of having here dozens and dozens of lines, okay? You will see this even better when we start adding more functions and more code.
This is how you declare a function in the create event, and then I will call this function right here. So whenever the enemy is clicked, we are going to be referring to this function, and anything that we write here is going to be run.
Let’s think here for a second. When we click the enemy, what we want to happen is that we decrease our current health. So I will decrease it by one. Then what we want to do is to check if the enemy is like dead or if we should switch up enemies or whatever.
First of all, I will check if my current health is equal to zero, which means that I basically have no health left. I will restart the health, okay, because I have defeated this enemy that I was currently fighting with, let’s say, and I want to switch up to a new one. Therefore, if I want to change the enemy, it should start off having full health because, well, here we were decreasing it, okay? So if this is the case, we will restart the current health. Okay, and of course, we’ll use the initial health value.
Actually, here we’re going to be doing even more stuff, so I will just leave an empty comment over here. For example, here, we’re going to be increasing the amount of gold we have, we are going to be changing the enemy sprites, more stuff. But well, I will just leave it like this because those are more functionalities that we will need. What I will actually do here is to add a show debug message when we are taking damage, and I will print the current health, okay, so we can see how all these values are being updated.
So over here, I will start, and here I have 9. Since I have already clicked on the enemy, well, I used to have 10, then I have 9, and well, that is why I’ve got a 9 there, and I can continue—8, 7, 6, 5, 4, 3, 2, 1. Then, after having one, I’ve got 10 again. So I can repeat this cycle, as you can see. Indeed, here the cycle of the current health is working as it should, okay?
Of course, we still have to draw the health bars, we still have to change the sprites, and more stuff. But well, this was just the super, super basic setup for us to get started and for us to code even more stuff in the following lessons. So indeed, I will see you in the next one.
Transcript – Change Sprite
Hi there and welcome to a new lesson! In this one, we’re going to be changing the enemy sprites when we have essentially defeated an enemy.
I’ll start by deleting this line, as we won’t be using it anymore, and I’ll begin creating the corresponding sprites. I’ve already created one sprite, so I’ll press CTRL+D once to duplicate it. Now, I have a copy of the original. To keep things organized, I’ll right-click here and create a new group called “enemies,” then drag and drop all relevant sprites into this group.
Next, I’ll start loading the appropriate ones. Here is enemy one, and here’s enemy two. Going back to the code, if the enemy runs out of health and we’re resetting it, we should switch to a new enemy. I’ll create a new function for this, called changeSprite, and define it over here in the code.
This is where wrapping code into different functions becomes advantageous—it allows for a more organized coding approach. Changing the sprite won’t take many lines, but breaking down a complex function like takeDamage—the core function that handles most of the game’s operations—into smaller functionalities helps keep the code readable. Since changing the sprite requires a notable number of lines, we can encapsulate it in a separate function.
To create the changeSprite function, we need a random sprite. We’ll pick from the three sprites we have, so I’ll create a local variable for this random sprite and initially set it to null. This means it’s an empty variable to which we’ll later assign a sprite. We’ll then assign a random value to this random sprite by using the choose function, which randomly selects from any values we provide.
Once we’ve selected the sprite, we need to update the current sprite of our object. We’ll set spriteIndex to randomSprite, which effectively updates the object’s visual representation.
To test this, I’ll temporarily set health to a lower value, like three, so we can see the changes quickly. As you can see, after each three hits, the sprite changes. However, sometimes the random sprite chosen is the same as the current one, so we end up with repeated sprites. We want to avoid duplicates, ensuring each sprite change gives us a different visual.
To do this, I’ll use a do…while loop. This loop will keep assigning new random sprites until we get one that’s different from the current spriteIndex. This approach ensures we don’t have repeated sprites, so every time the sprite changes, it will be a new one.
Now, let’s test this out. One, two, three—and it changes to a different sprite each time! Every few hits, the sprite changes, providing us with variety.
I’ll reset the initial health back to ten now. While testing, remember to set this back to ten, as a low health value makes the game too easy. An interesting observation is that even though we randomize the sprite selection, the sequence feels somewhat predictable. For example, the starting sprite is always the same because that’s how we initialize it.
The sequence we see—first this creature, then another—remains in a similar order, despite being randomized. This is because the randomization isn’t as comprehensive as it could be. To fix this, we’ll need to randomize the selection in a different way, affecting the entire game’s randomization process.
Rather than rushing through this, it’s better practice to create a new manager object to handle such global functions that impact the game from start to end. When randomization affects the whole project, a manager object is a good way to have a global reference or to call functions affecting multiple game objects or even the entire room.
This is a slightly more complex approach, but it helps maintain clean, organized code, especially as our game grows in complexity.
Transcript – Manager
Hi there and welcome to a new lesson. In this one, we are going to be discussing manager objects because they have multiple purposes. For example, one purpose is randomizing how things are chosen randomly. It may be a little confusing, but we first get this enemy, then another, then the same one again, and then the snake. Even if we play in different game sessions, we’re always getting the exact same result, so we have to avoid this.
We’re going to create a manager object because randomizing these decisions is something that will affect the game from end to end. Instead of calling it within the player object, we’ll do it in a completely separate object, as it impacts not just the player but any other object and instance in the room. That’s the reason we’ll use a manager object.
Besides randomizing, we also have global variables. Global variables don’t belong to any specific object, such as the enemy or any other object in the game; they have a global reference that can be accessed, modified, and utilized across different parts of the game. This is super useful for game states or storing variables that will be used in various places. Although this project is small, in larger projects with many objects, global variables that you can access anywhere are advantageous.
So, let’s put this into practice. Inside the objects, I’ll create a new object and name it objManager. We have our manager created, like any other object. There’s nothing particularly special to do in the manager script for it to function, so typically, everything is set up in the Create event.
To randomize the enemy sprites, we use a function to generate a new random seed, ensuring that different game sessions yield different results. For example, we might first get one enemy, then another, and then a snake. If we try it again, we could get the snake first, followed by another enemy, and so on. This way, we get different sequences each time we play.
Now, as we’re dedicating this lesson to creating the manager, I’ll also declare a global variable, which we create by using global. followed by the variable name. In this case, enemiesKilled. Initially, it will be zero, as no enemies have been killed at the game start. Why use a global reference here? While we could simply increase a variable within the enemy object when an enemy is killed, using a global variable is better because this count will be used in various game logic, like determining the amount of gold accumulated.
More enemies killed means more gold, so this isn’t just a variable for the enemy; it’s a game-wide analytic. Although this is a small project, in larger projects, enemiesKilled is valuable for the overall game state, like whether the game is over or not. By placing it in a manager script, it’s easier to access than if it were within a specific object.
You could still create it as an object variable, similar to currentHealth or initialHealth, but for larger projects, using a manager object is a best practice. With this, we’ve covered the manager object, and next, we’ll continue developing the game by adding more features. See you in the following lesson!
Transcript – Change Background
Hi there, and welcome to a new lesson. In this one, we are going to be changing the background.
To begin, we first need to have different sprites, as we did with our enemies, but this time for the background. Since I want to have different sprites, I’ll start by creating a new group—a folder named “backgrounds.” Here, I’ll have a total of five backgrounds. I’m duplicating them with CTRL-D and will drag and drop all of them into the corresponding folder.
Now, let’s get to importing them. This is background one. And we’ll continue like this with the others: background two, background three, and finally background four. Now, we actually have to change the background. It’s quite similar to the logic we used to change sprites, as we also want to ensure that each new background is different from the last one. It’s not the exact same process, but it’s similar.
I’ll add a new function here. Since this will require me to write about ten lines of code, I’ll keep it in a separate function to stay organized. I’ll name this function ChangeBackground. Just like with our sprites, I want to start by having a random background. I’ll initialize it as null. Then, I’m going to assign a value and set up a lastBackground variable to keep track of the previous background.
To make things a bit simpler, since accessing the current sprite of the layer is a longer line of code, I’ll store a direct reference to the last background here. I’ll use a do…until loop, so the code will “do something until” a condition is met. In this case, I’ll set randomBackground to randomly choose from background zero, one, two, three, and four. This process will repeat until randomBackground is different from lastBackground.
Now, to update the current background, I’ll need the ID of the layer. To get it, I’ll call layerBackgroundGetID, writing the name of the layer as “background.” Once I have the background layer, I’ll set the sprites to random backgrounds. This updates the lastBackground, so now we’re storing which background was last used.
Next, we need to think about when to change the background. Here, we want to change the background every time we kill five enemies. So, I’ll update the global.enemiesKilled variable and increase it by one each time an enemy is killed. After changing the sprite, I’ll check if global.enemiesKilled equals five, which means we’ve killed five enemies. If so, I’ll reset the variable to zero and change the background.
So, initially, global.enemiesKilled is zero, as defined in the manager. As we kill enemies, this count will increase from one to five. When we reach five, we reset it, and the background changes. This cycle is easy to follow.
Let’s see this in action. I’ll play, and we’ll start with background one. In the enemy settings, I’ll make sure that the last background used is set to background one. This way, we won’t get a repeated background from the menu. So now, we start with background one. I’ll kill five enemies: one, two, three, four, five. The background changes. Again, one, two, three, four, five, and the background changes. Each time, we’ll have a different background. Since there are five backgrounds, it will take some time to see them all. But as you can see, we eventually cycle through different backgrounds.
With this, we are now able to take damage, change the sprites of the enemy, and, more importantly, change the backgrounds. The game is starting to take shape, though there are still more elements to add. We’ll continue with them in the next lesson.
Interested in continuing? Check out our all-access plan which includes 300+ courses, guided learning pathways, new courses monthly, and more!