One of the great things about Phaser 3 is the plugin system. For example, did you know every time you load an image, or you check for input on a game object, you are actually using a built-in plugin? Not only does Phaser use these plugins internally for a lot of its core functionality, but Phaser also allows for you to extend its main functionality by adding your own plugins.
The goal of this tutorial is to teach you how to create a new dialog modal plugin that you will be able to extend and reuse in any of your games. You can see what we will be creating below:
Table of contents
Source Code
You can download all of the files associated with the source code for part one here.
Tutorial Requirements
For this tutorial, you will need the following:
- Basic to intermediate JavaScript skills
- A code editor
- A local web server
It is also recommended that you are familiar with basic Phaser concepts (scenes, creating the Phaser game object, etc.) If you are not familiar with these concepts, you will still be able to follow along with the tutorial, but we will not be covering them in depth. If you would like to learn more about these concepts or would like a refresher, you can check out the How to Create a Game with Phaser 3 tutorial here on GameDev Academy.
Learn Phaser 3 with our newest Mini-Degree
The Phaser Mini-Degree is now available on Zenva Academy. Learn to code and make impressive games with JavaScript and Phaser 3!
Setting Up Your Local Web Server
In order run your Phaser game locally, you will need to have a web server running locally. If you already have a local web server or are familiar with how to set this up, you can skip to the next part of the tutorial.
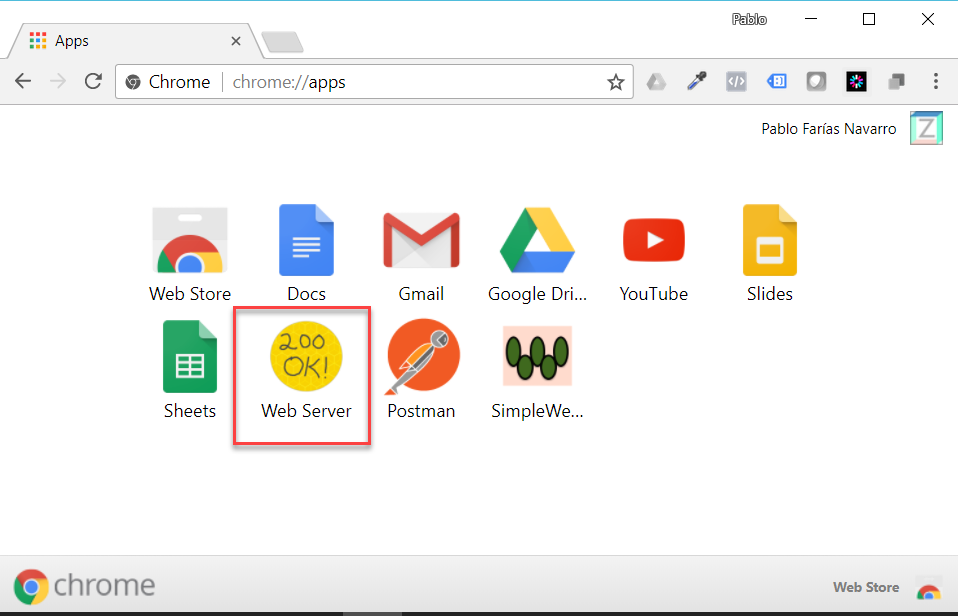
For this tutorial, I will be using a Google Chrome app called Web Server for Chrome. This app is very easy to use, and it gets your web server running very quickly. If you are not able to use this app, or you would like to learn more about some other options, Phaser has a great guide here: Getting Started with Phaser 3.
After you install the Chrome app, you can launch it by going to your Chrome Apps.
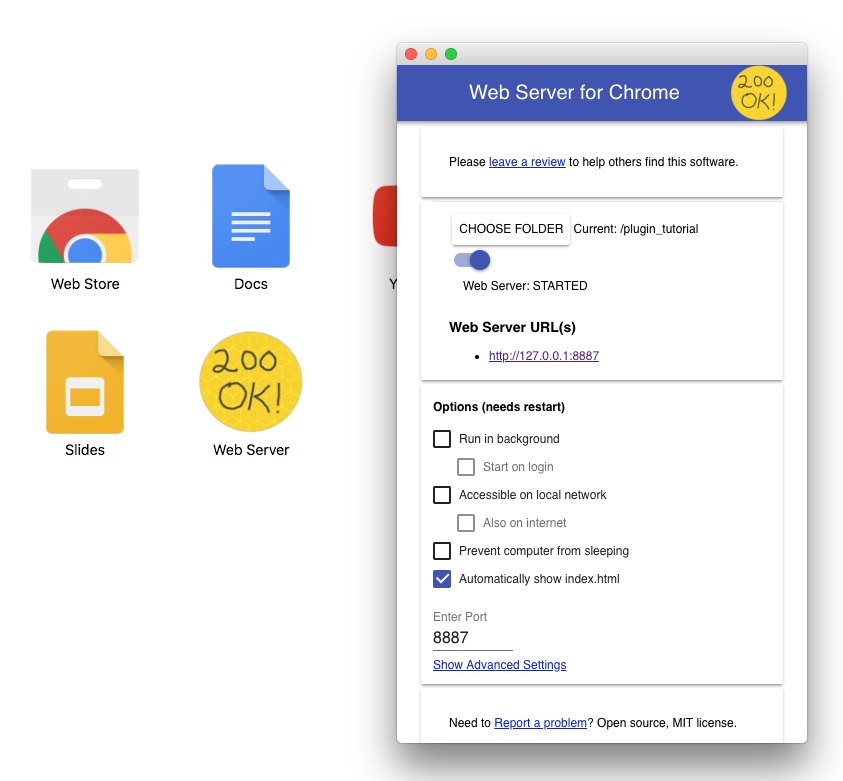
Once you launch the application, you should see a new window open that will allow you to choose which folder you want to use, enable/disable the server, and see the web server URL.
After you create the project folder in the next step, all you will need to do is click on the ‘CHOOSE FOLDER’ button, and then navigate to that folder.
Project Setup
Now that your local web server is running, we will set up our basic project structure. First, you will need to create a new project folder, and in this folder, you will need to create two new files: index.html and game.js. In your code editor, open up index.html and add the following code:
<!DOCTYPE html>
<html>
  <head>
    <meta charset="utf-8">
  </head>
  <body>
    <script src="//cdn.jsdelivr.net/npm/[email protected]/dist/phaser.min.js"></script>
    <script src="game.js"></script>
  </body>
</html>
Then, open up game.js in your code editor and add the following code:
// The game config that is used by Phaser
var config = {
  type: Phaser.AUTO,
  parent: 'phaser-example',
  width: 800,
  height: 600,
  scene: {
    preload: preload,
    create: create
  }
};

// Create a new Phaser Game object
var game = new Phaser.Game(config);

function preload () {}

function create () {}
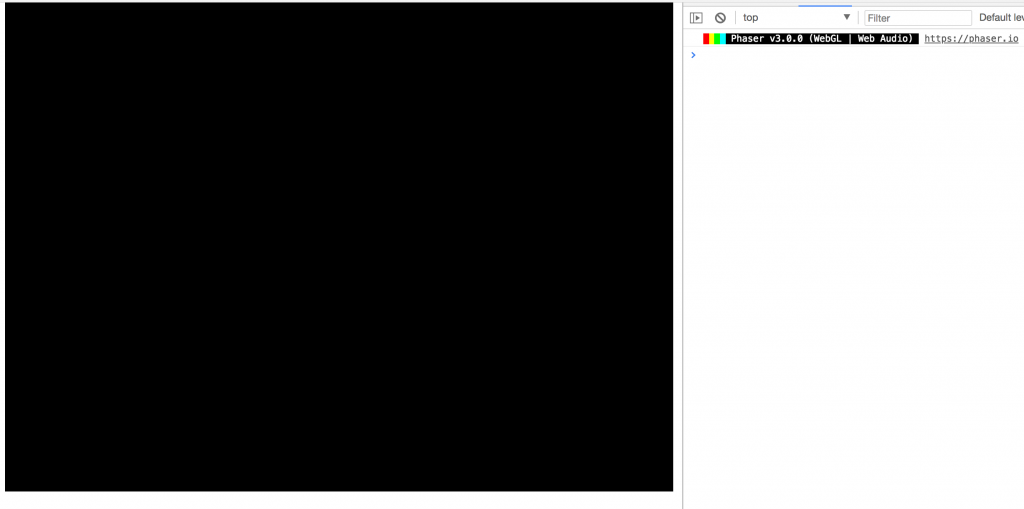
In the code above, we created our basic Phaser game. If you try running your game, you should see a black screen, and if you open the console in the developer tools, you should see a log with the version of Phaser your game is running.
 Creating the Plugin
With our basic project setup, we will now start working on our plugin. The first thing we will do is add the basic logic for a Phaser plugin, and then we will load our plugin in our game to make sure it is working correctly. In your project folder, create a new file called dialog_plugin.js. Then, open this file in your code editor and add the following code:
var DialogModalPlugin = function (scene) {
  // the scene that owns the plugin
  this.scene = scene;
  this.systems = scene.sys;

  if (!scene.sys.settings.isBooted) {
    scene.sys.events.once('boot', this.boot, this);
  }
};

// Register this plugin with the PluginManager
DialogModalPlugin.register = function (PluginManager) {
  PluginManager.register('DialogModalPlugin', DialogModalPlugin, 'dialogModal');
};

DialogModalPlugin.prototype = {
  // called when the plugin is loaded by the PluginManager
  boot: function () {
    var eventEmitter = this.systems.events;
    eventEmitter.on('shutdown', this.shutdown, this);
    eventEmitter.on('destroy', this.destroy, this);
  },

  //  Called when a Scene shuts down, it may then come back again later
  // (which will invoke the 'start' event) but should be considered dormant.
  shutdown: function () {},

  // called when a Scene is destroyed by the Scene Manager
  destroy: function () {
    this.shutdown();
    this.scene = undefined;
  }
};
Let’s review the code we just added:
- First, we created a new anonymous function and assigned it to the DialogModalPlugin variable. When this function is called, it takes a Phaser scene as a parameter and we store a reference to that Phaser scene. Lastly, we check to see if that scene is not booted, and if it hasn’t been then we call the boot method of our DialogModalPlugin.
- We then created a register method which will be called by the Phaser PluginFile Loader when we load and install our plugin in our game. The register method is assigned another anonymous function, which takes in the Phaser PluginManager as a parameter. When this method is called, we call the register method of the PluginManager, and we pass it three parameters:
- the name of our plugin (you need to make sure it doesn’t conflict with any of the other registered plugins).
- a reference to our plugin object
- a local mapping of where our plugin will be available in the scene (this will make the plugin available under this.sys.dialogModal)
- Lastly, we created the boot, shutdown, and destroy methods.
- In the boot method, we created an eventEmitter variable that will listen to the different scene events (start, update, pause, destroy, etc.). We then added code that will listen for the shutdown and destroy events, and then call the appropriate method. You can see the rest of the events you can listen to here: Phaser3 Plugin Template.
- The shutdown method is for doing any cleanup you need to do in your plugin. For now, we will leave this method empty.
- In the destroy method, we call the shutdown method so we can perform our cleanup.
Now that we have the basic code for our plugin, let’s test it in our game. To use a plugin, you first need to load the plugin in the preload function of your Phaser game. In game.js, add the following code to the preload function:
this.load.plugin('DialogModalPlugin', './dialog_plugin.js');After the plugin is loaded, you then need to install the plugin in that Phaser scene. To do this, add the following code to the create function:
this.sys.install('DialogModalPlugin');
console.log(this.sys.dialogModal);
If you refresh your game and look in the developer console, you should see some information about your new plugin.

Creating the Dialog Window
With the base plugin created, we will now begin working on the dialog window. To create the dialog window, we are going to use Phaser’s GameObject.Graphics. First, we will create a new init method in our plugin, and in this method, we will set up the properties that can be set in our plugin and then have it create the dialog window. Back in dialog_plugin.js, add the following code below the destroy method:
// Initialize the dialog modal
init: function (opts) {
  // Check to see if any optional parameters were passed
  if (!opts) opts = {};
  // set properties from opts object or use defaults
  this.borderThickness = opts.borderThickness || 3;
  this.borderColor = opts.borderColor || 0x907748;
  this.borderAlpha = opts.borderAlpha || 1;
  this.windowAlpha = opts.windowAlpha || 0.8;
  this.windowColor = opts.windowColor || 0x303030;
  this.windowHeight = opts.windowHeight || 150;
  this.padding = opts.padding || 32;
  this.closeBtnColor = opts.closeBtnColor || 'darkgoldenrod';
  this.dialogSpeed = opts.dialogSpeed || 3;

  // used for animating the text
  this.eventCounter = 0;
  // if the dialog window is shown
  this.visible = true;
  // the current text in the window
  this.text;
  // the text that will be displayed in the window
  this.dialog;
  this.graphics;
  this.closeBtn;

  // Create the dialog window
  this._createWindow();
}
In the code above we:
- Checked to see if any of the optional parameters were passed to the init function. If nothing was passed, then we set the opts variable to be an empty object.
- We set up all of the properties that can be set from the opts variable, and we setup defaults in case they were not passed.
- The border properties are used for the border around our modal window.
- The window properties are used for the inner window that is inside the border.
- The padding property is used for the padding between the scene border and the window border.
- The dialog speed and event counter properties are used to control how fast the text will animate on to the screen.
- Lastly, we call the _createWindow method (we will cover this in a bit).
In order to dynamically place our dialog window, we will use the windowHeight and padding properties that are set in init method, and we will use the scene’s width and height. To access the scene’s width and height, we can use the scene.sys.game.config object.
Now, add the following code below the init method we just added:
// Gets the width of the game (based on the scene)
_getGameWidth: function () {
  return this.scene.sys.game.config.width;
},

// Gets the height of the game (based on the scene)
_getGameHeight: function () {
  return this.scene.sys.game.config.height;
},

// Calculates where to place the dialog window based on the game size
_calculateWindowDimensions: function (width, height) {
  var x = this.padding;
  var y = height - this.windowHeight - this.padding;
  var rectWidth = width - (this.padding * 2);
  var rectHeight = this.windowHeight;
  return {
    x,
    y,
    rectWidth,
    rectHeight
  };
}
Let’s review the code we just added:
- The _getGameWidth and _getGameHeight are used to the get the Scene’s width and height.
- The _calculateWindowDimensions method is used to calculate the placement of the window, as well as the width and height of the window.
- For the x position, we use the value of the padding property that was set in the init method.
- For the y position, we use the Scene’s height and we subtract the values of the windowHeight and padding properties that were set in the init method.
- For the width of the window, we take the Scene’s width and we subtract the padding from both sides of the window.
With the logic for the window in place, we will add the logic for the window. The window will be made up of 2 different rectangles, one for the border around the window, and one for the inner part of the window.


Add the following code below the _calculateWindowDimensions method we just added:
// Creates the inner dialog window (where the text is displayed)
_createInnerWindow: function (x, y, rectWidth, rectHeight) {
  this.graphics.fillStyle(this.windowColor, this.windowAlpha);
  this.graphics.fillRect(x + 1, y + 1, rectWidth - 1, rectHeight - 1);
},

// Creates the border rectangle of the dialog window
_createOuterWindow: function (x, y, rectWidth, rectHeight) {
  this.graphics.lineStyle(this.borderThickness, this.borderColor, this.borderAlpha);
  this.graphics.strokeRect(x, y, rectWidth, rectHeight);
},
In the code above we:
- Created the inner window by using the fillStyle and fillRect methods. The fillStyle method allows you to specify the color and alpha of the graphic that will be created, while the fillRect method is used to create the actual rectangle by passing the x, y, width, and height properties.
- Created the outer window by using the strokeRect and lineStyle methods. The strokeRect method is used to draw a rectangle without providing a fill. Lastly, the lineStyle method is used to specify the lineWidth, color, and alpha.
Now that all of the logic for creating the window is in place, we need to create the _createWindow method, which will be used to tie everything together. Add the following code below the _calculateWindowDimensions method we just created:
// Creates the dialog window
_createWindow: function () {
  var gameHeight = this._getGameHeight();
  var gameWidth = this._getGameWidth();
  var dimensions = this._calculateWindowDimensions(gameWidth, gameHeight);
  this.graphics = this.scene.add.graphics();

  this._createOuterWindow(dimensions.x, dimensions.y, dimensions.rectWidth, dimensions.rectHeight);
  this._createInnerWindow(dimensions.x, dimensions.y, dimensions.rectWidth, dimensions.rectHeight);
},
Let’s review the code we just added:
- First, we got the game’s width and height by calling the _getGameHeight and _getGameWidth methods we created.
- Next, we calculated the dimensions of our dialog window by calling the _calculateWindowDimensions method, and we passed the game width and height.
- Finally, we created our inner and outer windows by calling the _createOuterWindow and _createInnerWindow methods, and we passed the dimensions we received from the _calculateWindowDimensions method.
To create the dialog window in our game, we need to call the init method of our plugin. In game.js, add the following code to the create function:
this.sys.dialogModal.init();
If you refresh your game, you should see the new dialog window appear with the default values we defined.

Conclusion
With basic logic for creating the dialog window in place, this brings part one of this tutorial to an end. In Part Two we will wrap up our plugin by:
- Adding a close button to the dialog window.
- Adding logic to show/hide the window.
- Adding logic to show dialog text.
- Adding logic to animate the dialog text
I hoped you enjoyed part one of this tutorial and found it helpful. If you have any questions, or suggestions on what we should cover next, let us know in the comments below.
