Table of contents
Introduction
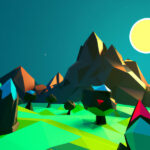
WebVR is a JavaScript API that allows VR experiences to run in a web browser on VR headsets, mobile phones and tablets, and regular computers. This tutorial will introduce you to WebVR development by creating a first-person shooter game using the A-Frame framework. To follow along, basic knowledge of HTML and JavaScript are required.
Did you come across any errors in this tutorial? Please let us know by completing this form and we’ll look into it! FINAL DAYS: Unlock coding courses in Unity, Godot, Unreal, Python and more.
Downloads
The files for this tutorial are available for download here.
What is A-Frame?
A-Frame is a front-end web framework for developing WebVR. Technically, A-Frame is an abstraction of three.js, a JavaScript library that uses the WebGL API to render 3D graphics in the browser.
An A-Frame app is simply an HTML web page that includes the A-Frame library and contains entities embedded within <a-scene></a-scene> tags. This is the full code for the “Hello, World” of A-Frame:
<!DOCTYPE html>
<html>
  <head>
    <title>Hello, WebVR! - A-Frame</title>
    <meta name="description" content="Hello, WebVR! - A-Frame">
    <script src="https://aframe.io/releases/0.7.0/aframe.min.js"></script>
  </head>
  <body>
    <a-scene>
      <a-box position="-1 0.5 -3" rotation="0 45 0" color="#4CC3D9" shadow></a-box>
      <a-sphere position="0 1.25 -5" radius="1.25" color="#EF2D5E" shadow></a-sphere>
      <a-cylinder position="1 0.75 -3" radius="0.5" height="1.5" color="#FFC65D" shadow></a-cylinder>
      <a-plane position="0 0 -4" rotation="-90 0 0" width="4" height="4" color="#7BC8A4" shadow></a-plane>
      <a-sky color="#ECECEC"></a-sky>
    </a-scene>
  </body>
</html>
A-Frame uses entity-component architecture. Every object in A-Frame is an entity represented as an HTML tag. Components that look like HTML attributes add behaviors to entities. Some components, such as geometry, material, and position, are built into A-Frame. You can create your own custom components in JavaScript or use existing components from the A-Frame registry.
Common entities are abstracted into primitives, which are comparable to prefabs in Unity. A-box, a-sphere, a-cylinder, and a-plane are all primitives.
Setting Up a Project
Developing and testing in A-Frame is easier if we run a local web server, instead of using the File->Open menu in a browser to open a page. There are multiple ways to run a local server, but we will use Node and npm, the Node package manager. Follow the instructions at https://nodejs.org/en/download/ to download and install Node and npm for your system.
To set up the project, create a directory named a-fps and create a file named a-fps/package.json with the following contents:
{
  "name": "a-fps",
  "description": "A-Frame First-Person Shooter",
  "version": "0.1.0",
  "license": "MIT",
  "scripts": {
    "start": "budo --live --verbose --port 3000 --open"
  },
  "devDependencies": {
    "budo": "^7.0.0"
  },
  "keywords": [
    "aframe",
    "webvr",
    "vr"
  ]
}
Now run
npm install
in your terminal in the a-fps directory. This will install the budo package listed as a dependency in package.json . Budo is a development web server. When you run
npm start
in your terminal, budo will start a web server on port 3000. Test your web pages in the directory where budo is running by going to http://localhost:3000 in your browser.


All depencies are installed in the node_modules directory.
Creating a Scene
In A-Frame, scenes are enclosed in <a-scene></a-scene> tags. Every object in the scene is an entity identified by <a-entity></a-entity> tags, with components added as attributes of the <a-entity> tag.
Let’s start setting up our scene. Create a new file, index.html , in your project’s directory, and open it in a code editor or IDE. I’m using Visual Studio Code — other options include Atom, Sublime Text, or classic vim or Emacs.
Create an HTML skeleton in index.html :
<!DOCTYPE html>
<html>
<head>
<script src="https://aframe.io/releases/0.7.0/aframe.min.js"></script>
</head>
<body>
</body>
</html>
The script tag makes A-Frame version 0.7.0 accessible.
Within the body section, create an A-Frame scene:
<body>
  <a-scene>
    <a-assets>
      <img id="skyTexture" src="https://cdn.aframe.io/a-painter/images/sky.jpg" crossorigin="anonymous">
    </a-assets>
    <a-sky src="#skyTexture" theta-length="90" radius="30"></a-sky>
    <a-camera>
      <a-entity cursor="downEvents: triggerdown; upEvents: triggerUp"
                geometry="primitive: ring; radiusInner: 0.03; radiusOuter: 0.05"
                material="color: blue; shader: flat"
                position="0 0 -1">
      </a-entity>
    </a-camera>
    <a-entity id="ground"
              geometry="primitive: cylinder; radius: 30; height: 0.1"
              position="0 0 0"
              material="shader: flat; color: #424949">
    </a-entity>
  </a-scene>
</body>
The assets section pre-loads images and other assets, such as imported models or audio files, to improve performance. By default, A-Frame will wait up to 3 seconds for assets to load before starting rendering. You can change this value by setting a timeout in milliseconds as an attribute of <a-assets> .
We are loading a texture from one of A-Frame’s demo apps. Since this image is not our own domain, we need to set the crossorigin attribute to “anonymous” to avoid generating a warning.
<a-sky> is a primitive that creates a background. On a lower level of abstraction, <a-sky> is actually a sphere. By setting the source to #skyTexture , we are using the image loaded with ID skyTexture as the background image. The “radius” attribute sets the radius of the sphere. “theta-length” is the ending angle of the arc that we include in the scene.
<a-camera> is a primitive that represents the camera. Normally, we don’t need to specify the camera, but we want to attach a reticle to the camera. A gaze-controlled reticle is created by making an entity with the cursor component. The values of the geometry parameter make the cursor a blue ring.
The entity we create next is a cylinder, which we specify in the geometry component. This cylinder serves as the ground. Since we don’t care about the thickness of the ground, we can make it very thin. The radius is set to the same radius as <a-sky> . As a result, the ground extends to the horizon. The material component sets the color and lighting of the cylinder.
To preview the scene, run npm start in your terminal. A local web server will start running on port 3000, and a browser window might open automatically that shows the scene. If it doesn’t open automatically, navigate to the URL http://localhost:3000 in your browser. You can move the reticle and the view by dragging the mouse. Clicking the goggles icon loads the scene in a full-screen view. If you are viewing the page in a browser on a VR headset, clicking the goggles icon switches to 360 degree VR mode.
To see the scene in VR, load the scene in your headset’s or mobile phone’s browser, replacing the “localhost” with the IP address of your development machine. If your computer has a firewall blocking access, and you don’t want to open a port, or if your VR headset is not on the same LAN, you can download and install ngrok to create a temporary URL.

Creating Enemies
For the enemies in our game, we’ll be using a 3D model created in Blender. The preferred file format for A-Frame is glTF, which is becoming the standard for 3D models on the web. Blender does not support glTF natively, but the glTF-Blender-Exporter add-on lets you export your models as glTF. See the instructions in this link to install the add-on.

Exporting glTF from Blender creates both a .gltf file and a .bin file. Within your project, create the folder assets/models and copy both files to this directory. The included source code for this tutorial includes a model, Ghost.gltf and Ghost.bin , in the assets/models folder, that you can use.
Models are pre-loaded using the <a-asset-item> tag. Within the a-assets section, add:
<a-asset-item id="ghost" src="assets/Ghost.gltf"></a-asset-item>
Outside the a-assets section, create entities that load the ghost model:
<a-entity gltf-model="#ghost" position="0 1.6 -10"></a-entity>
<a-entity gltf-model="#ghost" position="3 1.6 -10"></a-entity>
<a-entity gltf-model="#ghost" position="5 1.6 -10"></a-entity>
The gltf-model component assigns the pre-loaded ghost asset. The position component sets the x, y, and z coordinates where the entity is located.
We can make the ghosts respond to clicks by creating a custom component. Create a folder, assets/components , and a new file, assets/components/cursor-listener.js , with the following code:
AFRAME.registerComponent('cursor-listener', {
    init: function () {
        var el = this.el;
        el.addEventListener('click', function (evt) {
            el.parentNode.removeChild(el);
        });
    }
});
Create another file, assets/components/raycaster-autorefresh.js , with the following code:
AFRAME.registerComponent('raycaster-autorefresh', {
    init: function () {
        var el = this.el;
        this.el.addEventListener('model-loaded', function () {
            var cursorEl = el.querySelector('[raycaster]');
            cursorEl.components.raycaster.refreshObjects();
        });
    }
});
Custom components have to be registered by calling AFRAME.registerComponent() . This function accepts the component’s name and the component’s definition as a JavaScript object. The definition contains a schema, defining data that can be passed to the component, and lifecycle handlers, which are functions called at various points in the component’s lifecycle. The cursor-listener and raycaster-autorefresh components don’t contain any data. init is the handler called when the component is first added to the document object model (DOM).
Our first component, cursor-listener, listens for mouse clicks on the entity that has added the component. When a click is detected, the entity is removed. this.el is the entity in question. For convenience, we store it in the variable el and call el.addEventListener() to attach a listener. When the click is detected, the entity is removed from its parent node, effectively removing it from the DOM.
The second component, raycaster-autorefresh, is necessary to refresh the ray caster after a model loads. Its use is documented at https://stackoverflow.com/questions/47032056/gltf-cursor-listener-click-event-in-a-frame.
To be able to use the new components, we must include them in index.html using script tags in the head section:
<script src="assets/components/cursor-listener.js"></script>
<script src="assets/components/raycaster-autorefresh.js"></script>
Add the raycaster-autorefresh component to the scene by changing the <a-scene> tag:
<a-scene raycaster-autorefresh>
Add the cursor-listener component to each ghost:
<a-entity gltf-model="#ghost" cursor-listener position="0 1.6 -10"></a-entity>
<a-entity gltf-model="#ghost" cursor-listener position="3 1.6 -10"></a-entity>
<a-entity gltf-model="#ghost" cursor-listener position="5 1.6 -10"></a-entity>
When a ghost is clicked, it will now disappear.


Automatic Enemy Creation
Instead of creating enemy entities by hand, we can automate the process by implementing a new component to create enemies at the start of the game. Create a new file, assets/components/game-manager.js , and include it in index.html using a script tag:
<script src="assets/components/game-manager.js"></script>

In game-manager.js , we’re going to create a new component as well as helper functions that will generate entities. Let’s start with the helpers. We could embed all these functions in the component itself, but the code will be easier to read if we keep them separate.
var GameManagerUtils = {
    generateRandomNumber: function (min, max) {
        return Math.floor(Math.random() * max + min);
    },
    chooseRandomPosition: function () {
       var xPos = GameManagerUtils.generateRandomNumber(-10, 10);
        var yPos = 1.6;
        var zPos = GameManagerUtils.generateRandomNumber(-15, -30);
        return { 'x': xPos, 'y': yPos, 'z': zPos};
    },
    // Create a new enemy entity.
    createEnemy: function () {
        console.log('createEnemy');
        var newEnemy = document.createElement('a-entity');
        newEnemy.setAttribute('gltf-model', '#ghost');
        newEnemy.setAttribute('cursor-listener', '');
        var position = GameManagerUtils.chooseRandomPosition();
        var positionStr = position.x.toString() + ' ' + position.y.toString() + ' ' + position.z.toString();
        newEnemy.setAttribute('position', position);
        return newEnemy;
    }
};
Previously, we had written out a-entity elements with the gltf-model attribute. Now we are using the GameManagerUtils.createEnemy() function to generate new entities. createEnemy() calls the built-in JavaScript function document.createElement() to create a new entity with randomly generated x and z coordinates. setAttribute() is called to add the gltf-model and cursor-listener components.
Now let’s create the game-manager component. Recall that we have to call AFRAME.registerComponent() and define lifecycle handlers, like init . This is the code:
AFRAME.registerComponent('game-manager', {
    schema: {
        numberEnemies: { type: 'int' }
    },
    init: function () {
        var numEnemies = this.data['numberEnemies'];
        var sceneEl = document.querySelector('a-scene');
        var newEnemies = [];
        for (var i = 0; i < numEnemies; i++) {
            newEnemies.push(GameManagerUtils.createEnemy());
        }
        sceneEl.addEventListener('loaded', function () {
            newEnemies.forEach(function (enemy) {
                sceneEl.appendChild(enemy);
            });
        });
    }
});
Unlike the cursor-listener component, game-manager accepts an integer parameter, numberEnemies . The schema object defines parameters and their data types. When the game-manager component is added to an entity, numberEnemies is passed in as an inline CSS-style parameter:
<a-entity game-manager=“numberEnemies: 10”></a-entity>
Data from the schema can be accessed in the this.data object.
The init handler is called when the component initializes. init calls GameManagerUtils.createEnemy() to generate numberEnemies enemy entities. It also creates an event listener that detects when the scene has loaded. Once the ‘loaded’ event is emitted, all the enemies are added to the scene. The scene is obtained by querying for the a-scene tag using the document object model’s querySelector() function. You can read more about the DOM at https://developer.mozilla.org/en-US/docs/Web/API/Document.
To use this component, include game-manager.js in index.html:
<script src="assets/components/game-manager.js"></script>
Add the game-manager component to the a-scene entity:
<a-scene game-manager="numberEnemies: 10" raycaster-autorefresh>
to generate ten enemies, and comment out the gltf-model entities we created manually in the last section.
Animations
Finally, let’s make the enemies move. In A-Frame, animations are implemented by using the a-animation primitive or by attaching the animation component. According to the animation component documentation at https://github.com/ngokevin/kframe/tree/master/components/animation/, a-animation will eventually be deprecated in favor of the animation component. For this reason, we’ll be using the component.
In index.html , include the animation component in the head section:
<script src="https://unpkg.com/aframe-animation-component@4.0.0-beta8/dist/aframe-animation-component.min.js"></script>
Add the following lines to GameManagerUtils.createEnemy() in game-manager.js before newEnemy is returned:
var destinationStr = '0 ' + position.y.toString() + ' 0';
newEnemy.setAttribute('animation', { 'property': 'position',
                                     'to': destinationStr,
                                     'autoplay': true,
                                     dur: 10000});
This animates the enemy’s position, moving it to the coordinates represented by destinationStr . Since the camera is at (0, 0, 0), the enemy will move towards the origin but will not change its y-position. The autoplay parameter controls whether the animation starts automatically. The dur , or duration, parameter, is the length of each animation cycle in milliseconds. Adjust it using trial and error to get the speed you want.

Conclusion
Now that we have become familiar with the basics of A-Frame and created a simple WebVR shooter, we’re ready to look at more advanced features, like working with VR controllers, displaying menus, and adding different environments. We’ll explore those topics next time as we delve more into A-Frame.