You can access the full course here: BUILD AN RTS GAME WITH UNREAL ENGINE
Table of contents
Nav Mesh
In this lesson, we will set up the Navigation Mesh for our project.
Creating The Obstacles
The Nav Mesh system allows Actors to navigate in the level. In this game, we won’t control the units’ movement directly. We will point to a place where units should go and then they will use the Nav Mesh to navigate the level. The Nav Mesh will also help our units go around obstacles instead of going through them.
Speaking of obstacles, let’s add a couple of cubes to the level. To add a cube to the level, select the Add > Shapes > Cube option from the main toolbar.
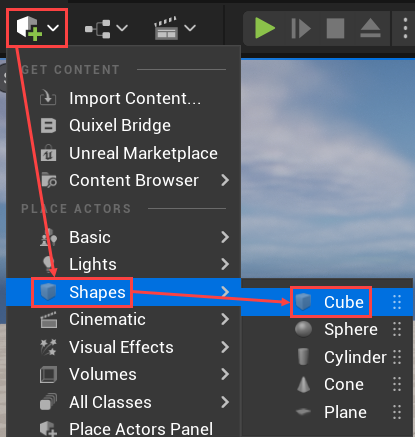
A new Cube Actor will appear in the level.
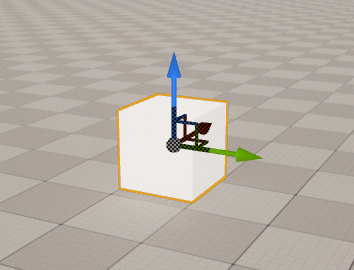
Let’s duplicate this cube now:
- Make sure the Cube Actor is selected in the Outliner panel. You can select an Actor by clicking on it either in the Outliner or in the Level Viewport
- Press the Ctrl+D hotkey to create a copy of this Cube Actor. Create as many copies as you want
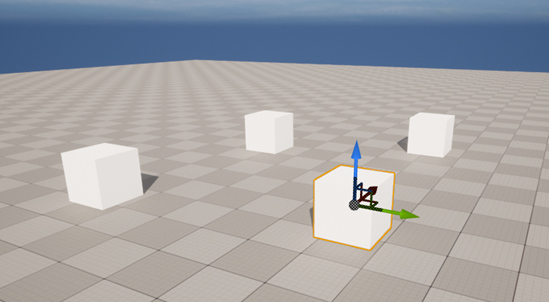
- Drag those Cubes to different positions on the level
Now we have the Cube obstacles in our level.
Setting Up The Navigation Mesh
Next, let’s go and select the Add > Volumes > NavMeshBoundsVolume option from the main toolbar to create a new Nav Mesh Actor.
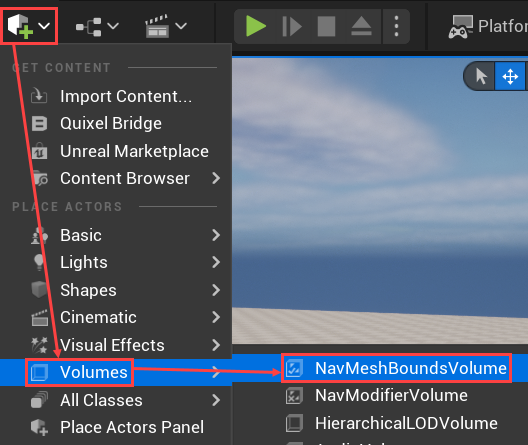
The NavMeshBoundsVolume Actor looks like a cube without visuals – only edges are visible. The NavMeshBoundsVolume Actor defines a volume, for which the Navigation Mesh will be generated.
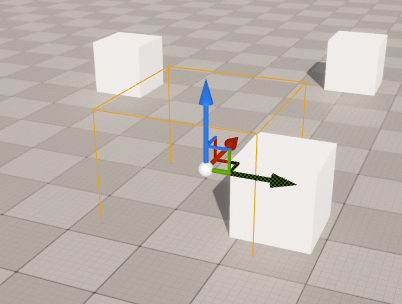
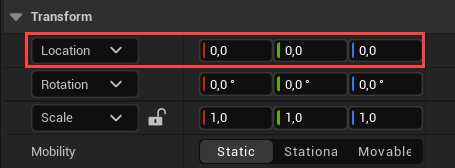
Now we need to configure the NavMeshBoundsVolume. First, let’s go to the Details panel and set the Transform > Location property to (0, 0, 0), so our Nav Mesh would be positioned in the center of the level.
Then, we will make this Nav Mesh big enough to fit our level. Let’s go to the Brush Settings dropdown in the Details panel and set the (X, Y, Z) properties to (8000, 8000, 600).
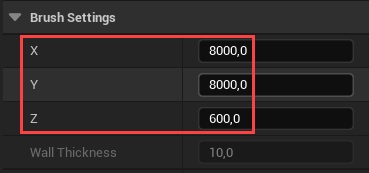
This way, the Nav Mesh should be big enough to fit the Ground Actor inside.
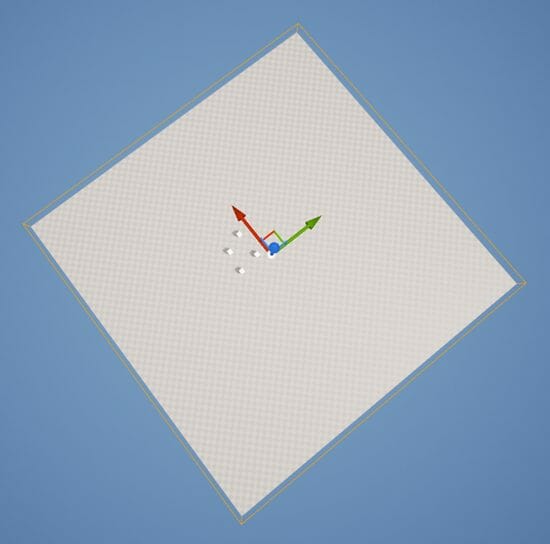
But how do we check that the Nav Mesh works? You should just press the P key to enable the navigation preview in the Level View. The walkable part of the level would be highlighted in green. The ground around cubes won’t be highlighted in green, which means this ground is un-walkable.
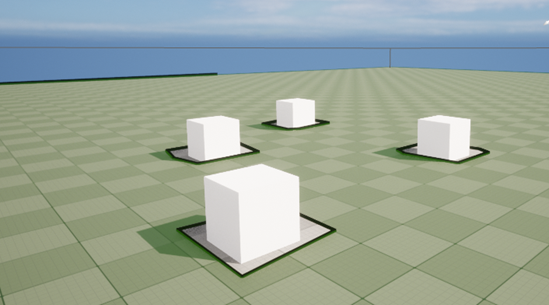
In this lesson, we added some obstacles to our level and added the Nav Mesh Actor to help our units to navigate around those obstacles. In the next lesson, we will start working on the units which can walk in our level.
Did you come across any errors in this tutorial? Please let us know by completing this form and we’ll look into it! FINAL DAYS: Unlock coding courses in Unity, Godot, Unreal, Python and more.
Transcript
Welcome back everyone. In this lesson, we are gonna be setting up our nav mesh and our AI navigation for our project.
Because, since we are using units that we aren’t directly controlling with an input, so we’re not really telling them to move left, right, or whatever. Instead, we are telling our units to move to a specific location.
And if there is an obstacle in the way, such as a box or a big rock, we want our units to move around it, rather than trying to go directly through the center. So how do we do that?
Well, first of all, let’s go ahead and just add in some obstacles. So I’m just gonna go up to here, where we can add in some objects.
And I’m gonna add in, let’s just say a cube, okay? You can bring that down like so, maybe increase it in scale a bit. And I am just going to move a cube here.
Duplicate with Ctrl D and just place a couple of them down here, just so we have an understanding of what this nav mesh does.
Okay, so we have our cubes placed down. Now, let’s just say we have a unit that is behind this one right here, and we want it to move on the other side.
Now, typically when you’d move a blueprint, or move a character, you just basically tell it to move in the direction that you want it to.
Yet, we can’t do that, because there is an obstacle in the way right here. And we have to create what’s known as a nav mesh, which is basically an asset that determines all of the walkable space in our level.
So how do we do that? Well, let’s go up to this little dropdown here, where we can create objects. And actually instead, we’re not gonna go here.
We are gonna open up the Place Actors menu, or the Place Actors panel. And if you don’t have that, you can just go window, Place Actors right here.
Now, in Place Actors, what we want to do is, we want to look for nav. And you should see here that we have ourself a Nav Mesh Bounds Volume. And we want to drag that into our project here. Okay?
Now you’ll see that this is sort of like a cube, but without the visual. And this is because, the Nav Mesh Bounds Volume basically defines an area of which it will generate a nav mesh for.
So what we need to do is, go to our details panel. I’m gonna set the location to be zero on the X, zero on the Y, zero on the Z. So you can see it’s pretty much in the center of our world right here.
And we need to basically increase the size of this selected box here. So to do that, we can scroll down in the details panel, and we want to go down to the brush settings, okay?
And you see here, we have the X, Y, and Z values. Basically, we just want to… When I increase these, we can basically change how big this is going to be, okay?
So just make sure that the bounds of this box here fit our level, because only the objects within this selected boundary are going to be calculated for a nav mesh.
Now, we’ve got that here, but how do we know it’s working? Well, what you can do is, press the P key on your keyboard. And you should see now that we have the walkable ground selected, okay?
So you can see here, around our cubes, we have this sort of like a gap, like it’s being cut out. And that basically means that our cubes are defined as non walkable.
If something wants to walk through a cube, it is gonna calculate a path going around it, okay?
So basically, whenever we want to move from one spot to another, it is only going to be moving on this sort of selected green plain here.
So great! That is how we can set up a nav mesh bounds volume. Now in the next lesson, we are gonna be looking at creating a unit which can actually utilize this, and move from one spot to another using AI.
So, thanks for watching. And I’ll see you all then in the next lesson.
Interested in continuing? Check out our all-access plan which includes 250+ courses, guided curriculums, new courses monthly, access to expert course mentors, and more!
