Table of contents
Part 1: What are scriptable objects, why would you use them, a UI Setup, and the Dialogue Controller
During this three part tutorial series, we will be creating a small project consisting mainly of UI (User Interface) elements. The user will be taking customer orders and making “digital pizzas” according to what the customer has ordered. We will use scriptable objects to hold the data of the pizza ingredients, and the dialogue data for the employee to customer speech. You will learn what scriptable objects are and why you should use them to increase your productivity when including this system in your projects.
To ensure that you will be able to effectively follow along with this tutorial, you should be comfortable with:
- C# Programming
- Unity Editor
- Visual Studio 2017
- Adding components to game objects
- Serialization
- Creating UI elements such as text objects, buttons, and panels.
Source Code Files
You can download the tutorial source code files here. All the project files are located in the main folder. The asset folder contains additional intermediate files that were used during the process of creating the game sprites.
Did you come across any errors in this tutorial? Please let us know by completing this form and we’ll look into it! FINAL DAYS: Unlock coding courses in Unity, Godot, Unreal, Python and more.
What are Scriptable Objects?
Scriptable objects are essentially data holders. They are great for holding large amounts of data for games that require inventories, card games and, dialogue systems. Scriptable objects are not Monobehaviours and need to inherit from ScriptableObject in your scripts. They also are not attached to GameObjects and are saved as .asset files in your projects. Scriptable objects can be dragged and dropped onto inspector reference components in projects. They can be created by adding the [CreateAssetMenu] attribute inside a script.
For even more information regarding Unity’s Scriptable Objects check out the fantastic Unite 2017 talk given by Ryan Hipple! Here is the link: https://youtu.be/raQ3iHhE_Kk
Why use Scriptable Objects?
Scriptable objects require little memory. The data persists through run time. You can edit Scriptable Objects during play mode. This makes play testing easy, because values such as enemy health, damage values, etc. can be changed while playing and those values will remain the same after exiting play mode. With that being said this can also not be so good if someone making the changes during play mode doesn’t revert the changes if they are unwanted.
User Interface Setup
Before proceeding any further with this tutorial go ahead and make sure you are using Unity version 2018.2.18f1. You may use an older version of Unity, but you may notice differences between the version used in this tutorial and your version, and it may make it difficult to follow along effectively. Go ahead and create a new 3d project, you can name the project whatever you like. Generally Unity will default to windows build settings on a new project, but for some reason if it didn’t make sure you are set to a windows build.
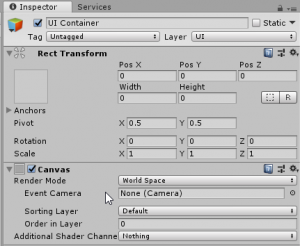
Create a UI>Panel. Rename the Canvas game object to “UI Container.” Rename the Panel you just created to “MainPanel.” Select the UI Container in the Hierarchy and on the Canvas element in the Inspector change the Render Mode to World Space, and drag the Main Camera into the Event Camera spot in the Inspector window.
Essentially, we are going to create an effect as if the user is a Pizzaria employee and we are going to make it seem like this is a First Person view aspect where the user is turning and looking at the different computer screens in the actual Pizzaria workplace. This project could also be expanded on afterwards and turned into a Virtual reality real world application where maybe the workplace could train new employees using this application.
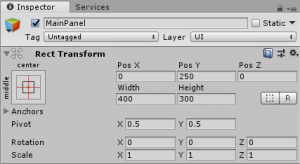
Select the MainPanel object and adjust the Pos Y value to 250, Width value to 400, and the Height value to 300 on the Rect Transform component in the inspector.
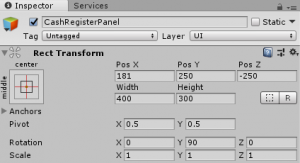
Duplicate the MainPanel object, and rename the second one to “CashRegisterPanel.” On the Rect Transform component adjust the Pos X value to 181, Pos Y to 250, and the Pos Z to -250.
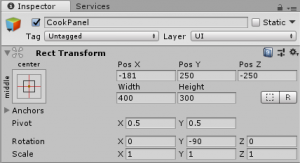
Duplicate the “CashRegisterPanel” object and on the Rect Transform component adjust the Pos X value to -181, Pos Y to 250, and Pos Z to -250. Rename it to “CookPanel.”
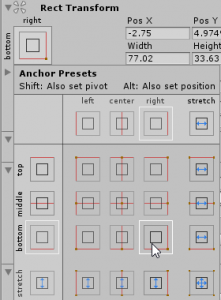
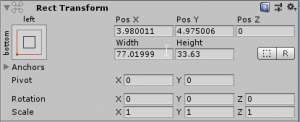
Add a UI Button object to the MainPanel and rename it to “GoToCashRegisterBtn.” Now adjust the Anchor Preset by holding Shift and Selecting the Bottom Right, let go of Shift and select Bottom Right again. This is going to set the Anchor point so that are button doesn’t move around if the resolutions are changed.
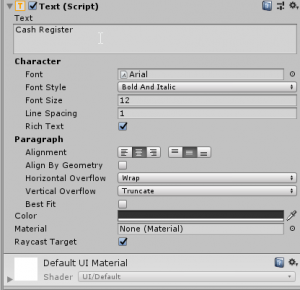
Make sure the Image(Script) component in the Inspector is set to UI Sprite. Rename the Text component on this button to “CashRegisterBtnTxt.” In the text field type “Cash Register” Leave the font at Arial, change the Font Style to Bold and Italic. Change the Font Size to 12. Adjust the alignment to center and middle. Horizontal Overflow should be set to Wrap and Vertical Overflow set to Truncate.
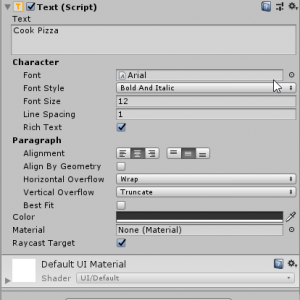
Duplicate the “GoToCashRegisterBtn” rename this object to “GoToCookBtn.” Rename the Text on the button object to “CookBtnTxt.” Change the text in the Inspector to “Cook Pizza.” Adjust the Anchor to Bottom Left; follow the same procedure as we did for the “GoToCashRegisterBtn.”
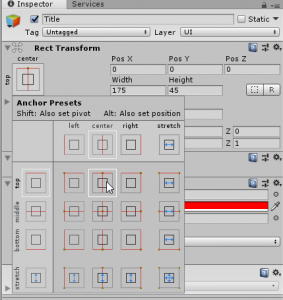
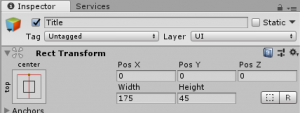
Select the “MainPanel” object in the Hierarchy and add a UI>Panel as a child object. Rename this Panel to “Title.” Adjust the Anchor setting to Top Center and follow the same procedure as we did with the previous anchoring of the two buttons we had already created.
Change the Color to Red on the Image(Script) component in the Inspector. Adjust the Width on the Rect Transform component to 175 and the Height to 45.
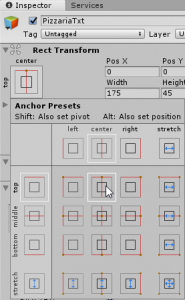
Add a UI> Text object to the MainPanel as a child of it. Rename it to “PizzariaTxt.” Adjust the anchor to Top Center.
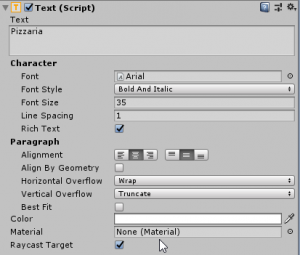
On the Rect Transform component adjust the Width Value to 175 and the Height value to 45. In the Text field put “Pizzaria.” Adjust the Font Style to Bold Italic. Adjust the Font Size to 35. Adjust the Alignment to Middle and Center. Horizontal Overflow needs to be set to Wrap and the Vertical Overflow to Truncate. Change the Color to white.
Select the CashRegisterPanel and create a UI>Panel, the new panel needs to be a child of the CashRegisterPanel. Rename this object to “MenuItemsContainer.” The MenuItemsContainer will house the different menu items that customers can order from the Pizzaria, we will add these items, which will be done via scriptable objects in Part Two of the tutorial.
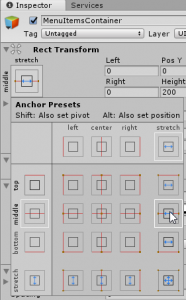
Set the Anchor Presets to Middle Stretch.
Add a Horizontal Layout Group component to the MenuItemsContainer object from the Inspector. Make sure the child Alignment is set to Middle Center. Uncheck all the boxes for Child Controls Size and Child Force Expand.
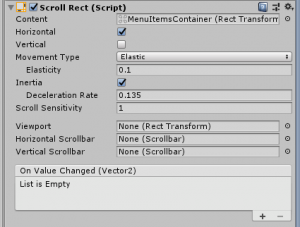
Add a Scroll Rect component to the MenuItemsContainer from the inspector. In the Content field make sure to drag and drop the MenuItemsContainer into that spot on the inspector. Make sure Horizontal is checked and Uncheck Vertical. Set the movement type to elastic. Elasticity should be set to 0.1, and feel free to play with this value to your preferences. I felt like leaving it at 0.1 was a good fit. Make sure Interia box is checked. Deceleration rate can be left at 0.135. Scroll Sensitivity can be left at 1. If you are not happy with this value, you may adjust this as well to your liking.
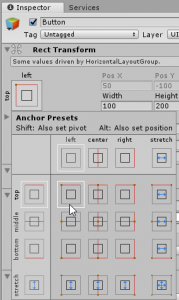
Select the MenuItemsContainer in the Hierarchy, and add a UI>Button; make sure the Button is indeed a child of the MenuItemsContainer object. Set the Anchor Preset to Top Left. Adjust the Width value in the Rect Transform to 100 and Height to 200.
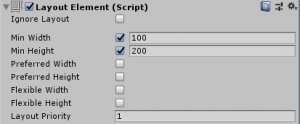
Add a Layout Element component to the Button from the inspector window. The Min Width box should be checked and the value set to 100. The Min Height box should be checked and this value set to 200.
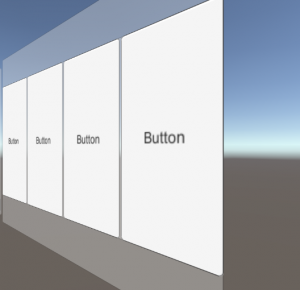
Duplicate this button 3 times, you should now have a total of 4 buttons that are children of the MenuItemsContainer object. The buttons should now look like this in the scene window:
If you hit play and the Main Camera is rotated you can test out the scroll rect by holding the left mouse button down on the buttons and sliding them back and forth. Remember, these buttons will make up the menu items the user is going to be pressing after they take a customer order from the main panel. The main panel will house the dialogue between the user and the customer. We will start adding the dialogue portion of the project in at part two of the tutorial.
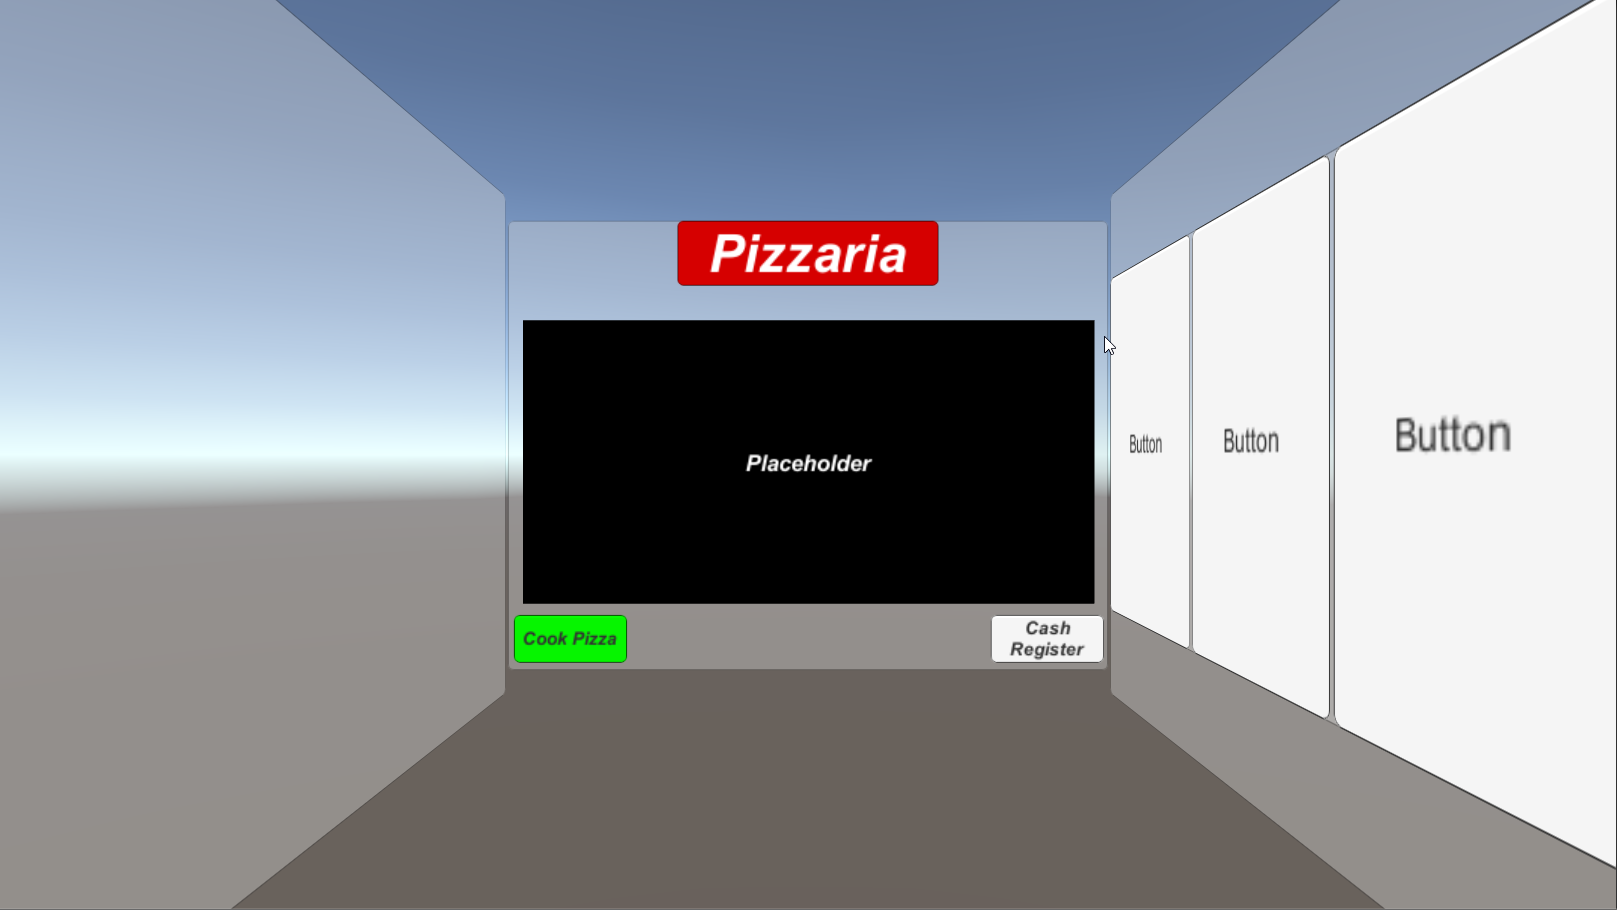
When hitting play mode the game window should now look like the screenshot below, my resolution was set to 1024X768, at the time of this screenshot: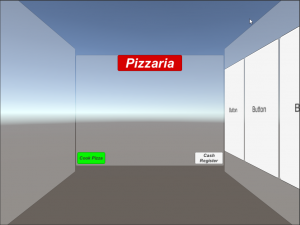
Dialogue Panel Setup-
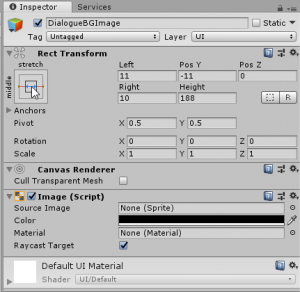
Select the MainPanel in the Hierarchy, and create a UI>Image. Make sure the new Image object is indeed a child to the MainPanel. Rename the image to DialogueBGImage. Set the Anchor Preset to Middle Stretch.
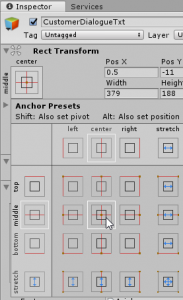
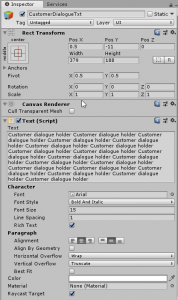
Select the MainPanel object in the Hierarchy and add a UI>Text object as a child. Rename this object to “CustomerDialogueTxt.” Adjust the Anchor Preset to Middle Center.
On the Rect Transform component in the inspector we need to adjust the following values: Pos X to 0.5, Pos Y to -11, and Pos Z to 0. Width to 379 and Height to 188. In the Text field type “Customer Dialogue Holder” and then copy paste it till it fills the whole black background area like so:
Change the Font Style to 15, and adjust the Alignment to Middle Center. Set the Horizontal Overflow to Wrap and Vertical Overflow to Truncate. Leave the Color at white.
The place holder dialogue text is simply there so we can see how the real dialogue will fit later on. We will be “feeding” the real dialogue text in with scriptable objects later on in the tutorial series.
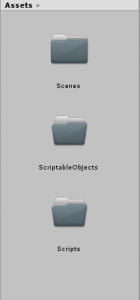
Now is a perfect time to go ahead and rename the SampleScene that is already in the Unity Project folder in the Scenes folder to “Main.” Save our scene and project. Create a new folder in the Assets directory and name it “ScriptableObjects.” We will be saving and storing all the scriptable objects we create for this tutorial in this folder. It’s important to keep projects organized so you can easily locate files, scripts, materials, sound effects, art, etc. without wasting valuable time. Create another folder and name it “Scripts.” You should now have the following folders created:
Setting up the Dialogue Controller
Create an Empty Game object and rename this object to “DialogueController.” Reset the transform component. With the DialogueController selected in the Hierarchy add a new script component to this object and name it to “PizzariaOperation.” Open the script up in Visual Studio.
Add the using UnityEngine.UI namespace to the top of this script.
using UnityEngine.UI;
Declare a Text variable and call it txtComponent. This variable is private, but we need to make it so it can be viewed in the Inspector, we can do this by adding the [SerializeField] attribute to this variable. We will be dragging and dropping other components onto this script in the Inspector later on in the tutorial.
 [SerializeField]
 Text txtComponent;
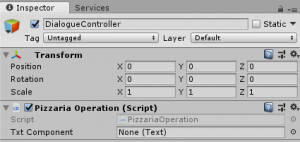
Save this script and go back to the Unity Editor, once the script compiles and with the DialogueController object selected in the scene check out the Inspector window, and where the PizzaOperation script is located in the Inspector window you should now see we have a field called Txt Component available.
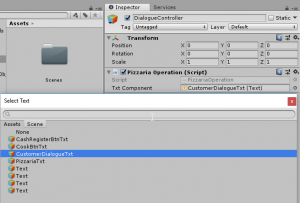
Click on the small circle selector button next to the None(Text) field in the Inspector. Select the CustomerDialogueTxt object from the list.
Open the PizzariaOperation script in Visual Studio and we need to add a line of code to the Start function. Save the script.
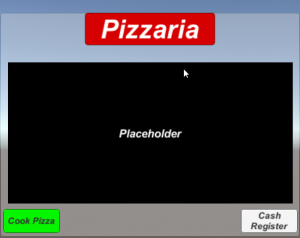
txtComponent.text = ("Placeholder");For right now the string “Placeholder” will display in the Dialogue panel when the Play button is hit in the Unity Editor.
Save the Scene and Project. This is a good place to conclude the first part of the tutorial. Part 2 of this tutorial series will finish up the DialogueController, and we will begin creating our scriptable objects that will hold the data for the employee to customer dialogue. See you next time!
