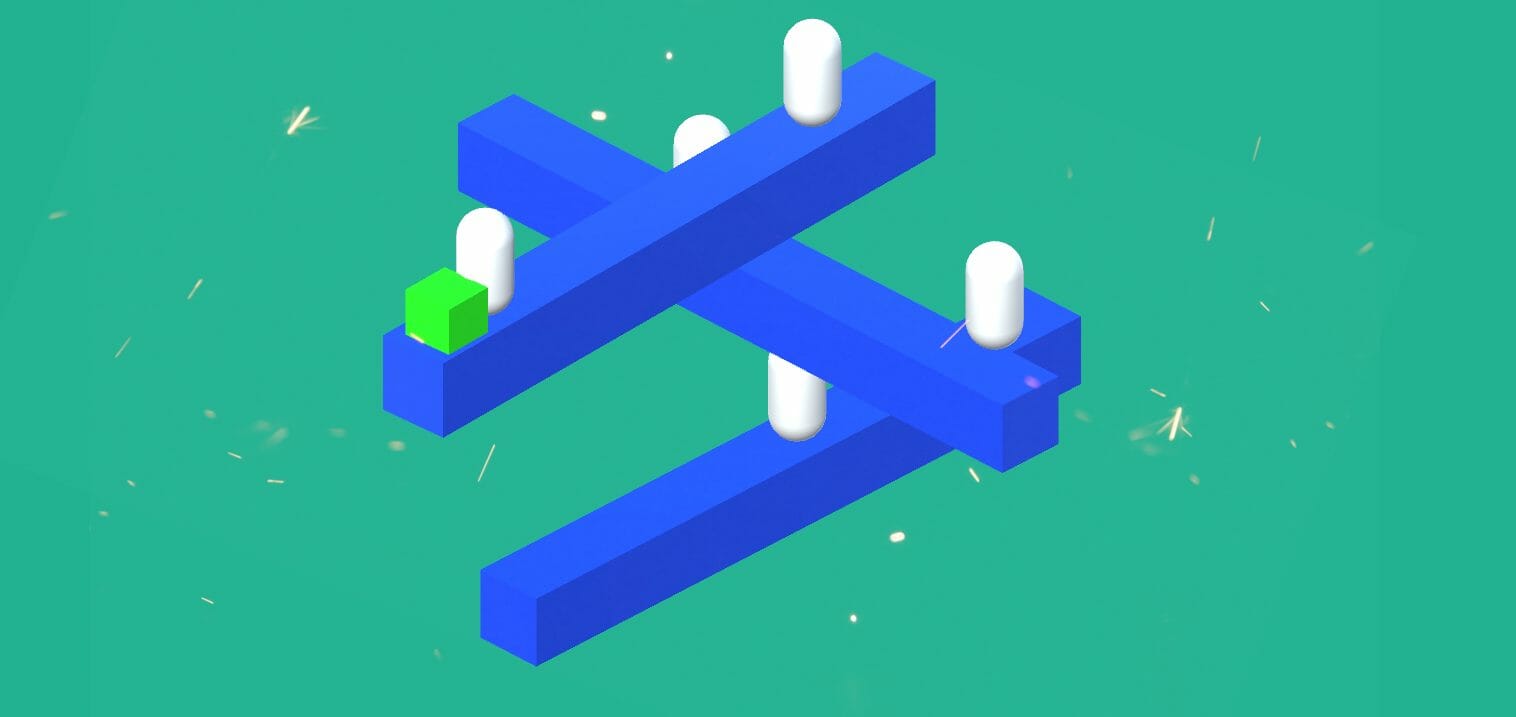
Table of contents
Introduction
It has been my persistent perception that video game design is at a unique junction of art and technicality. If one manages to mesh impeccable code with sublime artistry, the results can be quite novel – and the fluid nature of this junction creates limitless possibilities. One is never sure when one skill is employed or whether it is merely encapsulated and derived from the other. It is just this junction that makes game design such an intriguing world to explore. What new combination of art and technicality will we see today?
In this tutorial, we will be building on the previous project we made in Part 1 using the orthographic view and Unity’s Navigation Components. For Part 1, the artistic side of our game was ruined by our poor technical handling of interpolation. We were not able to seamlessly transition between occluding platforms and as such, the illusion fell apart. We will be fixing that in this tutorial.
Additionally, we will be making triggers and moving platforms. It simply couldn’t be called an “Illusion Puzzle Game” if we didn’t have this component. The end result is not just a functioning project, but a system in which we can use to build a complete game.
Project Files
You can download the complete project from this tutorial via this link: Source Code.
Did you come across any errors in this tutorial? Please let us know by completing this form and we’ll look into it!

FINAL DAYS: Unlock coding courses in Unity, Godot, Unreal, Python and more.
Fixing interpolation
Let’s start off this tutorial by first examining the way in which we are interpolating between platforms.
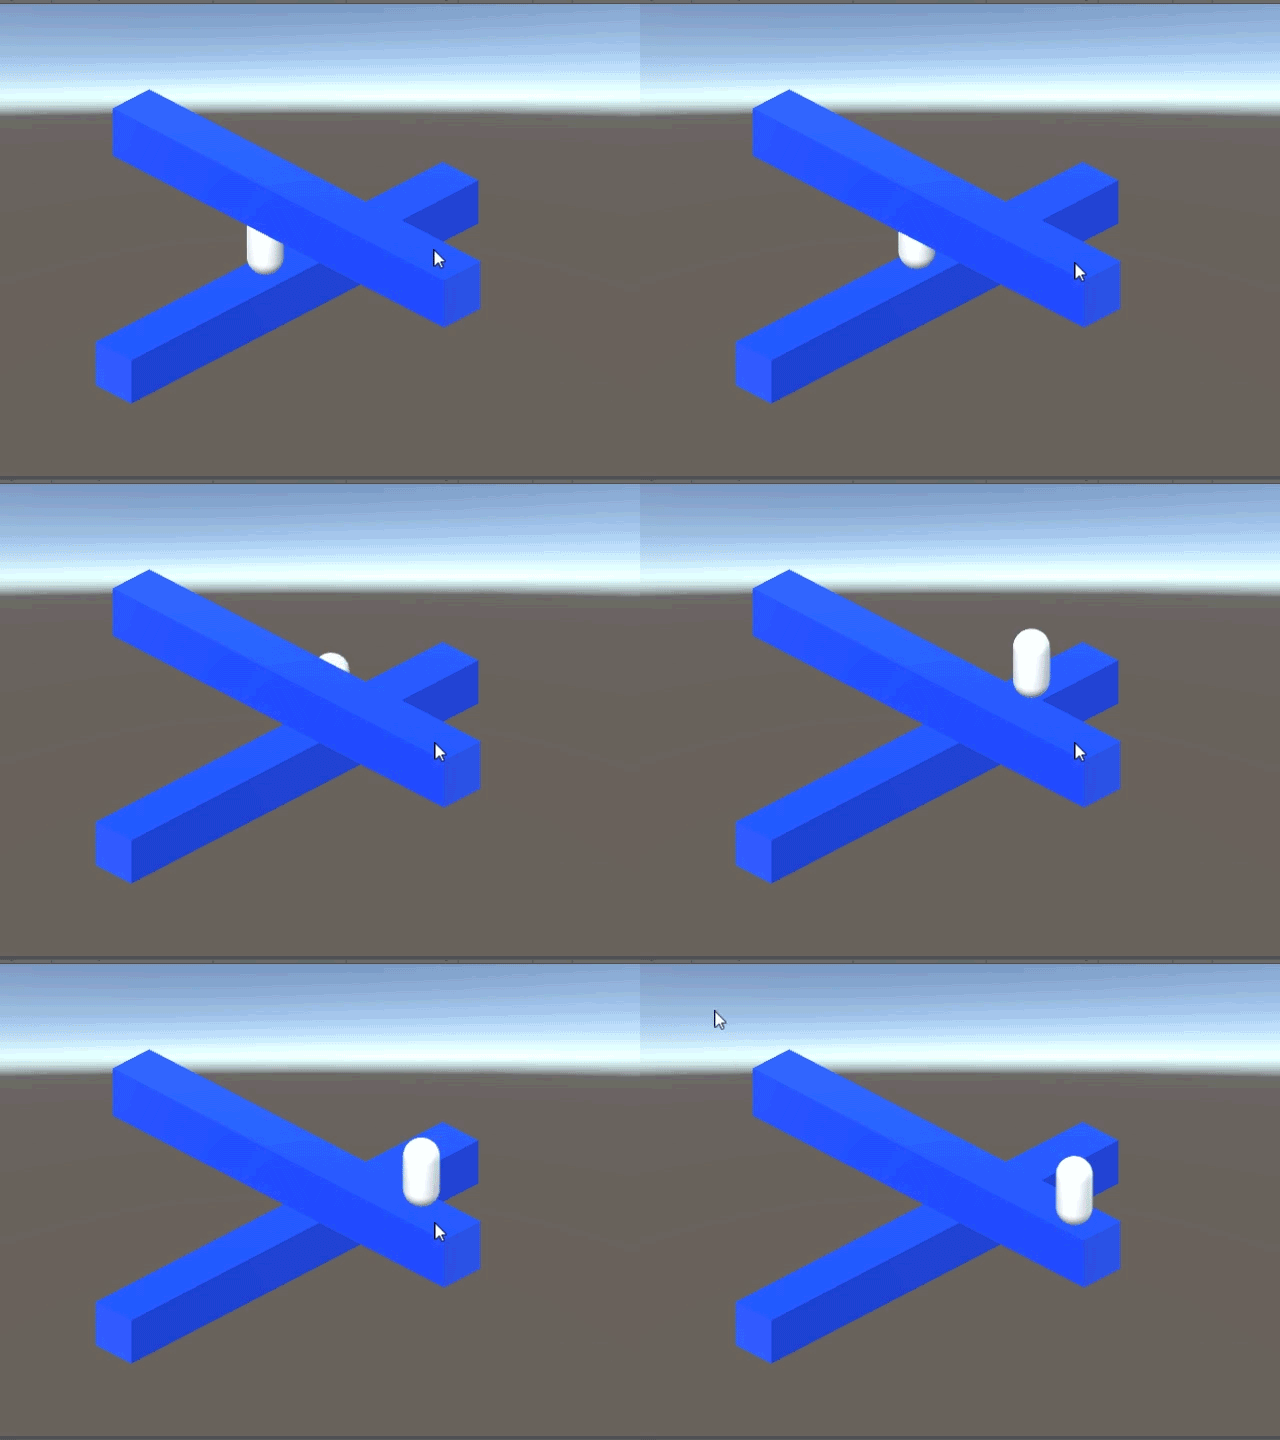
Likely, you already know what the problem is. This method of interpolation is much too sudden. Instantaneous movement isn’t going to uphold the illusion. Instead, we need a way to work out some sort of movement across the off-mesh links rather than straight “teleportation”. However, since we’re using Unity’s native navigation tools, we’re not going to get it 100% perfect, but we can get it 99% accurate.
The LERP Function
It is at this point we realize we need something called “Linear Interpolation.” In math, Linear Interpolation is used to approximate things like curves by taking two points and connecting them with a straight line (hence the term “linear”). In Unity, it’s a bit more specific. We can use a Liner Interpolation function (called “LERP” functions for short) to move an object someplace in between two points. Doing this recursively means we can interpolate an object between two points in a smooth manner. In our code, we’re going to use the “Vector3.Lerp” function to accomplish this. Go to your “PlayerController” script and let’s create a new method called “CompleteLink” where we will put all of our code for our interpolation algorithm.
using System.Collections;
using System.Collections.Generic;
using UnityEngine.AI;
using UnityEngine;

[RequireComponent(typeof(NavMeshAgent))]
public class PlayerController : MonoBehaviour
{
    private NavMeshAgent agent;
    private RaycastHit clickInfo = new RaycastHit();

    // Start is called before the first frame update
    void Start()
    {
        agent = GetComponent<NavMeshAgent>();
    }

    // Update is called once per frame
    void Update()
    {
        if (Input.GetMouseButtonDown(0))
        {
            var ray = Camera.main.ScreenPointToRay(Input.mousePosition);
            if (Physics.Raycast(ray.origin, ray.direction, out clickInfo))
                agent.destination = clickInfo.point;
        }

        if (agent.isOnOffMeshLink)
        {
            agent.CompleteOffMeshLink();
        }
    }

    void CompleteLink()
    {

    }
}
Let’s have a closer look at this “CompleteLink” method.
void CompleteLink()
    {

    }
The very first thing we’re going to want to do is to assign a couple of variables. We’re going to need the start and end positions of the off-mesh link, we’re going to need to offset this slightly to match the size of our character, and then we’re going to need the distance between those two points. This works out in our code like this,
    void CompleteLink()
    {
        Vector3 startLink = agent.currentOffMeshLinkData.startPos;
        Vector3 endLink = agent.currentOffMeshLinkData.endPos;
        float linkDistance = Vector3.Distance(startLink, endLink);
        endLink.y = agent.currentOffMeshLinkData.endPos.y + 1;
    }
By using some variables in the nav-mesh agent, we’re able to capture and offset the start and end positions. We’re offsetting the y-axis on “endLink” because we do not want the character interpolating to a position exactly on top of the platform, it must be offset above it.
Now, we need to go up to the top of our script and declare a few variables there as well. We’re going to need two public float variables called “interpolantValue” and “disconnectMargin.” Second, we’re going to need a private Vector3 named “storedTarget.”
using System.Collections;
using System.Collections.Generic;
using UnityEngine.AI;
using UnityEngine;

[RequireComponent(typeof(NavMeshAgent))]
public class PlayerController : MonoBehaviour
{
    public float interpolantValue = 100;
    public float disconnectMargin = 1.5f;

    private Vector3 storedTarget;
Go ahead and give these variables the default value shown. I’ve experimented with this a bit and found these values to be the best combination.
Next, we’re going to want to assign the “storedTarget” variable immediately in the update function.
    // Update is called once per frame
    void Update()
    {
        storedTarget = agent.pathEndPosition;
This will constantly update our Vector3 with whatever position the player has clicked on. Now, in the “CompleteLink” method, we’re going to actually do the LERP function now. The way it works out is like this:
    void CompleteLink()
    {
        Vector3 startLink = agent.currentOffMeshLinkData.startPos;
        Vector3 endLink = agent.currentOffMeshLinkData.endPos;
        float linkDistance = Vector3.Distance(startLink, endLink);
        endLink.y = agent.currentOffMeshLinkData.endPos.y + 1;

        transform.position = Vector3.Lerp(transform.position, endLink, linkDistance / interpolantValue);  //The format is "startPosition", "endPosition", percentage between them
    }
We’re setting the position of our player equal to a Vector3 which is being generated between two points (“transform.position” and “endLink”). By the very last argument, we are telling the function where we’d like this position to be between those two points. If we put a simple 1 as the last argument, we would have a similar result to what we have now. Our player would just teleport instantly across. If we set it to 0.5, we would move the character halfway between those two points, then halfway between the remaining distance, then halfway between that distance, etc. The way we have it now takes into account the world space distance between the points and divides it by some constant value (which we have defined).
Let’s test this out now! Replace the “CompleteOffMeshLink” method with our “CompleteLink” method.
if (agent.isOnOffMeshLink)
        {
            CompleteLink();
        }
Save your script, head over to Unity, and hit play.
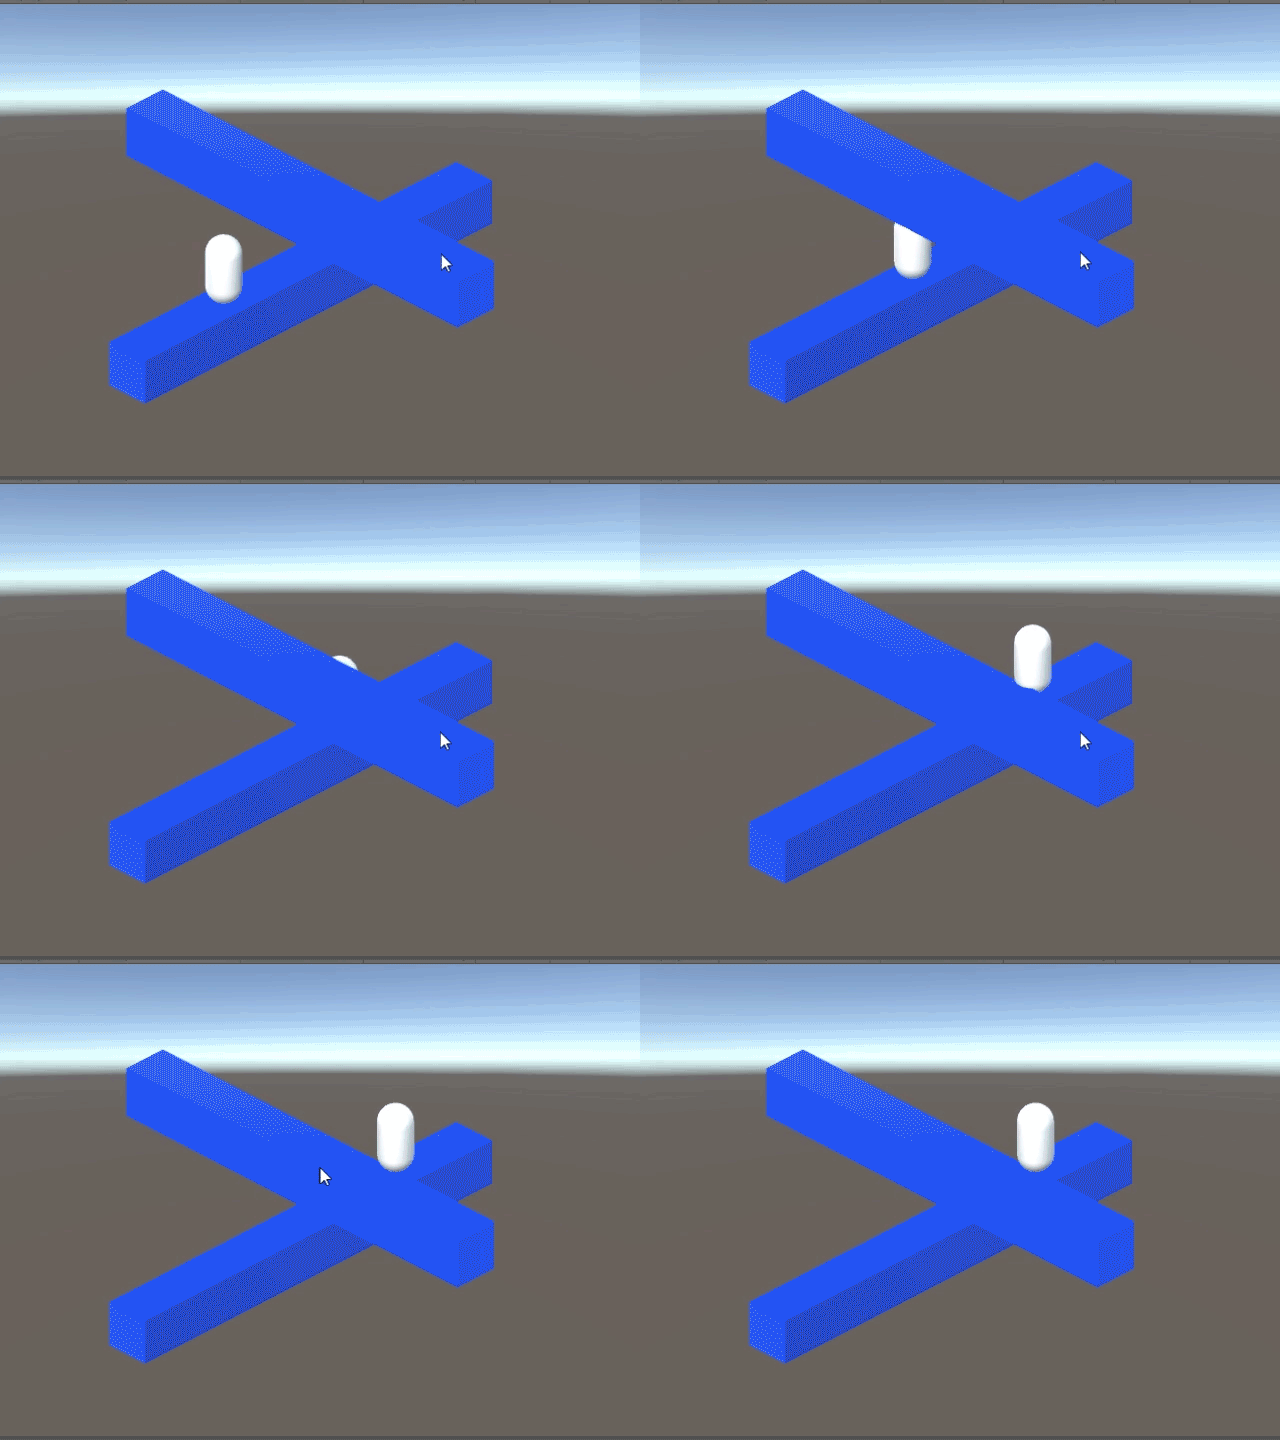
As you can see, it is a massive improvement to our previous method of interpolation. It is smooth, it is at the right speed, there is just one problem, it never actually reaches the end of the link! This is actually an excellent illustration of a classic math riddle. “If you’re standing some distance away from a door, and you halve the distance between you and the door each second, how long will it take before you reach the door?” The answer is, never! And we can confirm this by logging the distance between the player and the end link.

The distance becomes very small but it never equals zero! And so here is where we employ our variable “disconnectMargin.” We’re going to create an if-statement that will simply set the transform of the player equal to the end link position when the distance between them becomes less than “disconnectMargin.”
    void CompleteLink()
    {
        Vector3 startLink = agent.currentOffMeshLinkData.startPos;
        Vector3 endLink = agent.currentOffMeshLinkData.endPos;
        float linkDistance = Vector3.Distance(startLink, endLink);
        endLink.y = agent.currentOffMeshLinkData.endPos.y + 1;

        transform.position = Vector3.Lerp(transform.position, endLink, linkDistance / interpolantValue);

        if (Vector3.Distance(transform.position, endLink) < disconnectMargin)
        {
            agent.Warp(endLink);
            agent.SetDestination(storedTarget);
        }
    }
We’re using a function on the nav-mesh agent called “Warp” which simply “warps” the player to the position. And then we are setting the target equal to our previously-stored variable. Save your script and hit play in Unity.
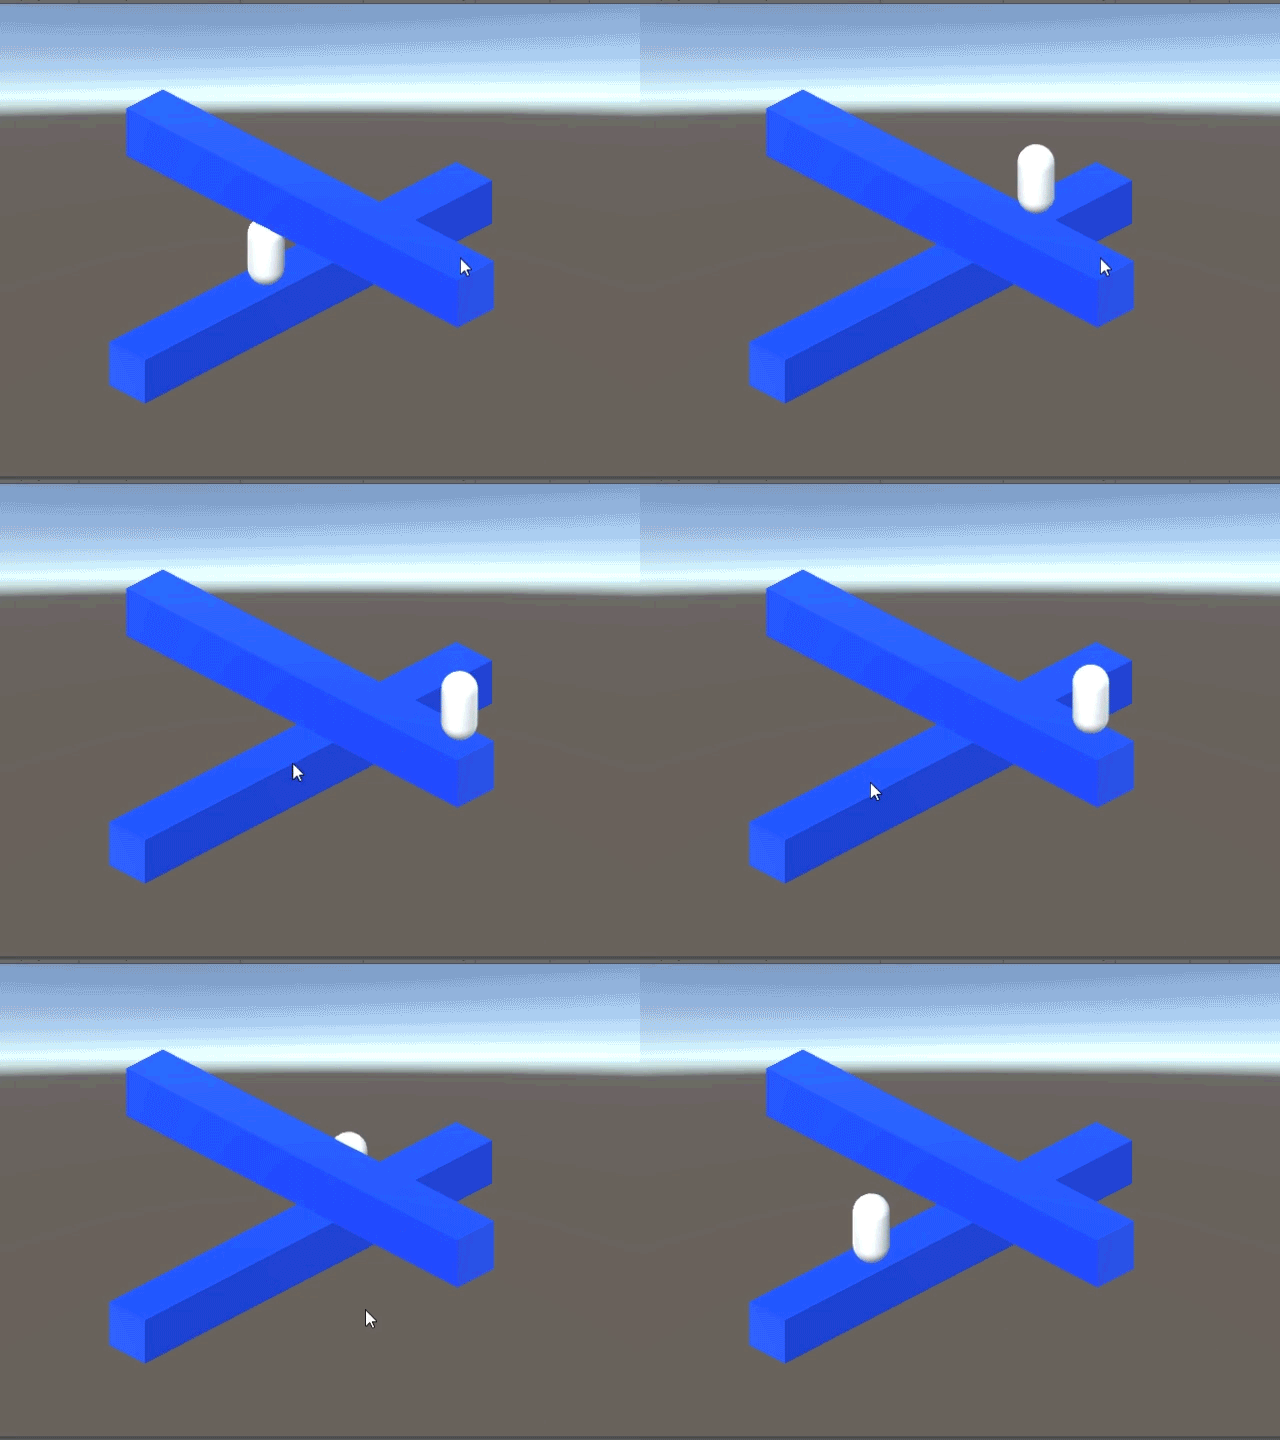
There we are. Finally, a way of interpolating that upholds the illusion. Fantastic!
Animated Platforms
At this point, we’ve got a good mechanic. But as it is, all we’ve got is something that says, “Hey, look what we can do.” We need one more mechanic in order to be in a position to actually design playable levels. Here is where we introduce “Animated Platforms.” Not only do we need this mechanic, but we need it to be generalized so that we can use it in multiple scenarios.
Creating the Animation
It is preferable to use animations because it allows more control over how and where the platforms move. In this case, we’re going to need two animations, one in an “OnTop” position (which we will call “active” position) and one where it is off to the side (the “inactive” position). Create a new folder called “Animations.”

Select the top platform and open up the animation tab.

Create a new animation clip for the “active” position. It’s a good idea, if you’re going to build more on to this level, to develop some sort of nomenclature to keep things organized. Since this is the only animated platform in my scene, I’ll just name it “OccludingPlatformActive.”

This only needs to be one frame long with the current rotation and position as the only keyframes. Add a position and a rotation property which will create two new keyframes with the current position and rotation.

Drag these keyframes so that there is no frame between them.


Next, we’ll create a new animation called “OccludingPlatformInactive.”


Create a rotation and position property, hit the record button, and reposition the platform like this:

This will create a keyframe which we can then duplicate with Ctrl-C and Ctrl-V (Command-C/Command-V for Mac users) and place at the end.

Dragging these together completes this animation.

Now, we need to go to the Animator tab and configure these states.
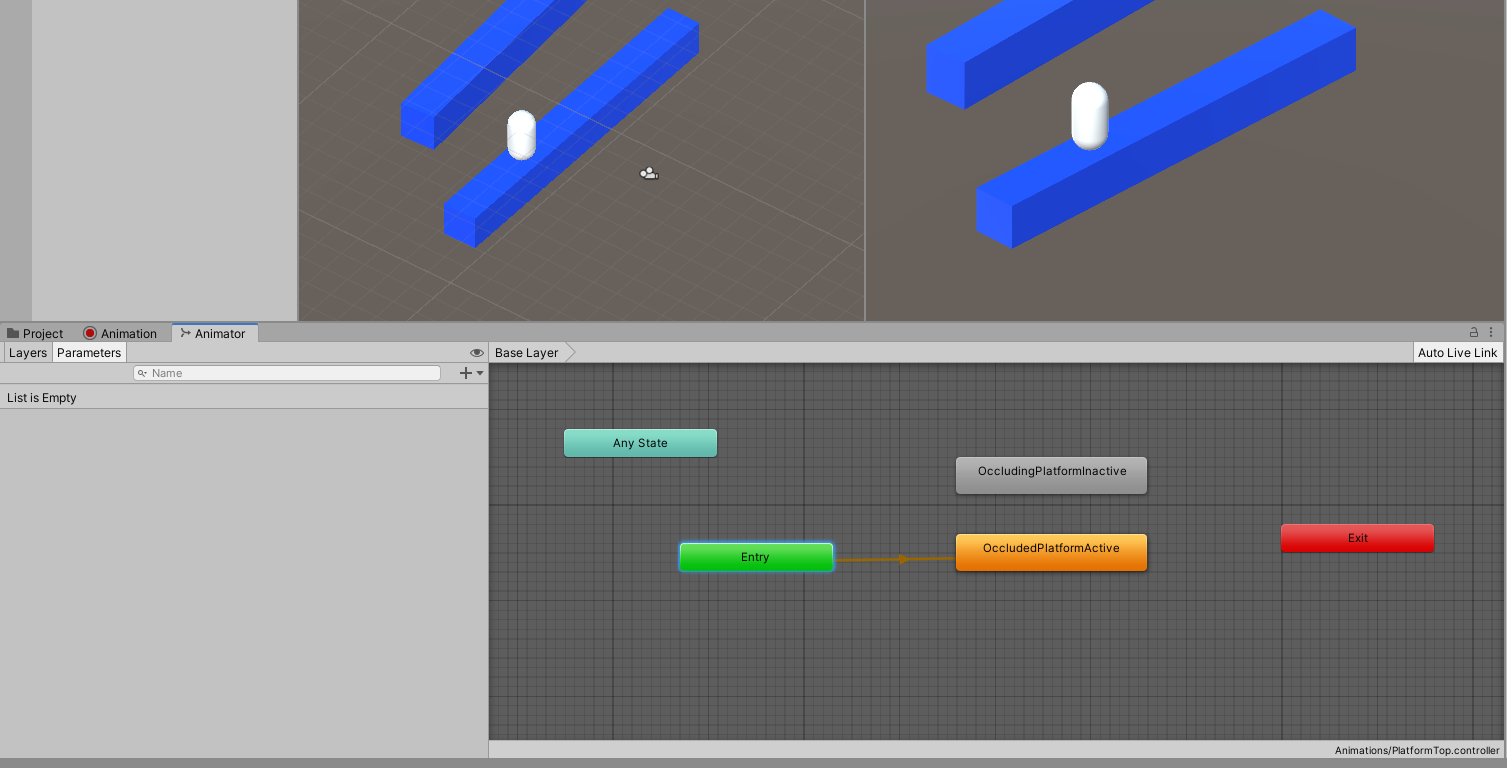
For a deeper look at the Unity Animator, check out this tutorial on the Game Dev Academy (Unity Animator Comprehensive Guide). Here, we’re not going to go very in-depth. The “OccludingPlatformActive” should be orange. This means it will play as soon as the game is started. Create a new boolean parameter called “Active.”

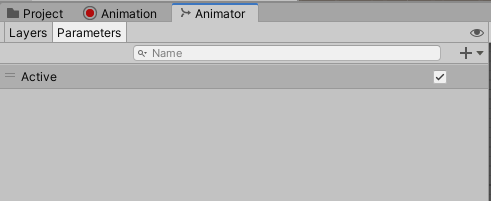
Create two transitions, one going from “OccludingPlatformActive” to “OccludingPlatformInactive” and one going the other way around.


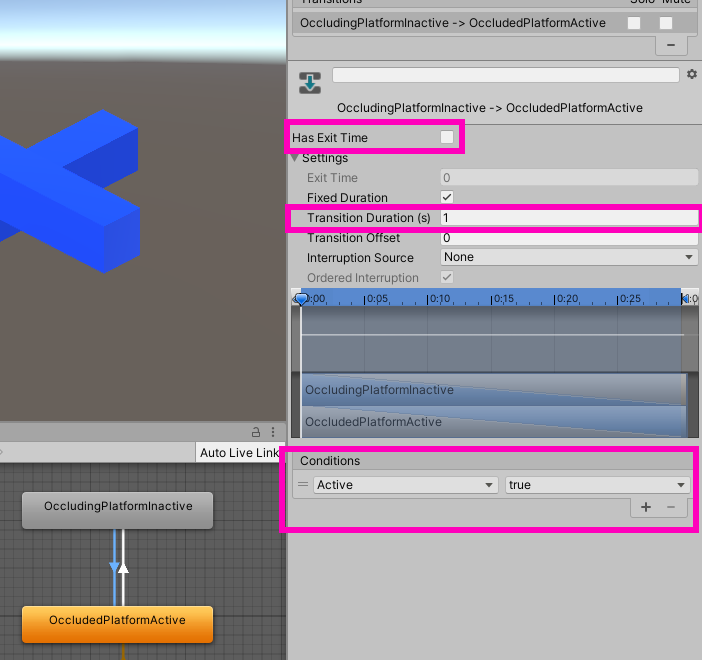
Select the first transition (the one going from the active to inactive animations) and make its condition to be when the parameter “Active” equals false. Diable “Has Exit Time” as well.

We need this transition to be considerably long. Open up “Settings” and change “Transition Duration” to about one second long.

Do the exact same for the other transition except change the condition from “false” to “true.”
Test to see if this is working by hitting play and toggling the “Active” boolean.
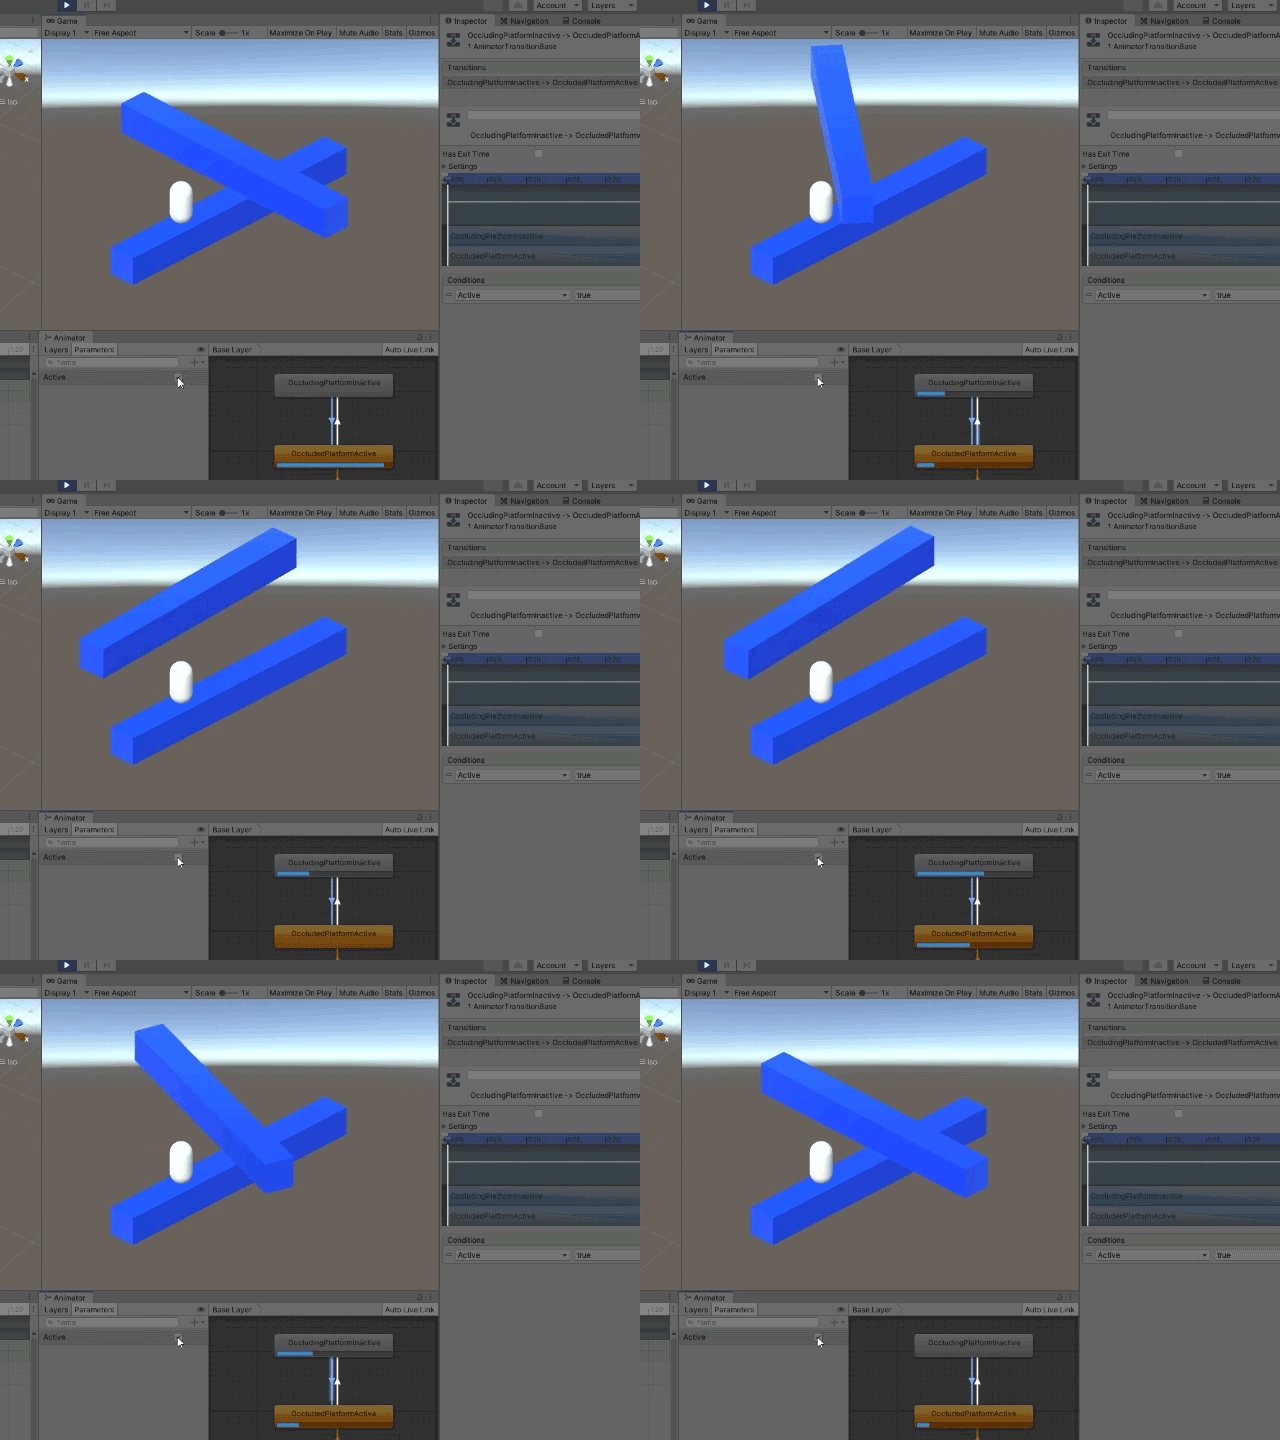
Fantastic! It’s working! Now, we have to trigger this via game objects in the scene.
Scripting a Trigger
There’s a couple of challenges when it comes to this sort of animation. The first is triggering it through in-game objects. The second is making sure the player doesn’t fall off when it’s moving. We overcome the first problem by simply using colliders. We can solve the second by some strategic parenting.
But first, let’s set up a trigger object. Create a new cube (called “trigger”) and place it on the top platform. This ought to be parented to the top cube so that it moves wherever the platform is rotated.
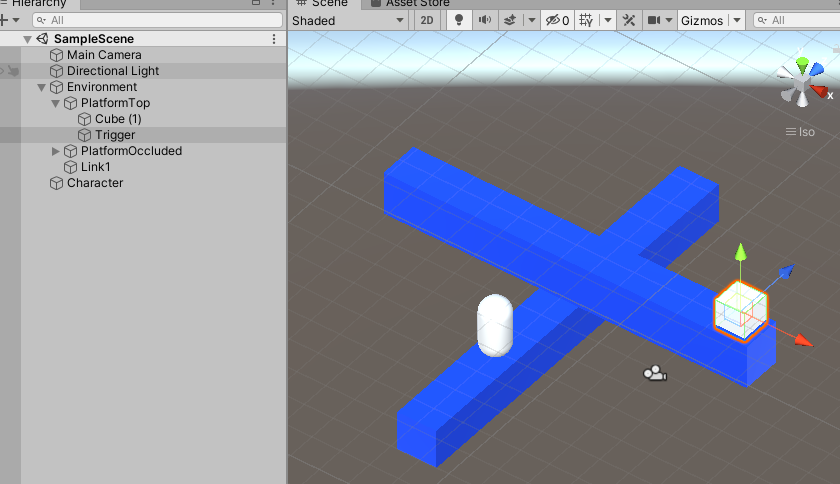
The trigger looks too bright. Create a new material to fix that.
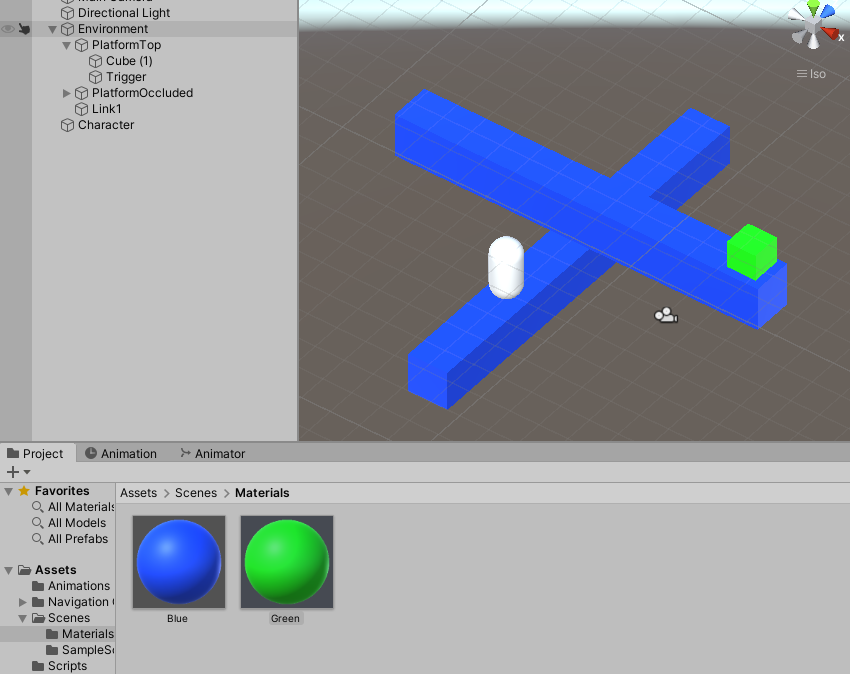
Now, create a new C# script called “Trigger” and drag it onto the trigger game object.
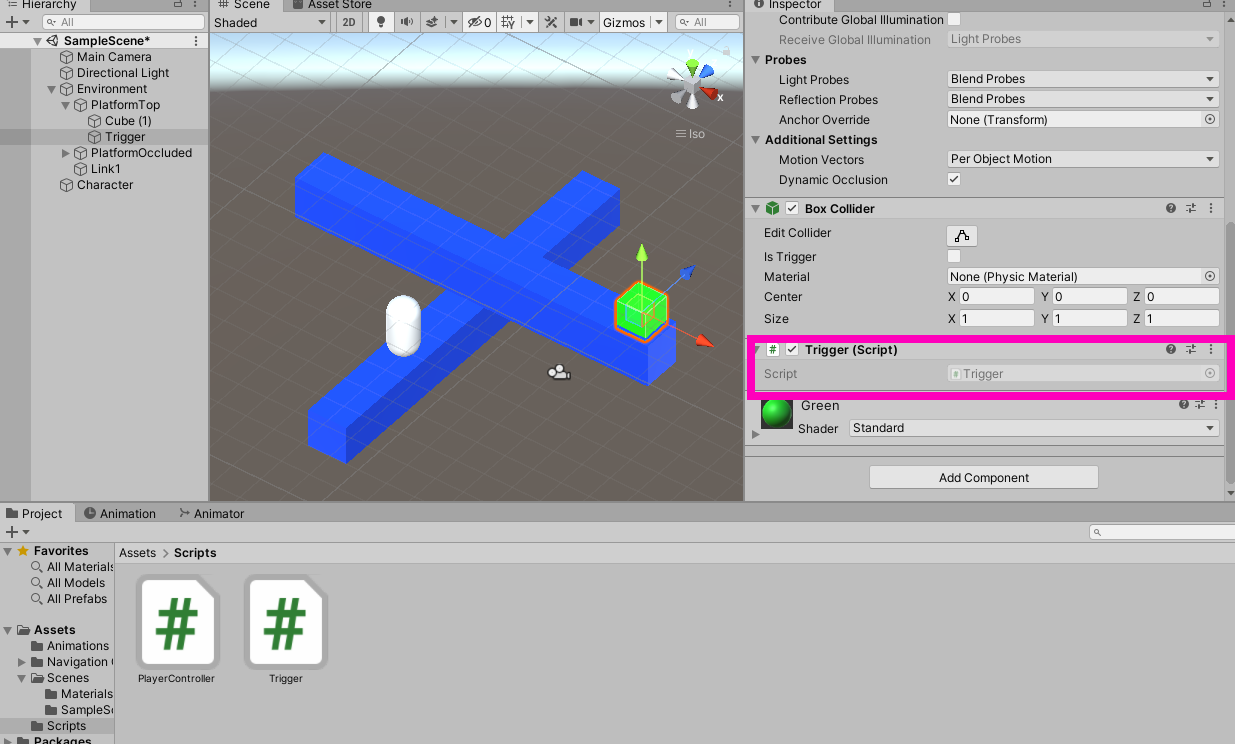
Where we start coding, however, begins in the “PlayerController” script. We’re going to create two new public methods called “EnableCleanMove” and “DisableCleanMove.” They have the following code in them:
 //To be called by the environment when motion is triggered

    public void EnableCleanMove(Transform parentTransform)
    {
        transform.SetParent(parentTransform);
        agent.enabled = false;
    }

    //When the motion is ended

    public void DisableCleanMove()
    {
        transform.SetParent(null);
        agent.enabled = true;
    }
This basically parents the player to whatever game object is moving (or whatever is supplied to “parentTransform” to be precise) and disables the navigation agent so that no path calculations take place during the transition.
Next, we need to populate the “Trigger” script. Basically, what we need this to do is to trigger the transition when the player is overlapping the trigger, call “EnableCleanMove” on the “PlayerController,” and reverse all of that when the animation is done transitioning. To do this, we’re going to need access to five different variables.
using System.Collections;
using System.Collections.Generic;
using UnityEngine;

public class Trigger : MonoBehaviour
{
    public GameObject target;
    public string triggerVariable;

    private PlayerController player;
    private Animator targetAnimator;
    private bool isPlayerRestored;
The use of these will become clear in a moment. Right now, we need to assign the private variables:
void Start()
    {
        targetAnimator = target.GetComponent<Animator>();
        player = GameObject.FindGameObjectWithTag("Player").GetComponent<PlayerController>();

        if (triggerVariable == null)
        {
            Debug.LogWarning(name + " has no supplied trigger variable. Nothing will be triggered");
        }
    }
The warning is so that the designer knows whether there is a loose connection between the trigger and the platform. After this, let’s create two new methods in the “Trigger” script called “TriggerAction” and “RestorePlayer.”
void TriggerAction()
    {

    }

    void RestorePlayer()
    {

    }
The code for each method looks like this:
 void TriggerAction()
    {
        bool targetVar = targetAnimator.GetBool(triggerVariable);
        targetAnimator.SetBool(triggerVariable, !targetVar);

        player.EnableCleanMove(target.transform);
        isPlayerRestored = false;
    }

    void RestorePlayer()
    {
        player.DisableCleanMove();
        isPlayerRestored = true;
    }
“TriggerAction” is toggling the animator parameter we created and calling the player’s “EnableCleanMove” method while telling the player to parent itself to the moving game object. This will make the player “stick” to the platform as it moves. The “RestorePlayer” method basically just reverses everything “TriggerAction” did.
“TriggerAction” is the natural choice when it comes to choosing a method to call when the player overlaps the trigger. We can call this method through an “OnTriggerEnter.”
private void OnTriggerEnter(Collider other)
    {
        if (other.CompareTag("Player"))
        {
            TriggerAction();
        }
    }
We’re almost done scripting! The last thing we need to do is to determine whether the animation is done transitioning. To do this, we use a special update function called “LateUpdate.” This function is the last update function to be called. This is perfect for determining whether the player is ready to be enabled. This works out in our code like this:
private void LateUpdate()
    {
        if (targetAnimator.IsInTransition(0))
        {
            Debug.Log("Player activated trigger " + name);
        }
        else
        {
            if (!isPlayerRestored)
            {
                RestorePlayer();
            }
            else
            {
                Debug.Log("Player is restored by " + name);
            }

        }

    }
Implementing The Trigger System
A couple of things need to happen before this code will work. The first is that our player needs to have a “Player” tag. We need to create one and tag our player with it.
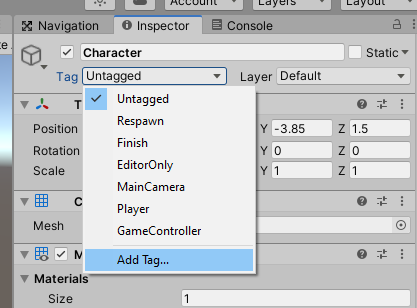
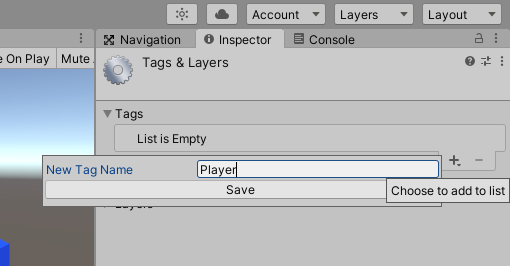
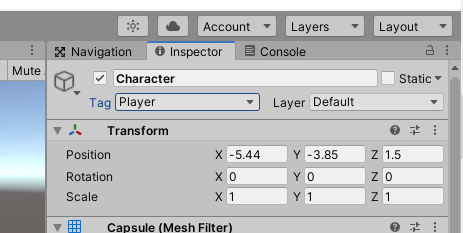
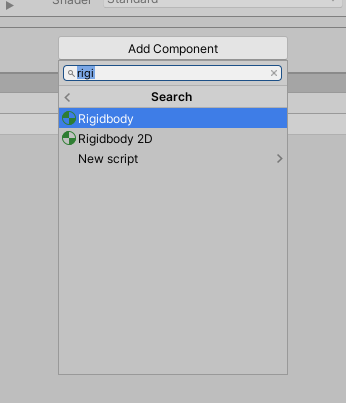
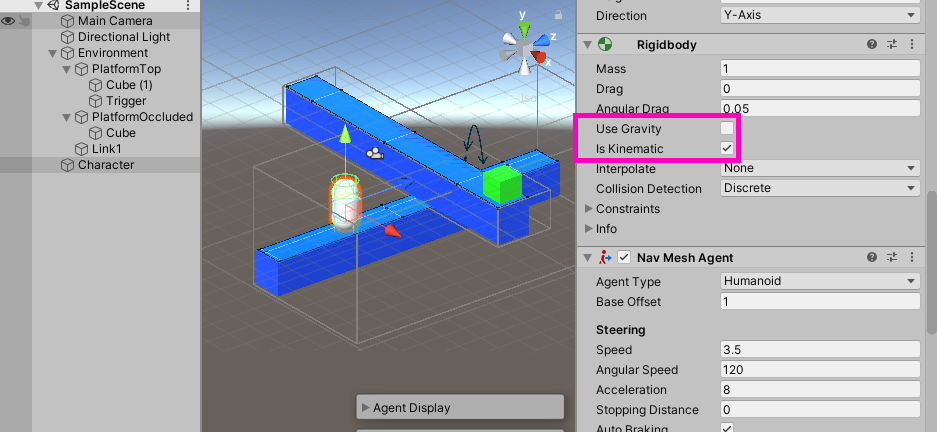
Second, we need to make sure the player has a Rigidbody component. It will not be detected by the trigger if it does not. Make sure “Use Gravity” is disabled and “is Kinematic” is enabled.
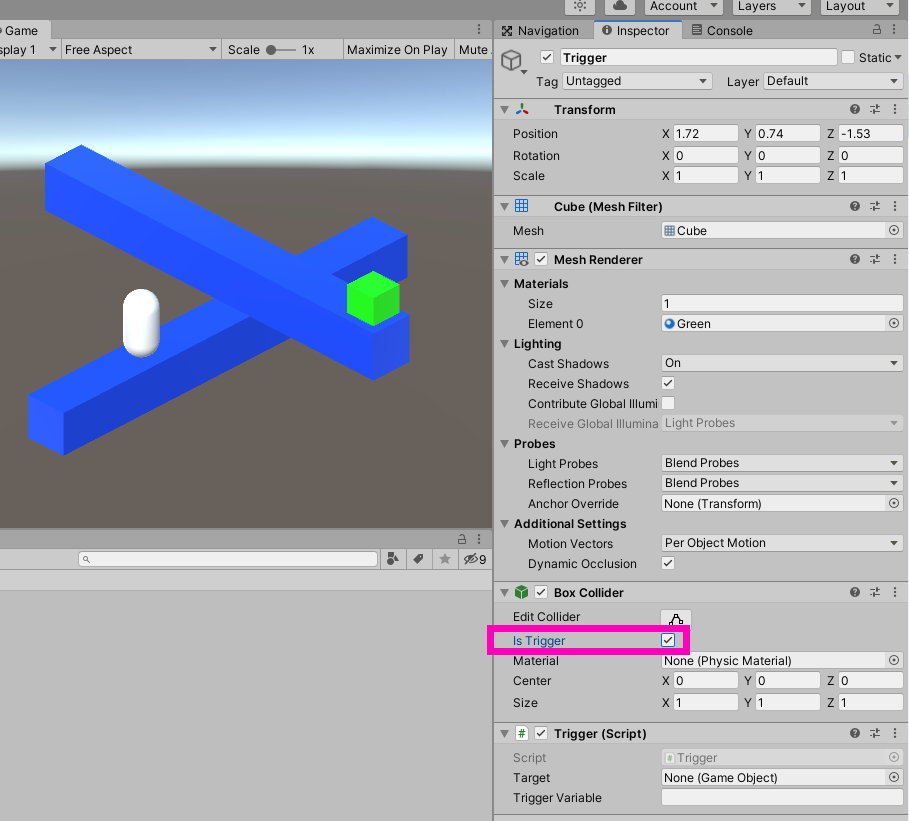
Third, the trigger’s collider must have “trigger” enabled.
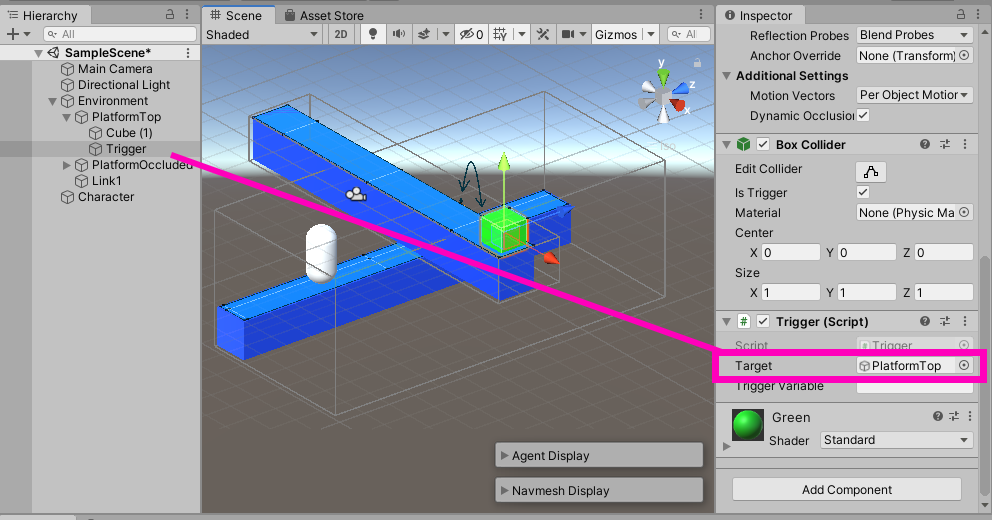
And finally, we need to populate the field’s on the Trigger script. Set “Target” equal to the “Platform Top.”
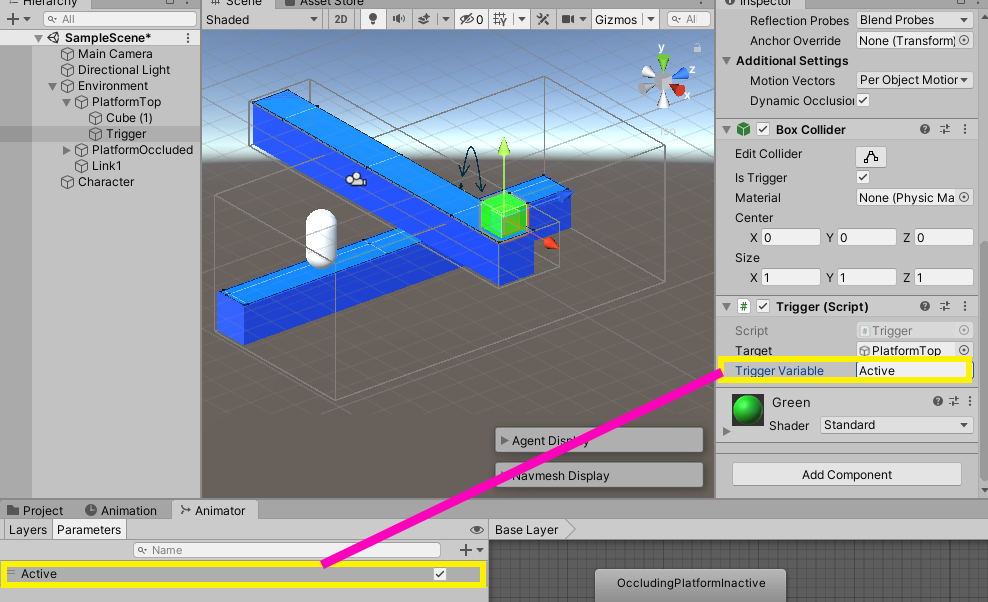
This field is supposed to contain whatever object has the Animator component. Next, we need to supply a trigger variable. This is the name of the parameter in the Animator. In our case, it is the “Active” boolean. Type the name into the field and that will finish our trigger system.
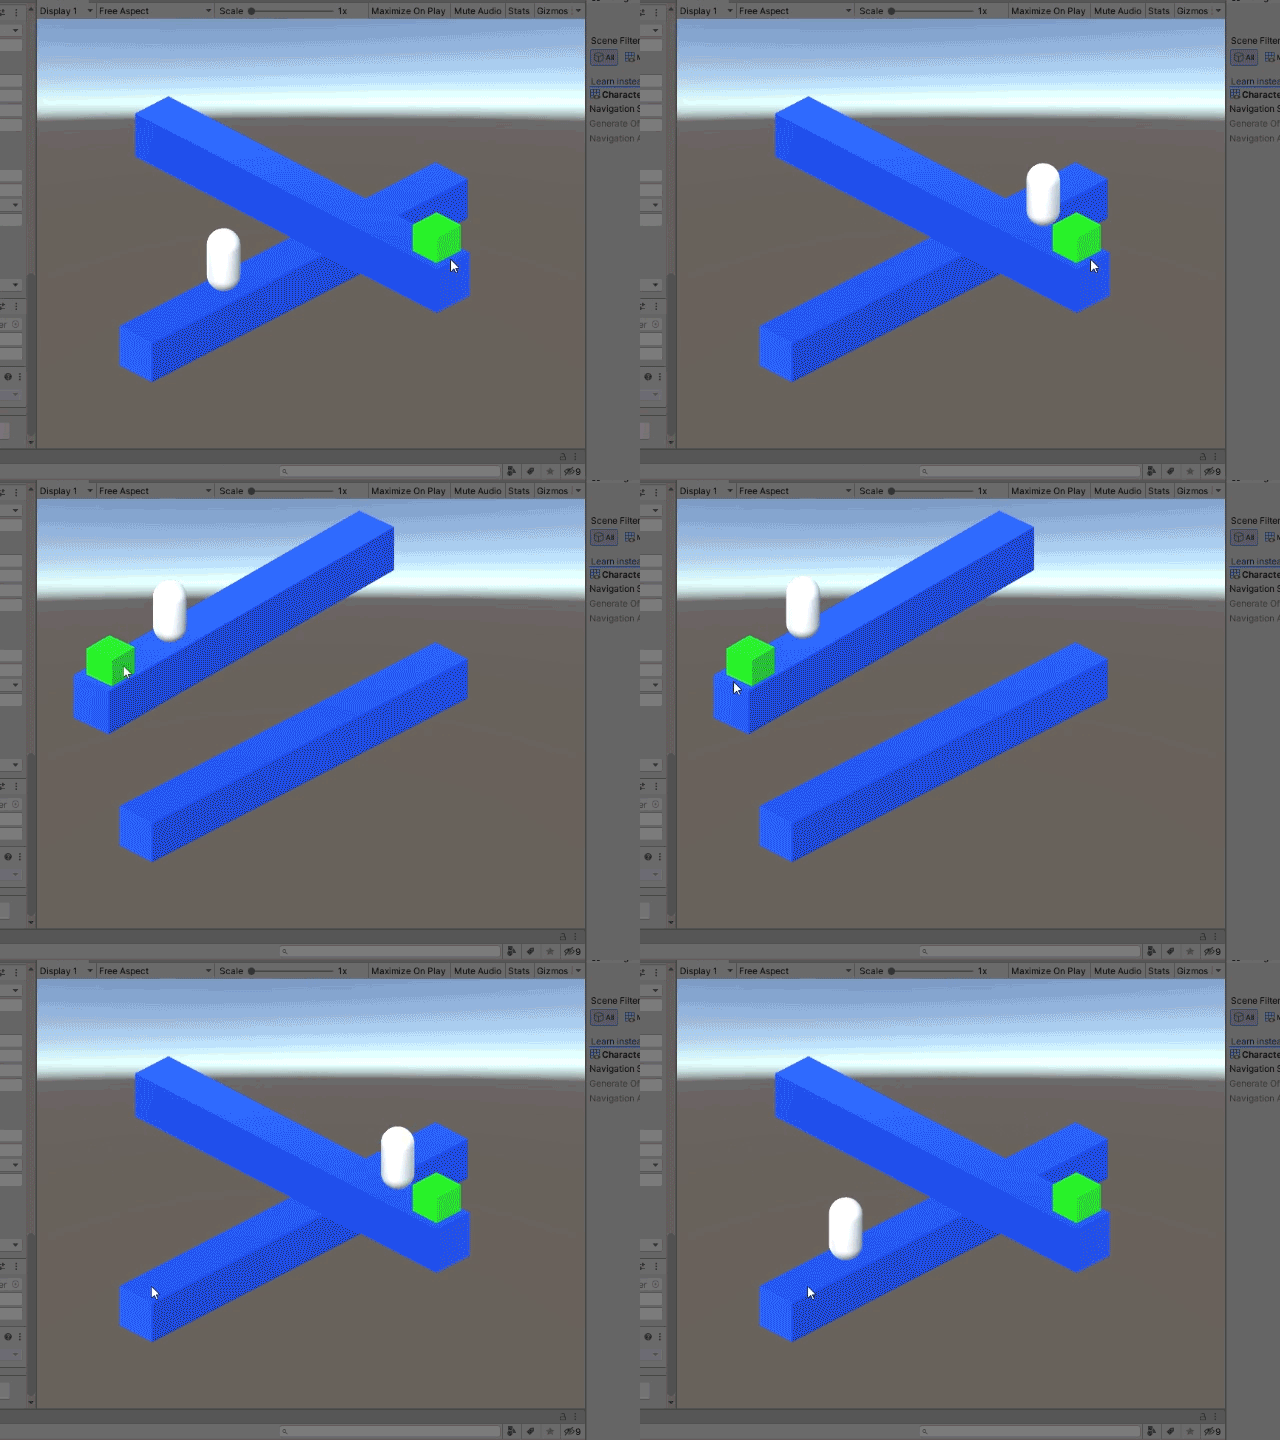
Hit play and test it out!
Conclusion
That’s it! We now have our complete illusion game complete with moving platforms, triggers, and more!
I think the end result looks quite satisfactory. It’s amazing how close we can get by simply using built-in tools. Of course, this was also made possible with the help of not only our orthographic view, but Unity’s Navigation component system as well. I hope through Part 1 and Part 2 of this tutorial series, you’ve learned how to not only use the Unity Navigation system but also how to tailor it to unique situations. For sure, the navigation components were never designed to be used like this, but they hold up quite well, and these ideas can be expanded for your own projects!
Use these principles well to…
Keep making great games!
