You can access the full course here: Kotlin for Beginners
In this lesson, we’re going to run our code on the Android Studio emulator.
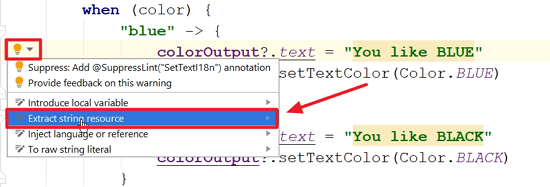
First, as an exercise, extract the strings we used in code from our last lesson to the “strings.xml” file as shown below:
Running our app
To run our app, you can either press the run button in your top-right menu or click on “Run” in the top-left menu bar and then “Run app“.
If you have already set your device up in Android Studio, it’ll be visible under “Connected Devices” and you can proceed normally to run it in your phone. Otherwise, we can run our code on an emulator by creating a virtual device:
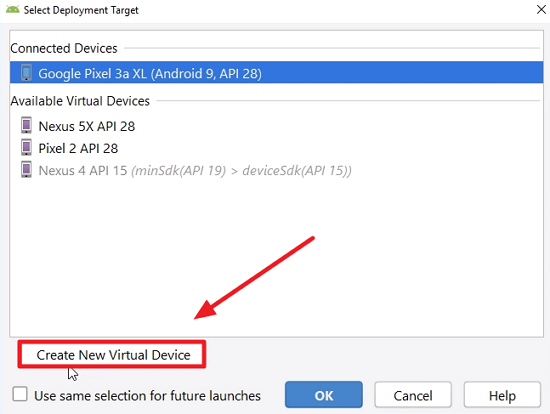
There will be a lot of options (all Google ones), but you can also import hardware profiles for other popular devices.
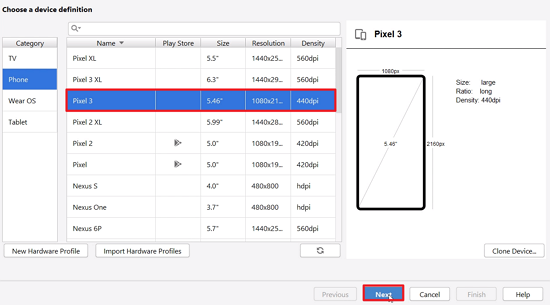
Let’s go ahead and select Pixel3 for this lesson:
Now, we have to choose an operating system. Let’s choose Pie. Android will then download all the needed files, so make sure you have available space on your computer for that. Once it’s done, select it and click Next:

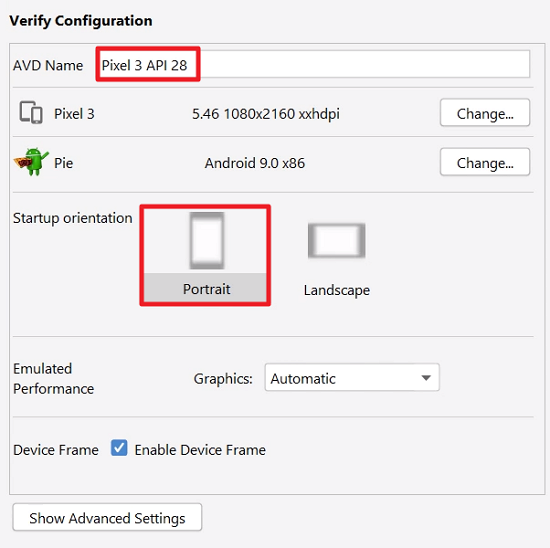
You can give your emulated device a specific name (to differentiate from other emulated devices you may have already tried before) and/or orientation mode. For now, we’re just going to go with the default choices:
Now, we select our new device on the list of “Available Virtual Devices” and click Ok. We notice that the phone displayed looks exactly like a Pixel3.
Let’s see if our code is running correctly:
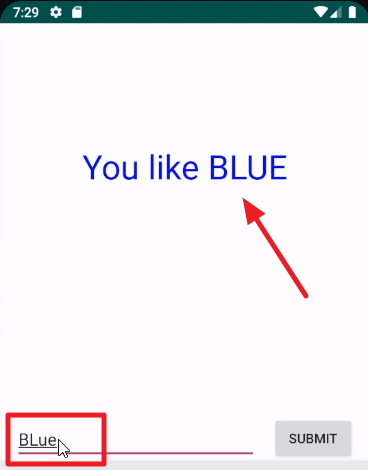
Independently of our use of upper and lower case letters, as we always convert the answer to lower case before checking which color was entered, it works just fine.
Let’s test the “else” case:
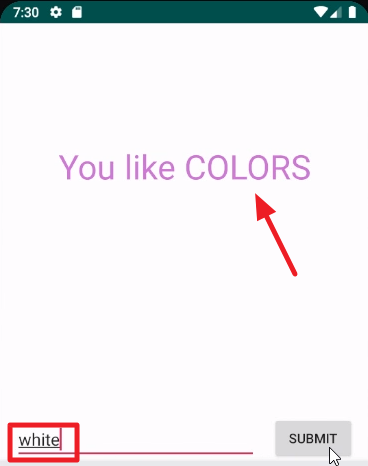
And, as expected, we got “You like COLORS”.
In the next lesson, we’ll run our code on a physical device.
Transcript
Note that this has other warnings here and these warnings are saying hey, this should be a string literal, so you should use an Android resources. Again it’s recommending that you export this as a string resource and you could do that by going through and selecting extract string resource. Now I’m not gonna do that here but you could certainly do that and again, that’s best practice and so, you get a sense that Android Studio’s really prompting you to code with best practices in mind.
Let’s go ahead and turn this by coming up here and selecting the run app. We can press the button here or you can select Run and choose Run App in the menu. If you have a device connected and you’ve set it up for development, then it’ll show up here and you can click OK and it’ll run on your device. Or if you don’t have a device and you want to run it on an emulator, you can create a virtual device.
Here I’ve created a few but let me show you how that works and so, if I go ahead and choose Create New Virtual Device, you have an option to select from a variety of different devices. These are going to be Google-specific ones. You can also import hardware profiles for other popular devices. If you have a Samsung or some other manufacturer, you can download their hardware profile and then it’ll show up in Android Studio and it’ll look like the device and behave in the same way. For our purposes, I’m gonna select Pixel 3 and choose Next.
Then what we’ll need to do is download an operating system and in our case, I wanna select Pie, so I’m gonna download for Android Pie. And in this case, it’s going to download and it’s a large download, so make sure that you have room on your hard drive or your computer in order to do that but I’ll skip ahead as soon as this is done.
Once that has finished, go ahead and choose Finish and now we will select the operating system image that we’ve downloaded and choose Next. From here you can give this a name, if you wanna have multiple versions of the same device. You can also set what is called the startup orientation and some other advanced features if needed. You can always come in and change this later but for now let’s go ahead and choose Finish. We can go ahead and select that and choose OK. So, here we have the emulator and it looks like a Pixel 3 device and here we have the app running.
So, if I go ahead and select this, I can say Blue and notice how I kind of capitalized a couple of different letters but go ahead and choose Submit. It says hey, You like BLUE and notice again because we said toLowerCase, regardless of how I capitalized it, the text is working, so let’s go ahead and change that. Let’s say yellow and we Submit. You like YELLOW. Of course it’s a little hard to see but you get the idea. What about purple. We’ll go ahead and choose Submit. Now check this out, it says You like COLORS.
Now I happen to have known that that particular RGB value was purple but because it was not recognized, we went to the else statement and from the else statement, we had our own defined color and we said You like COLORS and then we set it to purple. Same thing if I had said I want, say I’d set this to white, it’s going to say the same thing. If I go back here, let’s try black. And it says You like BLACK.
Interested in continuing? Check out the full Kotlin for Beginners course, which is part of our Mobile App Development Mini-Degree.
