Unreal Engine’s Blueprint Visual Scripting system vastly simplifies coding – making it easier for developers of any skill level to develop their games.
As a consequence, though, it is integral to master fundamental coding principles with the system before jumping into bigger game projects. It’s also just as important to learn how to apply these principles to simple game projects to battle-test your knowledge.
In this tutorial, we’re going to show you how to create auto-stacking blocks of boxes with a simple for loop to get you going. You’re also going to learn how to add physics to the Actors in the scene, as well as alter other core properties to familiarize yourself with.
Let’s get started!
Table of contents
Project Files
You can download a copy of the source code files for the project done in this tutorial here.
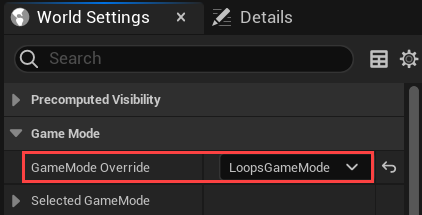
Note: This tutorial was made with Unreal Engine version 5.0, so if you have a higher version you might see some elements as deprecated although they still work. You’ll also need to set up the GameModeOverride to LoopsGameMode in the World Settings and select the Box as the Class in the SpawnActor Box node for the scene to run. Don’t forget to compile the project after you apply the changes!
Setting Up our Project
First of all, let’s go to the Content folder and create a new Loops folder there:

Then, we’ll create a new Basic level. Let’s name it LoopsLevel and save it in the Content > Loops folder:
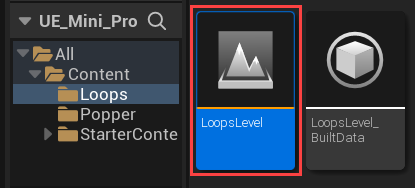
In this Loops mini-project, we want to create new Actor objects using loops, and not by dragging them by hand into the level. For that, we’ll need to create a couple of new blueprints first:
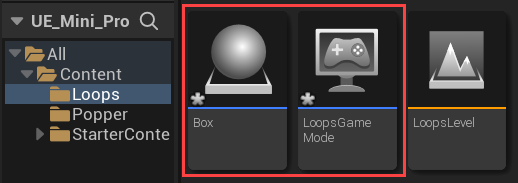
- The Actor blueprint named Box
- The GameMode blueprint named LoopsGameMode
We’ll save those blueprints in the Content > Loops folder as well:
Box Blueprint
Now, let’s open the Box blueprint asset. First thing, we’ll add a new Cube component to our Box blueprint:

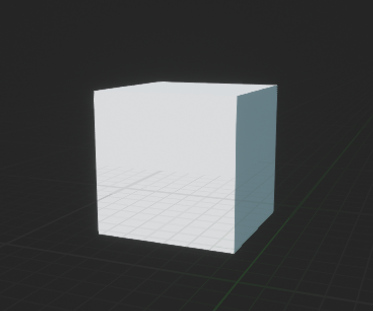
Then, in the Details panel, let’s set the Material of that Cube to M_CobbleStone_Smooth material for it to look a bit more interesting:

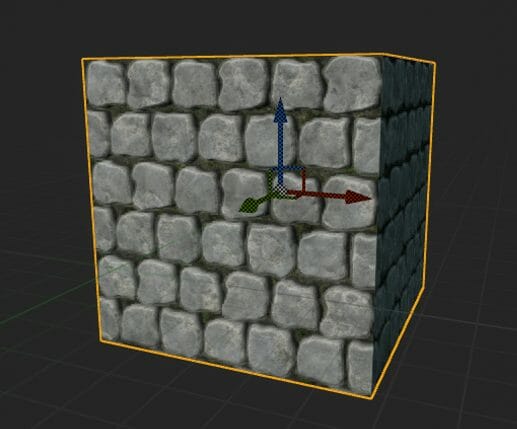
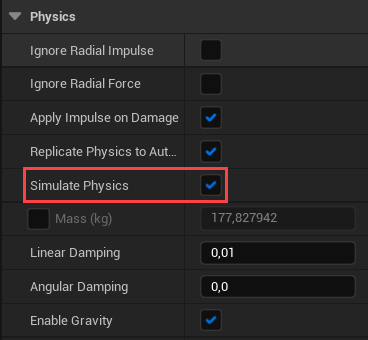
After that, in the Cube’s Physics component, we’ll enable the Simulate Physics property, so our cube would have physics working on it:
Then, you can Compile and Save the Box blueprint.
LoopsGameMode Blueprint
Now, let’s open the LoopsGameMode blueprint and go to the Event Graph. We’ll connect the BeginPlay event node to a new ForLoop node. Here’s what the ForLoop node does:
- Sets the Index property to the First Index’s value
- If the Index is less or equal to the Last Index, this node triggers the Loop Body control flow output pin. Otherwise, the cycle is ended and the control flow goes to the Completed pin
- Increments the Index
- Goes back to step “2“
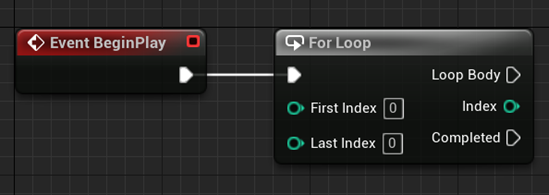
For the beginning, let’s run our loop ten times and print the index of the current iteration:
- Set the Last Index property of the ForLoop node to 10
- Connect the ForLoop’s Loop Body control flow to a new PrintString node
- Connect the ForLoop’s Index pin to the In pin of the PrintString node

Then, we will return to the LoopsLevel level. In the World Settings panel, we need to set the GameMode Override property to reference the LoopsGameMode for our changes to the LoopsGameMode to take place in the LoopsLevel level:
If you start the game now, you should see the numbers going from 0 to 10 in the top-left corner of the screen:
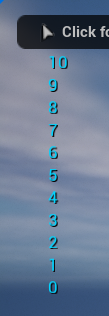
That happens because our ForLoop node runs the Loop Body control flow for each value of the Index property from 0 to 10 inclusively:

If we’ll set the Last Index property to 1000, we’ll see numbers running from 0 to 1000 at the game start:
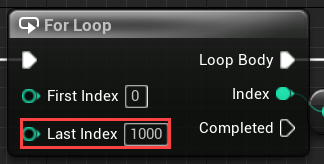

Using the loops allows us to save time and not copy-paste our code to be executed as many times as we want.
Spawning A Hundred Boxes
Next, let us make a hundred cubes spawn on top of each other.
First, we will delete the PrintString node from the LoopsGameMode blueprint’s EventGraph. You should have the ForLoop connected to the BeginPlay event node left:
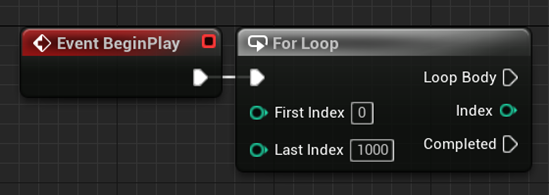
Then, we’ll connect the ForLoop node’s Loop Body control flow pin to a new SpawnActorFromClass node. This way, we’ll spawn objects in our loop:
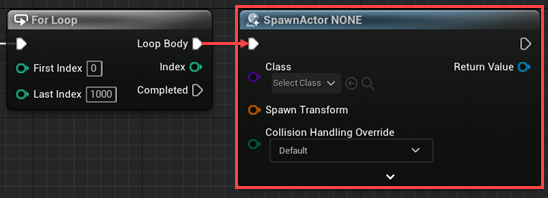
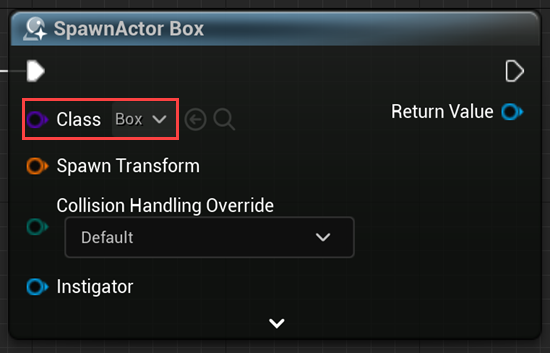
Next, in the SpawnActor node, we’ll set the Class property to Box, so it would spawn the Box blueprint we created earlier:
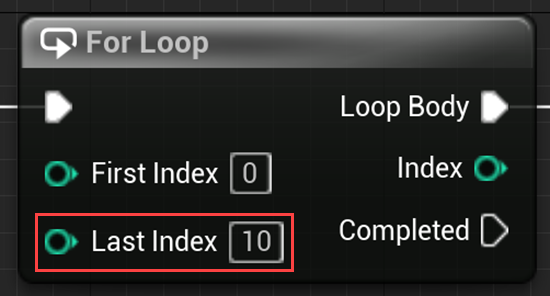
Also, we’ll change the ForLoop’s Last Index property from 1000 to 10, as we might want to start with a lesser amount of cubes:
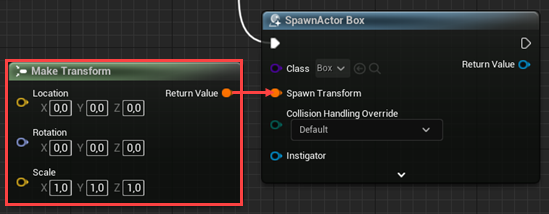
Finally, we need to connect the SpawnActor’s Spawn Transform input pin to a new MakeTransform node, so our cubes would have information on where they should spawn:
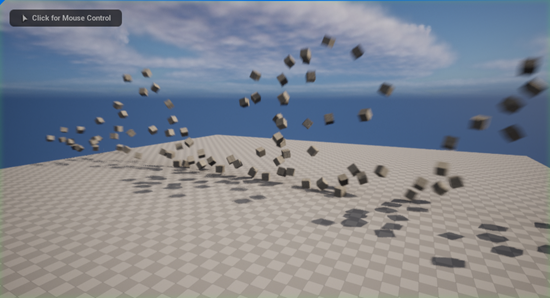
If you start the game now, you’ll see cubes “exploding” in all directions. That happens because we spawn them in the same Location at the same time and their colliders push them away from each other:
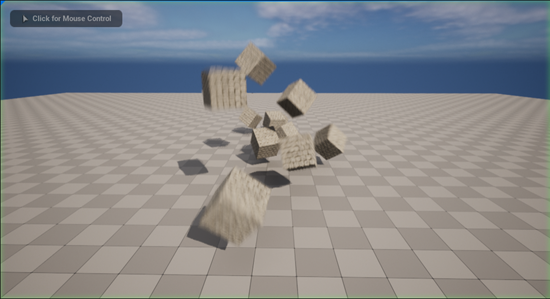
If you set the ForLoop’s LastIndex to 100, you’ll have a hundred cubes flying around:
Spawning A Tower
But how can we make the cubes spawn on top of each other? All we have to do is to iterate their Spawn Location like this:
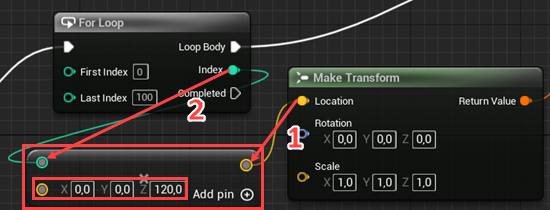
- Connect the MakeTransform node’s Location input pin to a new Multiply node. You have to connect the Multiply node to the Location pin first, so the Multiply node would return the Vector type
- Connect the ForLoop node’s Index output pin to the first input pin of the Multiply node
- Set the second input pin of the Multiply node to (0, 0, 120)
This way, we multiply the (0, 0, 120) Vector by the current Index and the cubes will be spawned every 120 vertical units. The first cube will be spawned at 0 height, the second at 120, the third at 240, and so forth:
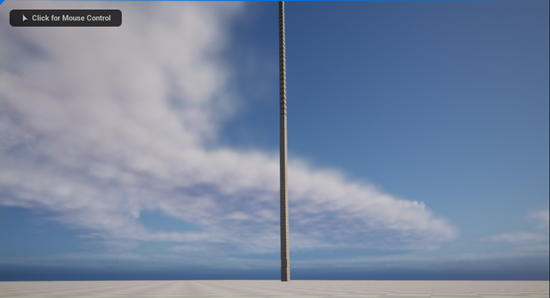
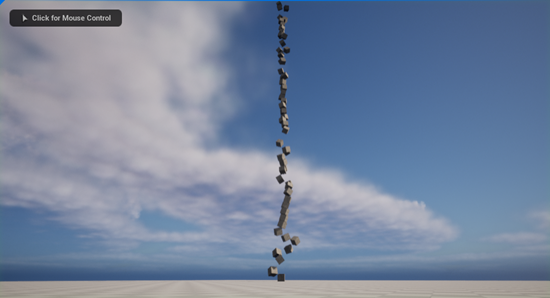
If you spawn a hundred cubes now, they will be aligned in a straight vertical line, forming a tower of sorts:
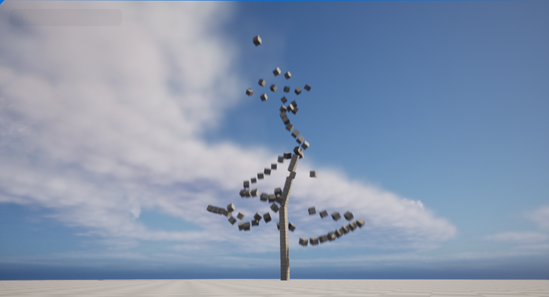
Though, that tower will crumble a second later, as soon as physics catches up with it:
Giving Boxes A Random Rotation
We can also spawn our cubes at random rotations. All we have to do for it is to connect the MakeTransform node’s Rotation input pin to a new RandomRotator node. That node will generate a random Rotation for every cube we’re spawning:

If you start the game now, the cubes will start falling straight away, as each of them has a different rotation and they can’t stack on top of each other:
After The Loop Ends
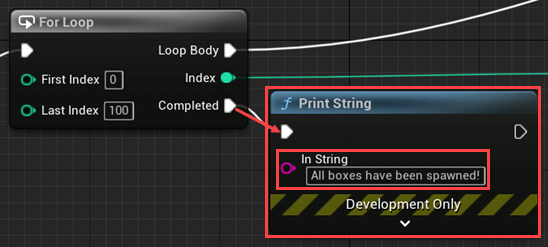
We can pass the control flow once the loop ends using the Completed pin of the ForLoop node. Let’s print a message when all cubes are spawned:
- Connect the ForLoop node’s Completed output control flow pin to a new PrintString node
- Set the In property of the PrintString node to “All boxes have been spawned!“
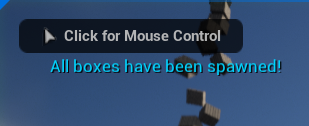
Now you’ll have the “All boxes have been spawned!” message shown once all the cubes have been spawned:
Loops Challenge
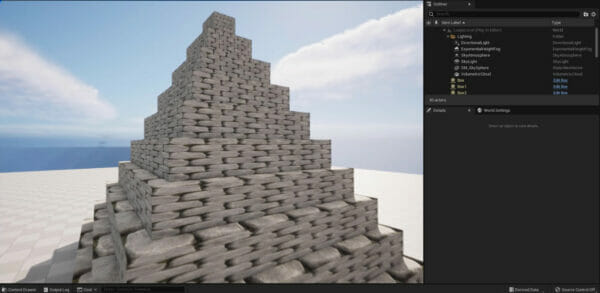
Before we finish up the tutorial, let’s have you solve a challenge! Your challenge is to create a tower of cubes that looks like a pyramid. Going from top to bottom, each cube should have a bigger scale than the previous one as seen below:
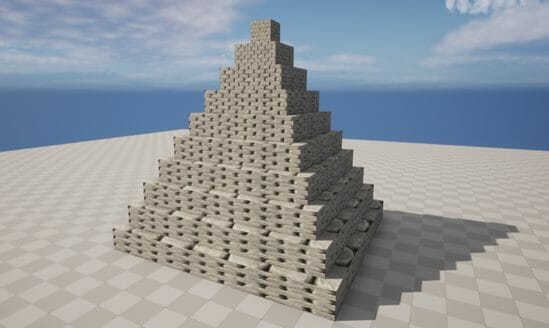
We suggest you use the Subtract and MakeVector nodes in that challenge. You should also remove the RandomRotator node from the LoopsGameMode Event Graph, as you don’t want those cubes to have random rotations in a pyramid:

Then, you should also iterate the For Loop from 0 to 10. This way your pyramid would be small and stable enough:
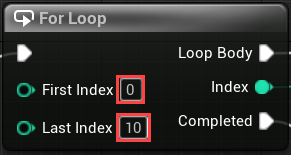
And that’s all the hints we have for you! Now you can go and try to solve the challenge.
Challenge Solution
Once you’ve made your best at this challenge, you can check yourself with our implementation. We’ll make our cube tower look like a pyramid by scaling the cubes on the X and Y axes.
First, as we want the cube at the bottom to be the biggest, we will “flip” our Index using the Subtract node:
- Create a new Subtract node
- Connect the ForLoop’s Index pin to the second input pin of the Subtract node, as we want to subtract the Index from the first value
- Set the first input pin of the Subtract node to 10. It should have the same value as the Last Index pin of the ForLoop node
This way, for the 0 Index, we’ll have 10, for the 1 Index, we’ll have 9, and so forth:
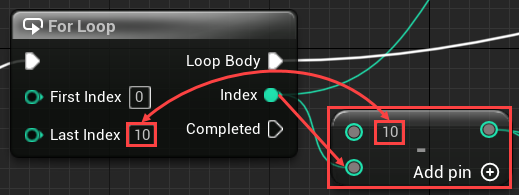
Then, we’ll create the scaling Vector from that flipped Index:
- Create a new Make Vector node
- Connect the output pin of the Subtract node to the X and Y input pins of the MakeVector node
- Set the Z pin of the MakeVector node to 1, so the cubes would have 100% height
This way, for the 0 Index, we’ll have the (10, 10, 1) scale, for the 1 Index, we’ll have the (9, 9, 1) scale, and so on:
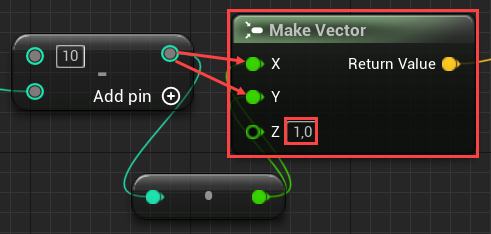
Finally, you should connect the Return Value output pin of the MakeVector node to the Scale input pin of the MakeTransform node. This way, the scale Vector we created will be applied to the cubes:

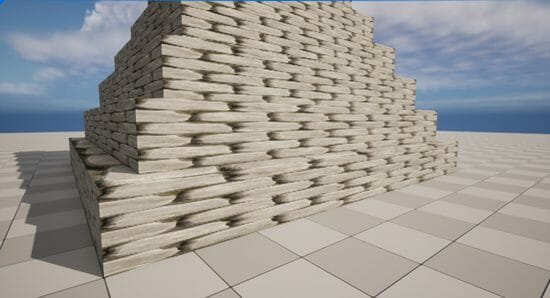
As the result, you should get a nice cube pyramid:
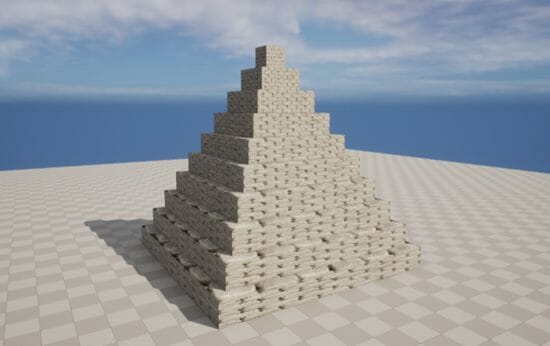
And if you look closely at the bottom levels of that pyramid, you’ll see that each level is just a stretched cube:
Conclusion
Well done on completing this tutorial!
See how easy it was to spawn whatever number of objects we want in the level scene with Unreal Engine? With this tutorial, not only did you get acquainted with the engine, but you also already coded with the Blueprints Visual Scripting System to create a pyramid of boxes! Getting confident about the simple steps within the engine will surely make your progress quicker and easier.
Moving forward, you can start tackling bigger and more complex projects, thus expanding the existing knowledge you just acquired. You can move on to adding in new features to your future scenes or dig deeper into the many features of the engine you’re interested in for your games. In any case, the foundations you’ve gathered here will provide you with a great starting point in your game-developing journey with Unreal Engine!
We wish you the best of luck in your learning path!
Want to learn more about Unreal Engine game logic? Try our complete Unreal Engine Mini-Projects course.
Did you come across any errors in this tutorial? Please let us know by completing this form and we’ll look into it! FINAL DAYS: Unlock coding courses in Unity, Godot, Unreal, Python and more.
