Table of contents
Introduction
Check out the other parts of this series:
One of the great things about Augmented Reality is just what its name implies: you get to add-to reality. Some developers have done this in the form of a “play basketball with a dinosaur” app or a “fight the aliens invading your living room” game. This has been the trend in the development of augmented experiences.
But what if there was a different way to augment reality? What if there was a way for you, the player, to directly augment your reality with what you create? What if you could see your own designs in your own living room? That is essentially the premise of this project.
Did you come across any errors in this tutorial? Please let us know by completing this form and we’ll look into it! FINAL DAYS: Unlock coding courses in Unity, Godot, Unreal, Python and more.
In this tutorial series, we will create an AR “drawing app” where the player can draw directly in 3D, augmented space. This allows for another exhilarating level of augmented experience. It allows the user to dictate how and where reality will be augmented.
We will be using a tool in Unity called “AR Foundation” which is Unity’s own AR ecosystem. AR Foundation will allow us to detect flat surfaces in the real world. Because of this, we can allow the player to draw above a kitchen table or on the table. This project will be able to run on iOS and Android devices, though there will be some requirements when it comes to the hardware. Also, this tutorial series is intended for people who have some knowledge of Unity and C# scripting.
Even if you aren’t sure if this describes you, just give this tutorial series a try! You might surprise yourself!
Source Code files
You can download the tutorial source code files here.
Part 1 of this Series
This tutorial is part of a series on AR Foundation. In this tutorial, we’ll set up our AR Foundation project to run on a mobile device, create our 3D pen point for drawing, and set up the camera so that we can test our mechanic in the Unity Editor.
Creating the project
Open up Unity Hub and create a new project to run on the latest version of Unity installed. Name it “AR Drawing App.” Set it to a 3D project and hit “create.”
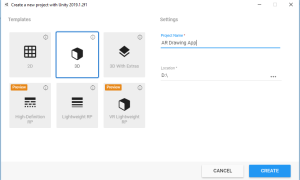
The very first thing we’re going to do is to get the device set up so that we can test our AR project.
Setting up our device: Android
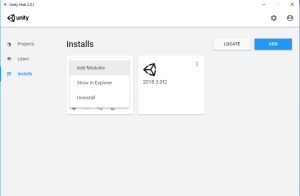
In order for AR Foundation to work on your device, it must first be compatible with ARCore for Android. Have a look at the supported devices on this page: https://developers.google.com/ar/discover/supported-devices Building to Android is really simple. If you didn’t add Android build support when you downloaded Unity, you can change that by simply going to the “Installs” portion on the Unity Hub. Click the “extra” icon on the top portion of your editor version and select the “Android Build Support” package.
Make sure you include the “Android NDK and SDK Tools.” 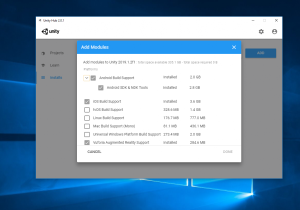 Click “Done” and you are all set up. To run a project on your Android device make sure “USB debugging” is enabled (you may have to look up how to do this since it is different for each device) and plug your device into your computer. Then supply a Package Name in the Player Settings, and supply a description in the “Camera Usage Description”.
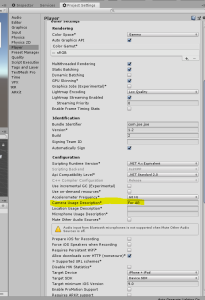
Then hit “Build and Run.”
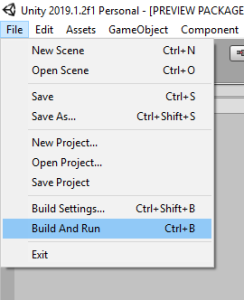
The project will compile and download to your device. It is important to frequently test on a device when developing AR applications.
Setting up our device: iOS
Building to iOS is a bit more involved. First, you have to have a Mac running the latest version of OSX and the latest version of Xcode. Second, you must have an Apple device with at least an A9 chipset. This basically means an iPhone 6S (or iPhone SE) or later. And finally, you must have an Apple Developer account. These accounts are free to create but you won’t be able to publish to the App Store. Go to https://developer.apple.com/ to create an account and download Xcode. Then you’re going to need to hook up your developer account to Xcode.
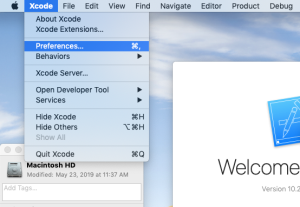
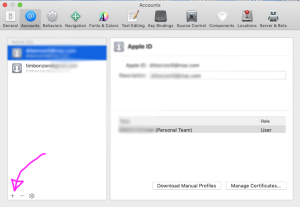
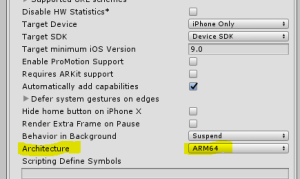
Now go to Unity and provide a Package Name and supply some description in the “Camera Usage Description”. AR Foundation is currently only compatible with “ARM64” architecture so set it to the appropriate setting.
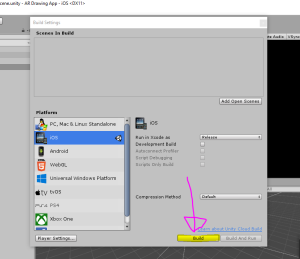
Now you can hit “Build.” It’ll ask you for a folder to store it in so go ahead and create a brand new folder.

Then open that same project in Xcode.
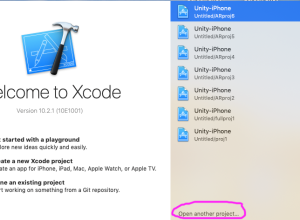
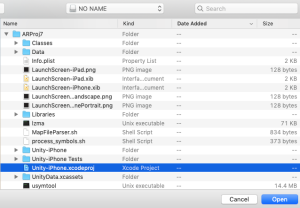
Navigate to the build settings and set the Provisioning Team to your developer account.
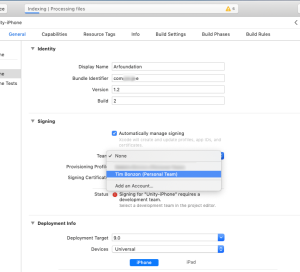
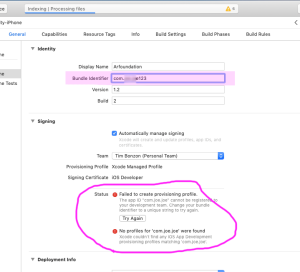
If it gives you a signing error then simply add a few numbers to the end of your Package Name.
Going from Unity to Xcode is sometimes fiddly and so it may take a couple of Google searches before you finally can build. For example, when I opened my project in Xcode, it gave me an error that said “The Folder ‘ARReferenceImages.xcassets’ doesn’t exist”,
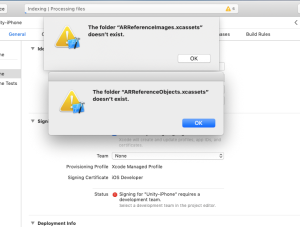
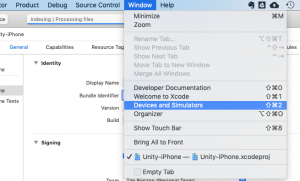
I simply closed this out had no issues. Plugin your iPhone or iPad and make sure it is recognized by going to the “Devices and Simulators” window.
Finally, hit build and run.
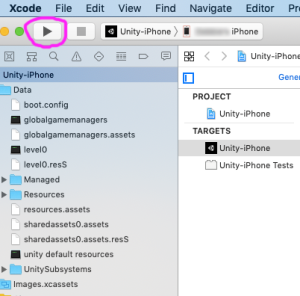
The project should start up on your device once it is done.
Importing the packages
Now that our device is ready to test our AR project, let’s go ahead and import AR Foundation. Go to Window -> Package Manager
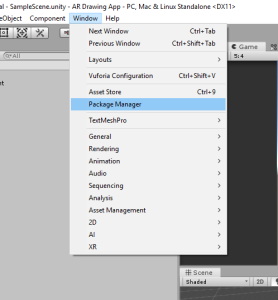
and wait for it to load the installed packages. If you can’t see AR Foundation as a package then you need to click on “Advanced” and then “Show preview packages.”
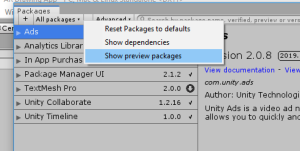
Select AR Foundation and click “Install.”
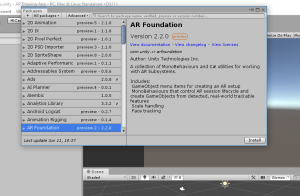
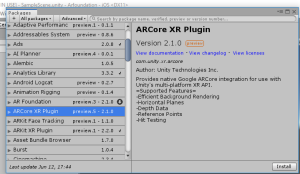
Once it is done installing, we need to know if we’re going to develop for Android or iOS. If for Android, then we import the ARCore package.
If for iOS, then we import the ARKit package.
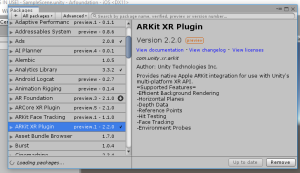
Chose the package that you need and then install it. Once it is done, we can go set up our scene.
Error Warning in Xcode
It is worth noting that you may have to downgrade your package if you’re getting “Undefined symbol” errors in Xcode. This has happened to me a couple of times and the solution I found was to downgrade the packages (AR Foundation and ARKit XR) until the error disappeared in Xcode. Like I mentioned before, exporting to a build platform is very fiddly and may take a couple of Google Searches before you find success.
Setting up the Scene
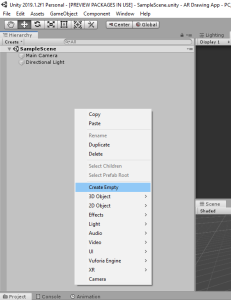
The first thing we will need is what’s called an “AR Session.” Create an empty game object called “AR Session” and add an “AR Session” component.
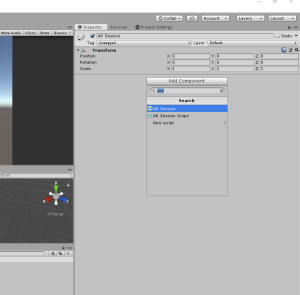
An AR Session is what starts and stops the Augmented Reality session on the device. With this, we can start, stop, or pause any AR activities on the device. Next, add an input manager component (search “AR Input Manager”) to this game object
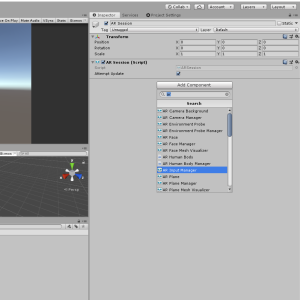
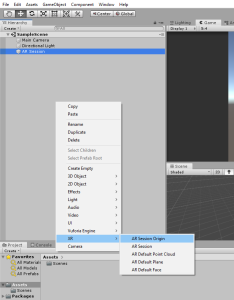
and we’re done with the AR Session object. We have an AR Session so we can start augmented reality on the device but we need a way to take the information that’s being gathered by the device and turn it into usable 3D information that can translate over to Unity. To do this, we use another component called an “AR Session Origin.” This takes the tracked features in the real world and converts it to 3D coordinates that Unity can use. We’re going to add this into the scene in a different way than when we added the AR Session. Right-click in the hierarchy and go to “XR” -> “AR Session Origin.”
As you can see, this has the “AR Session Origin” component and an AR Camera parented to the object.
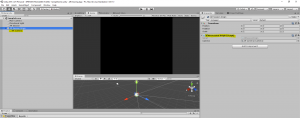
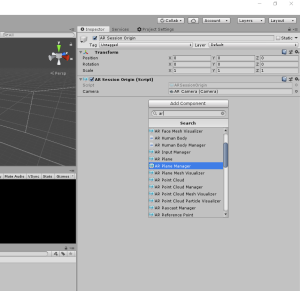
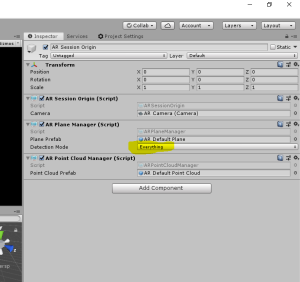
There are a couple of components this AR Session Origin is going to need for our project. The first is an “AR Plane Manager.”
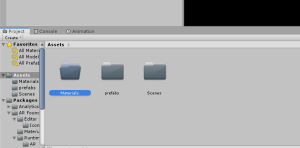
This takes the tracked feature points and determines if a flat surface lies somewhere in the real world; if it does then it spawns a game object. Right now, the “plane prefab” field is empty. Create a new folder called “prefabs”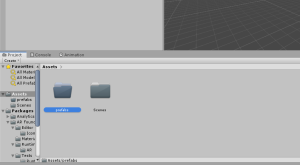
and then right-click in the hierarchy to create an “AR Default Plane.” 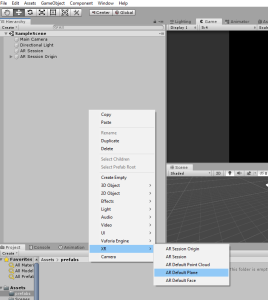
Make this a prefab and then assign it to the field on the “AR Plane Manager” script.
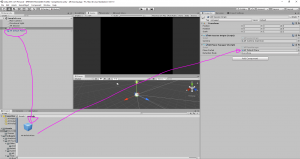
Next, we’ll need an “AR Point Cloud Manager.”
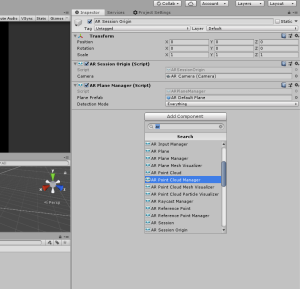
This recognizes the existence of tracked feature points that are close to each other. Once it does recognize these points, it will spawn the prefab in the “Point Cloud Prefab” field. Create this in the same way we did the Default Plane (create it in the scene,
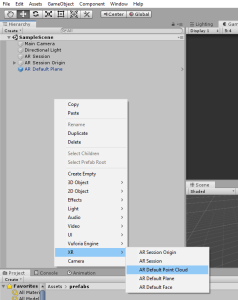
make it a prefab, and then drag it in the field on the Point Cloud Manager).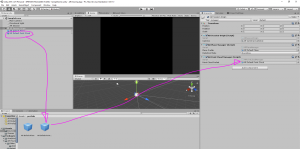
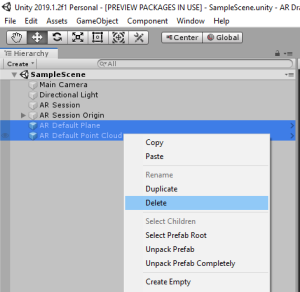
Now delete both of these objects in the scene since we no longer need them.
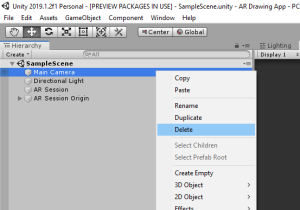
Since the AR Session Origin already has a camera we can delete the default camera.
We just need to make sure that the AR Camera has the tag “MainCamera.”
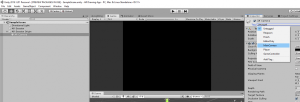
We’ll be needing this later on. Having done all this, let’s go ahead and build to our device to see if everything is functioning properly.
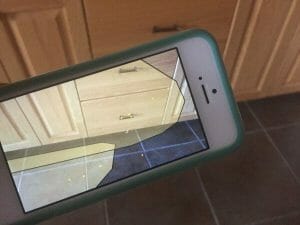
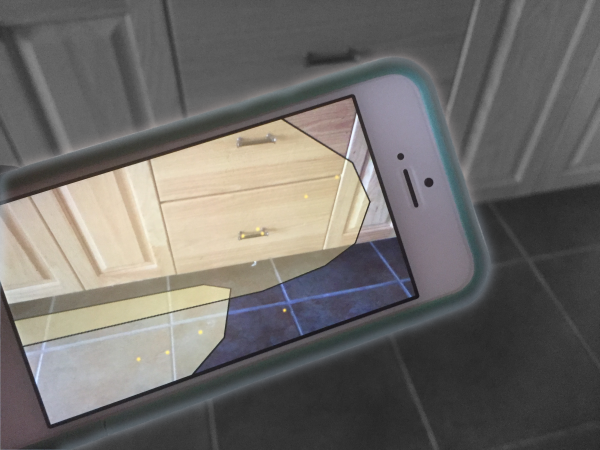
Looks like everything is working, you’ll notice we can track both horizontal and vertical planes with AR Foundation. We can change it to track only horizontal or vertical planes by changing the “Detection Mode” on the AR Plane Manager.
Let’s leave it set to “Everything” for this project.
Drawing in 3D Space: the Paint Stroke
Now that our project can detect planes and trackable points, let’s start making the drawing mechanic. Create a new empty game object called “Stroke” and make it a prefab.
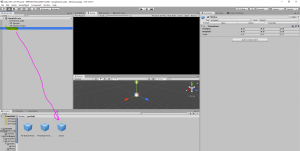
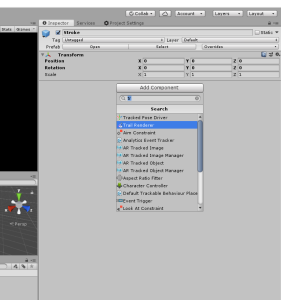
We are going to be using a component called a “Trail Renderer” in order to make a paint stroke. On the Stroke game object, add a Trail Renderer component.
Drag it around and you’ll see that it leaves a trail (this is actually a new mesh) that eventually fades.
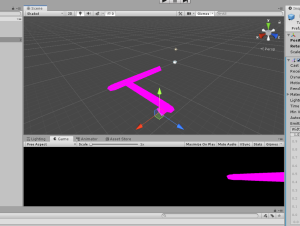
We want our trail to never fade so we need to change the “Time” value in the inspector to “infinity” (type this word in the number field).
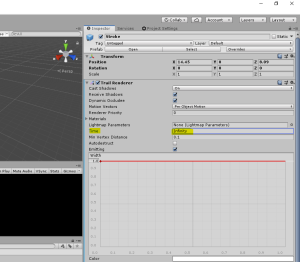
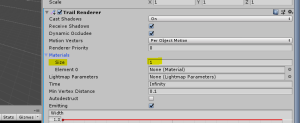
Next, our stroke is a very ugly pink color. This is because it currently has no material. Go to the “Materials” array in the Trail Renderer component and set the length to 1.
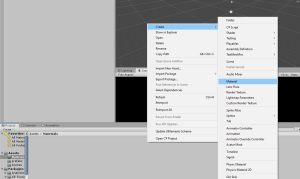
Now we need to create a material for the stroke. Go to your project folder and create a new folder called “Materials”,
then create a new material in that folder called “PenColor.”
We don’t need to do anything to this material yet so go ahead and just place it in the Materials field.
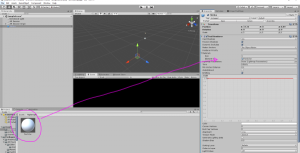
You’ll now see that our paint stroke has turned from pink to white!
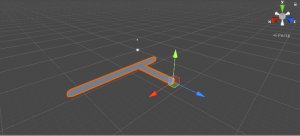
Now, apply the modified component to the prefab and we’re done with our paint stroke.
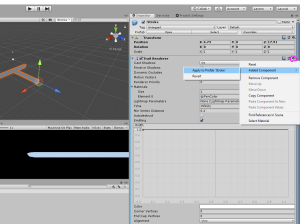
Delete the Stroke game object from the scene view and we can now move onto setting up the camera for testing in Unity.
Drawing in 3D Space: the Camera
When developing a game like this, we need a way to test our drawing mechanic right in the Unity Editor as that will allow us to see if any changes need to be made. A simple way to do this is just to make a simple mouse-look script as that (for our intents and purposes) will simulate the movement of the camera during an AR session. Create a new folder named “Scripts”
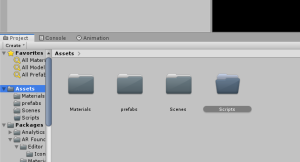
and create a new C# script called “Draw.”
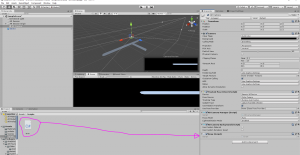
Assign this to our AR Camera and then boot up Visual Studio (or your preferred script editor) to make changes to our Draw script. We’re just going to be implementing a mouse-look mechanic so this is all the code we’ll need:
using System.Collections;
using System.Collections.Generic;
using UnityEngine;

public class Draw : MonoBehaviour
{
    public bool mouseLookTesting;

    private float pitch = 0;
    private float yaw = 0;

    // Start is called before the first frame update
    void Start()
    {

    }

    // Update is called once per frame
    void Update()
    {
        if (mouseLookTesting)
        {
            yaw += 2 * Input.GetAxis("Mouse X");
            pitch -= 2 * Input.GetAxis("Mouse Y");

            transform.eulerAngles = new Vector3(pitch, yaw, 0.0f);
        }
    }

}
As you can see, we use a public boolean to determine if we are testing in the Editor. This boolean should be set to false when you export the game so remember to do this before you export. Hit save and then go back to Unity. Enable “Mouse Look Testing” and then hit play. You should be able to tell by the way the gizmo is moving that we’ve got a mouse-look mechanic!
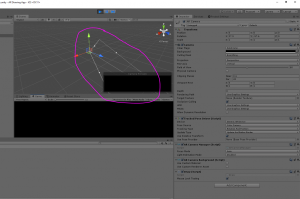
Now we can move onto creating the pen point in 3D space.
Drawing in 3D Space: the Pen Point
Create a new Sphere called “Pen Point” and parent it to the AR Camera.
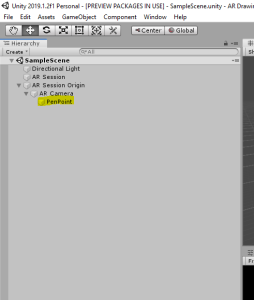
This will serve as our 3D Penpoint. Make sure the position of this point is extremely close to the camera on the Z-axis (mine was less than 0.25). This is because one world unit in Unity is about one meter in the real world. This also means that we need to scale this sphere way down. If we scale it down to 0.1 (on each axis), that would be about ten centimeters in the real world which is way too large for a pen point. We have to go down to 0.05 in order to get a decent size. Your Transform component should look like this and your sphere should look like this.
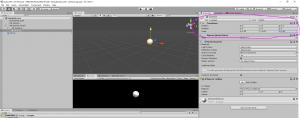
Alright! We’re done with the 3D pen point.
Conclusion
I like to think that we’ve now built the launch pad by which we rocket off into augmented reality worlds. We are now able to test an augmented reality app on a mobile device, we have got a paint stroke setup, and we’ve got a way to test our drawing mechanic in the editor.
In the next tutorial, we will begin to actually draw in 3D space, and we’ll build it to the device to make sure everything is working properly. Then we’ll set up the necessary components to start drawing on an AR detected plane. We will learn about how AR Foundation stores position information and how to raycast in augmented reality. Lot’s of cool things happening in the next tutorial, so come back on and let’s continue to augment our reality.
