Requirements:
Basic knowledge of HTML5 and CSS3.
Some exposure to JavaScript and jQuery is recommended but not required.
Source Code:
You can download the tutorial source code here.
Introduction
In this tutorial, we will build a simple price calculator with HTML5 and CSS3. Then we will use jQuery to streamline the interface by the allowing the calculator’s only button to perform a simple calculation and reset the text fields. We will also use jQuery for the program logic that performs the calculation.
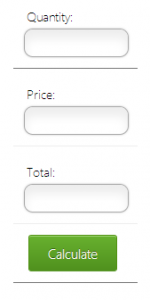
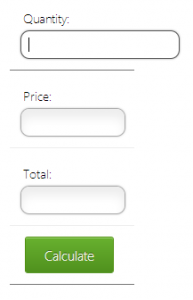
Here is a screenshot of the program we’ll be creating:
What you will need to complete this tutorial
To complete this tutorial, you will need a text editor. For beginning web developers I highly recommend Notepad++, which you can download for free from http://notepad-plus-plus.org/download/v6.5.5.html.
For simplicity’s sake I recommend creating a simple folder structure for the project. You do not have to follow this structure precisely but it does make things a little easier. Here is the recommended folder structure we will be using throughout this tutorial:
To create this structure, do the following:
- Create a new folder on your desktop called Price Calculator.
- Inside the Price Calculator folder, create a new folder called css. This is where the Cascading Style Sheet for the project will go.
- Inside the Price Calculator folder, create another new folder called scripts. Our jQuery code will go here.
Getting Started
Let’s create the basic HTML5 document structure and the css file for the project.
Open Notepad++. A new file is automatically created for you when the program loads. Save this file in the Price Calculator folder as price_calculator.html.
Create another new file by clicking on the New File icon in the upper left corner of the Notepad++ window (it looks like a white sheet of paper next to a green circle and a white + symbol inside the circle). This will create a new blank file and will appear as a new tab at the top of the Notepad++ window. This tab is automatically named new 2.
Save the new 2 file in the css folder and name this file styles.css.
Now we’re ready to start writing our HTML5 page. Click the price_calculator.html tab at the top of the Notepad++ window and type the following code into the editor window:
This code defines the basic HTML5 document structure for our project and also links the HTML page to our css file by using the tag.
The calculator is made up of a very simple HTML form. Type the following code between the opening and closing tags:
<!—- end form –>
We now have the calculator laid out in its basic form. Here we have wrapped the label, input, and button elements within list items which are wrapped in an unordered list while wrapping them all within a
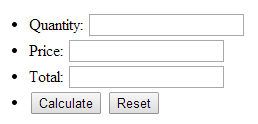
that has a class name of “form”. If you save and view the code we’ve written so far, the calculator should look similar to this:
It looks pretty rough and we’ll fix that with some css in a moment. At the outset I said that we will have only one button on our form performing two different functions. We definitely will have the appearance of one button in our program so don’t be concerned that two buttons are showing up on the form right now.
If you already haven’t done so, save the price_calculator.html file and open the styles.css file you created earlier. The css file is quite lengthy and I’ll break it down into sections, explaining what is happening in each one. To keep the tutorial at a reasonable length,
I won’t be explaining each css property that styles the form. There are many great resources online that will give you more information on css properties. If you’re just beginning with css I recommend experimenting with this code by changing values or removing some values completely and then viewing the result of your changes within your web browser. Experimenting with css in this way is one of the best ways to get a handle on what is happening behind the scenes. All of the source code for this tutorial can be downloaded from this site as well if you choose not to type in all of the code. Type (or copy and paste) the following code into Notepad++:
/* Remove the blue border that appears on input elements when they are focused. */
*:focus {
    outline: none;
}
body {
    font: 14px/21px "Segoe UI Light", Arial, sans-serif;
}
.form ul {
    width: 140px;
    list-style-type: none;
    margin: 0 45% 0 45%;
    padding: 0px;
}
.form li { padding: 12px; border-bottom: 1px solid #eee; position: relative; }

.form li:first-child, .form li:last-child {
    border-bottom: 1px solid #777;
}
.form label {
    width: 150px;
    margin-top: 3px;
    display: inline-block; /*align the labels and the text boxes*/
    float: left;
    padding: 3px;
}
.form input {
    height: 20px;
    width: 100px;
    padding: 5px 8px;
}
.form input {
    border: 1px solid #aaa;
    box-shadow: 0px 0px 3px #ccc, 0 10px 15px #eee inset;
    border-radius: 10px;
   -moz-transition: padding .25s;
   -webkit-transition: padding .25s;
   -o-transition: padding .25s;
    transition: padding .25s;
}
.form input:focus  {
    background: #fff;
    border: 1px solid #555;
    box-shadow: 0 0 3px #aaa;
    padding-right: 70px;
}
This section of our css file focus on the textboxes where the user types in the quantity and price as well as the box that displays our total.
Now let’s style the buttons. Type the following into Notepad++:
button.calculate {
background-color: #68b12f;
background: -webkit-gradient(linear, left top, left bottom, from(#68b12f), to( #50911e));
background: -webkit-linear-gradient(top, #68b12f, #50911e);
background: -moz-linear-gradient(top, #68b12f, #50911e);
background: -ms-linear-gradient(top, #68b12f, #50911e);
background: -o-linear-gradient(top, #68b12f, #50911e);
background: linear-gradient(top, #68b12f, #50911e);
border: 1px solid #509111;
border-bottom: 1px solid #5b992b;
border-radius: 3px;
-webkit-border-radius: 3px;
-moz-border-radius: 3px;
-ms-border-radius: 3px;
-o-border-radius: 3px;
box-shadow: inset 0 1px 0 0 #9fd574;
-webkit-box-shadow: 0 1px 0 0 #9fd574 inset ;
-moz-box-shadow: 0 1px 0 0 #9fd574 inset;
-ms-box-shadow: 0 1px 0 0 #9fd574 inset;
-o-box-shadow: 0 1px 0 0 #9fd574 inset;
color: white;
font-family: "Segoe UI Light", Arial, sans-serif;
font-size: 15px;
padding: 6px 20px;
text-align: center;
text-shadow: 0 -1px 0 #396715;
margin-left: 5px;
width: 100px;
height: 41px;
}
button.calculate:hover {
opacity: .85;
cursor: pointer;
}
button.calculate:active {
border: 1px solid #20911e;
box-shadow: 0 0 10px 5px #356b0b inset;
-webkit-box-shadow:0 0 10px 5px #356b0b inset ;
-moz-box-shadow: 0 0 10px 5px #356b0b inset;
-ms-box-shadow: 0 0 10px 5px #356b0b inset;
-o-box-shadow: 0 0 10px 5px #356b0b inset;
}
button.reset {
background-color: #68b12f;
background: -webkit-gradient(linear, left top, left bottom, from(#68b12f), to( #50911e));
background: -webkit-linear-gradient(top, #68b12f, #50911e);
background: -moz-linear-gradient(top, #68b12f, #50911e);
background: -ms-linear-gradient(top, #68b12f, #50911e);
background: -o-linear-gradient(top, #68b12f, #50911e);
background: linear-gradient(top, #68b12f, #50911e);
border: 1px solid #509111;
border-bottom: 1px solid #5b992b;
border-radius: 3px;
-webkit-border-radius: 3px;
-moz-border-radius: 3px;
-ms-border-radius: 3px;
-o-border-radius: 3px;
box-shadow: inset 0 1px 0 0 #9fd574;
-webkit-box-shadow: 0 1px 0 0 #9fd574 inset ;
-moz-box-shadow: 0 1px 0 0 #9fd574 inset;
-ms-box-shadow: 0 1px 0 0 #9fd574 inset;
-o-box-shadow: 0 1px 0 0 #9fd574 inset;
color: white;
font-family: "Segoe UI Light", Arial, sans-serif;
font-size: 15px;
padding: 6px 20px;
text-align: center;
text-shadow: 0 -1px 0 #396715;
margin-left: 5px;
width: 100px;
height: 41px;
}
button.reset:hover {
opacity: .85;
cursor: pointer;
}
button.reset:active {
border: 1px solid #20911e;
box-shadow: 0 0 10px 5px #356b0b inset;
-webkit-box-shadow:0 0 10px 5px #356b0b inset ;
-moz-box-shadow: 0 0 10px 5px #356b0b inset;
-ms-box-shadow: 0 0 10px 5px #356b0b inset;
-o-box-shadow: 0 0 10px 5px #356b0b inset;
}Here we have set various properties of the calculate and reset buttons from color, gradient color, button size, font size, and font family. We have made our cursor change into a pointer when the mouse cursor is hovered over the buttons as a little added visual feedback to the user. There is a lot going on here and if you’re new to css all of this may seem strange and confusing but it becomes easier to understand when each section of code is broken down into individual parts. Since this is mainly a tutorial on jQuery, the specifics of the css above is outside the scope of this article but I encourage you to play around with this code and modify it in order to better grasp what we’ve done to achieve the visual effects within our program.
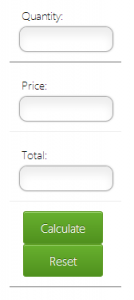
Save the file styles.css. The following screenshot shows our program (web page) in its current state:
Now we are going to get to the heart of this program and modify it using jQuery. jQuery is a JavaScript library that makes adding useful functionality to web pages much easier versus creating the same functionality in JavaScript itself. This is an over-simplified definition of jQuery and it would be well worth your time to study jQuery outside of this tutorial.
Before we can begin using jQuery, we need to download it. Go to http://jquery.com/ and click the Download jQuery button on the homepage. As of this writing, the current version of jQuery is 1.11.0. For our purposes, we’ll download the compressed, production version.
Click on the download link that says Download the compressed, production jQuery 1.11.0. A page will open in your browser with the jQuery source code.
Select all of the source code in the browser window (for Windows users, the keyboard shortcut for this is CTRL-A).
Once all of the source code has been selected, right-click and choose copy.
Go back into Notepad++ (which should still be open) and create a new file.
Paste the jQuery source code into the new file in Notepad++.
Save the file in the scripts folder (not in the css folder) and name it jquery.js. You can name the jQuery file anything you want (as long as it has the .js extension after the filename).
We can close the jquery.js tab in Notepad++ since we won’t be editing this file.
Now we need to tell our HTML5 page where to find our jquery.js file.
Click the price_calculator.html tab at the top of the Notepad++ window.
In thesection of the page directly under
type the following code:
Add one more reference directly below the one you just wrote:
This is a reference to a file we will be writing soon.
Now that our references have been added, we can start writing our jQuery code. In Notepad++, create a new file, name it calculate.js and save it in the scripts folder.
Type the following code into the file calculate.js:
var CALC = {

};
This code is the beginning of an object literal. An object literal is a way to group related code into distinct pieces, essentially dividing the code into units of functionality. Writing the code this way makes it easier to understand and maintain down the road. Object literals go into the discussion of encapsulation and object-orientation which is beyond the scope of this tutorial but you can find more information on the ups and downs of object literals here: http://learn.jquery.com/code-organization/concepts/
Okay, the code we just wrote has created an object using literal notation. Now we’ll write our functions that give our program its functionality. Place your cursor in the empty space between the two curly brackets { }; and type the following code:
 onReady: function() {
     $('#quantity').focus();
     $('button.reset').hide();
     $('button.calculate').click(CALC.calculate);
     $('button.reset').click(CALC.reset);
 },
Here we have created a function called onReady that will run when our program (web page) initially loads. Inside this function, we have done the following:
- Made the mouse cursor appear inside the quantity textbox (input field).
- Hidden the reset button from view.
- Enabled the Calculate button (when clicked) to run a function called calculate(which we will be writing in the next section).
- In the calculatefunction, the button is changed to Reset. When the reset button is clicked, run the resetfunction(which we’ll also be writing next).
Under the code you just wrote, type the following:
calculate: function(event) {
 // Get the quantity from the user.
    var quantity = $('#quantity').val();
    // Get the price from the user.
    var cost = $('#price').val();

// Initialize the variables, perform the calculation, store the values in the
variables, and make the total cost appear as a dollar amount with 2 places past
the decimal point.
    var totalCost = quantity * cost;
    totalCost=totalCost.toFixed(2);

    // Set the total cost by placing the value in the total cost input field.
 $('#total').val(totalCost);

// Hide the calculate button.
 $('button.calculate').hide();

// Show the reset button.
 $('button.reset').show();

 },
We have done a lot with a relatively small amount of code. The calculatefunction has been created which takes the quantity and price values that the user enters, multiplies them, and displays a final dollar amount in the total input field. This function gets fired when we click the Calculate button.
Whenever you see a name with a hash # mark in front of it, we are referencing one of the input elements. For instance, this line of code:
var cost = $(‘#price’).val();
creates a variable named cost and assigns it the value of the price input field. jQuery uses css selectors to work with HTML elements. Our price element has an id of price and we reference it in our jQuery code with the hash # mark.
The magic (so to speak) comes into play with the hide() and show() functions.
// Hide the calculate button.
    $(‘button.calculate’).hide();
// Show the reset button.
    $(‘button.reset’).show();
When the Calculate button is clicked, we immediately hide the Calculate button and show the Reset button. So essentially we have two buttons on the form but we’re showing and hiding them so fast that they appear as one.
The onReady function that we wrote at the beginning of this section will call the reset function once the Reset button has been placed onto the form.
Now it’s time to write the code that will clear the input fields and return the form to its original state so the user can enter another calculation. Directly below the code you just wrote, type the following:
reset: function(event) {
     $('#quantity').val('');
     $('#price').val('');
     $('#total').val('');
     $('#quantity').focus();
     $('button.calculate').show();
     $('button.reset').hide();
 }
This code clears all of the input fields by setting their values to an empty value, returns the mouse cursor (focus) the quantity input field, shows the Calculate button again, and hides the Reset button. Our form is now back in the state is was in when it was first opened and is ready for another calculation.
Directly below the code you just wrote, you should have a right curly bracket with a semi-colon }; already in place. If not, add that now. Below this curly bracket, type this last line of code:
$(document).ready(CALC.onReady);
This last line uses our object CALC and calls its onReady function. This is how you call an object’s function which goes into the discussion of object oriented programming. Object oriented programming is a powerful paradigm of many languages, JavaScript and jQuery included. It would be well worth your time to learn about object oriented programming as you continue your studies of JavaScript and jQuery.
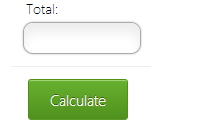
Go ahead and save the calculate.js file if you haven’t already and run price_calculator.html in your web browser. It should look like this:
I hope this small example program gets you thinking about the power of jQuery and object oriented programming. You can take this example and use it as a springboard for your own projects, especially where a streamlined interface is required.
Source Code:
You can download the tutorial source code here.
