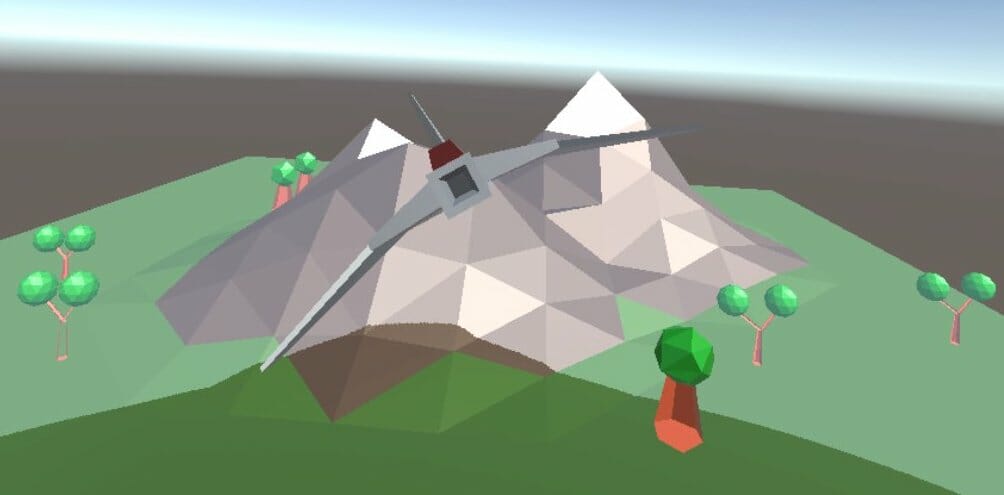
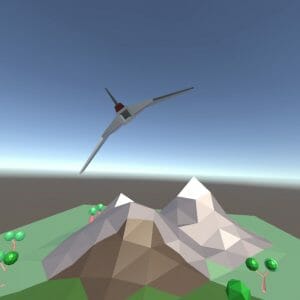
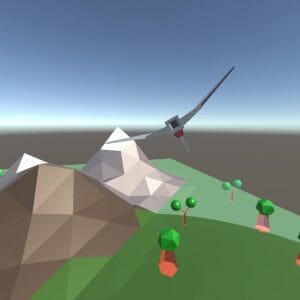
In my previous tutorial about the Gear VR controller, we learned how to use the Oculus Utilities package to utilize the Gear VR controller as a gun or pointing device. Now we’ll use the controller as a joystick to control a spaceship. Instead of reusing and modifying the Oculus Utilities prefabs, we will be directly accessing the controller’s orientation to manipulate a spaceship flying over an alien planet.
Table of contents
Downloads
You can download the Unity project for this tutorial here. The OVR directory created by Oculus Utilities is included. The spaceship model included in the project’s assets was created by Liz Reddington. It is licensed under CC-BY 3.0 and available at Spaceship – Poly on Google
Did you come across any errors in this tutorial? Please let us know by completing this form and we’ll look into it!

FINAL DAYS: Unlock coding courses in Unity, Godot, Unreal, Python and more.
Setting Up the Project
To get started, create a new project in Unity. Create the folder Assets/Plugins/Android/assets , and copy your phone’s Oculus signature file there. See Oculus Signature File (osig) and Application Signing to create a new signature file.
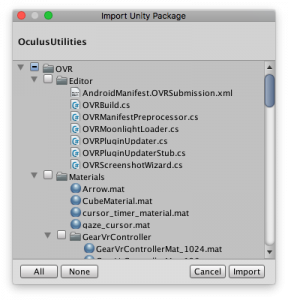
Download Oculus Utilies for Unity 5 from the Oculus Utilities for Unity Site and unpack the zip file on your computer. Import Oculus Utilities into your project by selecting Assets -> Import Package -> Custom Package and choosing the package you extracted. If you are prompted to update the package, follow the prompts to install the update and restart Unity.
A directory named OVR will be extracted into your project.
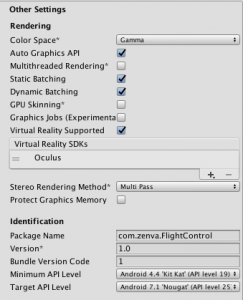
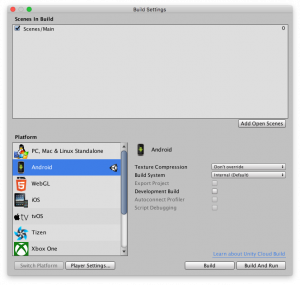
To prepare your project to be built, navigate to File -> Build Settings. Select Android as the platform. Click on Player Settings. Set a company name and project name. Under the “Other Settings” heading, select “Virtual Reality Supported” and add Oculus to “Virtual Reality SDKs.” Select Android 4.4 Kit-Kat (API Level 19) in the Minimum API Level field under the “Identification” heading. This is the minimum version of Android that supports the Gear VR.
OVRInput
In my previous tutorial, we used the OVRCameraRig prefab from the Oculus Utilities (OVR) package. The scripts that detected controllers were already attached to the prefabs. Now that we are not using the prefabs, we need to attach the right scripts and write additional code to handle controller rotation.
First, let’s take a look at the code provided by Oculus Utilities.
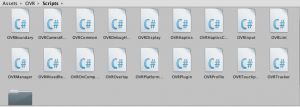
Open the script Assets/OVR/Scripts/OVRInput.cs . In Unity’s project window, note that C# scripts are displayed without the .cs extension, OVRInput.cs looks like OVRInput . When you create your own scripts, and the script’s icon appears in the project window, don’t add the .cs extension manually. If you do, your script’s real name will look like MyScript.cs.cs , and Unity will not be able to find it.
The documentation in the OVRInput script describes it as a unified input system for Oculus controllers and gamepads. The section that concerns us the most is the Controller enumerated type that maps to OVRPlugin.Controller :
public enum Controller
{
    None            = OVRPlugin.Controller.None,           ///< Null controller.
    LTouch          = OVRPlugin.Controller.LTouch,         ///< Left Oculus Touch controller. Virtual input mapping differs from the combined L/R Touch mapping.
    RTouch          = OVRPlugin.Controller.RTouch,         ///< Right Oculus Touch controller. Virtual input mapping differs from the combined L/R Touch mapping.
    Touch           = OVRPlugin.Controller.Touch,          ///< Combined Left/Right pair of Oculus Touch controllers.
    Remote          = OVRPlugin.Controller.Remote,         ///< Oculus Remote controller.
    Gamepad         = OVRPlugin.Controller.Gamepad,        ///< Xbox 360 or Xbox One gamepad on PC. Generic gamepad on Android.
    Touchpad        = OVRPlugin.Controller.Touchpad,       ///< GearVR touchpad on Android.
    LTrackedRemote  = OVRPlugin.Controller.LTrackedRemote, ///< Left GearVR tracked remote on Android.
    RTrackedRemote  = OVRPlugin.Controller.RTrackedRemote, ///< Right GearVR tracked remote on Android.
    Active          = OVRPlugin.Controller.Active,         ///< Default controller. Represents the controller that most recently registered a button press from the user.
    All             = OVRPlugin.Controller.All,            ///< Represents the logical OR of all controllers.
}
In Assets/OVR/Scripts/OVRPlugin.cs , OVRPlugin.Controller is an enumeration of values that represent each type of controller.
public enum Controller
{
    None               = 0,
    LTouch             = 0x00000001,
    RTouch             = 0x00000002,
    Touch              = LTouch | RTouch,
    Remote             = 0x00000004,
    Gamepad            = 0x00000010,
    Touchpad           = 0x08000000,
    LTrackedRemote     = 0x01000000,
    RTrackedRemote     = 0x02000000,
    Active             = unchecked((int)0x80000000),
    All                = ~None,
}
The Gear VR controller can be either LTrackedRemote or RTrackedRemote , depending on whether it is set up left-handed or right-handed. Currently, connecting two Gear VR controllers is not supported, but this could change in the future.
Representing controller types with numbers lets us use binary operations to store and extract multiple controller types in one variable. When we compute the bitwise OR of two binary numbers, we preserve all the bits in both masks. For example, the bitwise OR of 0001 and 0010 is 0011. Both 1’s are preserved in the result. When we compute the bitwise AND of 0001 and 0011, we get back 0001.
This technique lets us combine controller types by computing the bitwise OR of two or more OVRPlugin.Controller values. So, we can combine LTrackedRemote and RTrackedRemote by computing their bitwise OR. OVRPlugin.GetConnectedControllers() returns a bitwise OR of all connected controllers. We can determine if LTrackedRemote or RTrackedRemote is one of them by using bitwise operations:
gearController = connectedControllers & (OVRInput.Controller.LTrackedRemote | OVRInput.Controller.RTrackedRemote);
If, say, LTrackedRemote is connected, the result of the bitwise AND will be LTrackedRemote , and this value will be stored in the variable gearController . The same applies for RTrackedRemote . If neither is connected, gearController ’s value will be OVRInput.Controller.None .
Once the active Gear VR controller is identified, we can get its rotation quaternion by calling OVRInput.GetLocalRotation() . Then we can use this rotation to manipulate our spaceship.
ShipController
Our code to move the spaceship will go in the script ShipController.cs . Create the folder Assets/Scripts in your project, and in this folder create the ShipController script.
Start by declaring ShipController ’s data members:
public class ShipController : MonoBehaviour
{


    [SerializeField] float speed = 0.0f;

    [SerializeField] Transform vrCameraContainer;


    private OVRInput.Controller gearController;

    private Transform target;  // Target marker where the spaceship will move in each frame.

    private float distanceToCamera;


    // ...
}
The values of fields that are marked as [SerializeField] can be set in the inspector, even though their scope is private. The variable speed is the speed at which the camera container and ship will move. vrCameraContainer is the transform of the game object that will contain the main camera.
The variable gearController will store the value of whichever controller is active. The target represents the target position of the spaceship at each frame. Lastly, distanceToCamera stores the distance between the spaceship and vrCameraContainer .
When the game starts, we compute distanceToCamera in the Awake() method, which is called automatically before the game starts, but after all objects are initialized. We will also initialize target to the initial transform of the spaceship.
void Awake ()
{
    target = transform;
    distanceToCamera = Vector3.Distance(vrCameraContainer.position, transform.position);
}
We need code to determine which controllers are connected, so create a method, SetController() :
private void SetController()
{
    OVRInput.Controller connectedControllers = OVRInput.GetConnectedControllers ();
    Debug.Log (connectedControllers);
    gearController = connectedControllers & (OVRInput.Controller.LTrackedRemote | OVRInput.Controller.RTrackedRemote);
}
OVRInput.GetConnectedControllers() returns all connected controllers. The gearController is set to either LTrackedRemote or RTrackedRemote or none, using the bit manipulation technique we discussed in the previous section.
We will also need a method that returns the rotation of the connected controller:
private Quaternion GetOrientation()
{
    return OVRInput.GetLocalControllerRotation (gearController);
}
Create a method, MoveShip() , that will be called to update the spaceship’s position each frame.
void MoveShip ()
{
    Quaternion controllerRotation;
    Vector3 origPosition = transform.position;

    SetController ();
    controllerRotation = GetOrientation ();

    // Move the camera.
    vrCameraContainer.Translate (Vector3.forward * speed * Time.deltaTime);

    // Calculate the ship's target position.
    target.position = vrCameraContainer.position + (controllerRotation * Vector3.forward) * distanceToCamera;

    // Interpolate the ship's rotation to match the controller's rotation.
    transform.rotation = Quaternion.Slerp (transform.rotation, controllerRotation, speed * Time.deltaTime);
    // Move ship to the target transform.
    transform.position = Vector3.Lerp (transform.position, target.position, speed * Time.deltaTime);

}
Let’s see how this works. First, SetController() sets the value of gearController . We need to do this every frame because the controller can be disconnected or reconnected at any time. The GetOrientation() method acquires the controller’s rotation quaternion.
Our vrCameraContainer is moved forward by a distance determined by the speed. The spaceship will also move forward by the same speed, but the direction of its movement is determined by the controller. Each frame, the spaceship will move to the position of the target transform, which is computed by multiplying the controller’s rotation by the forward vector to determine a new direction. This product is multiplied by distanceToCamera to maintain the distance between the spaceship and the camera. The Vector3.Lerp() linearly interpolates the spaceship’s position to the target’s position for a smooth transition.
Each frame, MoveShip() is called by an Update() method that runs automatically.
void Update()
{
    MoveShip();
}
Setting Up the Game Assets
Now that our code is written, we need to put together the game’s assets. We will need a spaceship model as well as terrain or flying objects to make the game more interesting and to show that the spaceship actually moves.
For now, I’m using one of the terrain models from the VirtualTour tutorial. This file, Mountains.fbx , is also available in the included project file. Create a folder, Assets/Models , in your project, and copy Mountains.fbx there.
The spaceship model is a low-poly asset downloaded from Google Poly. Its files, Lo_poly_Spaceship_03_by_Liz_Reddington.mtl and Lo_poly_Spaceship_03_by_Liz_Reddington.obj , are also included in the attached project. Add these files to Assets/Models .
The camera will be located a fixed distance behind the spaceship to provide a third-person view. In VR, we never directly move the camera because the camera is controlled by the player’s head. Instead, we’ll nest the camera object inside another container.
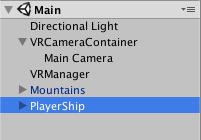
Create an empty game object named VRCameraContainer. Drag Main Camera into VRCameraContainer to nest it.
Use the transform widget and the arrows to move VRCameraContainer to an appropriate height above the terrain.
We also need to create a container for the spaceship model. Create an empty object, PlayerShip. Drag the spaceship model into the hierarchy pane, nesting it under PlayerShip.
Scale down the spaceship so it looks reasonable, and adjust its z-coordinate to position it in front of the camera.
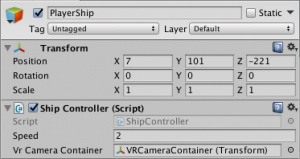
Attach the ShipController script to the PlayerShip object.
Drag the VRCameraContainer object to the “Vr Camera Container” field in the inspector, and set a speed.
Finding the Controller
If you run the game at this point, you’ll find that the ship doesn’t move along with the controller. What’s going on?
Let’s take a look at how the game knows that a controller is connected.
OVR/Scripts/OVRInput.cs determines which controllers are connected in the Update() and FixedUpdate() methods. However, OVRInput is a static class that is not attached to any game object, so OVRInput ’s update methods are never called. No matter what you do, the game won’t see your controller.
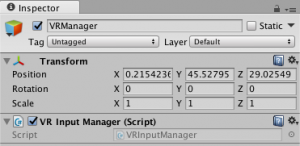
To resolve this situation, we’ll need to create a script that calls OVRInput.Update() and OVRInput.FixedUpdate() , and attach this script to an object. Create an empty game object named VRManager. Create a new C# script, Assets/Scripts/VRInputManager , with the following code:
using System.Collections;
using System.Collections.Generic;
using UnityEngine;

public class VRInputManager : MonoBehaviour
{
    // Update is called once per frame
    void Update () {
	if (OVRManager.instance == null) {
	    OVRInput.Update ();
	}
    }

    void FixedUpdate() {
        if (OVRManager.instance == null) {
	    OVRInput.FixedUpdate ();
	}
    }
}
VRInputManager.Update() calls OVRInput.Update() , but only if OVRManager does not exist. OVRManager is another object included in Oculus Utilities that calls OVRInput . Since we don’t need most of its functionality, we are not using it.
Attach the VRInputManager script to the VRManager object.
To try out the project, save the scene. I created a folder named Assets/Scenes and saved the scene as Main. In the Build Settings window, make sure the scene’s name is checked in the Scenes in Build box. With your phone connected, click the Build and Run button, and choose a name for the APK. I created a Build folder and saved the APK file there.
When the app loads, plug your phone into your headset to run it. If your controller is paired with your phone, press and hold down the home button to activate it.
Rotation
When you run the app, you’ll notice that the spaceship’s position changes with the controller, but its nose always points forward, and it is always level.
To make the spaceship move more realistically, we need to change its rotation as the controller moves.
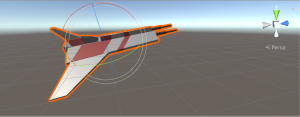
I tried various angle calculations, but it turned out that the most realistic-looking angles occurred when I simply used the rotation of the controller as the target rotation of the spaceship.
In the script ShipController.cs , we obtain a quaternion from OVRInput.GetLocalRotationController() that represents the rotation of the controller. Quaternions are composed of four numbers that together represent a rotation in a sphere. Conceptually, quaternions are complex — in fact, they are an extension of complex numbers — but Unity provides abstractions that allow you rotate an object using quaternions in a few lines of code.
Unity provides a function, Quaternion.Slerp() , that performs a spherical linear interpolation, or slerp, to rotate an object smoothly from one quaternion to another. Slerp is an interpolation along a spherical arc. The other type of interpolation, linear interpolation, or lerp, interpolates along a straight line. Lerp may run faster, but slerp provides smoother rotations.
To add rotation, add the following line to ShipController.MoveShip() before the Vector3.Lerp() call:
transform.rotation = Quaternion.Slerp (transform.rotation, controllerRotation, speed * Time.deltaTime);
This code interpolates the ship’s original orientation to the controller’s orientation.
Now try running the game. You’ll notice that as you move your controller, the spaceship rolls, pitches, and banks as it changes direction.
Conclusion
Now that you have a starting point for using the Gear VR controller as a flight stick, you can use these techniques to build your own flight simulations and combat games. With the controller, you can control a vehicle more intuitively while you move your head to look around. Using the controller as a steering device provides a new level of freedom and realism to Gear VR games.
