Until recently, holding your hand to your temple to manipulate a small touchpad was how you had to use Gear VR headsets. Bluetooth gamepads allowed some Gear VR games to support more input options, but the incorporation of natural movement into the VR experience was missing.
In April 2017, Samsung released the Gear VR controller with built-in sensors that track orientation. In apps that take advantage of the controller’s degrees of freedom, the controller becomes a part of the VR experience, as a pointer, a gun, a magic wand, a golf club, a flight stick, or any other device that relies on rotation. You can see the functionality of the Gear VR controller in the Oculus Home app. When the controller is paired, and you are in the Oculus Home environment, you’ll see an image of the controller that rotates as you rotate the controller in your hand.
Once the Gear VR controller is paired, you don’t need to modify your apps to be able to use the basic touchpad functionality. However, to fully utilize the controller’s features, you will need to make some changes to your projects. Oculus provides the scripts and prefabs you will need in the Oculus Utilities for Unity package.
In this tutorial, we will use the Oculus Utilities package to create a shooting game that demonstrates controller functionality.
Did you come across any errors in this tutorial? Please let us know by completing this form and we’ll look into it!

FINAL DAYS: Unlock coding courses in Unity, Godot, Unreal, Python and more.
Table of contents
Source Code Files
You can download the complete project here. This project was created in Unity 5.6.1.
Setting Up the Project
Download Oculus Utilies for Unity 5 from https://developer.oculus.com/downloads/package/oculus-utilities-for-unity-5/ and unpack the zip file on your computer.
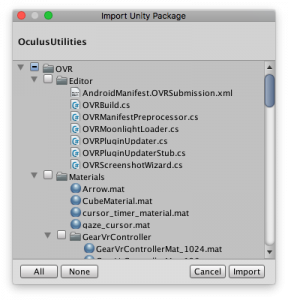
Create a new project in Unity. I named my project ShooterWithController. Import Oculus Utilities by selecting Assets -> Import Package -> Custom Package and choosing the package you extracted. If you are prompted to update the package, follow the prompts to install the update and restart Unity.
A directory named OVR will be added to your project’s assets.
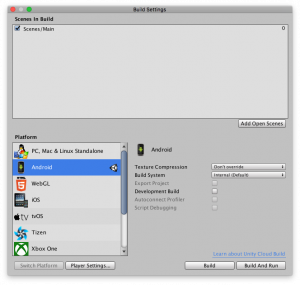
To prepare your project to be built, navigate to File -> Build Settings. Select Android as the platform.
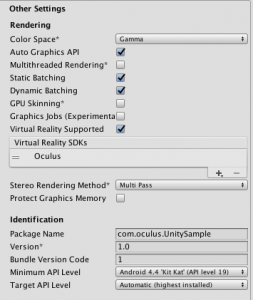
Click on Player Settings to load PlayerSettings int the Inspector panel. Set a company name and project name. Under the “Other Settings” heading, select “Virtual Reality Supported.” Add Oculus under Virtual Reality SDKs. Select Android 4.4 Kit-Kat (API Level 19) in the Minimum API Level field under the “Identification” heading. This is the minimum version of Android that supports the Gear VR.
Create the directory Assets/Plugins/Android/assets in your project, and copy your phone’s oculussig file to this directory. See https://dashboard.oculus.com/tools/osig-generator/ if you don’t have an oculussig file for your phone.
Using OVRCameraRig
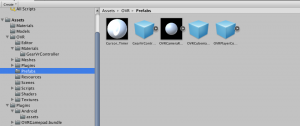
Let’s take a look at the OVR directory that was imported into the Assets folder of your project. In Assets/OVR/Prefabs , OVRCameraRig is a prefab that replaces the default main camera.
To use OVRCameraRig, drag the OVRCameraRig prefab to the scene. Delete the MainCamera that was created by default.
Another prefab, GearVRController, represents the controller. One of its components is a model of the controller itself. When active, the controller will be visible in the VR app.
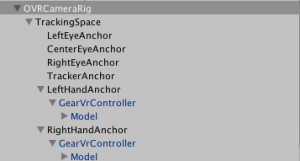
Drag the GearVRController prefab to both LeftHandAnchor and RightHandAnchor under OVRCameraRig.
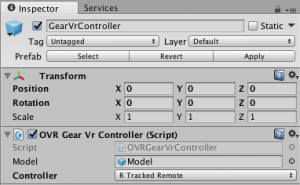
Select the instance of GearVRController under LeftHandAnchor. In the Inspector pane, set the Controller field of the OVR Game Controller script to “L Tracked Remote.” Set the Controller field of the GearVRController under RightHandAnchor to “R Tracked Remote.”
Which GearVRController is active depends on how you set up your controller when pairing it with your phone. If you set the controller to right-handed mode, the controller under RightHandAnchor will be active. In your app, it will appear on the right-hand side. If your controller is left-handed, the controller under LeftHandAnchor will be active.
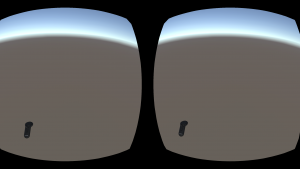
To see the controller in action, save the scene and select File -> Build and Run. When the app is running, you should see a controller that rotates as you rotate the controller in your hand.
Understanding GearVrController
In actual games, you probably want the image of the controller to look different. We can customize the controller’s appearance and behavior by building our own controller prefab based on the GearVRController prefab provided in the Oculus Utilities package. Let’s take a look at the GearVRController prefab in Assets/OVR/Prefabs .
The script Assets/OVR/Scripts/Util/OVRGearVrController.cs is attached to GearVRController. Open OVRGearVRController.cs :
public class OVRGearVrController : MonoBehaviour
{
	/// <summary>
	/// The root GameObject that should be conditionally enabled depending on controller connection status.
	/// </summary>
    public GameObject m_model;

	/// <summary>
	/// The controller that determines whether or not to enable rendering of the controller model.
	/// </summary>
    public OVRInput.Controller m_controller;

    private bool m_prevControllerConnected = false;
    private bool m_prevControllerConnectedCached = false;

    void Update()
    {
        bool controllerConnected = OVRInput.IsControllerConnected(m_controller);

        if ((controllerConnected != m_prevControllerConnected) || !m_prevControllerConnectedCached)
        {
            m_model.SetActive(controllerConnected);
            m_prevControllerConnected = controllerConnected;
            m_prevControllerConnectedCached = true;
        }

        if (!controllerConnected)
        {
            return;
        }
    }
}
m_model is the physical manifestation of the controller. In the inspector, its value is set to the object Model that is nested under GearVrController. m_controller is an instance of an enumerated type, OVRInput.Controller , that is defined in OVRInput.cs. The enumerators of OVRInput.Controller are all the valid controller types. For the Gear VR controller, we are only concerned with left tracked remote or right tracked remote. When you set up instances of GearVrController, you need to populate the m_controller field with “R Tracked Remote” or “L Tracked Remote” in the inspector. The boolean m_prevControllerConnected keeps track of whether this controller was active.
Update() checks if m_controller is connected by calling OVRInput.IsControllerConnected() . If the resulting boolean has changed since the last update, m_model is activated or deactivated depending on whether m_controller is connected. For example, if the Gear VR controller is right-handed, when you start the app, the instance of OVRGearVrController set to “R Tracked Remote” will detect that its m_controller is connected. The image of the right-handed remote will become visible in the app. The instance set to “L Tracked Remote” will detect that its m_controller is not connected, and its m_model will not be activated. The left-handed remote will not be visible.
Creating a Gun
Now that we’ve explored the default GearVrController prefab, let’s create our own prefab that will turn the Gear VR controller into a gun. But first, let’s create a ground where the gun’s projectiles can fall.
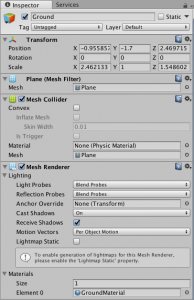
Create a plane and rename it “Ground.” Drag the OVRCameraRig up along the Y axis so that it is above the ground. Create a new material in Assets/Materials named “GroundMaterial.” Set its albedo to a brown color.
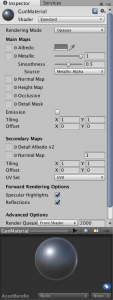
To prepare the gun, create a new material for it, Assets/Materials/GunMaterial . Set the albedo color in the inspector and adjust the metallic slider to make the material look more realistic.
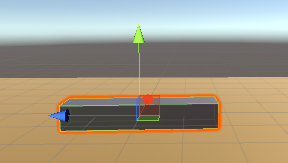
Create a cube in the scene named GunModel. Drag GunMaterial to this cube to apply it. Resize GunModel to a long, thin shape that’s small enough to look like a handheld controller. When the transform widget is selected, make sure the darker blue axis lines up with the long side. The blue axis aligns with the forward face of the cube.
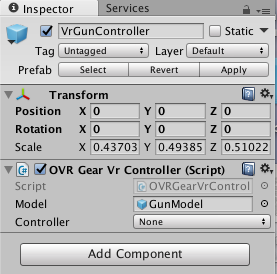
Then create an empty object in the scene and name it VrGunController. VrGunController will be our replacement for GearVrController. Nest GunModel under VrGunController by dragging and dropping.
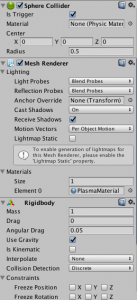
Next, we’re going to create a bullet that can be fired by the gun. Create a sphere and resize it until it looks small enough to reasonably be fired by the gun. Rename it Bullet. Create a new material for it in Assets/Materials , and apply the material by dragging it to Bullet.
Add a Rigid Body to the bullet, which will allow us to set a velocity and apply kinematics to it. Note that the bullet already has a sphere collider around it. Check the box next to “Is Trigger.” We will use this field later to implement shooting enemies.
Drag Bullet to Assets/Prefabs , and remove the original bullet you created in the scene. The Bullet prefab will be used to initialize bullets when you fire the gun.
Now we’ll add scripts to VrGunController and GunModel. Add the script Assets/OVR/Scripts/Util/OVRGearVrController to VrGunController. This allows VrGunController to be used as the Gear VR controller. Drag GunModel to the Model field. For now, don’t populate the Controller field. We will set the handedness of the Controller when we assign an instance of VrGunController to one of the anchors in OvrCameraRig.
Create a new C# script, GunController, in Assets/Scripts :
using System.Collections;
using System.Collections.Generic;
using UnityEngine;

public class GunController : MonoBehaviour {

	public GameObject projectilePrefab;

	// Use this for initialization
	void Start () {
		this.transform.forward = Camera.main.transform.forward;
	}

	public void ShootProjectile(float projectileSpeed)
	{
		GameObject projectile = GameObject.Instantiate(projectilePrefab);
		projectile.transform.position = this.transform.position;

		Rigidbody rb = projectile.GetComponent<Rigidbody>();
		rb.velocity = this.transform.forward * projectileSpeed;


	}
}
Start() , called when the GunController is initialized, points the GunModel in same direction as the camera. Subsequent orientations are set by the player moving the controller.
ShootProjectile(projectileSpeed) is called when the Gear VR controller’s trigger is pulled. ShootProjectile() instantiates an instance of the projectile prefab and fires it in the same direction the gun is pointing with a speed determined by projectileSpeed .
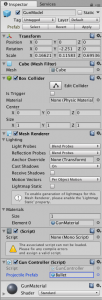
Drag GunController to the GunModel object to add it as a component. In the inspector, set “Projectile Prefab” to Bullet.
Let’s add the code to detect a trigger pull to Assets/OVR/Scripts/Util/OVRGearVrController , which we’ve attached to VrGunController. Open the script and add the following lines to the end of the Update() method:
if (OVRInput.GetUp(OVRInput.Button.PrimaryIndexTrigger)) {
    if (m_gunController != null) {
	Debug.Log ("OVRGearVrController: Shooting projectile");
	m_gunController.ShootProjectile (projectileSpeed);
     } else {
	Debug.Log ("OVRGearVrController: m_gunController is null");
     }
}
Also add the following data members to the OVRGearVrController class:
public GunController m_gunController;
public float projectileSpeed = 20f;
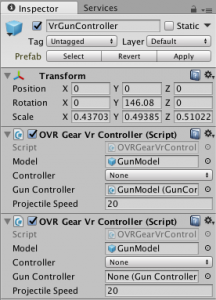
In the inspector panel, set the “Gun Controller” field to GunModel. GunModel’s GunController component will be the value of m_gunController . When the Gear VR controller’s trigger button is pressed and released, if m_gunController is active, ShootProjectile() is called with a speed of projectileSpeed , which can also be set in the inspector. From trial and error, 20 is a reasonable speed.
Drag VrGunController to Assets/Prefabs , and remove VrGunController from the scene for now. We will add the prefab back to the scene in the next step.
You should still have an instance of OVRCameraRig in your scene. Remove GearVrController from OVRCameraRig -> TrackingSpace -> LeftHandAnchor and OVRCameraRig -> TrackingSpace -> RightHandAnchor. Then drag and drop VrGunController from Assets/Prefabs twice, once to nest under LeftHandAnchor, and once to nest under RightHandAnchor.
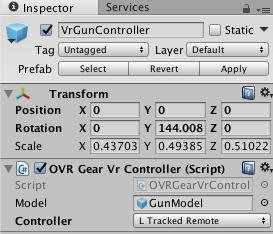
Select the VrGunController under LeftHandAnchor. In the inspector, set Controller under “OVR Gear Vr Controller (Script)” to “L Tracked Remote.”
Similarly, set the VrGunController instance under RightHandAnchor to “R Tracked Remote.”
When you build and run the project on your phone with the controller paired, you should see an image of the GunModel that you can rotate by rotating your controller. When you click the trigger button, bullets will be fired from the gun.
Adding Enemies
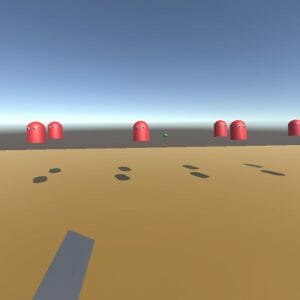
Now let’s add enemies we can target with the controller-enabled gun. The attached project includes a Blender model, Assets/Models/GhostModel.fbx , that can be used as the prefab model for our enemies. Copy this file to into your project’s Assets/Models folder.
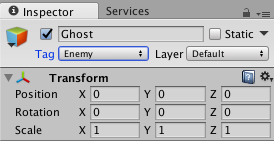
Create a new GameObject, Ghost. From the Tag dropdown in the inspector, select “Add Tag” and apply it to Ghost.
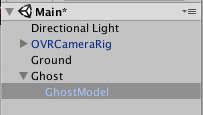
Drag GhostModel to the Ghost object to nest it.
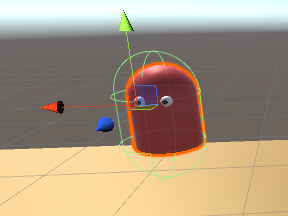
In the scene view, use the rotation widget to rotate GhostModel until it is upright, and scale it to a size that looks reasonable in the scene. Add a capsule collider to Ghost. Click “Edit Collider” and resize the green capsule until it approximately encloses the ghost.
Create a new C# script, Assets/Scripts/EnemyController , and attach it to Ghost. EnemyController will control the ghost’s movement:
using System.Collections;
using System.Collections.Generic;
using UnityEngine;

public class EnemyController : MonoBehaviour {

	float speed = 2f;

	// Update is called once per frame
	void Update () {
		transform.Translate (-1 * Vector3.forward * speed * Time.deltaTime, Space.World);
	}

	public void SetSpeed(float newSpeed) {
		speed = newSpeed;
	}

}
The Update() method moves the ghost forward each frame update.
Now drag Ghost from the hierarchy pane into Assets/Prefabs , and remove the Ghost you created in the scene. Ghosts will be created programmatically at the start of the game by a GameManager object.
Create a new empty GameObject called GameManager. Attach a new C# script to it, Assets/Scripts/GameManager :
using System.Collections;
using System.Collections.Generic;
using UnityEngine;

public class GameManager : MonoBehaviour {

	public GameObject enemyPrefab;
	public int numEnemies = 10;
	public float enemySpeed;

	// Use this for initialization
	void Start () {
		SpawnEnemies ();
	}

	// Update is called once per frame
	void Update () {


	}

	void SpawnEnemies() {
		float startX = -20f;
		float xCoord = startX;
		float zCoord = 15;
		float height = 1.5f;
		int enemiesInRow = 5;
		for (int i = 0; i < numEnemies; i++) {
			Quaternion rotation = Quaternion.identity;
			GameObject enemy = Instantiate (enemyPrefab, new Vector3 (xCoord, height, zCoord), Quaternion.LookRotation(-1 * Camera.main.transform.forward));
			enemy.GetComponent<EnemyController>().SetSpeed (enemySpeed);
			xCoord += 10f;
			// Increment the z coordinate if a row is filled.
			if ((i + 1) % enemiesInRow == 0) {
				xCoord = startX;
				zCoord += 2f;
			}
			//newEnemy.transform.forward = -1 * Camera.main.transform.forward;
		}
	}
}
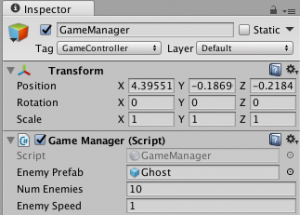
The data member enemyPrefab is the template used to create enemies. In the inspector, populate “Enemy Prefab” with Ghost. The number of enemies to spawn and the speed of the enemies can also be set in the inspector.
SpawnEnemies() , called when GameManager initializes, creates numEnemies enemies in equally spaced rows.
We still need to be able to detect when an enemy is hit by a bullet. Create a new C# script, Assets/Scripts/BulletController , and add it to the Bullet prefab we created earlier:
using System.Collections;
using System.Collections.Generic;
using UnityEngine;

public class BulletController : MonoBehaviour {

	public float maxDistance = 100f;

	// Use this for initialization
	void Start () {

	}

	// Update is called once per frame
	void Update () {
		// Self-destruct if this bullet exceeds maxDistance from the camera.
		if (Vector3.Distance (transform.position, Camera.main.transform.position) > maxDistance) {
			Destroy (gameObject);
		}
	}

	// Detect collisions.
	void OnTriggerEnter(Collider other) {
		Debug.Log ("BulletController::OnTriggerEnter");

		// If the bullet has collided with an enemy, destroy both the enemy and itself.
		if (other.gameObject.CompareTag("Enemy")) {
			Debug.Log ("BulletController::OnTriggerEnter: Collided with enemy");
			Destroy(other.gameObject);
			Destroy (gameObject);
		}

	}
}
Earlier, we made Bullet’s sphere collider a trigger. OnTriggerEnter() is called when another collider enters the trigger — in other words, when a bullet hits another object with a collider. If the other object is tagged “Enemy”, we destroy both the object and the bullet.
Update() checks how far the bullet is from the main camera. The bullet is destroyed if this distance exceeds maxDistance. This avoids filling the scene with stray bullets. Note that we do not need to explicitly move the bullet because we have already assigned a velocity to the bullet’s rigid body in GunController::ShootProjectile() .
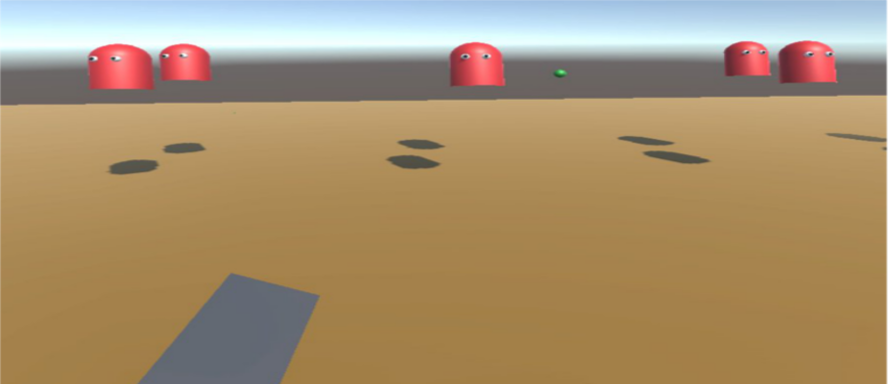
At this point, we have a game that uses the Gear VR controller as a gun to shoot floating ghosts. There is plenty of room for improvement, but you have the basics of how to use Unity Utilities to support the Gear VR controller.
