In Part 1 and Part 2 of this tutorial, we continued building a Phaser project template that you can reuse and extend in any future project you work on. In the first two parts we:
- created the basic structure for our project
- added the following scenes: boot, preloader, title, and options.
In Part 3 of this tutorial, we are going to continue working on our template by:
- adding the logic for a global state
- adding audio to our game
- refactor some of our code into reusable components
You can download all of the files associated with the source code for Part 3 here.
Let’s get started!
Did you come across any errors in this tutorial? Please let us know by completing this form and we’ll look into it!

FINAL DAYS: Unlock coding courses in Unity, Godot, Unreal, Python and more.
Table of contents
Global State
Now that we have a way for a player to enable and disable audio in our game, we will need a way to make these values available to the other scenes in our game. One way of doing this is by creating a global state that can keep track of these values, that way as they are updated each scene will be able to access these values.
However, instead of just making these variables global, we will create a new Model class that will be used for keep track of these values. In the src folder, create a new file called Model.js and add the following code to it:
export default class Model {
  constructor() {
    this._soundOn = true;
    this._musicOn = true;
    this._bgMusicPlaying = false;
  }

  set musicOn(value) {
    this._musicOn = value;
  }

  get musicOn() {
    return this._musicOn;
  }

  set soundOn(value) {
    this._soundOn = value;
  }

  get soundOn() {
    return this._soundOn;
  }

  set bgMusicPlaying(value) {
    this._bgMusicPlaying = value;
  }

  get bgMusicPlaying() {
    return this._bgMusicPlaying;
  }
}
Let’s review the code we just added:
- First, we created a new class called
Modeland in its constructor, we added three new properties:_soundOn,_musicOn, and_bgMusicPlaying. - We then created getters and setters for each of these properties by using the
setandgetsyntax. If you are not familiar withgetandset, these are a special syntax for ES6 classes that allow us to read and write property values.- For example, if we instantiated a new instance of our class like this:
const model = new Model();, we would be able to access our_musicOnproperty like this:model.musicOn. - By using the
_when we label our properties, we can access those properties without using the_.
- For example, if we instantiated a new instance of our class like this:
Now that we have our new model class, we still need a way to make it accessible to all our Phaser Scenes, and we can do that by adding that model to our Phaser Game object. To do this, open index.js and add the following code below the super call in our constructor:
const model = new Model();
this.globals = { model };
Next, add the following line at the top of the file with our other imports:
import Model from './Model';
In the code above, we imported our new Model class and we created a new instance of our class. We then created a new property on our Phaser Game object called globals, we made that property an object, and then we added our new Model instance to that object.
By adding the model instance to a property on our Phaser Game Object, we are now able to access that model in our Scenes by calling `this.sys.game.globals.model`.
So, now that we have a way to track the global state of our game, let’s go back to the Options Scene and update the local state in that scene to use our global state. Open OptionsScene.js and in the create function, replace the following lines:
this.musicOn = true;
this.soundOn = true;
with the following line:
this.model = this.sys.game.globals.model;
Then, update the this.musicOn = !this.musicOn; line to be:
this.model.musicOn = !this.model.musicOn;
Next, update the this.soundOn = !this.soundOn; line to be:
this.model.soundOn = !this.model.soundOn;
Then, at the bottom of the create function, add the following line:
this.updateAudio();
Finally, in the updateAudio function, update the this.musicOn === false and this.soundOn === false lines to be: this.model.musicOn === false and this.model.soundOn === false.
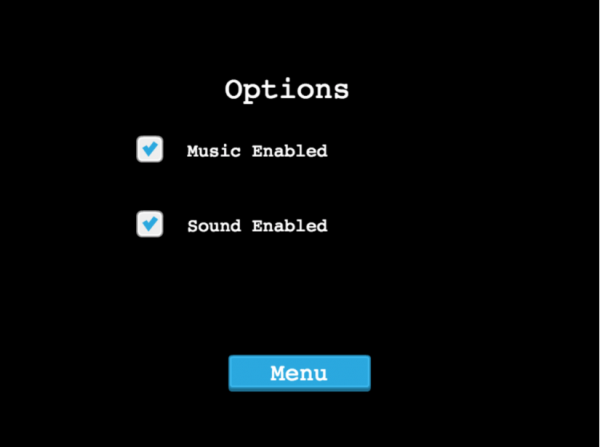
Now, if you save you your code changes and when your game refreshes you can test our new global state. If you click on one of the UI elements to disable it, and then navigate back to the Title Scene, and then go back to the Options Scene, it should still be deselected.
Adding Background Music
Now that our global state is keeping track of the music options, we will work on adding some background music to our game. For our background music, we will add this to our Title Scene, and we will need to check if the setting for music enabled is set to true. To do this, open TitleScene.js and add the following code at the bottom of the create function:
this.model = this.sys.game.globals.model;
if (this.model.musicOn === true) {
  this.bgMusic = this.sound.add('bgMusic', { volume: 0.5, loop: true });
  this.bgMusic.play();
}
In the code above, we did the following:
- First, we grabbed a reference to our global model state and we stored it in
this.model. - We then checked to see if the
musicOnproperty is set totrueand if it is then we add a new sound Game Object to our game by callingthis.sound.add, and we passed two arguments:- The key of the asset we want to use. For this, we used the
bgMusicasset that we loaded in Part Two of this tutorial. - A config object that contains any settings we want to apply to this Game Object. In this object, we passed the
volumeproperty, which controls how loud the sound will be. By default, this value is set to 1. We also passed theloopproperty, which will tell Phaser to keep looping that audio asset. By default, this value isfalse.
- The key of the asset we want to use. For this, we used the
- Lastly, we played the audio sound by calling the
playmethod.
Now, to quickly test our changes, open up PreloaderScene.js and in the ready function update the this.scene.start('Options'); line to be:
this.scene.start('Title');Now, save your code changes and in your browser, you should hear the new background music start once the game reached the Title Scene. However, if you navigate to another scene and then back to the Title Scene you will notice that our background music will start multiple times (you may need to navigate back and forth a few times to hear it).
To fix this issue, we will use our global state to track if the background music is already playing, and if it isn’t then we will start our music. In the code we just added, update the following line:
if (this.model.musicOn === true) {to be:
if (this.model.musicOn === true && this.model.bgMusicPlaying === false) {Then, add the following line inside that if statement:
this.model.bgMusicPlaying = true;
Now, if you save your code changes and test your game again, the background music should only start one time.
Stoping the Background Music
Now that we our background music working in our game, we need to update the logic in our Options Scene to pause the background music when the player disables the music in our game. To do this, we will need to make our `bgMusic` Game Object available in our Options Scene, and one way to do this is to store a reference to it in our globals object.
First, we will add a new property called bgMusic to our globals object. To do this, open index.js and update the following line:
this.globals = { model };to be:
this.globals = { model, bgMusic: null };Next, to store a reference to our background music Game Object, open TitleScene.js and add the following line inside the if statement that checks if the background music should be added:
this.sys.game.globals.bgMusic = this.bgMusic;
This code block should now look like this:
if (this.model.musicOn === true && this.model.bgMusicPlaying === false) {
  this.bgMusic = this.sound.add('bgMusic', { volume: 0.5, loop: true });
  this.bgMusic.play();
  this.model.bgMusicPlaying = true;
  this.sys.game.globals.bgMusic = this.bgMusic;
}
Now that we have stored a referenced to this Game Object, we can now access it in our Options Scene. Open OptionsScene.js, and replace all of the code in the updateAudio function with the following code:
if (this.model.musicOn === false) {
  this.musicButton.setTexture('box');
  this.sys.game.globals.bgMusic.stop();
  this.model.bgMusicPlaying = false;
} else {
  this.musicButton.setTexture('checkedBox');
  if (this.model.bgMusicPlaying === false) {
    this.sys.game.globals.bgMusic.play();
    this.model.bgMusicPlaying = true;
  }
}

if (this.model.soundOn === false) {
  this.soundButton.setTexture('box');
} else {
  this.soundButton.setTexture('checkedBox');
}
Let’s review the code we just added:
- First, in the
ifstatement that checks if themusicon property is set tofalse, we stopped our audio Game Object by calling thestopmethod. Then, we updated thebgMusicPlayingproperty to befalse. - Next, in the
elsestatement, we added a newifstatement that checks if thebgMusicPlayingis set tofalse, and if it is then we start our audio Game Object by calling theplaymethod. Then, we updated thebgMusicPlayingproperty to betrue.
Now, if you save your code changes and test your game in the browser, you should be able to access the Options Scene and then start and stop the background music by clicking on the Music Enabled checkbox.
Refactoring
With our background music completed, we can now start working on refactoring some of our code. Currently, in our game template we have 4 different buttons that when they are clicked will start a different scene. To clean up our code, and make it easier to add one of these buttons later, we are going to create a new class and move this logic there.
To do this, create a new folder in your src folder that is called Objects. Then, in this new folder create a new file called Button.js. In this file, add the following code:
import 'phaser';

export default class Button extends Phaser.GameObjects.Container {
  constructor(scene, x, y, key1, key2, text, targetScene) {
    super(scene);
    this.scene = scene;
    this.x = x;
    this.y = y;

    this.button = this.scene.add.sprite(0, 0, key1).setInteractive();
    this.text = this.scene.add.text(0, 0, text, { fontSize: '32px', fill: '#fff' });
    Phaser.Display.Align.In.Center(this.text, this.button);

    this.add(this.button);
    this.add(this.text);

    this.button.on('pointerdown', function () {
      this.scene.scene.start(targetScene);
    }.bind(this));

    this.button.on('pointerover', function () {
      this.button.setTexture(key2);
    }.bind(this));

    this.button.on('pointerout', function () {
      this.button.setTexture(key1);
    }.bind(this));

    this.scene.add.existing(this);
  }
}
Now, this code should like similar to the code that is already used in our Title and Options Scenes. However, there are a few things that are different:
- For our class, we had it extend the
Phaser.GameObjects.Containerclass. If you are not familiar, a Phaser Container is similar to a Group in the sense that we can add child Game Objects to it to help organize our Game Objects, but it also allows us to manipulate it like a sprite. - By extending the Phaser Container class, this allows us to position the Container in our game, and then we can position our child Game Objects inside that container.
- In the constructor of our new class, we are expecting the following parameters:
xandy– the position of our Container.scene– the scene this Container should be added to.key1andkey2– the keys of our image assets that we would like to use for our buttons. The first key is the main image and the second key is the hover image.text– the text that will be displayed on our button.targetScene– the scene that will be started when a player clicks our button.
- We then created our Game Objects and added them to the Container by calling
this.add. - Finally, we added our new Container to the Phaser Scene by calling
this.scene.add.existing.
Now that we have created our new class, we can update our existing scenes to use this code. First, in OptionsScene.js replace the following code in the create function:
this.menuButton = this.add.sprite(400, 500, 'blueButton1').setInteractive();
this.menuText = this.add.text(0, 0, 'Menu', { fontSize: '32px', fill: '#fff' });
Phaser.Display.Align.In.Center(this.menuText, this.menuButton);

this.menuButton.on('pointerdown', function (pointer) {
  this.scene.start('Title');
}.bind(this));
with this line:
this.menuButton = new Button(this, 400, 500, 'blueButton1', 'blueButton2', 'Menu', 'Title');
Then, at the top of the file we will need to import our new class. To do this, add the following line below the import 'phaser' line:
import Button from '../Objects/Button';
Now, if save your code changes and view your game in the browser, you should be able to visit the Options Scene, and it should look the same as before.
Next, we will update the Title Scene. Open TitleScene.js, and add the following line at the top of the file below the import 'phaser' line:
import Button from '../Objects/Button';
Next, we will remove all of the old code for the three buttons and replace that code with code that will use the new Button class. To do this, replace all of the code in the create function with the following code:
create () {
  // Game
  this.gameButton = new Button(this, config.width/2, config.height/2 - 100, 'blueButton1', 'blueButton2', 'Play', 'Game');

  // Options
  this.optionsButton = new Button(this, config.width/2, config.height/2, 'blueButton1', 'blueButton2', 'Options', 'Options');

  // Credits
  this.creditsButton = new Button(this, config.width/2, config.height/2 + 100, 'blueButton1', 'blueButton2', 'Credits', 'Credits');

  this.model = this.sys.game.globals.model;
  if (this.model.musicOn === true && this.model.bgMusicPlaying === false) {
    this.bgMusic = this.sound.add('bgMusic', { volume: 0.5, loop: true });
    this.bgMusic.play();
    this.model.bgMusicPlaying = true;
    this.sys.game.globals.bgMusic = this.bgMusic;
  }
}
Finally, you can remove the following code from TitleScene.js:
centerButton (gameObject, offset = 0) {
  Phaser.Display.Align.In.Center(
    gameObject,
    this.add.zone(config.width/2, config.height/2 - offset * 100, config.width, config.height)
  );
}

centerButtonText (gameText, gameButton) {
  Phaser.Display.Align.In.Center(
    gameText,
    gameButton
  );
}
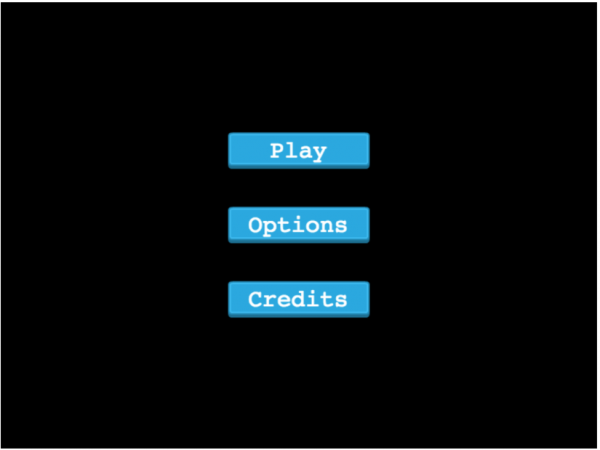
Now, if you save your code changes and view your game in the browser, the Title Scene should work and look the same way as before.
Conclusion
Now that we have finished refactoring the code for our Buttons, that brings this tutorial to a close. In summary, this tutorial showed you how to create a basic Phaser project template that you will be able to reuse and extend. Some examples of ways this template can be enhanced are:
- You can add an image to your Title Scene.
- You could add a Game Over Scene.
- You could update the template so that it is responsive and resizes automatically on mobile devices.
I hope you enjoyed all of these tutorials and found them helpful. If you have any questions, or suggestions on what we should cover next, please let us know in the comments below.
