Table of contents
Introduction
In the past few years, augmented reality has become very popular. From expensive devices like the Hololens, to your own pocket devices with Apple’s Arkit and Arcore for Android, augmented reality is fast becoming widely available. In this tutorial, we will make a simple project which utilizes image detection and motion tracking. The project is simple, but it will lay the groundwork for any other augmented reality projects you would like to build.
Requirements
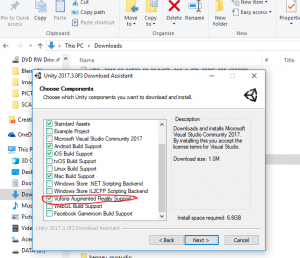
Because augmented reality makes use of some hardware, we are going to need a few things. The first is an android phone running at least 7.0. It is possible to use an iPhone or an iPad, but, for this example I used an android phone because building to an android phone is a lot easier than building to iOS. Or, if you don’t want to build to a phone you can use the webcam on your computer in most cases. Second, you will need to have a way to attach your phone to your computer (if you are using a phone). Third, a deck of standard playing cards. We will track the image of a playing card and then overlay a different image of a different playing card. The last thing you need to do is import Vuforia. The only way to do this is to re-install Unity. Open up the download assistant (for Unity 2017.3 or any other version later than that) and check “Vuforia Augmented Reality Support” (also check “Android Build Support” since we will be targeting Android) in the package manager.
This will undoubtedly take some time so make a pot of coffee, go run errands, read a book, and then come back to find it is 50% done (sorry).
Assets
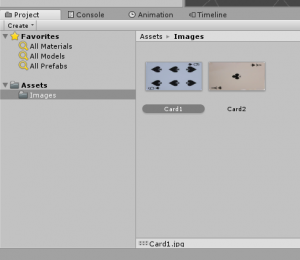
You can download the images here. There is a Six of Spades and an Ace of Clubs. You can choose which one you want to be detected and which one you want to be overlayed, I chose the Six of Spades as the one to be detected and then the Ace of Clubs as the one to be overlayed. If you would like, find some other playing cards that you would like to be detected as well, since it is only the Six of Spades that will have the Ace of Clubs overlayed onto it. Go to your project tab and create a new folder called “Images” then import the playing cards into this folder.
Did you come across any errors in this tutorial? Please let us know by completing this form and we’ll look into it!

FINAL DAYS: Unlock coding courses in Unity, Godot, Unreal, Python and more.
Setting up our Build Settings
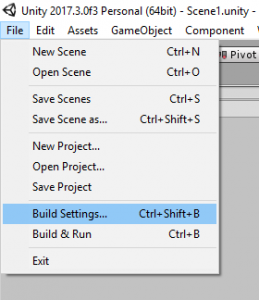
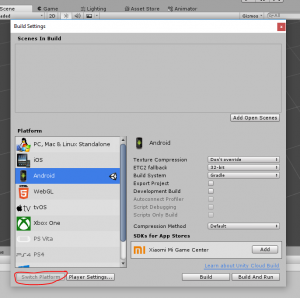
Since we will be targeting Android there are a few things in the build settings that we have to change. If you aren’t going to use a phone and are using your webcam instead, you can skip this section. Go to File -> Build Settings
and then select the Android build platform then click “Switch Platform”.
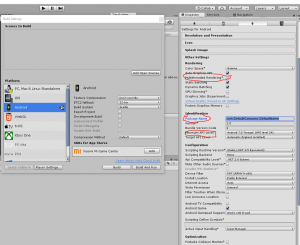
It shouldn’t take too long since we haven’t imported much. Once that is done click on “Player Settings” and go to “Other Settings”. In order for Vuforia augmented reality to work, we need to disable “Multithreaded Rendering”, provide a company and project name in the “Package Name” field, and as an extra precaution, change the “Minimum API Level” to 7.0, this will prevent this project from running on a device that could have insufficient hardware.
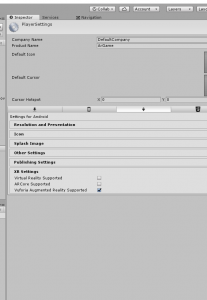
The last thing we have to is to enable “Vuforia Augmented Reality Support” in the “XR Settings”.
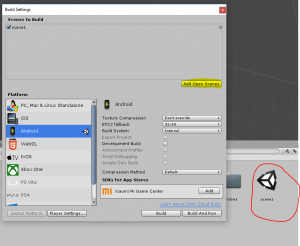
If you wanted to build to an iOS device, do like we just did with the Android settings, the only thing that is different is we don’t have to specify the Minimum API Level. The last thing we have to do is to create a new scene. Right-click in the project tab and go to Create -> Scene, name it “Scene1” and then click “Add Open Scenes” in the build settings.
Great! The Build Settings are all in order! Let’s move on!
Vuforia Configuration
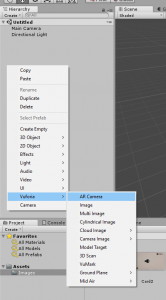
Right-Click in the Hierarchy and click on Vuforia -> AR Camera,
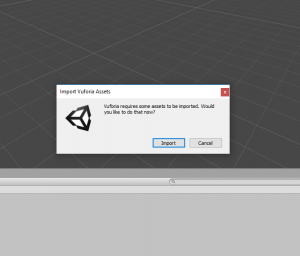
it will import a couple things before we see anything new in the hierarchy.
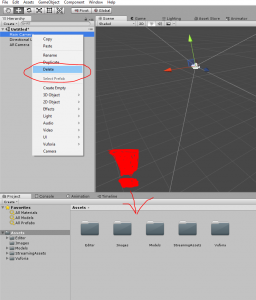
This will create a brand new camera in our scene which means we can delete the old camera (notice the newly imported files).
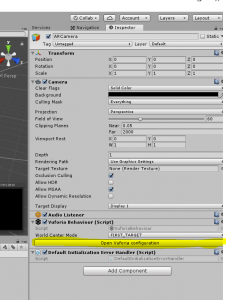
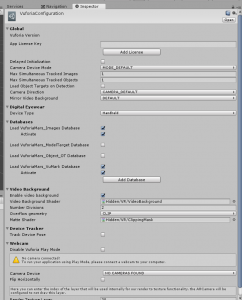
This camera will act as the camera on our device (or webcam on our computer). Select the newly created camera and click on “Open Vuforia Configuration”,
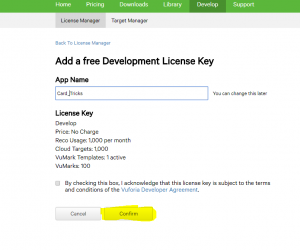
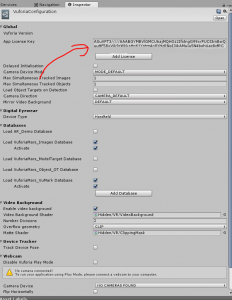
there are a couple things we need to do in order for this project to work. The first thing we need is an App License Key. You can see the field it needs to go in. Click Add License Key. This will take you to developer.vuforia.com. Here you need to create a developer account, it’s free but it does require an email. Once you have an account go ahead and click on Add License Key in Unity and then log in to Vuforia. Then click Get Development Key, call it “Card Tricks”, and then click “Confirm”.
This key will allow 1000 recognitions per month, which means it is only for development, if you would like more recognitions then you would have to purchase a key. Copy your key and then paste it into the App License Key field in Unity.
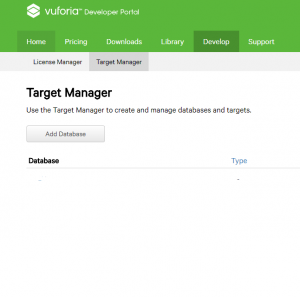
Next, we need to create a Target Database. This is a sort of container for images that Vuforia has put tracking markers on in order to recognize that image in the real world. Go to Target Manager
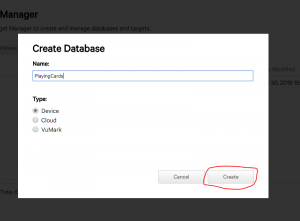
and click Add Database, give it a sensible name (like “Playing Cards”) and then click Create.
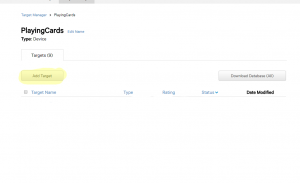
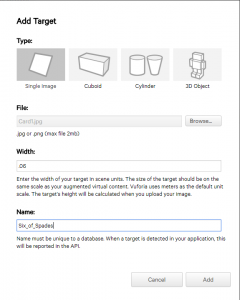
Then we need to add a Target, this is the actual image that is detected. Select your database and then click “Add Target”.
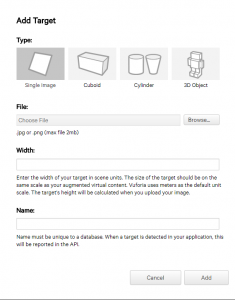
There are four different types of detection targets, “Single Image”, “Cuboid”, “Cylinder”, and “3D Object”. We will be using “Single Image”.
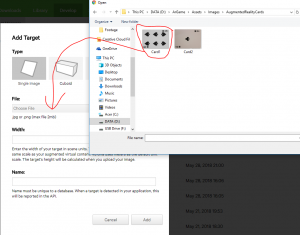
This means that the camera will recognize certain features on an image. “Cuboid” and “Cylinder” allow you to detect the shape instead of features by inputting the object’s (whether a Cube or a Cylinder) size, this should only be used if you have a specific object that you know the exact dimensions of. “3D Object” allows you to detect a specific three-dimensional shape, this requires special file type called Vuforia Scanner Data which can only be generated by a separate program. With Single Image selected, chose the card image that you want to be detected (in my case it was the Six of Spades).
We need to enter the width of the playing card in real life. A standard playing card is about six centimeters wide. One 3D world unit (i.e 1.0) is equal to one meter. This means that our card is 0.06 world units wide. Finally, just give our target image a name, like “Six_Of_Spades”, and then click “Add”.
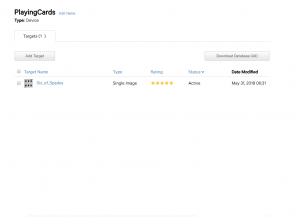
On our newly created target, you’ll notice it gives us a rating,
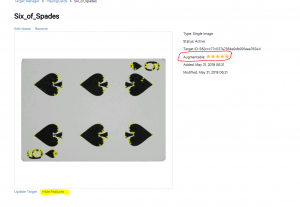
this tells us how “augmentable” the image target is. A score of five stars means that it is very easy to detect, one star means that Vuforia won’t recognize it very well, and no stars means that it is not “augmentable” at all. If you click on your newly created target and then select “Show Features”, you can see the parts the Vuforia will look for with our device’s camera.
Okay! Our database is complete!
Unity Setup
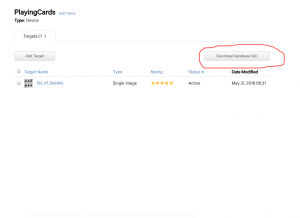
Now that we have our image targets setup, we need to import them into Unity. Click “Download Database”.
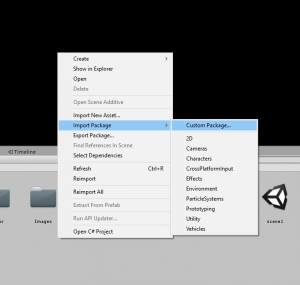
Once it is finished downloading, go to Unity and right-click in the Project tab. Go to Import Package -> Custom Package
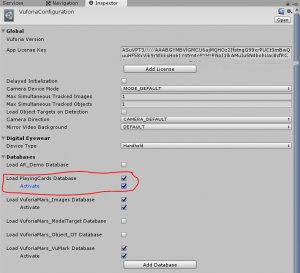
and find the newly downloaded target database. Let’s double check to make sure that this database is correctly imported. Select the ARCamera and click “Open Vuforia Configuration”. Under the “Databases” drop down you should find the “PlayingCards” database has actually appeared.
Make sure it is active and enabled. Alright! Now we can add the card that is going to be overlayed.
Augmenting our reality
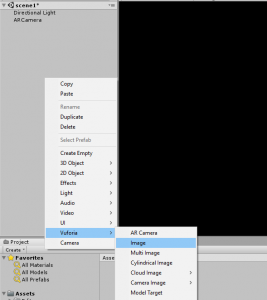
Now we get to add the image (Ace of Clubs) that is going to cover the playing card. Go to Gameobject -> Vuforia and select “Image”.
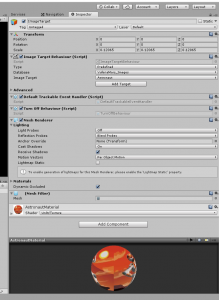
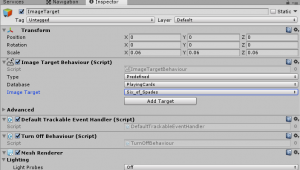
This has several components but the one we need to pay attention to is the “Image Target Behaviour”.
This is where we specify what database we are going to use. Keep “Type” set to “Predefined”. Set the “Database” to our “Card_Tricks” database. Set the “Image Target” to our “Six_Of_Spades” image.
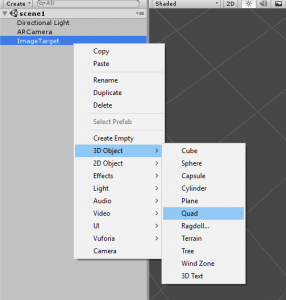
This image gives us a sort of guide as to where Vuforia will detect the Six of Clubs, this image will track to wherever the card’s recognized position is.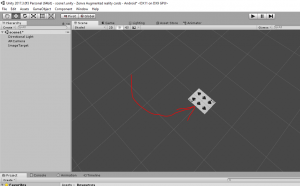 As such, whatever is parented to this card will appear on our Six of Clubs (the Six of Clubs in the real world). With this in mind, select the Target Image and right-click, go to 3D Object -> Quad.
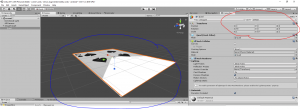
Scale and Rotate the quad so that it matches the size of the target image. It should look something like this:
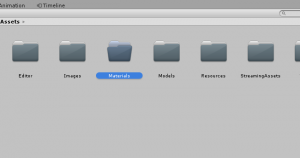
Next, we need to make this quad look like an Ace of Spades. Go to your project tab and create a new folder called “Materials”.
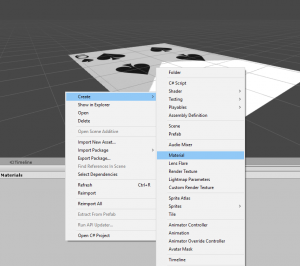
Then right-click in the folder and create a new material called “AceMaterial”.
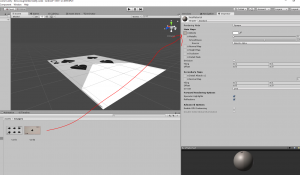
This is going to be a very simple material. Find the Ace of Spades image and drag it in the “Albedo” field.
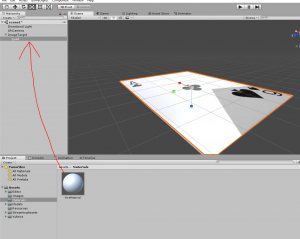
Now all we have to do is drag this material on to the quad so that it should now look like an Ace of Spades.
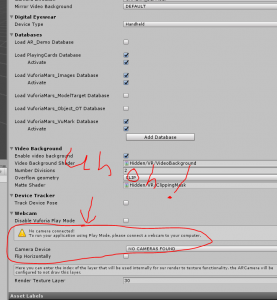
Alright! Now, everything is setup here so all we have to do is either build the game to a phone, or, if you are using your webcam, you can hit the play button. One thing you have to do before you test it on your webcam is to make sure that Vuforia recognizes it as a legitimate camera. Select your ARCamera and open the Vuforia Configuration. In the “Webcam” section, make sure that “Disable Vuforia Playmode” is unchecked and that “Camera Device” points to your webcam.
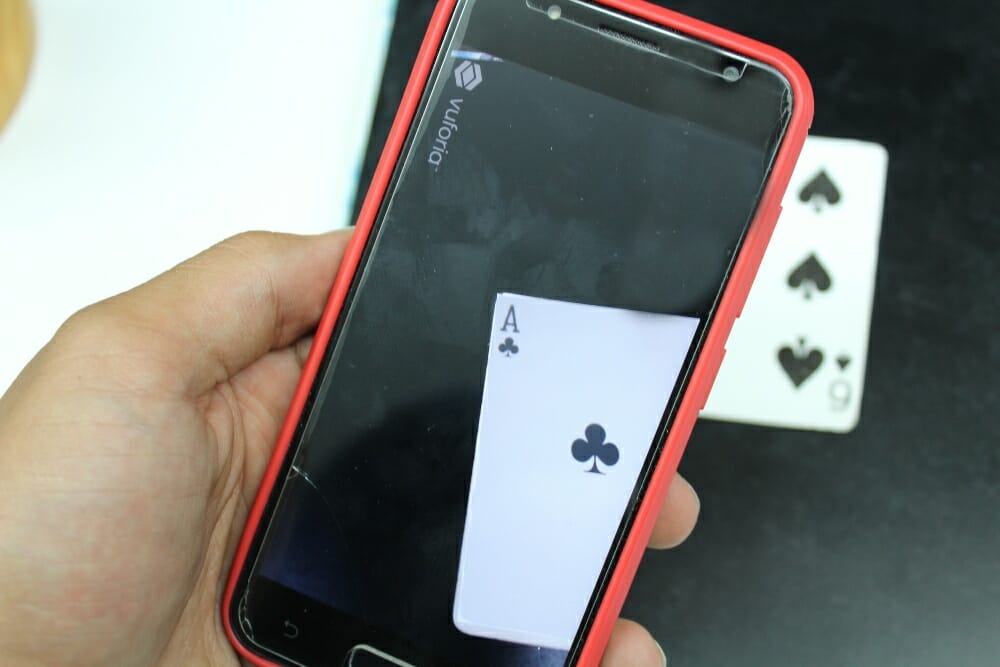
If everything looks good then you can hit play and watch the Six of Spades change into the Ace of Clubs!
Focusing
This is example is pretty cool but there is just one small problem, nearly everything is out of focus.
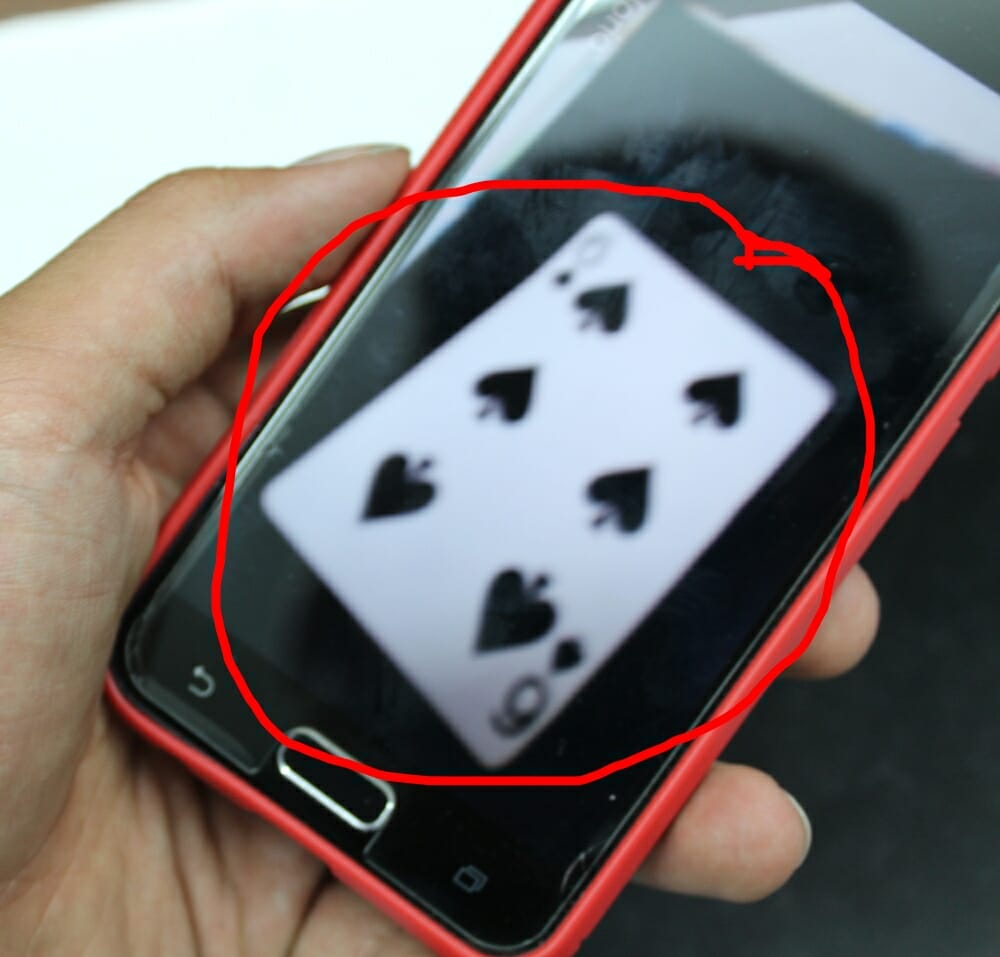
To fix this, create a new folder called “Scripts” and create a new C# script called “FocusComponent” and assign this to the ARCamera. Then type the following code into the new script:
using System.Collections;
using System.Collections.Generic;
using UnityEngine;

//This part is VERY important!!!!
using Vuforia;

public class FocusComponent : MonoBehaviour {
	void Start ()
	{
		// Setting up callbacks with the Vuforia behaviour
		var vuforia = VuforiaARController.Instance;
		vuforia.RegisterVuforiaStartedCallback(OnVuforiaStarted);
		vuforia.RegisterOnPauseCallback(OnPaused);
	}

	private void OnVuforiaStarted()
	{
		//This specifies how the camera will focus
		CameraDevice.Instance.SetFocusMode(
			// "CONTINUOUSAUTO" means that the camera will automatically focus on the subject
			CameraDevice.FocusMode.FOCUS_MODE_CONTINUOUSAUTO);
	}

	private void OnPaused(bool paused)
	{
		if (!paused) // resumed
		{
			// Set again autofocus mode when app is resumed
			CameraDevice.Instance.SetFocusMode(
				CameraDevice.FocusMode.FOCUS_MODE_CONTINUOUSAUTO);
		}
	}

}
If you try it now the camera should focus on the card. The explanation of the code is very complicated since it uses a script that inherits from a separate superclass called VuforiaBehaviour, but the main part of this script is this method:
private void OnVuforiaStarted()
	{
		//This specifies how the camera will focus
		CameraDevice.Instance.SetFocusMode(
			// "CONTINUOUSAUTO" means that the camera will automatically focus on the subject
			CameraDevice.FocusMode.FOCUS_MODE_CONTINUOUSAUTO);
	}
Right now we have the focus mode set to “CONTINUOUSAUTO”. Vuforia recommends using this mode whenever possible. It works basically like an auto focus. Great! Our card is now in focus!
Conclusion
As you can see, getting into virtual reality is not very complicated. It is actually very fun once you start creating. Also note, we don’t have to just track images onto a card, we could track 3D objects as well. Anything parented to the ImageTarget will track with the detected image. This means that we could put primitives like cubes and cylinders, or bigger stuff like terrain and trees, onto a tracked image. Also, you could experiment with different types of targets, like tracking a cuboid or a cylinder. Unfortunately, Vuforia has a limited amount of recognitions (1000 per month) before you have to pay for the rest. As such it is not very practical for published apps. However, I hope you have enjoyed using Vuforia with Unity and that this will help to lay the ground work for any other augmented reality projects you might have in mind. Until then,
Keep making great games!
