Phaser game engine has many new and useful features for a faster and easier game development process. In this tutorial you will learn how to create a simple tower defense game in Phaser 3 style. First we will create an empty game, then we will continue with adding enemies, turrets and bullets. We will use arcade physics to make bullets hit the enemies. In the end we are going to create fully functional tower defense game.
Learning goals
- Create Phaser 3 game
- Use paths and make enemies move along a path
- Learn about Phaser 3 groups and how to use them for managing enemies, turrets
- and bullets
- Play with Phaser.Math for faster game development
- Understand basic tower defense game logic
Tutorial requirements
- Basic to Intermediate level of JavaScript
- Web browser – modern web browser
- Code editor – any type of code editor, even notepad will do the work (I prefer NetBeans for convenience)
- Local web server
- Assets – you can use the assets that come with the source files download for this tutorial.
Source code download
Get the full source code for this tutorial here.
Did you come across any errors in this tutorial? Please let us know by completing this form and we’ll look into it!

FINAL DAYS: Unlock coding courses in Unity, Godot, Unreal, Python and more.
Create tower defense game
Its time to start with our game. First we will create an empty Phaser 3 project with the default scene. We will need to implement these functions for our scene:
preload – load our resources here, in our case one atlas and one image
create – create the game logic here
update – update the game here
Here is how our empty game should look:
var config = {
    type: Phaser.AUTO,
    parent: 'content',
    width: 640,
    height: 512,
    scene: {
        key: 'main',
        preload: preload,
        create: create,
        update: update
    }
};
var game = new Phaser.Game(config);

var graphics;
var path;

function preload() {
    // load the game assets – enemy and turret atlas
    this.load.atlas('sprites', 'assets/spritesheet.png', 'assets/spritesheet.json');
    this.load.image('bullet', 'assets/bullet.png');
}

function create() {

}

function update() {

}
In our tower defense game the enemies will move along a path. For this reason we will create a very simple path element. Change the create function to this:
function create() {
    // this graphics element is only for visualization,
    // its not related to our path
    var graphics = this.add.graphics();

    // the path for our enemies
    // parameters are the start x and y of our path
    path = this.add.path(96, -32);
    path.lineTo(96, 164);
    path.lineTo(480, 164);
    path.lineTo(480, 544);

    graphics.lineStyle(3, 0xffffff, 1);
    // visualize the path
    path.draw(graphics);
}
Now when you run the game in the browser you should see something like this:
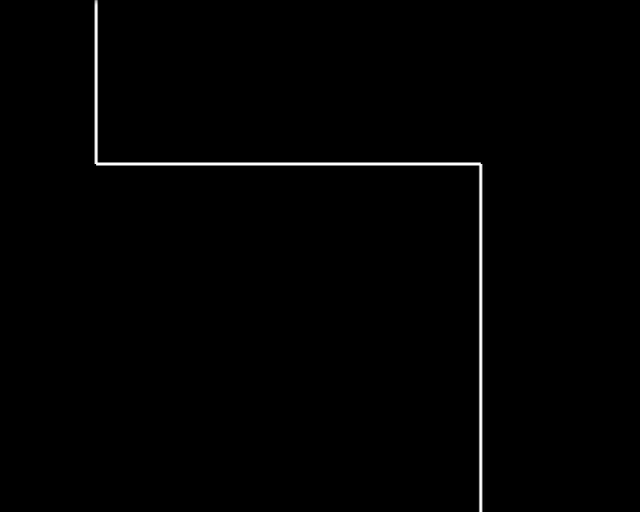
I am using really simple path for this tutorial, but you can experiment a bit with it and use different curves.
Now its time to create the enemies. For this we will extend the Phaser 3 Image class.
Add this code before the create function:
var Enemy = new Phaser.Class({

        Extends: Phaser.GameObjects.Image,

        initialize:

        function Enemy (scene)
        {
            Phaser.GameObjects.Image.call(this, scene, 0, 0, 'sprites', 'enemy');

        },
        update: function (time, delta)
        {

        }

});
This is our empty Enemy class. Now we need to add some logic to it. I’ve decided to separate the path follower part so you could get the basic idea of how to make an object follow a path. For this reason each enemy will have a follower object with two parameters – t showing the progress on the path from 0 – start to 1 – end and vec (Phaser.Math.Vector2()) to get the x and y coordinates of the given t point. Add this row at the end of the Enemy constructor:
this.follower = { t: 0, vec: new Phaser.Math.Vector2() };Now add this method to our Enemy:
	startOnPath: function ()
        {
            // set the t parameter at the start of the path
            this.follower.t = 0;

            // get x and y of the given t point
            path.getPoint(this.follower.t, this.follower.vec);

            // set the x and y of our enemy to the received from the previous step
            this.setPosition(this.follower.vec.x, this.follower.vec.y);

        },
The method startOnPath places the enemy at the first point of our path.
Now change the update method of the Enemy to this one:
        update: function (time, delta)
        {
            // move the t point along the path, 0 is the start and 0 is the end
            this.follower.t += ENEMY_SPEED * delta;

            // get the new x and y coordinates in vec
            path.getPoint(this.follower.t, this.follower.vec);

            // update enemy x and y to the newly obtained x and y
            this.setPosition(this.follower.vec.x, this.follower.vec.y);

            // if we have reached the end of the path, remove the enemy
            if (this.follower.t >= 1)
            {
                this.setActive(false);
                this.setVisible(false);
            }
        }
ENEMY_SPEED is defined this way for now:
var ENEMY_SPEED = 1/10000;
At certain point you would want each enemy type to have different speed, but for now we will use global variable. Now we will add the enemies group to the game, add the code below at the end of the create function:
	enemies = this.add.group({ classType: Enemy, runChildUpdate: true });
	this.nextEnemy = 0;
and change the scene update function to this:
function update(time, delta) {

    // if its time for the next enemy
    if (time > this.nextEnemy)
    {
        var enemy = enemies.get();
        if (enemy)
        {
            enemy.setActive(true);
            enemy.setVisible(true);

            // place the enemy at the start of the path
            enemy.startOnPath();

            this.nextEnemy = time + 2000;
        }
    }
}
If you run your game now, you should see something like this:
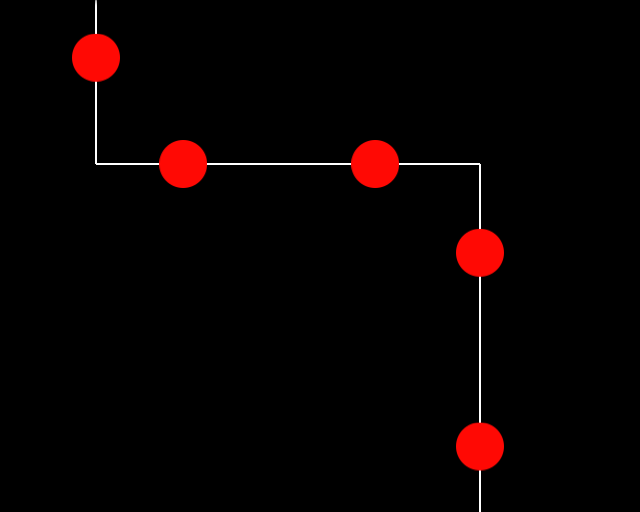
Great, we have the enemies. Now its time to work on our defense. First I will draw a a grid on our graphics so it will be clear where the turrets can be placed. Here is the drawGrid function:
function drawGrid(graphics) {
    graphics.lineStyle(1, 0x0000ff, 0.8);
    for(var i = 0; i < 8; i++) {
        graphics.moveTo(0, i * 64);
        graphics.lineTo(640, i * 64);
    }
    for(var j = 0; j < 10; j++) {
        graphics.moveTo(j * 64, 0);
        graphics.lineTo(j * 64, 512);
    }
    graphics.strokePath();
}
Call drawGrid at the start of the create function like this:
    var graphics = this.add.graphics();
    drawGrid(graphics);
The Turret class will extend the Image in the same way. The difference will be that the turrets won’t move but they will execute certain action (shoot) each X seconds. Here is the Turret class, you can place it right after the Enemy:
var Turret = new Phaser.Class({

        Extends: Phaser.GameObjects.Image,

        initialize:

        function Turret (scene)
        {
            Phaser.GameObjects.Image.call(this, scene, 0, 0, 'sprites', 'turret');
            this.nextTic = 0;
        },
        // we will place the turret according to the grid
        place: function(i, j) {
            this.y = i * 64 + 64/2;
            this.x = j * 64 + 64/2;
            map[i][j] = 1;
        },
        update: function (time, delta)
        {
            // time to shoot
            if(time > this.nextTic) {
                this.nextTic = time + 1000;
            }
        }
});
Now we will create the turrets group. Add this code at the end of the create function:
turrets = this.add.group({ classType: Turret, runChildUpdate: true });To add a turret to the game we will add a function on pointerdown user input. Add this at the end of the create function:
this.input.on('pointerdown', placeTurret);And here is the placeTurret function:
function placeTurret(pointer) {
    var i = Math.floor(pointer.y/64);
    var j = Math.floor(pointer.x/64);
    if(canPlaceTurret(i, j)) {
        var turret = turrets.get();
        if (turret)
        {
            turret.setActive(true);
            turret.setVisible(true);
            turret.place(i, j);
        }
    }
}
And here is the canPlaceTurret:
function canPlaceTurret(i, j) {
    return map[i][j] === 0;
}
Here we use an array to check if the place where we want to place a turret is free. When we place a turret we set the value to 1. The path elements are predefined with -1.
Add this to the top of the game:
var map =      [[ 0,-1, 0, 0, 0, 0, 0, 0, 0, 0],
                [ 0,-1, 0, 0, 0, 0, 0, 0, 0, 0],
                [ 0,-1,-1,-1,-1,-1,-1,-1, 0, 0],
                [ 0, 0, 0, 0, 0, 0, 0,-1, 0, 0],
                [ 0, 0, 0, 0, 0, 0, 0,-1, 0, 0],
                [ 0, 0, 0, 0, 0, 0, 0,-1, 0, 0],
                [ 0, 0, 0, 0, 0, 0, 0,-1, 0, 0],
                [ 0, 0, 0, 0, 0, 0, 0,-1, 0, 0]];
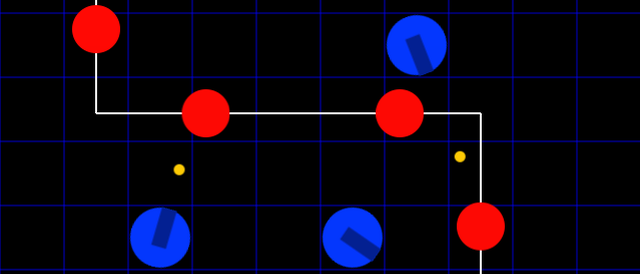
Now if you run the game in the browser you should have something like this:
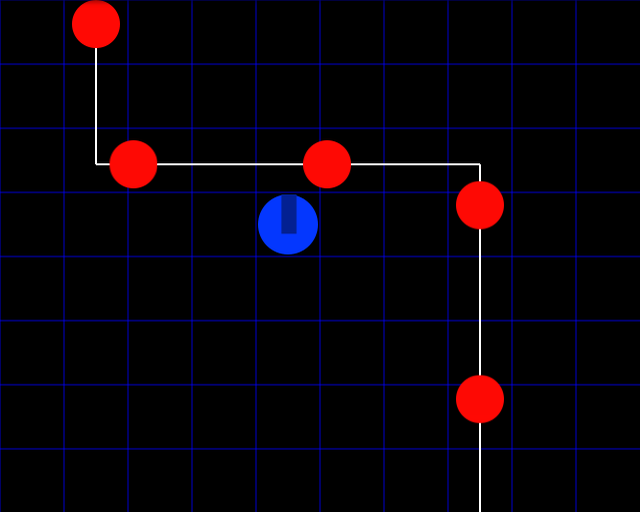
When you click in game and the place is empty you should be able to place a turret. But our turrets are pretty idle – they do nothing to the enemies. Its time to make them shoot and kill. We will create the bullets the same way like the enemies and the turrets.
var Bullet = new Phaser.Class({

    Extends: Phaser.GameObjects.Image,

    initialize:

    function Bullet (scene)
    {
        Phaser.GameObjects.Image.call(this, scene, 0, 0, 'bullet');

        this.dx = 0;
        this.dy = 0;
        this.lifespan = 0;

        this.speed = Phaser.Math.GetSpeed(600, 1);
    },

    fire: function (x, y, angle)
    {
        this.setActive(true);
        this.setVisible(true);

        //  Bullets fire from the middle of the screen to the given x/y
        this.setPosition(x, y);

    //  we don't need to rotate the bullets as they are round
    //  this.setRotation(angle);

        this.dx = Math.cos(angle);
        this.dy = Math.sin(angle);

        this.lifespan = 300;
    },

    update: function (time, delta)
    {
        this.lifespan -= delta;

        this.x += this.dx * (this.speed * delta);
        this.y += this.dy * (this.speed * delta);

        if (this.lifespan <= 0)
        {
            this.setActive(false);
            this.setVisible(false);
        }
    }

});
And add this row at the end of the create function:
bullets = this.add.group({ classType: Bullet, runChildUpdate: true });Now we will create a function for the turrets to use, when they need to shoot bullets. The function will get three parameters – x, y and the angle between the turret and the enemy. This function will call bullet.fire with the same parameters.
function addBullet(x, y, angle) {
    var bullet = bullets.get();
    if (bullet)
    {
        bullet.fire(x, y, angle);
    }
}
And we need one more function to make our turrets work. It will pick up and return an appropriate enemy. In our case the first enemy from the array of enemies that is near the turret. You can play a bit and make the function get the nearest enemy. If there is no enemy near the turret it will return false. This function will use Phaser.Math.Distance.Between to calculate the distance between two points.
function getEnemy(x, y, distance) {
    var enemyUnits = enemies.getChildren();
    for(var i = 0; i < enemyUnits.length; i++) {
        if(enemyUnits[i].active && Phaser.Math.Distance.Between(x, y, enemyUnits[i].x, enemyUnits[i].y) <= distance)
            return enemyUnits[i];
    }
    return false;
}
In getEnemy we iterate on the children of the enemies group and test if the child is active and then if the distance is less than the third parameter.
Now we need to change the Turret to use these two functions for shooting bullets. Change its update method to this:
        update: function (time, delta)
        {
            if(time > this.nextTic) {
                this.fire();
                this.nextTic = time + 1000;
            }
        }
And now we need to create the fire method. It would receive an enemy through the getEnemy function. Then we will calculate the angle between the turret and the enemy and we will call addBullet with this angle. Then we will rotate our turret towards this enemy. Because the turret image is pointing up we need to adjust the angle a bit. And because the angle of the Image class is in degrees we need to multiply the current value with Phaser.Math.RAD_TO_DEG.
Add this code to the Turret Class:
        fire: function() {
            var enemy = getEnemy(this.x, this.y, 100);
            if(enemy) {
                var angle = Phaser.Math.Angle.Between(this.x, this.y, enemy.x, enemy.y);
                addBullet(this.x, this.y, angle);
                this.angle = (angle + Math.PI/2) * Phaser.Math.RAD_TO_DEG;
            }
        },
Now you should see the turrets firing at the enemies. But the bullets and the enemies don’t interact. To make them interact we will use the arcade physics. Change the game config object to this:
var config = {
    type: Phaser.AUTO,
    parent: 'content',
    width: 640,
    height: 512,
    physics: {
        default: 'arcade'
    },
    scene: {
        key: 'main',
        preload: preload,
        create: create,
        update: update
    }
};
In create method change
enemies = this.add.group({ classType: Enemy, runChildUpdate: true });to
enemies = this.physics.add.group({ classType: Enemy, runChildUpdate: true });and
bullets = this.add.group({ classType: Bullet, runChildUpdate: true });to
bullets = this.physics.add.group({ classType: Bullet, runChildUpdate: true });Now we will make the enemies with 100 hit points and each bullet will make 50 damage.
Add this at the end of the Enemy method startOnPath:
this.hp = 100;
And we need to add this method so our Enemy will receive the damage:
        receiveDamage: function(damage) {
            this.hp -= damage;

            // if hp drops below 0 we deactivate this enemy
            if(this.hp <= 0) {
                this.setActive(false);
                this.setVisible(false);
            }
        },
We are almost ready with the interaction between the bullets and the enemies. We will use the overlap method to do so.
Add this code at the end of the create function:
this.physics.add.overlap(enemies, bullets, damageEnemy);
And now we need to create the function damageEnemy:
function damageEnemy(enemy, bullet) {
    // only if both enemy and bullet are alive
    if (enemy.active === true && bullet.active === true) {
        // we remove the bullet right away
        bullet.setActive(false);
        bullet.setVisible(false);

        // decrease the enemy hp with BULLET_DAMAGE
        enemy.receiveDamage(BULLET_DAMAGE);
    }
}
And now you should be able to see the enemies disappear when hit two times. Make the damage variable something smaller like 20 or the enemy hp a lot more to test the performance. You can play with the values and other properties to get a better understanding of the game mechanics.
Conclusion
After finishing this tutorial you should be able to create a basic tower defense game with Phaser 3. There is a lot more to be done on one tower defense game; for example, you can add a user interface, a variety of towers and enemies, animations and effects. You can try to make the game in several scenes, with main menu scene, game over and victory scenes or dialogs, user scores and more. Phaser 3 with its modular structure and rich functionality is a great way to develop professional HTML5 games in a short time.
