You can access the full course here: Real-time Strategy Project – Unit Movement
Table of contents
Multiple Units
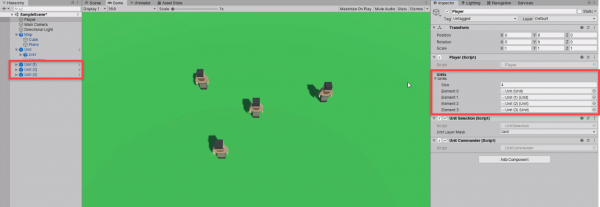
To begin, let’s duplicate the unit a few times and move them around. Then select the Player and drag the unit objects into the Units list.
Box Select UI
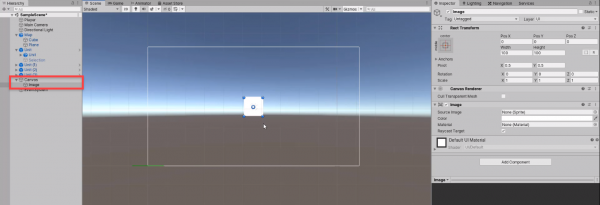
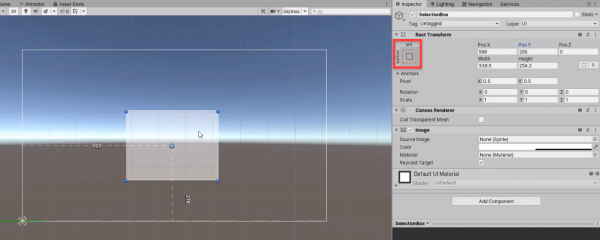
For the box select, create a new UI canvas. As a child of that, create a new Image object.
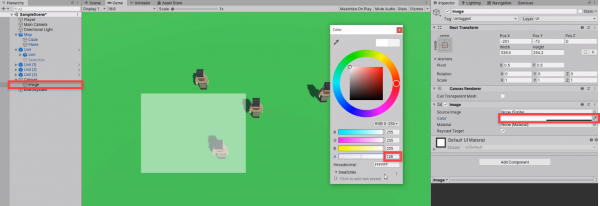
Select the image and set the color to 255, 255, 255, 128.
- Rename the image to SelectionBox
Finally, in order to set up the image to work easily with mouse coordinates, set the anchoring to Bottom – Left. We can then disable the object by default.
UnitSelection Script
In the UnitSelection script, let’s create a new variable for the selection object and the start position of the mouse.
public RectTransform selectionBox;
private Vector2 startPos;
In the Update function, let’s set the start pos variable in the mouse down if statement.
startPos = Input.mousePosition;
Then, let’s check for when the mouse button is held down and released.
// mouse up
if(Input.GetMouseButtonUp(0))
{

}

// mouse held down
if(Input.GetMouseButton(0))
{
    UpdateSelectionBox(Input.mousePosition);
}
The UpdateSelectionBox function will update the selection box on-screen.
// called when we are creating a selection box
void UpdateSelectionBox (Vector2 curMousePos)
{
    if(!selectionBox.gameObject.activeInHierarchy)
        selectionBox.gameObject.SetActive(true);

    float width = curMousePos.x - startPos.x;
    float height = curMousePos.y - startPos.y;

    selectionBox.sizeDelta = new Vector2(Mathf.Abs(width), Mathf.Abs(height));
    selectionBox.anchoredPosition = startPos + new Vector2(width / 2, height / 2);
}
Back in the editor, make sure that the selection box is references in the UnitSelection component, then press play to test it out.
UnitSelection Script
Back in the UnitSelection script, let’s fill in the mouse up if statement in the Update function.
// mouse up
if(Input.GetMouseButtonUp(0))
{
    ReleaseSelectionBox();
}
The ReleaseSelectionBox function will disable the selection image and select all units that are inside of it.
// called when we release the selection box
void ReleaseSelectionBox ()
{
    selectionBox.gameObject.SetActive(false);

    Vector2 min = selectionBox.anchoredPosition - (selectionBox.sizeDelta / 2);
    Vector2 max = selectionBox.anchoredPosition + (selectionBox.sizeDelta / 2);

    foreach(Unit unit in player.units)
    {
        Vector3 screenPos = cam.WorldToScreenPoint(unit.transform.position);

        if(screenPos.x > min.x && screenPos.x < max.x && screenPos.y > min.y && screenPos.y < max.y)
        {
            selectionUnits.Add(unit);
            unit.ToggleSelectionVisual(true);
        }
    }
}
Back in the editor, we can now select multiple units.
Transcript
Welcome back everyone. In this lesson, we are gonna be continuing on with selecting our units. In the previous lesson, we set it up so that we can click on a unit to select it and then click off of it to deselect it. Now in this lesson, we are gonna be working on group selecting units, so we can then click and drag to select a wide range of units here.
And as a matter of fact, let’s actually start by duplicating this unit a few times. So I’m just gonna Control + D, move him over here, Control + D, move him over there, Control + D, move him over there. So we now have a group of units and since we have multiple units now, we need to select our player object and add these to our units list here. So I’m just gonna drag and drop them in this array here because all units that we want to control or are recognized as ours, need to be inside this playlist right here. So like before, we can click play, we can select units, as you can see here, I’m selecting these different units, but we can only select one at a time.
So what we’re gonna be doing now is be setting up that box select so we can select, for example, all of these at the same time and then control them. Now to begin with this, what we are gonna be doing is setting up a UI to actually have this square which is going to be the selection rect box and what I’m going to do is go right click, I’m gonna go UI, Canvas, to create a new UI canvas here in the editor and as a child of that canvas, I’m gonna create a UI image.
Now, to get a better view of this image, let’s going into 2D mode here. Click the 2D button, press F to focus on the image, and there we go. If we look in the game view, we can see we have the image right here on screen. But we don’t want it like this ’cause right now, this image is pretty much all white, so if we do hover it over on top of, and let’s make it a bit bigger.
If we do hover over a unit, we can’t really see what we’re looking at, so we need to make this slightly translucent. So for the color here, I’m gonna set this to about 255 divided by two, so about 128, that’s what we’re gonna have. So we can see the unit and we can still see what we’re selecting. Let’s rename this here to our SelectionBox.
And what we also want to do then is change a few things here in the rect transform. Right now, the actual anchoring is set to the center of the screen. So zero, zero is in the center of the screen and if you look here at the position X and the position Y, these values will change based on where I move this. If I move it to the left, you’ll see that it goes into negative and if I move it to the right, you’ll see that it goes into the positive. Same with the Y, vertical, it goes into the positive and downward, it goes into the negative.
Now we don’t want it this way, because the way we’re gonna be setting it up with our mouse cursor and all that, the way that screen position works, which is what our mouse cursor works in, it’s different than this. Zero, zero isn’t the center of the screen, it’s actually the bottom left of the screen. So we need to change this so that zero, zero for this selection box here is actually in the bottom left corner of the screen and to do that, we can just change the anchoring.
So let’s click on the anchor box here and I’m gonna set this here to bottom left. So now, as you can see, zero, zero is down here in the bottom left, which is what we want, which is great. Okay, so I’m just gonna move this back here. I’m gonna deactivate it so it’s not visible by default and now let’s go inside of our unit selection script and I’m gonna start by adding in a new variable. This is going to be our public RectTransform object which is gonna be our selectionBox.
And we also need a few other variables. First of all, we need the start position for our click. So when we initially click down on the screen, we need to figure out what that position is so we can then figure out how big, how wide we make the box. So I’m gonna have a private vector2 for out startPos and there we go, that’s all we need for now.
So down here in the update function, we are gonna be adding in two more if statements. Right now, we have for if the mouse is down, then we need to figure out when the mouse is up, so we can select the units that are inside the box. And we also need to know every frame that the mouse is clicked down, so that we can then update this selection box. So here, I’m gonna go for mouse up, this is done by going if(Input.GetMouseButtonUp(0)) for the left mouse, and for mouse held down, this is gonna be (Input.GetMouseButton(0)) for the left mouse.
Okay, so whenever we click the mouse button down, we want to first of all, set the start position. So here, we can go startPos equals Input.mousePosition, so we’re getting the first position of the mouse on the screen when we click down. And whenever the mouse is held down, what we want to do is update the selection box. So we want to basically make the selection box, change its width, its height, its position to basically look as if we’re dragging a box across.
So down here, I’m gonna create a new function called void update the selection box and this is gonna send over a vector2 for the current mouse position. So up here in the if GetMouseButton down, I’m gonna call the UpdateSelectionBox, sending over the Input.mousePosition. Okay, so down here in UpdateSelectionBox, this function here is going to be called when we are creating a selection box and what we want to do is basically enable the selection box so if this selection box is disabled, we want to enable it.
So we can go if(!selectionBox.gameObject.activeInHierarchy). So if this is currently not active in the hierarchy, then we want to enable it. So selectionBox.gameObject.SetActive(true). Okay, now what we want to figure out is the width and the height of the box. What is the width gonna be and what is the height gonna be? The width is gonna be the distance between the start position of the mouse and the current position of the mouse on the x-axis and the height is going to be the distance between the two but on the y-axis.
So here, we can go float for the width, this is gonna be equal to our curMousePos.x, subtracting out startPos.x. And the height is gonna be equal to the curMousePos.y minus the startPos.y. Okay, now what we want to do is set the size of the selection box and then also select the position of the box. So first up, the size of the box is going to be basically, the width and the height right here. So what we can do is go selectionBox.sizeDelta to edit the width and the height of the box. This is gonna be equal to a new Vector2 and for the width, this is gonna be the width and the height.
Now a problem with this right now is that the width and the height here have a possibility of being into the negative. If our start position is, let’s say zero, or let’s just say the start position is somewhere and we move our mouse to the left, this number here is gonna go into a negative, so we want this to be positive and a way to do that is by making an absolute.
So with width here, we can make this a Mathf.Abs for absolute and then enter the width. So if this number is a negative, it’ll just simply make it a positive number. Same for the height here, we can go Matf.Abs, like so.
Okay, now what we want to do is set the position of the box because this is also gonna change as we increase, decrease, and modify the size of the selection rect. So to change the position, we can go selectionBox.anchoredPosition equals, and this is gonna be our start position plus half of the width and half of the height, because if you go back to the editor and we click on our selection box right here, you’ll see that the pivot point, the center point, is in the middle of the box. So this is half of the box width after from the left and it’s also half the box height away from the bottom left here as well. So we need to add that difference onto the initial start position.
So we can just go here, equals startPos plus new Vector2, width divided by two and height divided by two. Okay, we got all this set up right here, now let’s actually go and test this out inside of the editor. I think everything here should be pretty good. So let’s go back inside the editor, let’s disable this selection box right here and on our player, let’s drag in the selection box, rect transform, into the unit selection script, press play, and we should see that we can then click and drag and as you can see here, it’s just like as you would see on your computer or in other RTS games as well. We can Click + Drag, let go doesn’t really change anything at the moment, we need to implement that still. But we can also Click + Drag here.
And yeah, so this is the basics of actually getting this working. Now all we need to do is make it so that when we release, this disappears and all the units that are inside of this selection box, get selected. So we’re gonna be working on that in the next lesson and I’ll see you all then.
Welcome back everyone. In this lesson we’re gonna be continuing on with our box selection. In the previous lesson we set it up so that currently we can click and drag to visualize the box. Letting go doesn’t do anything and it doesn’t select the units yet, which is what we’re gonna be working on in this lesson. So let’s open up our unit selection script right here. We were working on the UpdateSelectionBox function.
And what we want to do now is go up to our Update function and inside of here we’re gonna be working on the GetMouseButtonUp if statement right here. So when we let go of our mouse button what we want to do is call a function that we’ll create down here. And this is going to be called our void ReleaseSelectionBox. So we can call that over here in GetMouseButtonUp, ReleaseSelectionBox and this is gonna first of all disable the selection visual right here and it is also going to determine what units are inside of the box.
So first of all let’s disable the box. So selectionBox.setactive false, whoops, selectionBox.gameObject.setActive false. And what we want to do now is determine the min and the max for this object. We wanna know the bounds of this, the bounds of this basically selection box on screen. And we’re gonna be storing this in two Vector2 variables. First up we have a Vector2 for the min. And this is gonna be the min for the x and the y. So what’s the minimum x value? So what’s the left hand side x value? And what’s the minimum y value? So what’s the bottom left y value?
So this position here is basically gonna be the bottom left of the selection box and this is gonna be equal to our selectionBox.anchorPosition. And since this here is the center of the rectangle, we need to subtract the width and the height divide by two. So subtract selectionBox.sizeDelta divide by two. And then we also have our vector2 for the max, which is gonna be the top left position of the box. And this is gonna be equal to our selectionBox.anchorPosition, so the center of the selection box. And then we need to add on top of that the width and height divided by two to get the top left. So plus selectionBox.sizeDelta divide by two.
Okay so we got the min and the max positions of this box. And with these what we’re gonna be doing is looping through each of our units and converting their world position into a screen position, and then determining whether or not they are inside the bounds of these two values. So let’s loop through each of the units. So we got foreach, unit unit in player.units, so each of our player units here. What we want to do first of all is convert this unit here which has a world position, a global world position into a screen position. So here we’ll have a vector3 screenPos and that’s gonna be equal to our camera.WorldToScreenPoint and this can convert a world point into a screen point. The world point we wanna convert is going to be our unit.transform.position.
So now we have the unit as a screen position and what we want to do of that is determine okay, is the x position of this unit greater than the min x and is the x position less than the max x. So we then know that vertically this unit is inside the selection box. Then we need to go okay, is this unit’s screen y position greater than the min y and is it less than the max y. And with these four checks we can then determine that okay, this unit is inside of the selection box, so select it, otherwise just skip over it.
So to do this we can just go if our screenPos.x is greater than the min.x and the screenPos.x is less than max.x and the screenPos.y is greater than min.y and the screenPos.y is less than the max.y, then what we can do is go selectedUnits.add unit like so. Okay so we got our unit selected here and then we can then toggle the selection visual on the unit. So go unit.ToggleSelectionVisual true.
Okay, there we go. It’s probably a bit to get a hold of inside this function, because it is quite large. Just gonna add a comment up here explaining what it does. So pretty much we’re disabling the selection box, ’cause we no longer want to see. We’re getting the min and the max positions on this selection box, so the bottom left and the top right positions of the box. Then we’re looping through each of our units. We are converting our unit position to a screen position and then we are basically determining here in this if statement whether or not this screen position of the unit is inside of our selection box. If so we are then selecting that unit.
Okay, so we’ve got that all set up and pretty much for now that should be all we need to do. We can now go back inside the editor, wait for the scripts to compile. We can then press play. And what we should be able to do is just like before, as you can see we can select the individual units, but if we have our box and let go it disappears. Let’s select this unit here. There we go, we got that on selected.
Let’s try select all of ’em. There we go. We can also select all the units, we can select these two over here. We can select these three. We can select all of ’em, we can select one, we can select this one, select all of ’em. So yeah as you can see here, we have our selection system up and ready to go. Now what we need to do is actually get these units moving. We need to be able to right click on the ground and basically tell the units to move to that position.
And that’s gonna be done in the next lesson where we start to work on our unit commander script. So I’ll see you all then in the next lesson.
Interested in continuing? Check out the full Real-time Strategy Project – Unit Movement course, which is part of our Strategy Game Development Academy.
