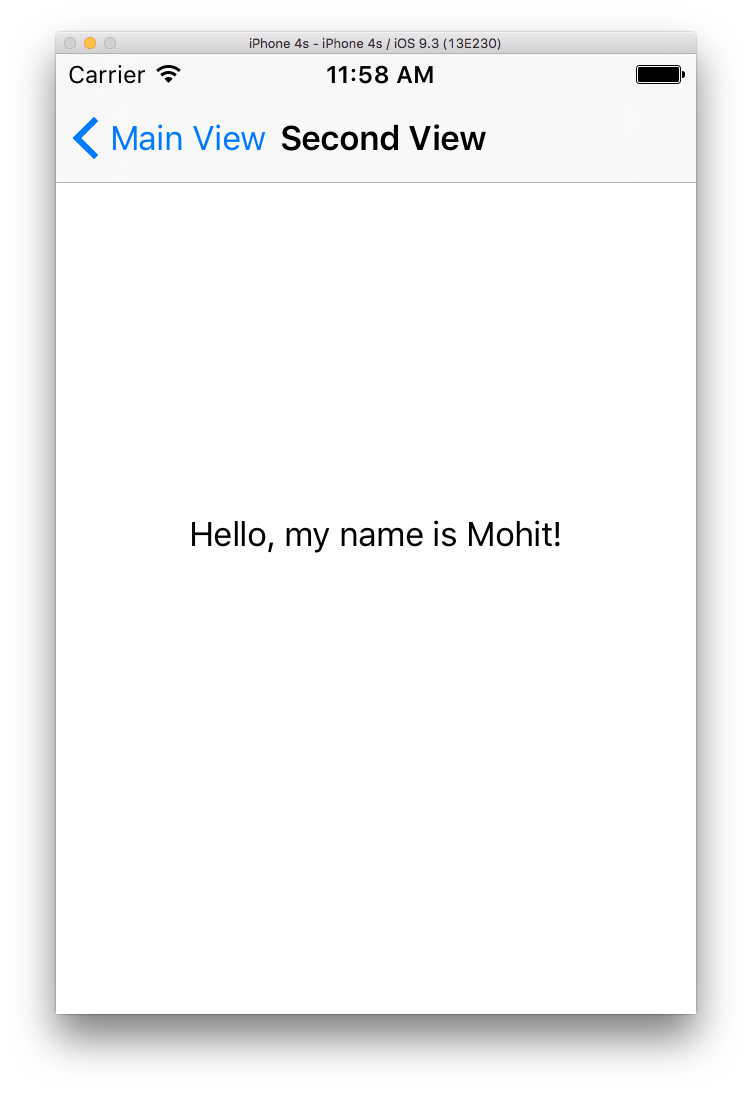
Hello World! In this post we’re going to learn how to effectively navigate between two or more view controllers using segues and a UINavigationController. We’ll also see how we can pass data between them using properties. We’ll be building a small app that will use a UINavgiationController to navigate between two view controllers and pass data between them as well.
Did you come across any errors in this tutorial? Please let us know by completing this form and we’ll look into it!

FINAL DAYS: Unlock coding courses in Unity, Godot, Unreal, Python and more.
Download the source code for this post here.
Learn iOS by building real apps
Check out The Complete iOS Development Course – Build 14 Apps with Swift 2 on Zenva Academy to learn Swift 2 and iOS development from the ground-up with an expert trainer.
Let’s create a new Single View iOS application called Navigator. Most of what we’ll doing will be in our storyboard. Open it up and we should see our view controller. First, we’ll wrap our existing view controller in a UINavigationController.
The purpose of the UINavigationController’s purpose is to manage navigating hierarchical content in a way that’s easy for the user to follow. Let’s look at an example below.
The Settings app in the emulator uses a UINavigationController. The top navigation bar leaves a breadcrumb trail for the users to traverse back up the hierarchy. In addition to the breadcrumb trail, we can also have toolbar buttons that the user can tap. These are most commonly used for actions that relate to the content of the current view controller. For example, suppose we had a list of notes; there might be a toolbar button allowing the user to add a new note. When we’re editing an existing note, there might be toolbar buttons to save the note or delete it.
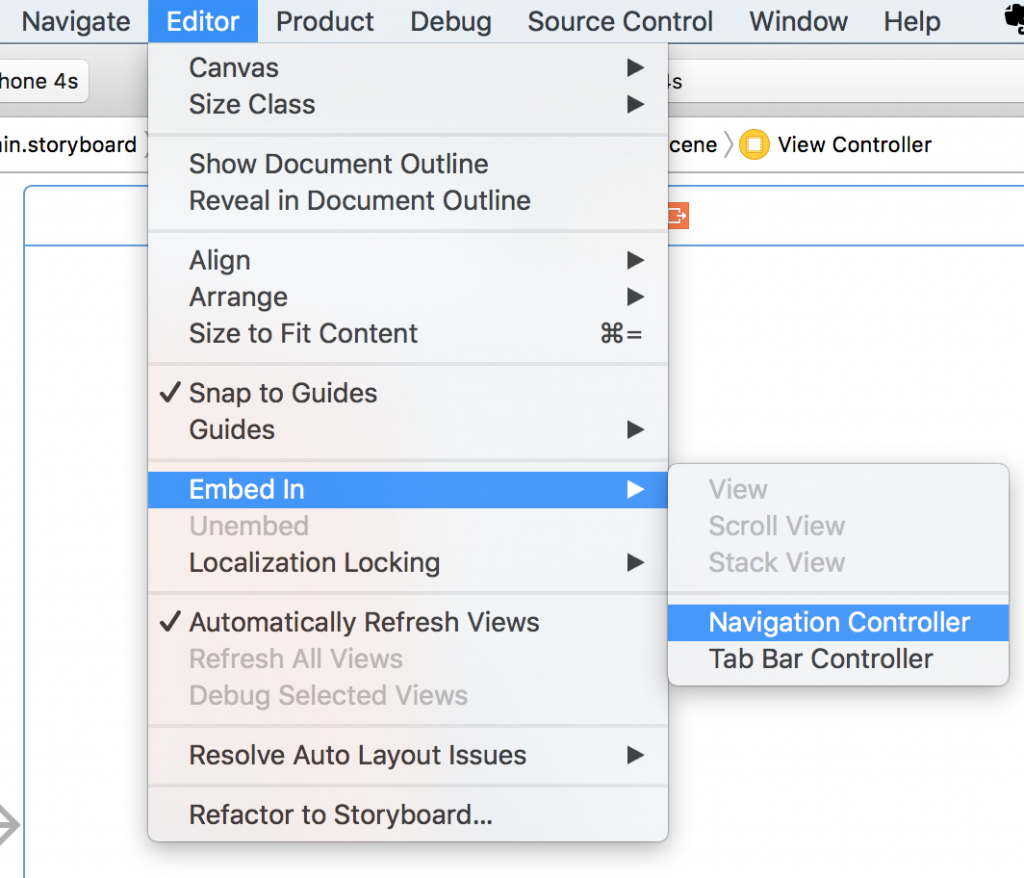
The best part about the UINavigationController is that we can use it as-is; we don’t need to subclass or modify it! It’ll work right out of the box. Xcode even provides us a quick shortcut to embed our view controller into a UINavigationController. Let’s click on the top bar of our view controller in the storyboard to select the view controller. Then go to the Editor menu in the menu bar and click Embed In -> Navigation Controller.
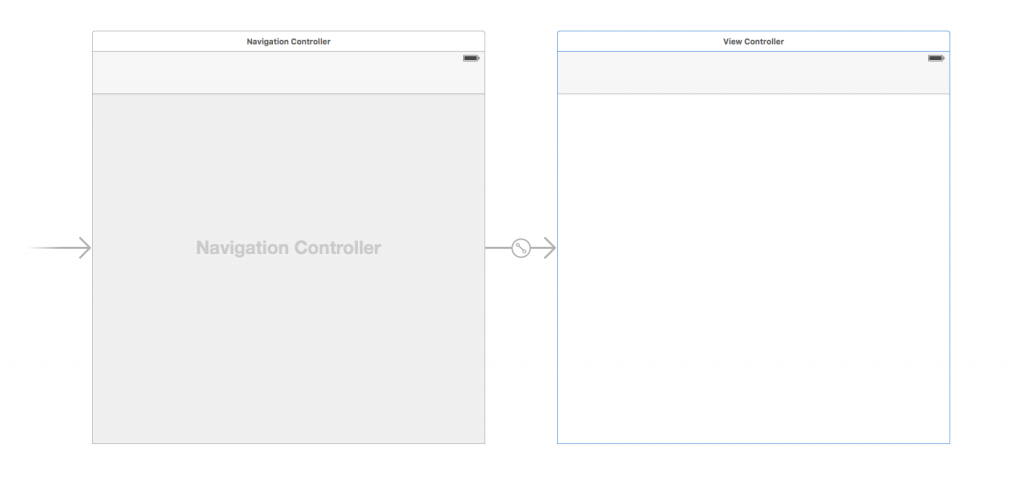
Afterwards, we should see the Navigation Controller and the arrow moved to the new Navigation Controller, like in the bottom screenshot.
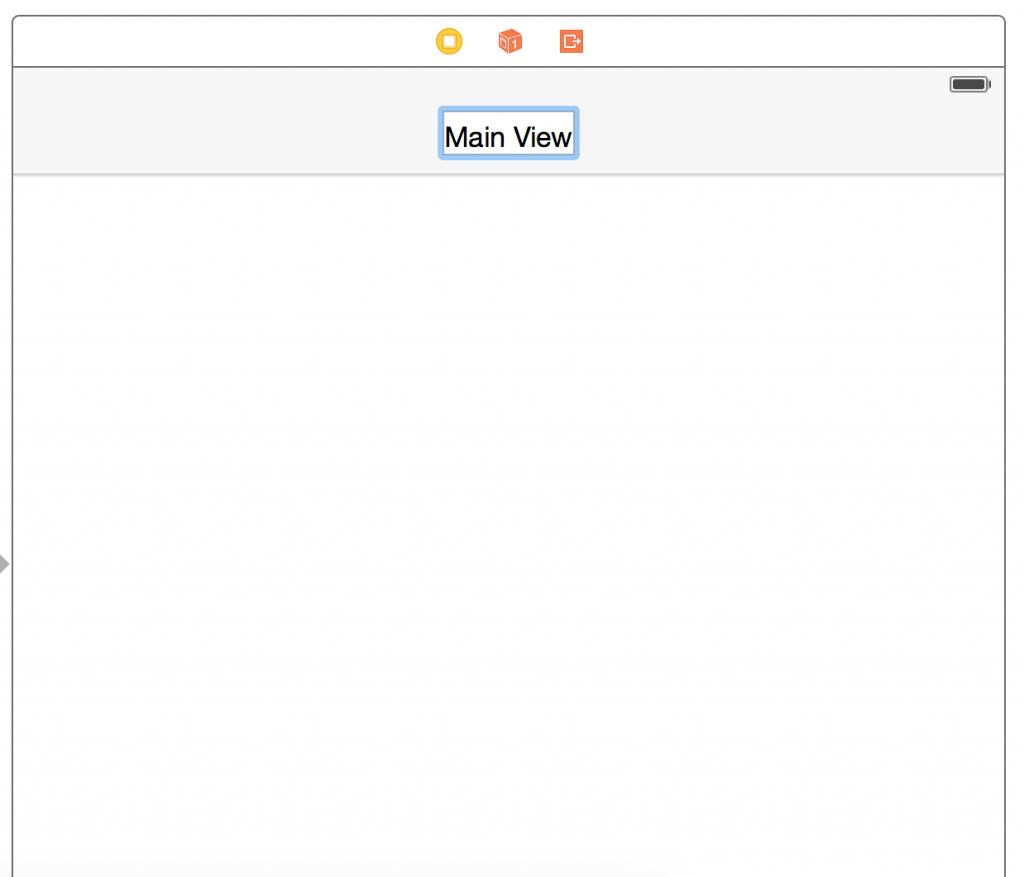
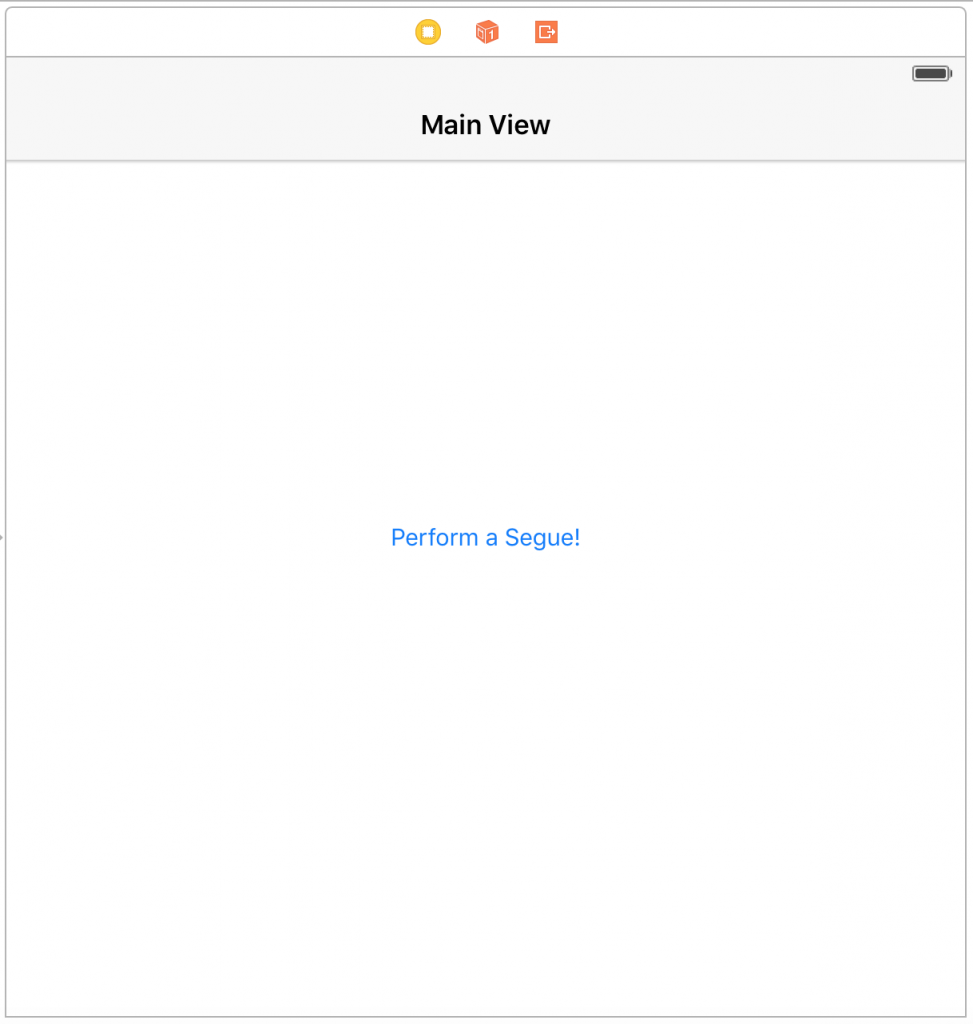
That’s all we need to do to configure our view controller! Now when we have multiple view controllers with segues, the navigation controller will automatically put a top bar in for us. In fact, we already have a top bar in our existing view controller. Let’s double-click on it and change the text to say something like Main View.
Now let’s center a button in that view controller so that when we press on it, we trigger the segue to another view controller.
Regarding autolayout, simply align it to be centered horizontally and vertically. Now let’s create a new view controller that we’ll actually segue to. In the Object pane on the bottom right of Xcode, scroll to the top and drag out a new view controller object. Our storyboard should look like the below screenshot.
Notice we have a warning about a scene being unreachable. This warning occurs because we have a view controller with no way to get to it! Ignore this warning for now since we’ll fix it very soon!
We’ll also need to create a new Swift class to manage this view controller. Go to File on the menu bar and create a new Swift file called SecondViewController. Inside it, we have to initialize a Swift class with the same name and make it subclass UIViewController. We’ll have to make sure we import UIKit instead of Foundation at the beginning. For consistency, let’s also override the same functions we did in our first view controller class. The entire Swift file should look like the following.
import UIKit

class SecondViewController: UIViewController {

    override func viewDidLoad() {
        super.viewDidLoad()
    }

    override func didReceiveMemoryWarning() {
        super.didReceiveMemoryWarning()
    }

}
Now we need to set our second view controller’s class in the storyboard to be this new SecondViewController. Open up the storyboard and click on the top bar of our second view controller. In the right pane, open up the Identities inspector (third item from the left, also to the left of the Attributes inspector). In the Class field, set it to be SecondViewController. Refer to the screenshot below if you have any issues finding the right field.
Now we’re ready to configure the segue! Control-drag from the button in the first view controller into the second view controller. In the dialog that pops up, select show.
A top bar should appear in the second view controller and there should be a connection between our first view controller to our second view controller. Instead of configuring it manually, we’ll see how we can do it in code.
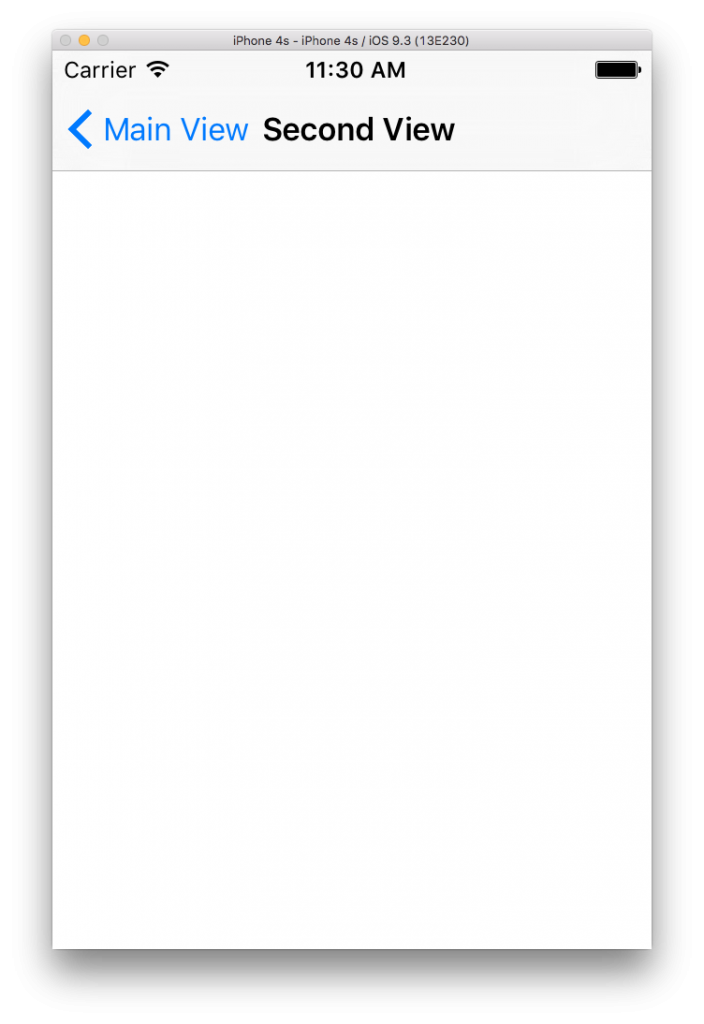
To configure the title of our second view controller manually, open up the corresponding Swift class. UINavigationController sets the title of the top navigation bar to be the title of the current view controller. Instead of setting the title of the navigation controller directly, we can set the title of the second activity in viewDidLoad. When the UINavigationController brings up this view controller, the top bar’s title will be the title of this view controller.
override func viewDidLoad() {
    super.viewDidLoad()
    self.title = "Second View"
}
Let’s try running our app to see if the segue works.
It works! Configuring a segue in iOS is simple enough, but what if I had data I need to send to the second view controller? For this next half of this post, we’re going to see how to do this.
First, let’s create a UILabel in our second view controller and center it horizontally and vertically with autolayout. Let’s also create an outlet to it in our SecondViewController class called dataLabel. We also need to create another variable called data and set its type to be an optional String. This is the property that we’ll set in our first view controller before we segue. In the viewDidLoad function, set the UILabel’s text to be the data (using optional binding). The entire class should look like the following.
import UIKit

class SecondViewController: UIViewController {

    var data: String?
    @IBOutlet weak var dataLabel: UILabel!

    override func viewDidLoad() {
        super.viewDidLoad()
        self.title = "Second View"

        if let concreteData = data {
            dataLabel.text = concreteData
        }
    }

    override func didReceiveMemoryWarning() {
        super.didReceiveMemoryWarning()
    }

}
This is all we need to do on the receiving side. Before we configure the sending side, we need to open up the storyboard and select the arrow denoting the segue between the first and second view controllers. In the Attributes inspector, set the identifier to be called dataSegue. The segue identifiers allow us to have many different segues from a single view controller to any number of other view controllers. We know which segue it is from this unique identifier.
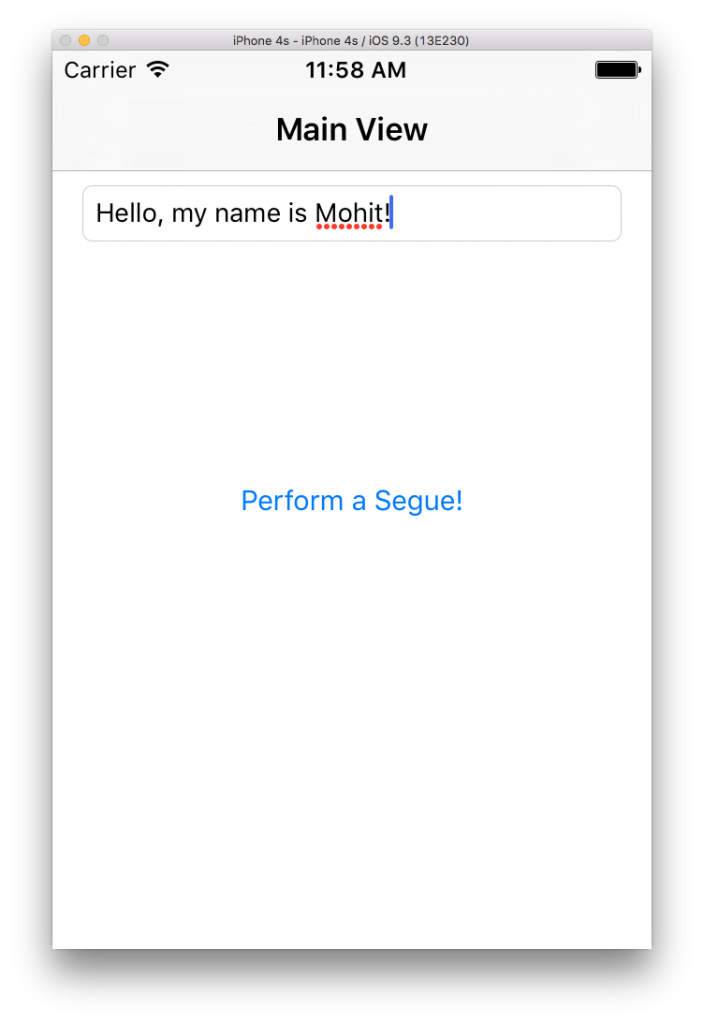
Drag out a UITextField to the top of the screen, right under the top navigation bar. Stretch it so it fills the content up to the left and right margins. Pin it to the left, right, and top. That should be enough constraints to unambiguously position the UITextField. Create an outlet to it in our first view controller called dataTextField.
Before we complete the segue, we need to extract text from the UITextField and set the data property of the second view controller. We can do this by overriding the prepareForSegue method.
override func prepare(for segue: UIStoryboardSegue, sender: Any?) {
    // TODO
}
In this method, we need to make sure that the segue we’re about to execute is the right one. The segue parameter has a property called identifier that we can check against the identifier of the segue that we set in the storyboard.
if segue.identifier == "dataSegue" {
    // TODO
}
After we’re sure that the segue we want is this one, we need to get a reference to the SecondViewController. The segue parameter has a property called destinationViewController that we can use. However, this property is of type UIViewController, not SecondViewController. To be extra careful, we’ll use the as? operator to downcast destinationViewController to SecondViewController. Then we can use optional binding to set the second view controller’s data. The entirety of the prepareForSegue method should look like the code below.
override func prepare(for segue: UIStoryboardSegue, sender: Any?) {
    if segue.identifier == "dataSegue" {
        let secondViewController = segue.destination as? SecondViewController
        if let svc = secondViewController {
            svc.data = dataTextField.text
        }
    }
}
Notice how we don’t have to forcibly unwrap the text property of the UITextField. This is because the data property of our SecondViewController is also an optional type. Hence, in the event that the text of the UITextField is nil, we’d be setting the data property to be nil, which is ok since that type is an optional whose value can be nil. In the SecondViewController’s viewDidLoad method, we then use optional binding to safely unwrap the property and set it to the text of the UILabel.
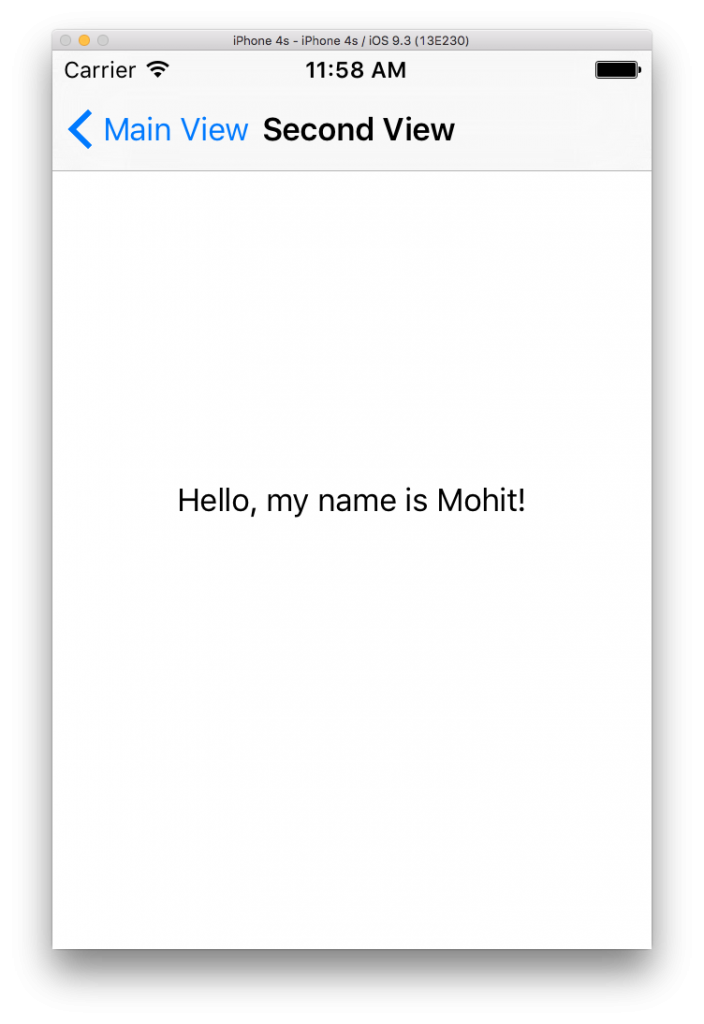
Let’s recap the flow of data one more time to get a better understand of how it works. First, the user enters the data into the UITextField. After they click the UIButton to segue, we set the property of the destination view controller to be the text of the UITextField. Then, after the view loads, we set the text of the UILabel to be that of the property.
One important thing to note: we can’t immediately set the text of the UILabel as soon as the property is set. This is because the outlet to that UILabel and the UILabel itself doesn’t exist until the viewDidLoad method. Inside that method call, it is safe to use any of the outlets because the views exist and the outlets are set.
Let’s see this data transfer happen in our app!
In this post we learned to learn how to navigate between two view controllers using segues and a UINavigationController. We also passed data between our two view controllers using properties. Ultimately, we built an app that can pass dynamic data between two view controllers. We can extend this concept to pass any kind of data across any number of view controllers.
