In my last two tutorials we created a Fruit Ninja game and added some content to it. In this last tutorial, we will add a new game mode. This will imply in adding a title screen, refactoring part of our code and adding some extra content. I will cover the following content in this tutorial:
- Adding a custom font for all the texts being shown
- Adding a new game mode called Time Attack. In this mode, the player must cut as many fruits as possible before the time runs out
- Refactoring the code for our states, to reuse between different states
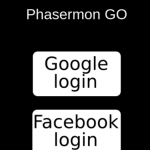
- Adding a title screen, where the player can choose between the two game modes
- Adding two cuttables prefabs for the Time Attack mode. The first one is a clock, which increases the remaining time when cut, and the second one is a time bomb, which reduces the remaining time when cut
To read this tutorial, it is important that you are familiar with the following concepts:
- Javascript and object-oriented concepts.
- Basic Phaser concepts, such as: states, sprites, groups and arcade physics
Table of contents
Learn Phaser by building 15 games
If you want to master Phaser and learn how to publish Phaser games as native games for iOS and Android feel free to check Zenva‘s online course The Complete Mobile Game Development Course – Build 15 Games.
Assets copyright
The bomb asset used in this tutorial was made by Alucard under Creative Commons License (http://opengameart.org/content/bomb-2d), which allows commercial use with attribution.
Source code files
You can download the tutorial source code files here.
Game states
We will use the following states to run our game:
- Boot State: loads a json file with the level information and starts the Loading State
- Loading Sate: loads all the game assets, and starts the next State
- Title State: shows the title screen, allowing the player to choose between the two game modes: Classic and Time Attack
- Classic State: runs the game mode we were working in the last two tutorials, in which the player cuts fruits until runs out of lives
- Time Attack State: new game mode, where the player cuts fruits until runs out of time
There are a lot of changes in the states codes, since we’re going to refactor the code to allow multiple game modes. So, to simplify, I will show the changes as they’re necessary.
Refactoring the code for adding multiple game modes
Since we’re going to have multiple states, we have to identify common code between them and put it in another state which will be extended. In order to do that, we’ll create the following parent states to be extended:
- JSONLevelState: loads a JSON file as we were using in the last tutorials, with assets, groups and prefabs
- LevelState: represents a generic level. Is responsible for detecting swipes, checking for collisions and showing the score and game over screen
The states hierarchy is shown in the figure below. Notice that TitleState extends JSONLevelState, since we will start it from a JSON file, but it does not extend LevelState, since it’s not a game state. On the other hand, both ClassicState and TimeAttackState will extend LevelState, overwriting necessary methods and adding new ones.

The code for JSONLevelState and LevelState are shown below. JSONLevelState has the “create_prefab” method and the code for creating them from the JSON file. LevelState has the “start_swipe”, “end_swipe”, “check_collision”, “init_hud”, “game_over” and “restart_level” methods. Notice that the highest score variable may be different according to the game mode, so we have to leave its name as a variable to be set in other state implementations, as you can see in the “game_over” method.
var FruitNinja = FruitNinja || {};

FruitNinja.JSONLevelState = function () {
    "use strict";
    Phaser.State.call(this);

    this.prefab_classes = {
    };
};

FruitNinja.JSONLevelState.prototype = Object.create(Phaser.State.prototype);
FruitNinja.JSONLevelState.prototype.constructor = FruitNinja.JSONLevelState;

FruitNinja.JSONLevelState.prototype.init = function (level_data) {
    "use strict";
    this.level_data = level_data;

    this.scale.scaleMode = Phaser.ScaleManager.SHOW_ALL;
    this.scale.pageAlignHorizontally = true;
    this.scale.pageAlignVertically = true;
};

FruitNinja.JSONLevelState.prototype.create = function () {
    "use strict";
    var group_name, prefab_name;

    // create groups
    this.groups = {};
    this.level_data.groups.forEach(function (group_name) {
        this.groups[group_name] = this.game.add.group();
    }, this);

    // create prefabs
    this.prefabs = {};
    for (prefab_name in this.level_data.prefabs) {
        if (this.level_data.prefabs.hasOwnProperty(prefab_name)) {
            // create prefab
            this.create_prefab(prefab_name, this.level_data.prefabs[prefab_name]);
        }
    }
};

FruitNinja.JSONLevelState.prototype.create_prefab = function (prefab_name, prefab_data) {
    "use strict";
    var prefab_position, prefab;
    // create object according to its type
    if (this.prefab_classes.hasOwnProperty(prefab_data.type)) {
        if (prefab_data.position.x > 0 && prefab_data.position.x <= 1) {
            // position as percentage
            prefab_position = new Phaser.Point(prefab_data.position.x * this.game.world.width,
                                              prefab_data.position.y * this.game.world.height);
        } else {
            // position as absolute number
            prefab_position = prefab_data.position;
        }
        prefab = new this.prefab_classes[prefab_data.type](this, prefab_name, prefab_position, prefab_data.properties);
    }
};
var FruitNinja = FruitNinja || {};
FruitNinja.LevelState = function () {
"use strict";
FruitNinja.JSONLevelState.call(this);
this.prefab_classes = {
};
};
FruitNinja.LevelState.prototype = Object.create(FruitNinja.JSONLevelState.prototype);
FruitNinja.LevelState.prototype.constructor = FruitNinja.LevelState;
FruitNinja.LevelState.prototype.init = function (level_data) {
"use strict";
FruitNinja.JSONLevelState.prototype.init.call(this, level_data);
// start physics system
this.game.physics.startSystem(Phaser.Physics.ARCADE);
this.game.physics.arcade.gravity.y = 1000;
this.MINIMUM_SWIPE_LENGTH = 50;
this.score = 0;
};
FruitNinja.LevelState.prototype.create = function () {
"use strict";
FruitNinja.JSONLevelState.prototype.create.call(this);
// add events to check for swipe
this.game.input.onDown.add(this.start_swipe, this);
this.game.input.onUp.add(this.end_swipe, this);
this.init_hud();
};
FruitNinja.LevelState.prototype.start_swipe = function (pointer) {
"use strict";
this.start_swipe_point = new Phaser.Point(pointer.x, pointer.y);
};
FruitNinja.LevelState.prototype.end_swipe = function (pointer) {
"use strict";
var swipe_length, cut_style, cut;
this.end_swipe_point = new Phaser.Point(pointer.x, pointer.y);
swipe_length = Phaser.Point.distance(this.end_swipe_point, this.start_swipe_point);
// if the swipe length is greater than the minimum, a swipe is detected
if (swipe_length >= this.MINIMUM_SWIPE_LENGTH) {
// create a new line as the swipe and check for collisions
cut_style = {line_width: 5, color: 0xE82C0C, alpha: 1};
cut = new FruitNinja.Cut(this, "cut", {x: 0, y: 0}, {group: "cuts", start: this.start_swipe_point, end: this.end_swipe_point, duration: 0.3, style: cut_style});
this.swipe = new Phaser.Line(this.start_swipe_point.x, this.start_swipe_point.y, this.end_swipe_point.x, this.end_swipe_point.y);
this.groups.fruits.forEachAlive(this.check_collision, this);
this.groups.bombs.forEachAlive(this.check_collision, this);
this.groups.special_fruits.forEachAlive(this.check_collision, this);
this.groups.time_bombs.forEachAlive(this.check_collision, this);
this.groups.clocks.forEachAlive(this.check_collision, this);
}
};
FruitNinja.LevelState.prototype.check_collision = function (object) {
"use strict";
var object_rectangle, line1, line2, line3, line4, intersection;
// create a rectangle for the object body
object_rectangle = new Phaser.Rectangle(object.body.x, object.body.y, object.body.width, object.body.height);
// check for intersections with each rectangle edge
line1 = new Phaser.Line(object_rectangle.left, object_rectangle.bottom, object_rectangle.left, object_rectangle.top);
line2 = new Phaser.Line(object_rectangle.left, object_rectangle.top, object_rectangle.right, object_rectangle.top);
line3 = new Phaser.Line(object_rectangle.right, object_rectangle.top, object_rectangle.right, object_rectangle.bottom);
line4 = new Phaser.Line(object_rectangle.right, object_rectangle.bottom, object_rectangle.left, object_rectangle.bottom);
intersection = this.swipe.intersects(line1) || this.swipe.intersects(line2) || this.swipe.intersects(line3) || this.swipe.intersects(line4);
if (intersection) {
// if an intersection is found, cut the object
object.cut();
}
};
FruitNinja.LevelState.prototype.init_hud = function () {
"use strict";
var score_position, score_style, score;
// create score prefab
score_position = new Phaser.Point(20, 20);
score_style = {font: "48px Shojumaru", fill: "#fff"};
score = new FruitNinja.Score(this, "score", score_position, {text: "Fruits: ", style: score_style, group: "hud"});
};
FruitNinja.LevelState.prototype.game_over = function () {
"use strict";
var game_over_panel, game_over_position, game_over_bitmap, panel_text_style;
// if current score is higher than highest score, update it
if (!localStorage[this.highest_score] || this.score > localStorage[this.highest_score]) {
localStorage[this.highest_score] = this.score;
}
// create a bitmap do show the game over panel
game_over_position = new Phaser.Point(0, this.game.world.height);
game_over_bitmap = this.add.bitmapData(this.game.world.width, this.game.world.height);
game_over_bitmap.ctx.fillStyle = "#000";
game_over_bitmap.ctx.fillRect(0, 0, this.game.world.width, this.game.world.height);
panel_text_style = {game_over: {font: "32px Shojumaru", fill: "#FFF"},
current_score: {font: "20px Shojumaru", fill: "#FFF"},
highest_score: {font: "18px Shojumaru", fill: "#FFF"}};
// create the game over panel
game_over_panel = new FruitNinja.GameOverPanel(this, "game_over_panel", game_over_position, {texture: game_over_bitmap, group: "hud", text_style: panel_text_style, animation_time: 500});
this.groups.hud.add(game_over_panel);
};
FruitNinja.LevelState.prototype.restart_level = function () {
"use strict";
this.game.state.restart(true, false, this.level_data);
};
Now, we can write the code for ClassicState, which represents the game mode we already had. Since most of its logic is already in LevelState and JSONLevelState, we only have to set the highest score name and overwrite the “init_hud” method to include player lives, as shown below.
var FruitNinja = FruitNinja || {};

FruitNinja.ClassicState = function () {
    "use strict";
    FruitNinja.LevelState.call(this);

    this.prefab_classes = {
        "fruit_spawner": FruitNinja.FruitSpawner.prototype.constructor,
        "bomb_spawner": FruitNinja.BombSpawner.prototype.constructor,
        "special_fruit_spawner": FruitNinja.SpecialFruitSpawner.prototype.constructor,
        "background": FruitNinja.Prefab.prototype.constructor
    };
};

FruitNinja.ClassicState.prototype = Object.create(FruitNinja.LevelState.prototype);
FruitNinja.ClassicState.prototype.constructor = FruitNinja.ClassicState;

FruitNinja.ClassicState.prototype.init = function (level_data) {
    "use strict";
    FruitNinja.LevelState.prototype.init.call(this, level_data);

    this.lives = 3;

    this.highest_score = "classic_score";
};

FruitNinja.ClassicState.prototype.init_hud = function () {
    "use strict";
    FruitNinja.LevelState.prototype.init_hud.call(this);
    var lives_position, lives;
    // create lives prefab
    lives_position = new Phaser.Point(0.75 * this.game.world.width, 20);
    lives = new FruitNinja.Lives(this, "lives", lives_position, {texture: "sword_image", group: "hud", "lives": 3, "lives_spacing": 50});
};
I’ll leave the TimeAttackState code for when we’re going to use it.
Custom font
We will add a custom font to show all the text content in our game, like title, menu items, and hud. You can download the font we are going to use here or with the source code. To add it to the game, you can simply add a font-face in your index.html file. However, it might not work for all browsers, according to some reports in Phaser’s forums. To circumvent this, you can add a style to load the custom font and a div object in your index.html file to force the browser to load the font.
The index.html with both methods is shown below. Notice that we set the “left” property of the .fontPreload style to be -100px, so the div object won’t be visible. After doing that, you can simply use the font family name (Shojumaru) in the style property of our text prefabs.
<!DOCTYPE html>
<html>

	<head>
		<meta charset="utf-8" />
		<meta name="viewport" content="width=device-width, initial-scale=1, maximum-scale=1, minimum-scale=1, user-scalable=no" />
		<title>Learn <a class="wpil_keyword_link" href="https://gamedevacademy.org/how-to-learn-coding-for-beginners/" target="_blank" rel="noopener" title="Game Development" data-wpil-keyword-link="linked">Game Development</a> at ZENVA.com</title>

		<style>
		  body {
		    padding: 0px;
		    margin: 0px;
		    background-color: black;
		  }
          @font-face {
		  	font-family: 'Shojumaru';
		  	src: url('assets/fonts/shojumaru.ttf');
		  }

          .fontPreload {
		  	font-family: Shojumaru;
		  	position:absolute;
		  	left:-100px;
		   }
		  </style>


	</head>

	<body>
        <div class="fontPreload">.</div>

        <script type="text/javascript" src="js/phaser.js"></script>

        <script src="js/states/BootState.js"></script>
        <script src="js/states/LoadingState.js"></script>
        <script src="js/states/JSONLevelState.js"></script>
        <script src="js/states/TitleState.js"></script>
        <script src="js/states/LevelState.js"></script>
        <script src="js/states/ClassicState.js"></script>
        <script src="js/states/TimeAttackState.js"></script>

        <script src="js/prefabs/Prefab.js"></script>
        <script src="js/prefabs/TextPrefab.js"></script>

        <script src="js/prefabs/Spawners/Spawner.js"></script>
        <script src="js/prefabs/Spawners/FruitSpawner.js"></script>
        <script src="js/prefabs/Spawners/BombSpawner.js"></script>
        <script src="js/prefabs/Spawners/SpecialFruitSpawner.js"></script>
        <script src="js/prefabs/Spawners/TimeBombSpawner.js"></script>
        <script src="js/prefabs/Spawners/ClockSpawner.js"></script>

        <script src="js/prefabs/Cuttables/Cuttable.js"></script>
        <script src="js/prefabs/Cuttables/Fruit.js"></script>
        <script src="js/prefabs/Cuttables/Bomb.js"></script>
        <script src="js/prefabs/Cuttables/SpecialFruit.js"></script>
        <script src="js/prefabs/Cuttables/TimeBomb.js"></script>
        <script src="js/prefabs/Cuttables/Clock.js"></script>
        <script src="js/prefabs/Cuttables/Cut.js"></script>

        <script src="js/prefabs/HUD/Score.js"></script>
        <script src="js/prefabs/HUD/Lives.js"></script>
        <script src="js/prefabs/HUD/RemainingTime.js"></script>
        <script src="js/prefabs/HUD/GameOverPanel.js"></script>
        <script src="js/prefabs/HUD/Menu.js"></script>
        <script src="js/prefabs/HUD/MenuItem.js"></script>
        <script src="js/prefabs/HUD/StartGameItem.js"></script>

        <script type="text/javascript" src="js/main.js"></script>
	</body>
</html>
Title screen
The title screen will have the game title and a menu with the game mode options. To do that, we have to create MenuItem and Menu prefabs. The MenuItem will be a text prefab that shows a game mode. When the menu selection is over an item, we will play a tween animation to change the item scale up and down. When the player selects an item, we want it to execute some action, by calling the “select” method. By default, this method does nothing, so we will write new prefabs that will extend MenuItem and overwite this method.
The MenuItem prefab code is shown below. In the constructor, we create a tween animation for the scale object. Then, we add two children to this tween, by calling its “to” method twice, one for increasing the scale and one for decreasing it. Finally, we use to “repeatAll” method to keep the tween repeating after all children are executed. Finally, in the “selection_over” method we start the tween, while in the “selection_out” method we stop it.
var FruitNinja = FruitNinja || {};

FruitNinja.MenuItem = function (game_state, name, position, properties) {
    "use strict";
    FruitNinja.TextPrefab.call(this, game_state, name, position, properties);

    this.anchor.setTo(0.5);

    this.on_selection_animation = this.game_state.game.add.tween(this.scale);
    this.on_selection_animation.to({x: 1.5 * this.scale.x, y: 1.5 * this.scale.y}, 500);
    this.on_selection_animation.to({x: this.scale.x, y: this.scale.y}, 500);
    this.on_selection_animation.repeatAll(-1);
};

FruitNinja.MenuItem.prototype = Object.create(FruitNinja.TextPrefab.prototype);
FruitNinja.MenuItem.prototype.constructor = FruitNinja.MenuItem;

FruitNinja.MenuItem.prototype.selection_over = function () {
    "use strict";
    if (this.on_selection_animation.isPaused) {
        this.on_selection_animation.resume();
    } else {
        this.on_selection_animation.start();
    }
};

FruitNinja.MenuItem.prototype.selection_out = function () {
    "use strict";
    this.on_selection_animation.pause();
};

FruitNinja.MenuItem.prototype.select = function () {
    "use strict";
    // the default item does nothing
};
Now, we will write the Menu prefab code, which will have a list of items and will navigate through them. The Menu code is shown below. In the constructor, the menu items are received from the properties parameter and the first one is under selection. In the “update” method we check for the directionals to navigate through the items and the spacebar to select the current item. Notice that, when navigating through the items, we have to remove the selection from the current item and change it to the new one. When the spacebar is pressed, we just have to select the current item.
var FruitNinja = FruitNinja || {};

FruitNinja.Menu = function (game_state, name, position, properties) {
    "use strict";
    var live_index, life;
    FruitNinja.Prefab.call(this, game_state, name, position, properties);

    this.visible = false;

    this.menu_items = properties.menu_items;
    this.current_item_index = 0;
    this.menu_items[0].selection_over();

    this.cursor_keys = this.game_state.game.input.keyboard.createCursorKeys();
};

FruitNinja.Menu.prototype = Object.create(FruitNinja.Prefab.prototype);
FruitNinja.Menu.prototype.constructor = FruitNinja.Menu;

FruitNinja.Menu.prototype.update = function () {
    "use strict";
    if (this.cursor_keys.up.isDown && this.current_item_index > 0) {
        // navigate to previous item
        this.menu_items[this.current_item_index].selection_out();
        this.current_item_index -= 1;
        this.menu_items[this.current_item_index].selection_over();
    } else if (this.cursor_keys.down.isDown && this.current_item_index < this.menu_items.length - 1) {
        // navigate to next item
        this.menu_items[this.current_item_index].selection_out();
        this.current_item_index += 1;
        this.menu_items[this.current_item_index].selection_over();
    }

    if (this.game_state.game.input.keyboard.isDown(Phaser.Keyboard.SPACEBAR)) {
        this.menu_items[this.current_item_index].select();
    }
};
Finally, we can create the TitleState by using the Menu and MenuItem prefabs. The menu items will be loaded from the JSON file (which you can check in the source code), so we just have to add the game title and the menu in the “create” method. The title is simply a text prefab. To pass the menu items to the menu we iterate through the “menu_items” group, saving them in an array, which will be passed to the menu.
var FruitNinja = FruitNinja || {};

FruitNinja.TitleState = function () {
    "use strict";
    FruitNinja.JSONLevelState.call(this);

    this.prefab_classes = {
        "start_game_item": FruitNinja.StartGameItem.prototype.constructor,
        "background": FruitNinja.Prefab.prototype.constructor
    };
};

FruitNinja.TitleState.prototype = Object.create(FruitNinja.JSONLevelState.prototype);
FruitNinja.TitleState.prototype.constructor = FruitNinja.TitleState;

FruitNinja.TitleState.prototype.create = function () {
    "use strict";
    var title_position, title_style, title, menu_position, menu_items, menu_properties, menu;
    FruitNinja.JSONLevelState.prototype.create.call(this);

    // adding title
    title_position = new Phaser.Point(0.5 * this.game.world.width, 0.3 * this.game.world.height);
    title_style = {font: "72px Shojumaru", fill: "#FFF"};
    title = new FruitNinja.TextPrefab(this, "title", title_position, {text: "Fruit Ninja", style: title_style, group: "hud"});
    title.anchor.setTo(0.5);

    // adding menu
    menu_position = new Phaser.Point(0, 0);
    menu_items = [];
    this.groups.menu_items.forEach(function (menu_item) {
        menu_items.push(menu_item);
    }, this);
    menu_properties = {texture: "", group: "background", menu_items: menu_items};
    menu = new FruitNinja.Menu(this, "menu", menu_position, menu_properties);
};
You can already run the game with the title screen, to see it working.

Time attack state
Since we already have most of the game logic in the LevelState, the TimeAttackState is easy to implement, as shown below. Notice that, besides setting the highest score variable, we only have to add the remaining time to the hud, which is updated in the “update” method.
var FruitNinja = FruitNinja || {};

FruitNinja.TimeAttackState = function () {
    "use strict";
    FruitNinja.LevelState.call(this);

    this.prefab_classes = {
        "fruit_spawner": FruitNinja.FruitSpawner.prototype.constructor,
        "time_bomb_spawner": FruitNinja.TimeBombSpawner.prototype.constructor,
        "clock_spawner": FruitNinja.ClockSpawner.prototype.constructor,
        "special_fruit_spawner": FruitNinja.SpecialFruitSpawner.prototype.constructor,
        "background": FruitNinja.Prefab.prototype.constructor
    };
};

FruitNinja.TimeAttackState.prototype = Object.create(FruitNinja.LevelState.prototype);
FruitNinja.TimeAttackState.prototype.constructor = FruitNinja.TimeAttackState;

FruitNinja.TimeAttackState.prototype.init = function (level_data) {
    "use strict";
    FruitNinja.LevelState.prototype.init.call(this, level_data);

    this.remaining_time = Phaser.Timer.SECOND * 60;

    this.highest_score = "time_attack_score";
};

FruitNinja.TimeAttackState.prototype.update = function () {
    "use strict";
    if (this.remaining_time > 0) {
        this.remaining_time -= this.game.time.elapsed;
        if (this.remaining_time <= 0) {
            this.game_over();
            this.remaining_time = 0;
        }
    }
};

FruitNinja.TimeAttackState.prototype.init_hud = function () {
    "use strict";
    FruitNinja.LevelState.prototype.init_hud.call(this);
    var remaining_time_position, remaining_time_style, remaining_time;
    // show remaining time
    remaining_time_position = new Phaser.Point(0.5 * this.game.world.width, 20);
    remaining_time_style = {font: "48px Shojumaru", fill: "#fff"};
    remaining_time = new FruitNinja.RemainingTime(this, "remaining_time", remaining_time_position, {text: "Remaining time: ", style: remaining_time_style, group: "hud"});
};
To show the remaining time we create a RemainingTime prefab, which is simply a text prefab that shows the remaining time value. To update it, we use “this.game.time.elapsed”, which contains the elapsed time since the last update, in milliseconds.
var FruitNinja = FruitNinja || {};

FruitNinja.RemainingTime = function (game_state, name, position, properties) {
    "use strict";
    FruitNinja.TextPrefab.call(this, game_state, name, position, properties);
};

FruitNinja.RemainingTime.prototype = Object.create(FruitNinja.TextPrefab.prototype);
FruitNinja.RemainingTime.prototype.constructor = FruitNinja.RemainingTime;

FruitNinja.RemainingTime.prototype.update = function () {
    "use strict";
    // update the text to show the remaining time in seconds
    this.text = "Remaining time: " + this.game_state.remaining_time / Phaser.Timer.SECOND;
};
You can already try playing the Time Attack mode with the regular prefabs and see if it’s working.

Clock and time bomb
Since we have our generic Cuttable and Spawner prefabs, adding the clock and the time bomb will be easily done as we did with the special fruit in the last tutorial.
First, we will create the Clock and TimeBomb prefabs, which will extend Cuttable, as shown below. For each one, the only thing we have to do is change the “cut” method. In the Clock prefab, we increase the reamining time by 3 seconds, while in the TimeBomb we decrease it by 5 seconds.
var FruitNinja = FruitNinja || {};

FruitNinja.Clock = function (game_state, name, position, properties) {
    "use strict";
    FruitNinja.Cuttable.call(this, game_state, name, position, properties);

    this.body.setSize(20, 20);
};

FruitNinja.Clock.prototype = Object.create(FruitNinja.Cuttable.prototype);
FruitNinja.Clock.prototype.constructor = FruitNinja.Clock;

FruitNinja.Clock.prototype.cut = function () {
    "use strict";
    FruitNinja.Cuttable.prototype.cut.call(this);
    // if a time bomb is cut, increase the remaining time by 3 seconds
    this.game_state.remaining_time += Phaser.Timer.SECOND * 3;
    this.kill();
};
var FruitNinja = FruitNinja || {};
FruitNinja.TimeBomb = function (game_state, name, position, properties) {
"use strict";
FruitNinja.Cuttable.call(this, game_state, name, position, properties);
this.body.setSize(20, 20);
};
FruitNinja.TimeBomb.prototype = Object.create(FruitNinja.Cuttable.prototype);
FruitNinja.TimeBomb.prototype.constructor = FruitNinja.TimeBomb;
FruitNinja.TimeBomb.prototype.cut = function () {
"use strict";
FruitNinja.Cuttable.prototype.cut.call(this);
// if a time bomb is cut, decrease the remaining time by 5 seconds
this.game_state.remaining_time -= Phaser.Timer.SECOND * 5;
this.kill();
};Next, we will create the spawner for both prefabs. Here the only method we have to change is “create_object”, which will return a new Clock for the ClockSpawner and a new TimeBomb for the TimeBombSpawner.
var FruitNinja = FruitNinja || {};

FruitNinja.ClockSpawner = function (game_state, name, position, properties) {
    "use strict";
    FruitNinja.Spawner.call(this, game_state, name, position, properties);
};

FruitNinja.ClockSpawner.prototype = Object.create(FruitNinja.Spawner.prototype);
FruitNinja.ClockSpawner.prototype.constructor = FruitNinja.ClockSpawner;

FruitNinja.ClockSpawner.prototype.create_object = function (name, position, velocity) {
    "use strict";
    // return new time bomb
    console.log("spawning clock");
    return new FruitNinja.Clock(this.game_state, name, position, {texture: "clock_image", group: "clocks", velocity: velocity});
};
var FruitNinja = FruitNinja || {};
FruitNinja.TimeBombSpawner = function (game_state, name, position, properties) {
"use strict";
FruitNinja.Spawner.call(this, game_state, name, position, properties);
};
FruitNinja.TimeBombSpawner.prototype = Object.create(FruitNinja.Spawner.prototype);
FruitNinja.TimeBombSpawner.prototype.constructor = FruitNinja.TimeBombSpawner;
FruitNinja.TimeBombSpawner.prototype.create_object = function (name, position, velocity) {
"use strict";
// return new time bomb
return new FruitNinja.TimeBomb(this.game_state, name, position, {texture: "time_bomb_image", group: "time_bombs", velocity: velocity});
};Now, you can add the two new spawner in the Time Attack mode and try playing it.

Finishing the game
And that concludes our Fruit Ninja game, tell me our opinion on this tutorial series and what games you would like to see next.