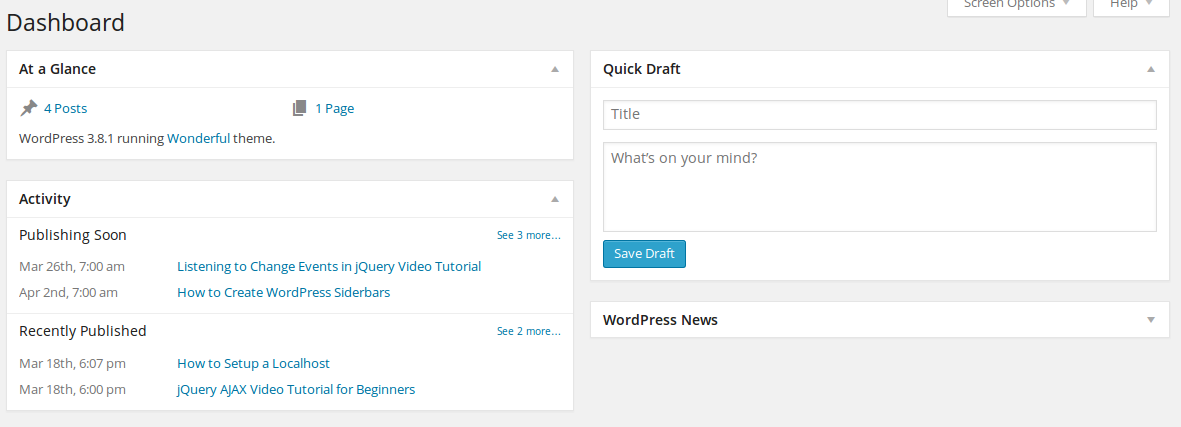
Wouldn’t it be cool to have your very own custom WordPress dashboard widget- a widget that will be displayed on your Dashboard page upon logging into WordPress?
To get started, add the following contents to the functions.php file in your current theme directory:
<!--?php function dashboard_widget_function(){ # We are defining the dashboard widget function and giving our widget some contents. echo ' The contents of your dashboard widget goes here, you could add any HTML that you like '; } ?-->Under the above code in the functions.php file, go ahead and add the following:
<!--?php function add_dashboard_widgets(){ # we defining a function to hook to the wp_dashboard_setup action wp_add_dashboard_widget( 'widget_id', 'Title', 'dashboard_widget_function' # giving our widget an id, title and contents # the contents of the widget are that of our dashboard_widget_function() ); } ?-->Lastly, we add the following code to the bottom of the above code:
<!--?php add_action('wp_dashboard_setup', 'add_dashboard_widgets'); # hooking our add_dashboard_widgets function to the wp_dashboard_setup action ?-->Once the above code has been added to the current theme’s functions.php file, log in to your WordPress Dashboard and you should see your custom Dashboard widget.
Tip: If you don’t see your dashboard widget, click on “Screen Options” (this option is located at the top right of your WordPress Dashboard area) and make sure you check the box next to your widget’s title.
Now that we can see how easy it is to create a dashboard widget in WordPress- How about a real life example?
<!--?php /* Example: 10 Latest Comments Dashboard Widget */ /* This code should go inside your functions.php file */ function dashboard_comments_display(){ $args = array( # creating the $args array and giving it some values 'number' => 10, # allowing a maximum of 10 comments 'status' => 'approve' # must have a status of 'approved' ); $comments = get_comments($args); # creating our comments variable and giving # it the value of the get_comments # action with our $args array # passed to it foreach($comments as $comment) : # initiating our for each loop echo ' </p> <div><p>' . comment_author_link() . ' '. $comment->comment_content . ' <br> <br> <a href="http://example.com/?p=' . $comment->comment_post_ID . '">Visit This Comments Page?</a> </p> <hr> <p> </div> <p> '; # content to display # we will loop through everything inbetween # 'foreach' and 'endforeach' until there is # nothing left to display endforeach; # ending for each loop } #closing our dashboard_comments_display function function add_dashboard_widgets(){ # defining a function to hook to the wp_dashboard_setup action wp_add_dashboard_widget( 'dashboard_comments_widget', 'Recent Comments', 'dashboard_comments_display' ); # giving our widget an id, title and the # contents from # dashboard_comments_display } add_action( 'wp_dashboard_setup', 'add_dashboard_widgets' ); # hooking our add_dashboard_widgets function to the # wp_dashboard_setup action ?-->The above example will display a widget (in the dashboard) titled ‘Latest Comments’ with the last 10 comments with a status of ‘approved’.
Each comment will have the users name, a link to their website (if specified) and their comment, with a link to the post at the bottom, followed by a horizontal rule.
This widget will display (by default) on the dashboard of any user that is registered on your wordpress install. You can easily take this to the next level, with: http://wordpress.org/extend/plugins/ag-custom-admin/
This is a nice plugin that I have used in the past for customization of the admin area.
Once its all setup you can configure the plugin and one of the options is to customize both admin and user dashboards or just customize the user dashboard.
When chooing the latter, you can then go and create some custom widgets and create a unique dashboard for your registered users.
Keep in mind, that you would then need to be using the functions script from the ag-custom-admin plugin directory- to ensure that the widgets are not displaying globally.
I hope you found this resource useful!
Interested in WordPress Plugin Development?
At ZENVA we have a comprehensive video course on WordPress Plugin Development, check it out here.


