Table of contents
Part 3: Keeping track of the score, item pickups, and endless obstacle spawning
This is the final part of a three part tutorial series on how to create a Hyper Casual game. Please make sure you have followed and completed the first and second parts of the tutorial and completed them before starting Part 3. Here are the links to Part 1 and Part 2.
This part of the tutorial was made in Unity version 2018.2.13f1, which was the same version used in the previous tutorials.
Source Code Files
You can download the tutorial source code files here. All the project files are located in the main folder. The asset folder contains additional intermediate files that were used during the process of creating the game sprites.
Did you come across any errors in this tutorial? Please let us know by completing this form and we’ll look into it! FINAL DAYS: Unlock coding courses in Unity, Godot, Unreal, Python and more.
Changing the Background Color
Change the background color on the Main Camera to Black (feel free to change this to any color you like, the color of the background will not affect how the game is played).
Adding the needed libraries
The following libraries need to be added: SceneManagement and TMPro to the GameManager script.
using UnityEngine.SceneManagement;
using TMPro;
Disabling and Activating the GameOverPanel
Make sure you have disabled the GameOverPanel in the inspector window. We will be activating it only when the GameOver function is called in the GameManager script. Add a public GameObject to the GameManager script, and name it GameOverPanel, set this in the inspector and as well on the script component attached to the GameManager object in the scene. This is so the script knows what GameOverPanel to be activating when the GameOver function is called. In the GameOver function we need to set the GameOverPanel to be active. Save the script.
 public GameObject GameOverPanel;

public void GameOver()
    {
        Debug.Log("Game Over!");
        GameOverPanel.SetActive(true);
    }
Restart button functionality
Add a RestartGame function to the GameManager script. Inside this function we are simply going to load the scene again.
 public void RestartGame()
    {
        SceneManager.LoadScene(0);
    }
We then need to setup the on click event on the restart button in the inspector window.
Item pickups
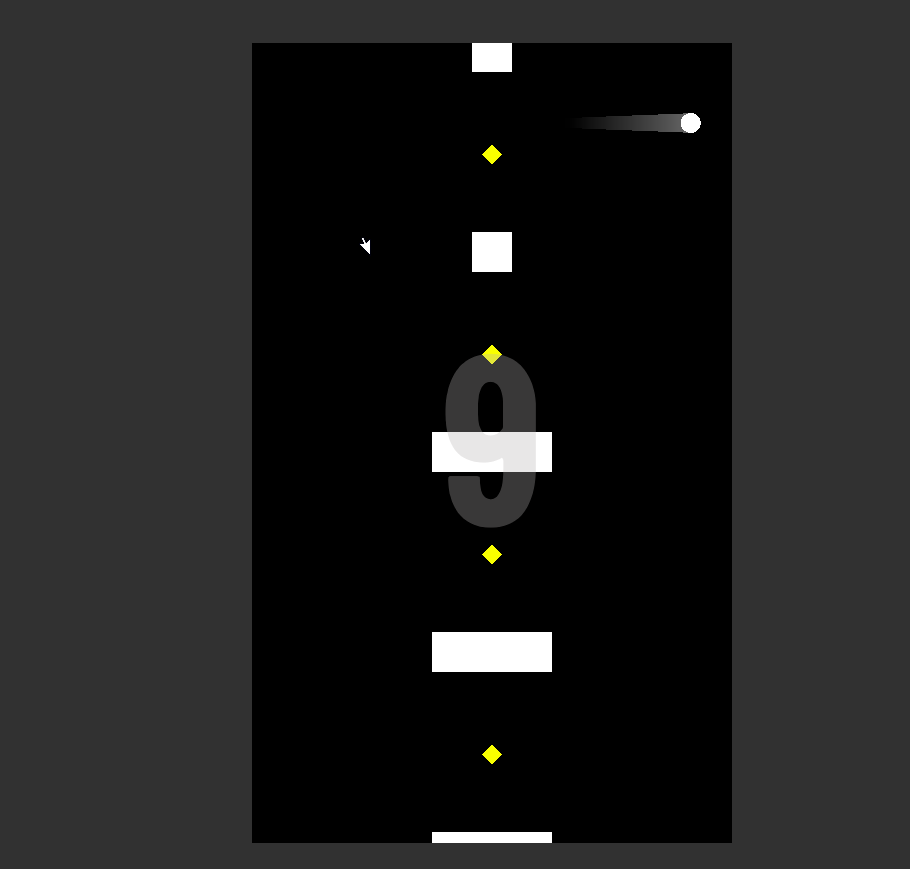
Of course, no Hyper Casual Game would be complete without a collectible of some kind, we will be creating some diamond pick ups next. Create an empty game object and rename it to “Item.” On the transform component set the X position to 3 and the Y position to 6. Create a new diamond sprite and set the color to yellow. Make the Diamond a child of the Item game object. Rename the diamond to Diamond1. Add a circle collider 2D component and set the Is Trigger to true. Reset the transform component. Adjust the scale to 0.5 on both the X and Y values. Add a new tag to and name it “Item.” Make sure to tag the Diamond1 with this tag. Make the Item game object into a prefab by dragging it from the hierarchy into the Prefabs folder.
Open the Player script and we need to add an if statement to the OnTriggerEnter2D function that will detect if the player gameobject collides with a game object tagged as “Obstacle” and then call the PlayerDeath function there and else if the player collides with a game object tagged as “Item.” The else if statement will remain empty until we add in function to increase the score.
 private void OnTriggerEnter2D(Collider2D other)
    {
        if(other.gameObject.tag == "Obstacle")
        {
            PlayerDeath();
        }
        else if(other.gameObject.tag == "Item")
        {

        }


    }
Setting the Score with TextMeshPro and Increasing It
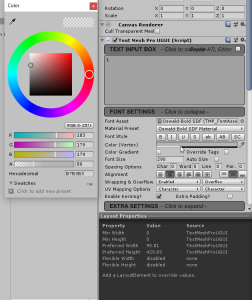
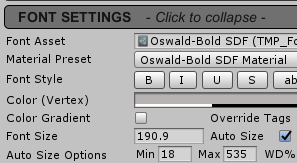
Select the Canvas game object in the hierarchy and create an empty game object and name it “Score.” Make sure this is a child to the Canvas object. Create a UI>TextMeshPro-Text object as a child to the Score object. With the CurrScore object selected adjust the alignment to center and middle in the inspector. Change the font asset to Oswald-Bold. In the Text Input Box put 1. Adjust the Font Size value to 290. Change the Hexidecimal color value to B7B3B3. Adjust the Alpha to 80.
On the Rect Transform component adjust the Width to 270 and the Height to 280. Check the Autosize checkbox and change the Max value to 535.
Open the GameManager script and add a public TextMeshUProGUI variable called “currScoreText.” Add a private int currScore variable. In the Start function set the currScore value to 0.
public TextMeshProUGUI currScoreText;

    int currScore;

	// Use this for initialization
	void Start () {

        currScore = 0;
        ScoreSetting();
	}
Open up the Player script and call the ScoreIncrement function in the else if statement where the player is colliding with the Item pickup. In order to do this correctly you must reference the gameManagerObject then call the ScoreIncrement function, it should look like this:
void Awake()
    {

        gameManagerObject = GameObject.Find("Game Manager").GetComponent<GameManager>();
    }

 private void OnTriggerEnter2D(Collider2D other)
    {
        if(other.gameObject.tag == "Obstacle")
        {
            PlayerDeath();
        }
        else if(other.gameObject.tag == "Item")
        {
            gameManagerObject.ScoreIncrement();

        }


    }
Save the script, and open the Unity Editor, the CurrScore game object in the scene needs to be attached to the Game manager component in the inspector window on the open spot Curr Score Text, just drag the CurrScore object from the hierarchy to the open spot on the Game Manager component, and then hit Play and test out the changes. Every time the player now collides with the diamond item the score will increase. We can’t forget to call the Destroy function on the item pickup so that once the player collides with it, and then the score increments, we need to destroy the game object in the scene so it no longer remains in the game. Do this under the gameManagerObject.ScoreIncrement function on the Player script, make sure to save the script and test that the item is indeed being destroyed after the player collides with the object in the game. Save the scene and Project.
Destroy(other.gameObject);
Delete the Item prefab form the Hierarchy, we will be instantiating this object along with the obstacles randomly through code next.
Random infinite obstacle and item pickup generation
An important aspect of Hyper Casual games is to increase replay-ability. We want to keep the player coming back to play our little game, so one way to do this is by adding randomly placed obstacles and item pickups. This way the player experiences a somewhat different game every time they restart the game. We made our item pickup into a prefab and now we are going to turn the SquareObstacle into a prefab, but first we need to add some more squares to the SquareObstacle gameobject.
Select the Square obstacle gameobject in the hierarchy and duplicate the Square four times, this will now give you a total of 5 Squares that are children to the SquareObstacle. You can easily duplicate an item by hitting Ctrl-D on your keyboard.
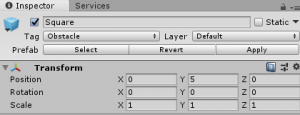
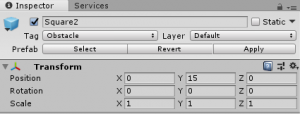
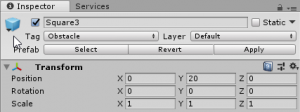
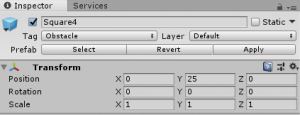
Some values on the squares transform component needs to be adjusted. See the screenshots below for the adjusted values:
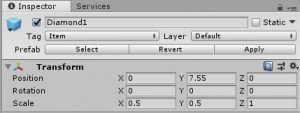
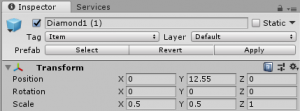
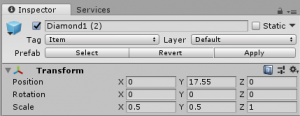
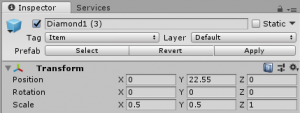
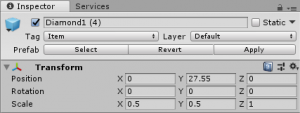
Make the item prefab game object a child of the Square Obstacle. Duplicate the Diamond1 four times. See the screenshots below for the transform component adjusted values:
Make the SquareObstacle into a prefab.
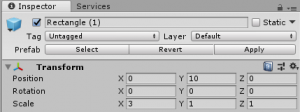
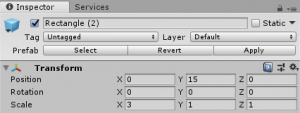
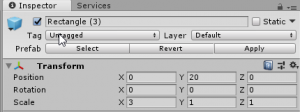
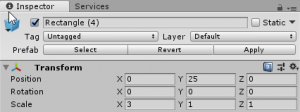
Create an Empty Game Object and reset its transform component. Rename this to “RectangleObstacle” Drag a square sprite from the sprites folder under the RectangleObstacle and make it a child of it. Rename the square to Rectangle, adjust the X value on the scale of the transform component to 3. Adjust the Y value of the Position on the transform component to 5. Duplicate that rectangle 4 times. Make sure to add the tag “Obstacle” to each one of the Rectangles, so that when the player does collide with one it will work properly. See the screenshots for the transform component adjustment values:
Make the RectangleObstacle game object into a prefab. A quick note, here you should be comfortable enough at this point to adjust any of the scale or even position transform values on the obstacles to some vlaues you may favor more than how they are laid out in this tutorial.
Delete both the RectangleObstacle and the SquareObstacle form the Heirarchy. Save the scene and Project.
Create an empty game object and reset the transform component. Rename this object to “ObstacleGenerator.” Create and attach a new script to this game object and name the script “ObstacleGenerator.” This script is going to control the infinite instantiation of all our obstacle prefabs. This is going to be done by measuring the distance between the player game object and the obstacle prefabs. Every time the player gets within a distance of 25 between the obstacle prefabs a new obstacle will be instantiated. We are going to use an array to hold the obstacle prefabs and then use the Random.Range function to choose a random obstacle to instantiate every time the player is within the distance of 25. Add the following code to the ObstacleGenerator script:
public class ObstacleGenerator : MonoBehaviour {

    public GameObject Player;

    public GameObject[] obstacles;

    private int obstCount;

    int playerDistance = -1;
    int obstcIndex = 0;
    int distanceBetweenObstc = 25;

    // Use this for initialization
    void Start () {

        obstCount = obstacles.Length;
        CreateObstacle();
	}

	// Update is called once per frame
	void Update () {

        int PlayerDistance = (int)(Player.transform.position.y / (distanceBetweenObstc / 2));

        if(playerDistance != PlayerDistance)
        {
            CreateObstacle();
            playerDistance = PlayerDistance;
        }
	}

    public void CreateObstacle()
    {
        int RandomObstCounter = Random.Range(0, obstCount);
        GameObject newObstacle = Instantiate(obstacles[RandomObstCounter], new Vector3(0, obstcIndex * distanceBetweenObstc), Quaternion.identity);
        newObstacle.transform.SetParent(transform);
        obstcIndex++;
    }

}
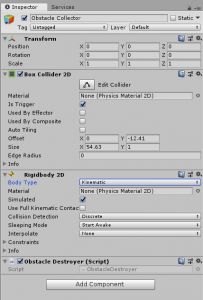
Save the script and open the Unity Editor and hit play to test the changes. You should now be able to see the obstacle prefabs being instantiated as the player moves upwards. Next, we need to make sure we are destroying the obstacles and item pickups that are being instantiated so that they do not remain in the game scene and “hog” the resources and cause crashing of the game. We can do this by creating an empty game object and making it a child of the Player. We are going to rename this object “Obstacle Collector.” This is essentially going to follow behind the player and as the player moves upwards it follows behind it since its now a child of the Player game object. As this Obstacle Collector collides with the game objects tagged “Obstacle” and also “item” they will be destroyed.
Add a Box Collider 2D to the Obstacle Collector set the IS Trigger to True and set the Y offset value on the box collider to -12.41 adjust the size X value to 54.63. Add a rigid body 2D component, and set the Body Type to Kinematic. We have to use a rigid body on this so that collision works properly, and we are setting it to kinematic, remember kinematic body types are not affected by forces or gravity. Kinematic body types also use less resources. Create and add a new script to the Obstacle Collector and name the script ObstacleDestroyer.
Add a private void OnTriggerEnter2D function with the parameter other. Inside this function create an if statement that will check if the ObstacleCollector collides with any obstacle tagged “Obstacle” and also “Item” then Destroy the game object.
 private void OnTriggerEnter2D(Collider2D other)
    {
        if (other.gameObject.tag == "Obstacle" && other.gameObject.tag == "Item") ;
        {
            Destroy(other.gameObject);
        }


    }
Save the script and open the Unity Editor and hit play to test the changes. You should now see the obstacles and items being removed from the game scene as the Obstacle Collector collides with them as the player moves upwards.
Adding Rotation to the Obstacles
Some pizzazz is needed to our obstacles; we can accomplish this by adding a simple rotation script to the obstacles so that they randomly rotate in a direction. This will add a nice “Juicy” effect to the game.
Create a new script and name it Rotation, open it up for editing. Add a public variable called “RotSpeed” with no initial value.
Create a private void function and name it “ObstacleRot”. Inside this function we can rotate the obstacles by using Transform.Rotate Vector3.forward and multiplying this by Time.deltaTime and the RotSpeed. We will need to call this function in the update function, but we also need to do an if check to see if the RotSpeed is not equal to 0, then call the ObstacleRot function.
public int RotSpeed;

	// Use this for initialization
	void Start () {

	}

	// Update is called once per frame
	void Update () {

        if(RotSpeed != 0)
        {
            ObstacleRot();
        }
	}

    private void ObstacleRot()
    {
        transform.Rotate(Vector3.forward * Time.deltaTime * RotSpeed);
    }
Tutorial Conclusion
So that’s it! You have successfully created a Hyper Casual game. Some ways to add some more polish to this little game are to add a camera shake element triggered by the player’s death, or even change the background color randomly every time the game is restarted. Some pickup effects could be added where the particle effects come into play, when the player collides with an item.
