You can access the full course here: AR Projects – Geology App
Table of contents
Part 1
The Image Target properties in the video for this particular lesson has been updated, please see the lesson notes below for the corrected properties.
Project Setup
In this lesson we’ll be setting up our plates ready to animate and script later on. First, let’s drag the EasyAR_Startup prefab (EasyAR > Prefabs) into the scene. This is basically the powerhouse of the augmented reality engine. If we select it, we can paste in our SDK licence key we created on the EasyAR website.

Image Targets
What’s an image target? An image target is an image that the AR app can identify. It can figure our its position, rotation and scale, then render models, particles, etc on top. To create one, drag the ImageTarget prefab (EasyAR > Prefabs > Primitives) into the scene.
Here’s an example of what an image target looks like. They’re located in the StreamingAssets folder, which EasyAR finds at the start of the game.

The following properties have been updated, and differs from the video:
Select the image target and change the properties in the Inspector:
- Path – the file path of the image target .jpg (located in the StreamingAssets folder)
- Name – the name of the image target (without file extension)
- Size – reference size to the real life image (can be anything but we’ll just set it to 5 x 5)
- Storage – set to Assets as this is where the image targets are located
- Loader – links to the EasyAR image tracker (located as a child of the EasyAR_Startup object)

Now let’s create the structure for the plates. First, rename the image target to ImageTarget_TectonicPlates, then we can do the following:
- Create an empty GameObject (right click ImageTarget_TectonicPlates > Create Empty) as a child of the ImageTarget_TectonicPlates and call it TectonicPlates
- Create an empty GameObject as a child of TectonicPlates and call it LeftPlate
- Do the same for a RightPlate

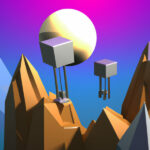
Next, let’s add in the plate model. Drag the TectonicPlate model (> Models) into the scene as a child of the LeftPlate. It’s fairly large, so let’s scale it down to 0.2 and rotate 90 degrees.

Then duplicate the model and make it a child of the RightPlate model. Set the rotation to -90 degrees.

Right now the models are kinda “long”, so let’s squish them a bit. For each of the models, set their Z scale to 0.18. Then set their X position to -0.9 and 0.9 respectively.

Part 2
Animators
In this lesson, we’re going to be animating our plates. The animations we’re going to make are:
- Transform Forwards Back
- Left plate moves forwards, right plate moves back
- Transform Back Forwards
- Left plate moves back, right plate moves forwards
- Divergent
- Both plates move away from each other
- Convergent Over Under
- Left plate moves over, right plate moves under
- Convergent Under Over
- Left pate moves under, right plate moves over
When we imported our models, they had Animators attached. We don’t need them as we’ll be animating the main object. So we can remove those components.

Now select the TectonicPlates object and add an Animator component.

Creating Animations
Go to the Animations folder (if you don’t have one, make one), then create a new Animation Controller – call it TectonicPlates. Then attach it to the Animator component we just added.

Now in the same folder, create an Animation Clip called TransformForwardsBack.

We then want to attach the clip to the animation controller. To do that, double click the TectonicPlates animation controller to open it up in the Animator window (if that doesn’t work, open the Animator window (Window > Animation > Animator).
Then drag in the TransformForwardsBack clip to attach it.

Next, select the TectonicPlates object and open up the Animation window (Window > Animation > Animation). Here, we want to click on the drop-down in the top left and select our animation.

Let’s add the the position property of the LeftPlateModel.

Then do the same for the RightPlateModel‘s position.

There should be two sets of keyframes already made. Keep the first ones where they are, but drag the end ones over to 6:00 seconds. Then set the timeline to 2:00 seconds and drag the left plate forward and the right plate backwards.

Now duplicate the 2:00 second keyframes to 4:00 seconds. This will create an animation that makes the plates move over 2 seconds, hold it for 2 seconds then move back to the default position.

To make it look a bit better, we can have the plates “hit” each other or move towards each other a bit so it looks like they’re really grinding along each other.

Now create a new animation called TransformBackForwards which is just the opposite version of the animation we just made.
In the next lesson, we’ll be finishing off our animations.
Transcript 1
Hey everyone. My name is Daniel Buckley, and I’ll be your instructor for this course. In this course, we’re gonna be creating tectonic plates in augmented reality.
Let’s have a look at what we will be making. We’re gonna be using an image target, which renders two tectonic plate models that we can interact with to create different plate boundaries. At the top left, we have the convergent boundary, where two plates move towards each other, and this will be done by simply dragging across the screen, like swiping across the screen towards the center on both plates.
Then, to the right of that, we have the divergent boundary. This is where the user will swipe away from both plates, and that will cause the plates to move apart from each other. And down at the bottom, we have the transform boundary. This is where the user swipes parallel to each other, going in opposite directions, which causes the plates to grind along each other horizontally.
Let’s have a look at what we’ll be learning in this course. First of all, we’ll be learning how to use EasyAR in Unity. EasyAR is an augmented reality SDK, which allows us to use image targets. These are little QR codes that you can print out that the app can identify. You can figure out its position, its rotation, and its scale and can then render models, particle effects, or whatever you want on top. In our case, we’re gonna be rendering these two tectonic plates, as well as a little lava image.
One of the largest parts of this project is gonna be the animations. As you can see, each of these different type of boundaries have specific animations that play, even some that have particle effects playing along with them. These animations will then be combined with Unity’s timeline. The timeline is a tool that allows you to pair animations with each other, as well as various other things, like enabling and disabling objects and calling functions and scripts. This is a very versatile tool that is mainly used to make cut-scenes and different scripted segments in games.
For us to also be able to drag and move the tectonic plates, we’ll be creating a touch-and-drag manager. This will detect touches on the plates and then figure out the direction that the player drags in to calculate then which direction to move the plate.
ZENVA is an online learning academy with 350,000 students. We feature a wide range of courses for those people who are just starting out or for those people who just want to learn something new. The courses are also very versatile. You can learn many different ways. If you just want to view the course and soak up the information that way, that’s fine. You can also follow along the course with the included project files. All right, with that done, let’s get started on making our project.
Transcript 2
Hey everyone, welcome to how to create interactable tectonic plates in augmented reality. In this lesson, we are going to be creating our plates, ready to be animated and scripted in later lessons.
So to begin, let’s first of all set up our EZAR SDK inside of our Unity scene. To do that, go down to the EZAR folder, go to pre-fabs, and then drag in the EZAR, start a pre-fab into your scene. Once that’s done, go to the side where we have our EZAR behavior, and you just want to paste in your SDK key that you created on the EZAR website. Now, once that’s done, we can just delete our main camera over here, as it’s no longer needed as EZAR actually comes with a camera already set up here.
Now that we have that done, we are ready to actually start making our plate. So to do that, we can go back to our EZAR photo, go pre-fabs, primitives, and drag in the image target. Now, what image target is, is basically a image that the app can actually identify through the camera and render whatever you want on it, in our case, we’re going to be rendering a 3-D model of two tectonic plates and following animations.
The image marker looks like this, so it’s a very specific image, looks a bit like a QR code. And the point of having all of this sort of detail, and all of this contrasting colors is so that the app can easily identify it. It’s got to be an image that is very specific and with a lot of points, see, there’s a lot of right edges, sharp points, a lot of contrasting colors, in our case two very contrasting colors, white and black. In doing that, we’ll create an image target that is very identifiable by the app.
Now that we have our image target here, let’s actually rename it to Image Target underscore Tectonic Plates, and down here, in our path, we need to enter in the path of our image target. Now, with these here, it’s pretty easy to set up image targets, you only need to create a photo called streaming assets, down here, and you place in your image targets as a jpeg image.
So it’s easy as that, EZAR is able to identify this photo when the game starts, and to load up these images. So, going back to our image target, we can enter in the path of that image, and that image is called tectonicplatesmarker.jpeg, so you can just enter that in here. And then down in the name, we just need enter in the name of the file, we don’t have to include the file extension. So that will just be tectonicplatesmarker, and for the size, we’re just going to enter in 5 by 5.
And what this is, it’s basically a reference to the marker in real world, basically, so whatever models or images or particle effects, or whatever you put on top of this, however large it is in reference to the size of this pink square is how large they will be in reference to the actual image target. So if you print out a really small one, and let’s say the model is twice the size of this pink square, and you print off a one centimeter by one centimeter little image target, then the model will be two centimeters wide. Whereas if you print off a, let’s just say, ten by ten one, then the model will be twenty by twenty. So it scales up, it’s not necessary that you make this pink square a specific size, but if you do want to use the empty units for whatever reason, then you might want to do that.
But in our case, five by five is fine, because we’re only using two models and most of this stuff is done in script anyway.
Now, it’s time to actually start importing your models on top. So, to do that, we’re gonna’ right click on the image target, let’s actually drag this out a bit, right click on the image target, and go create empty. I’m going to create an empty game object just to store our models, make it a little more easier, act like a little container, and also the fact that the scale is one one, whereas on the image target, it’s actually five, so just for scale purposes and ease of use, I’m going to do this. And let’s just call this tectonic plates.
Now that done, we also need to create two more empty game objects, one for the left plate and one for the right plate. So let’s just do that now, let’s create one here, call this left plate, we can also duplicate with control d, so let’s just do it like that instead of having to make a new one. And we’ll call that right plate. Like so. Now it’s time for the model. To do that, let’s go back to assets folder, let’s go to models, and we want to drag in the tectonic plate model right here.
So simply click and drag, and drag in on top of the left plate, like so. It’s pretty large at the moment. If we zoom out we can use WSD and hold right click to look around and move, and as you can see, it is pretty large at the moment. So what we’re going to be doing is we’re going to re-size it, so down here on the scale let’s make this point five by point five by point five. See how large that is it’s pretty large compared to the pink square so let’s actually scale it down a bit more, let’s go point two by point two by point two. And, yeah, that looks about right.
So what we can also do now is we need to rotate this so this side here is facing here so with that we can alter the y let’s make this 90 on the y like so, and we want to drag it back so it’s about in the center like so so that’s about one, well not really one, let’s turn off the lighting up here actually. Up here there’s a little icon, in the scene view, and we can just disable them, what that does that basically turns off the lighting in the scene view because, with the directional light, some sides can be quite dark, whereas, if we do go back to game view, you can see the lighting is still on.
We’ll talk about the game view later and how to work on it in the editor. Come back to the scene view now. We can now duplicate this tectonic plate with control d, and drag it into the right plate there. Let’s then set the x to negative one, since it’s on this side now, and set the y to negative 90 so we can flip it like so. And there we go, we got two plates set up ready to be animated. See, if you go into game view, you can see our plates here.
Now, something we can do, I personally find it that the plates are a bit too wide on the side, so we can actually lower that zed scale, let’s make that one eight over here, point one eight, and we can make them a bit closer by making it negative point nine. So to rename these, we’ll call this right plate model, right plate model here, and our left plate model, we’ll call that left plate model, like so.
And there we go. We have our plates set up, ready to be animated in the next lesson. So yeah, see you then.
Transcript Part 3
Welcome back everyone, in this lesson, we’re gonna be starting to create the actual animations for our app.
These animations are gonna involve the transform, forward and backwards, the divergent animation, and the convergent over-under and convergent under-over. I’ll be explaining these in a second, why there are some duplicates, and so yeah, let’s get started. First thing you wanna do, is open up our image target, open up our tectonic plates, and open up to see the models. And what we wanna do is we just wanna remove the animated component on both of our models, as that won’t be needed, as we are gonna be animating them as a whole.
So once that’s done, click on our tectonic plates up here, our empty game object which holds our two plates, and what we wanna do is we wanna add an animator component to that, so just look up animator, and add that like so, and now what we wanna do is we then want to go over to our animations folder here, open that up, if you don’t have an animations folder, simply create one, and what we wanna do in there is right click, go create, and we want to make an animated controller, and we’ll simply call this Tectonic Plates.
And once that’s done, we click on tectonic plates here with our animator, and drag that into our controller. What an animated controller is, it is basically if I double click, it’s basically a place, it’s basically a list of all the different animations and states and the connections between them. So you’re able to call specific animations, and then those animations can pass onto others, it’s very useful for if you have states, such as a character, such as your default state would be idle, then there would be running, and there’d be jumping, those sort of animations.
But in our case we’re not really gonna be using the animator, we’re just gonna be having it, it’s ’cause it’s kind of a necessity for the animations. We’re gonna be mainly focusing and building our animations inside of a timeline, which we will going on over next lesson. But for now, let’s start creating our animations.
So our first one, let’s right click in the animations folder, go create, and animation. And we are gonna be calling this one our TransformForwardsBack. Let’s click on our tectonic, actually let’s click into our animator here, and simply drag and drop it in, there we go.
Now, what we wanna do is we wanna go back to our scene view, we want to click on our tectonic plates here, and then we wanna open up our animation window down here. If you don’t have this window already, you can go window, then you can go animation, animation, and that should open up the animation window. And once you have your tectonic plates selected, we should then be introduced to this window here, the animation window. Make sure that you have your TransformForwardsBack animation selected here, and we can begin animating.
Now, the TransformForwardsBack animation it is simply the two plates grinding along each other horizontally, and what forwards back means, is basically the left plate is gonna go forwards, while the right plate is gonna go back. We’re gonna have an alternate animation as well, called TransformBackForwards, which means the left plate goes back and the right plate goes forward. This is because we’re gonna allow the player to swipe either direction pretty much, so they’re not gonna be restricted to going, they have to swipe up on the left and swipe down on the right, they’ll be able to do either on both and it’ll play a different animation.
So to begin, let’s click on add property, and what we wanna be animating is our left plate. Our left plate model right here. So we wanna open up that left plate model, open up it’s transform, and position like so. Do the same for the right plate as well, right plate, right plate model, transform, and position. Now, what we wanna do here, is we pretty much want these two plates to move in a tiny bit, and then the left plate to move up, right plate to move down. So for that, we want to go to, actually, we wanna have it so that it does the animation in two seconds, we wait two more seconds, and then it reverts back to default.
So let’s actually stretch this all the way over to six seconds like so, at the two second mark here, we want to click on this red circle here to go into recording mode, click on our left plate model, and let’s just say we want to drag this forwards about, about here, so let’s go negative .7, like that, and on our right plate model, let’s go .7. It’s a bit too far, let’s go .5 instead, negative .5 on our left model, there we go. So now, if you play that back, you can see, that the positions are moving from zero, all the way up to .5 here, and then slowly going back.
But we wanna hold this for two seconds, so let’s click on this animation here, go control + C, and then let’s go over to four seconds, and control + V, and there we go. So if you play that back now, it should go up like so, wait two seconds, and then slide back, pretty simple. But we also wanna make ’em move in a tiny bit, so let’s go close, and once we’re here, we also want these to, actually let’s do it here, a bit early on. Alright, let’s go on our left plate model, move that in a tiny bit, let’s make that, actually see if .8 works, .85, .88, and on the right model, negative .88, yep. So as you can see, it goes in a bit, and then slides across, and then they go back. Alright, let’s duplicate this here.
Cause we also want, actually, if we open up these we can see our individual keys here, so as we go up here, we can go here, and enter in our .88 here, our negative .88 there, we can copy this again, and we can paste it over that like so. And then we can also copy that there and paste that there. So now when we play it back, it should go together, out, come back, and like so. So yep, that’s our TransformForwardsBack animation, now let’s also go and create our TransformBackForwards animation, which is pretty much just gonna be a duplicate of this one.
Something you can do to make it easy, if these are mirrored animations, we can simply select all the key points on our ForwardsBack, go to our BackForwards, paste them in, and from there we can easily just go through and flip the individual values.
And there we go. Our BackForwards animation is done. Now we can actually go and move on to our next set of animations in the next lesson. So yeah, see you then.
Interested in continuing? Check out the full AR Projects – Geology App course, which is part of our EdTech Mini-Degree.