In this tutorial, we’re going to delve into Core Data and build an app to manage our contacts. We’re going to learn about creating a data model, add records to the model, fetch data, and display data using a list.
Did you come across any errors in this tutorial? Please let us know by completing this form and we’ll look into it!

FINAL DAYS: Unlock coding courses in Unity, Godot, Unreal, Python and more.
Download the source code for this post here.
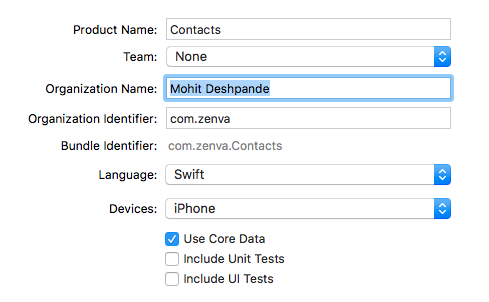
Let’s create a new Single View Application called Contacts and select the Core Data check box.
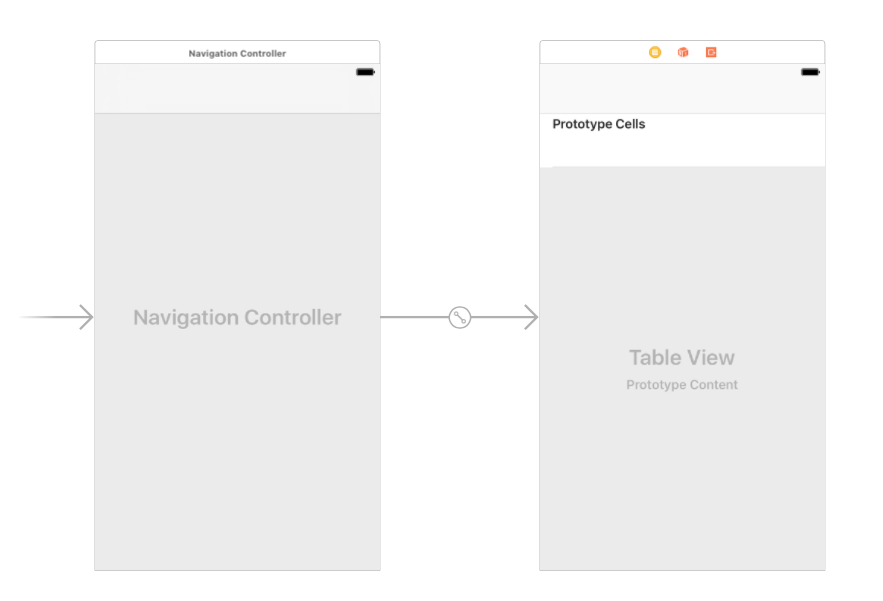
Let’s set up our UI first. Let’s drag out a Table View Controller and embed it in a Navigation Controller by selecting the new UITableViewController and going to Editor -> Embed In -> Navigation Controller. Our storyboard should now look like the following.
We need to change the superclass of ViewController to UITableViewController instead of UIViewController and set ViewController to be the Class attribute (in the Identity Inspector) of the Table View Controller in our storyboard. Now we’ve wired up our view controllers!
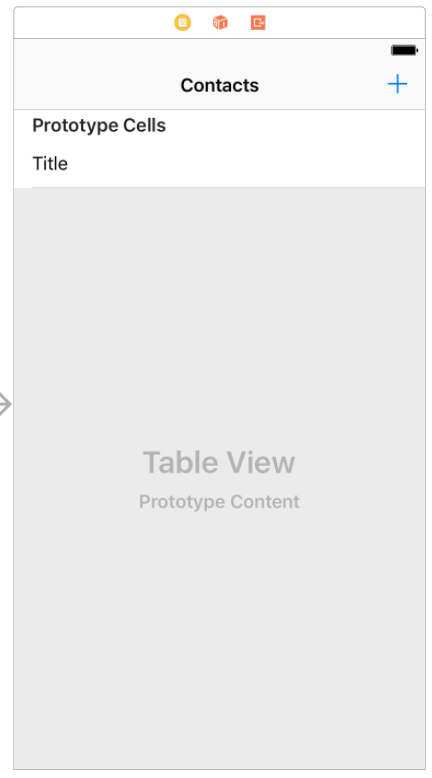
Let’s start setting up the Table View Controller. First, select a prototype cell in the UITableView and change it’s identifier to contactsCell so that we can properly dequeue it. For the Style attribute, change it to Basic. We’ll just need a label to add the name of our contact. Change the title of the navigation bar to say Contacts by double-clicking on the center of it.
Speaking of adding contacts, let’s scroll to the bottom of the Object Library and add a Bar Button Item to the top navigation bar on the right in the shape of a plus symbol. Change the System Item attribute to Add to get a plus symbol.
We’ll add an action in ViewController that executes when that Bar Button Item is pressed. Control-Drag to create an action called addContact.
@IBAction func addContact(_ sender: UIBarButtonItem) {
}
Now we need to write Swift code to set up this UITableView. We need a String array to keep track of all of our contacts.
var contacts: [String] = []
We need to override the two primary methods for a UITableView to be populated. The implementation is simple because of our list of contacts!
override func tableView(_ tableView: UITableView, numberOfRowsInSection section: Int) -> Int {
    return contacts.count
}

override func tableView(_ tableView: UITableView, cellForRowAt indexPath: IndexPath) -> UITableViewCell {
    let cell = tableView.dequeueReusableCell(withIdentifier: "contactsCell", for: indexPath)
    cell.textLabel?.text = contacts[indexPath.row]
    return cell
}
We simply return the size of the list of contacts for the first method. For the second method, we need to dequeue the cell using the identifier that we configured earlier! Then we need to set the text of the cell to be the corresponding entry in the contacts list.
The only thing left to implement, functionality-wise, is adding contacts to this list! We can use the action for the plus UIBarButtonItem to add content to that list of contacts using a dialog box. This is such a common thing to do that Apple created UIAlertController, and we can use it out-of-the-box!
We need to add an action to cancel and an action to add. We can add a UITextField to the main body of the dialog using addTextField(). The most involved part of this code will be the add action.
@IBAction func addContact(_ sender: UIBarButtonItem) {
    let dialog = UIAlertController(title: "New Contact", message: "Add the contact's name", preferredStyle: .alert)

    dialog.addTextField()
    dialog.addAction(UIAlertAction(title: "Cancel", style: .cancel))

    let addAction = UIAlertAction(title: "Add", style: .default) {
        [unowned self] action in

        if let contactName = dialog.textFields?.first?.text {
            self.contacts.append(contactName)
            self.tableView.reloadData()
        }
    }

    dialog.addAction(addAction)

    present(dialog, animated: true)
}
We’re using a trailing closure to provide code that will be executed when this add action is pressed in the dialog. We need to check if the text field has any text, and, if it does, we add that text to the list of contacts and reload our table view so that we can display the new data. The [unowned self] is there to ensure that we’re using proper memory management.
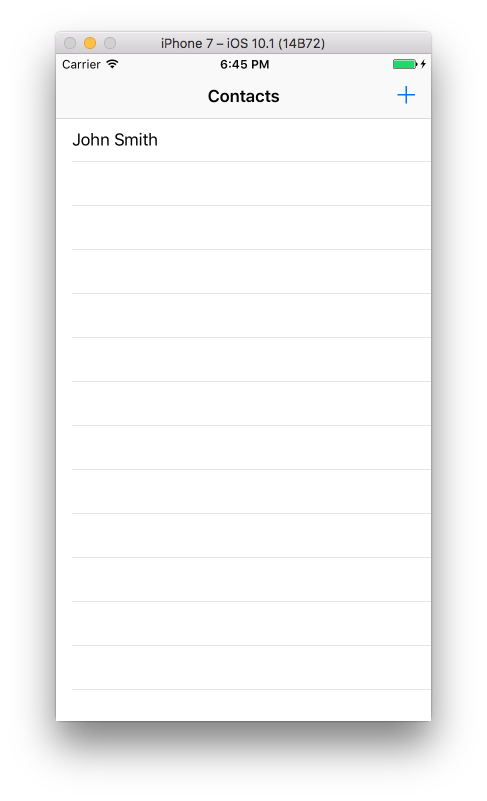
Let’s run our app! We can add to our UITableView!
But note that there’s no real persistent storage! If we were to quit our emulator or reboot our device, all of our data would be gone! This is where Core Data can help us. We can use Core Data to build a model for our contacts app, and we can persist our data through rebooting.
The reason for using Core Data (and not just a text file) is that we can store more complicated data and access it easily. Under-the-hood, Core Data uses a SQLite database as a means of persistent storage. We don’t have to know anything about SQLite to use it however! We get the full power of a database with the intuitive syntax of Swift when we use Core Data.
Click on the Contacts.xcdatamodeld to bring up the model.
Before we get started, we should discuss some terminology so that we’re on the same page. Think of an entity as a Swift class: it encapsulates all of the properties of one “thing”. An attribute is then like a Swift property: it defines some information about an entity. Each entity can have any number of different attributes of different types.
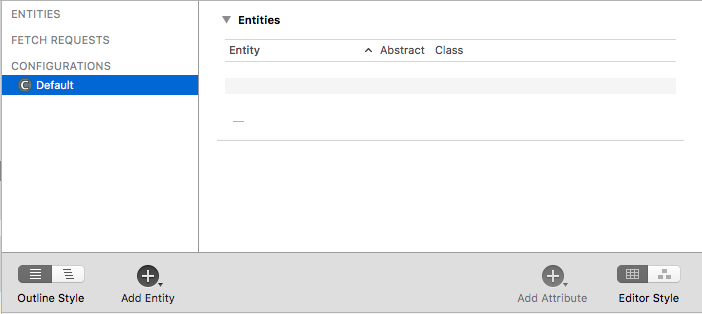
Let’s start by creating an entity called Contact using the Add Entity button at the bottom. In the main pane, let’s add an attribute called name of type String.
This is all we need to setup our data model! We could add more attributes like phone number or email if we wanted to make our model more complex.
Now that we’ve created our data model, we need to be able to save and retrieve data to and from this model. We can do this using an NSManagedObject, which represents a single record stored in Core Data. We have to use this whenever interacting with Core Data.
For example, if we wanted to add a new contact to Core Data, we have to use NSManagedObject. If we wanted to fetch objects from Core Data, we’d get back an array of NSManagedObjects. Editing and deleting also involve interacting with NSManagedObject. In general, interacting with Core Data almost always requires an NSManagedObject.
To account for this, we need to start using NSManagedObjects in our Swift code. However, NSManagedObject is in the CoreData framework that we need to import at the top of our Swift file, right under import UIKit.
import CoreData
Now we can start using NSManagedObject. We can start by changing the contacts array to hold NSManagedObject instead of String. We also need to extract the name attribute from that NSManagedObject when we set the text of the cells. We can use the value(…) method to extract an attribute and cast it to the appropriate Swift type.
var contacts: [NSManagedObject] = []

...

override func tableView(_ tableView: UITableView, cellForRowAt indexPath: IndexPath) -> UITableViewCell {
    let cell = tableView.dequeueReusableCell(withIdentifier: "contactsCell", for: indexPath)
    let contact = contacts[indexPath.row]
    cell.textLabel?.text = contact.value(forKeyPath: "name") as? String
    return cell
}
Let’s create some utility methods that will encapsulate retrieving from and inserting into Core Data. The first thing we need to do is to have a method that return an NSManagedObjectContext. This is our connection to Core Data. We need an NSManagedObjectContext to save and retrieve data. We can get one using our UIApplication.
func getContext() -> NSManagedObjectContext {
    let appDelegate = UIApplication.shared.delegate as! AppDelegate
    return appDelegate.persistentContainer.viewContext
}
Now that we have a context, we can add a method to insert into Core Data.
func storeContact(_ contactName: String) {
    let context = getContext()
    let entity = NSEntityDescription.entity(forEntityName: "Contact", in: context)
    let contact = NSManagedObject(entity: entity!, insertInto: context)

    contact.setValue(contactName, forKey: "name")

    do {
        try context.save()
        contacts.append(contact)
    } catch let error as NSError {
        let errorDialog = UIAlertController(title: "Error!", message: "Failed to save! \(error): \(error.userInfo)", preferredStyle: .alert)
        errorDialog.addAction(UIAlertAction(title: "Cancel", style: .cancel))
        present(errorDialog, animated: true)
    }
}
We need to first grab a context and say which entity we want to create. Then we create an NSManagedObject! After we’ve instantiated a new NSManagedObject, we can start setting its attributes using the setValue(…) method. We supply the value we want to save for a particular attribute. Finally, we have to remember to call context.save()! This will actually commit the data to persistent storage! Don’t forget it!
Notice that we use a do-catch block. Since we’re dealing with a form of file I/O, there’s the chance that something could go wrong! If that is the case, we report that error to the user through an alert dialog.
We also need to retrieve all of our contacts from Core Data to put into the contacts array for the UITableView to get data from. We can create a method for this as well.
func fetchContacts() {
    let context = getContext()
    let fetchRequest = NSFetchRequest<NSManagedObject>(entityName: "Contact")

    do {
        contacts = try context.fetch(fetchRequest)
    } catch let error as NSError {
        let errorDialog = UIAlertController(title: "Error!", message: "Failed to save! \(error): \(error.userInfo)", preferredStyle: .alert)
        errorDialog.addAction(UIAlertAction(title: "Cancel", style: .cancel))
        present(errorDialog, animated: true)
    }
}
We can retrieve all contacts using NSFetchRequest and passing in the name of the entity we want to retrieve. This method will set the contacts array to the result. In the event of an error, we do the same thing as we did in the previous method: report the error to the user.
Now that we have these methods, we can use them. When adding a new contact, we can use the storeContact method in the addContact IBAction.
@IBAction func addContact(_ sender: UIBarButtonItem) {
    let dialog = UIAlertController(title: "New Contact", message: "Add the contact's name", preferredStyle: .alert)

    dialog.addTextField()
    dialog.addAction(UIAlertAction(title: "Cancel", style: .cancel))

    let addAction = UIAlertAction(title: "Add", style: .default) {
        [unowned self] action in

        if let contactName = dialog.textFields?.first?.text {
            self.storeContact(contactName)
            self.tableView.reloadData()
        }
    }

    dialog.addAction(addAction)

    present(dialog, animated: true)
}
Finally, we need to fetch the set of contacts before the UITableView loads so that it can use the contacts list. Since we’ve implemented the fetchContacts method, we simply need to call it somewhere in our code.
override func viewWillAppear(_ animated: Bool) {
    super.viewWillAppear(animated)
    fetchContacts()
}
We can call it in the viewWillAppear method so that the contacts are loaded first!
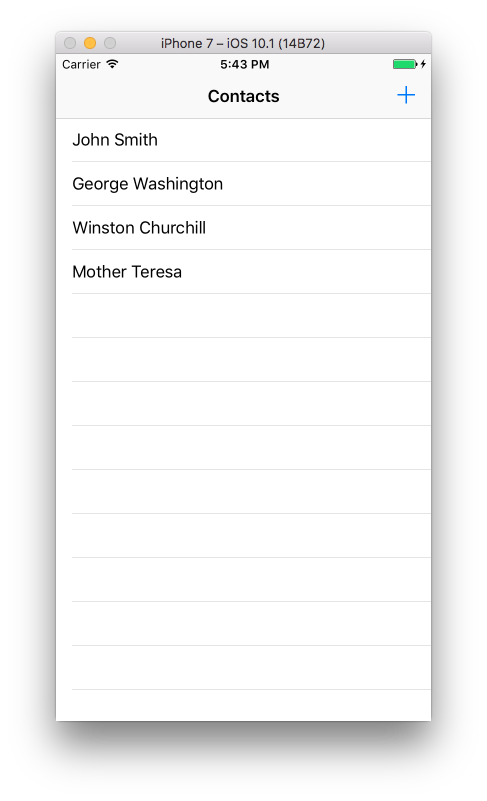
Now let’s run our app! Add a name to it and quit the emulator or reboot your device. When we re-open the app, our data is all still there! Core Data works!
In this post, we explored Core Data and built an app to manage our contacts that used Core Data. We learned about the importance of data persistence and how we can use Core Data to solve that problem. We built a Core Data model and used it to store data. We learned how to insert information into Core Data and how to fetch data from it as well. We built an app that uses Core Data for persistent storage.

