Hi, and welcome to the Lesson 1- Installing Visual Studio and say “Hello World” on our tutorial series Learning C# with Zenva.
Tutorial Source Code
All of the source code for this tutorial can be downloaded here.
In this lesson, we are going to download our IDE, Visual Studio Community 2015, learn how to install and configure it and write our first program that shows on the screen the sentence “Hello World”.
Before we get start, we need to know, what is an IDE?. IDE stands for Integrated Development Environment, in the computer area. An IDE is a software suite where developers can write and test their software. We will use Visual Studio Community 2015 as our IDE for these tutorial series.
Visual Studio is a powerful IDE from Microsoft. It not only has tools to create software since UI design, coding, testing and debugging, but also websites, applications, and services. Our focus in this course is to learn the language C#.
As I said, we will use C# as our programming language. ‘C-Sharp’ is an object-oriented language created by Microsoft. Based on C++ and JAVA, C# offers the same power as the C++ with the ease of Visual Basic programming. So, let’s get started!
Did you come across any errors in this tutorial? Please let us know by completing this form and we’ll look into it!

FINAL DAYS: Unlock coding courses in Unity, Godot, Unreal, Python and more.
DOWNLOADING AND INSTALLING VISUAL STUDIO COMMUNITY 2015
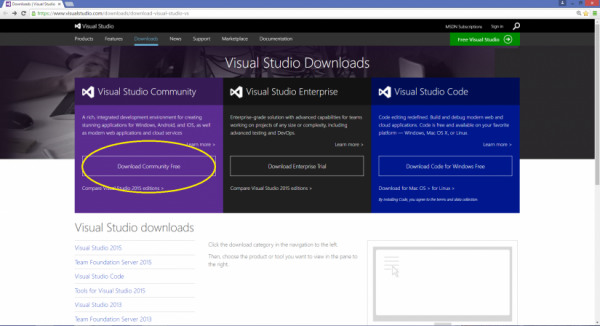
Click here to visit Visual Studio website and click on ‘Download Community Free’.
After download, execute it.

Choose your installation location -> Select Default Installation -> Click Install.
After the installation, if it asks for RESTART, please do it; otherwise, click LAUNCH.
When you open Visual Studio Community for the first time, it asks for Sign In. We can do it later. Now click on ‘Not now, maybe later’.
Here you can you choose your color theme. I use Blue theme. You can change it later. After selecting your theme, click on Start Visual Studio.

Here is where you can change your color theme inside Visual Studio. Tools -> Options -> Environment –> Color Theme

Congratulations. You have installed Visual Studio Community 2015. Let’s write our first code!
HELLO WORLD
To write our programs, we will use a simple console application. Follow the steps below to start writing our first program and run it in a console application.
File -> New -> Project.
Installed -> Templates -> Visual C# -> Windows –> Console Application.
Name: HelloWorld;
Location: Choose a location to save your project;
Solution name: HelloWorld. Click OK.
This is how it looks after you have clicked OK.
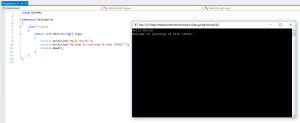
Write or copy and paste the code below into Visual Studio code area. In the following tutorials, we are going to understand every single line of the program.
using System;

namespace HelloWorld
{
    class Program
    {
        static void Main(string[] args)
        {
            Console.WriteLine("Hello World!");
            Console.WriteLine("Welcome to Learning C# with ZENVA!!");
            Console.Read();
        }
    }
}
Let’s understand what we wrote:
Console.WriteLine(): print a text and jump to another line.
Console.Read(): wait for the user to press a key to end the program.
The using above everything is a type of statement used to refer to a namespace that can be present in a dll in order to easily access classes that are within this namespace. In our case, we are using “System”. Without it, instead of writing Console.Writeline, we should write System.Console.Writeline.
To save our application, click on Save Program or press Ctrl+ S.
To run the application we simply click on Start or press F5. Let’s run our application.

Did you see how easy is that?
This is the end of this tutorial. I hope you have enjoyed and I see you in the next lesson!
Thank you!


