Want to learn how to make games with GPT-6 Sol? This tutorial combines the AI-coding and engine skills Zenva teaches across its catalog of over 400 courses, walking you through a 2D beat ’em up inspired by Block City Battle Buddies from A Minecraft Movie. You’ll generate assets with ChatGPT, plan the game with Codex, connect your agent to Godot, and test the result.
This tutorial assumes you already have Godot and Codex installed, can use ChatGPT, and know the basics of navigating the Godot editor.
If you’d like a guided path for learning the coding and game-engine skills behind this workflow, explore Zenva Academy. You can keep reading here to follow the free tutorial.
Table of contents
Generate the Game Assets With ChatGPT
Start with a visual reference: a low-resolution screenshot of Block City Battle Buddies from footage of the movie. Give the screenshot to ChatGPT and ask it to generate a higher-resolution version of what the game might look like.
Next, think of the game as separate components rather than one finished image. You’ll need a background, animated characters, and UI elements. Use the generated reference to request each of those pieces.
Create the Background and Character Sprite Sheets
Ask ChatGPT to generate the background without the characters or HUD. Then request a character sprite sheet with a transparent background and consistent spacing between sprites so it can be used in a game engine.
The player character needs standing, walking, jumping, punching, being-hit, and defeated poses. Repeat the process for the enemies, using the same generated game reference as the starting point.

Generate the UI Elements
Request the damage-bar frame, hearts, and text for Start Game and Game Over. Include a flash effect for punches, too. Once you have the assets, download them and put them together in a folder.
How to Make Games With GPT-6 Sol: Plan Before You Build
With your assets ready, launch Codex in the CLI with GPT-6 Sol set to extra-high reasoning, shown as gpt-6-sol xhigh. You can use the Codex app instead, or follow the same approach with another coding agent such as Claude Code. Other models are also an option.
You could ask the agent to generate the full game immediately, but this workflow starts with an interactive game design document. That gives you something to review before committing to the Godot implementation, with room for your creative input.
Describe the game you want in detail and ask the agent to create the design document. You can dictate your requirements and paste them into Codex; the prompt for this game ran to roughly 23,000 characters. The point is to communicate your intended game, rather than leaving the whole design to a short, open-ended request.
Ask the agent to prepare the audio as part of this work, using Python to synthesize the game’s music and audio.
Review the Interactive Game Design Document
Open the generated index.html file in your browser. The document introduces the game with the heading One Screen Endless Trouble and includes a playable browser prototype, not just a written plan.

A game design document normally communicates what the game will be about so you can iterate on the idea. Here, the playable scene lets you try the concept before moving it into Godot. The browser prototype is an intermediate result, not the final engine project.
Review the controls, game mechanics, music, and difficulty progression. The character is constrained to the playable area rather than being able to move up into the water. The document also shows the character animations, with individual frames identified through coordinates on the sprite sheets.
This is your chance to get a feel for the game the agent is planning to build. The design document will also serve as the reference for the next implementation step.
Install and Enable the Godot AI Extension
Now move into Godot, the engine used for the final game. Create a folder for the Godot project and open the project in the editor. You’ll connect it to your coding agent through the Godot AI extension.
In the editor’s Asset Store tab, search for godot ai. Find the Godot AI extension, then download and install it.

After installation, open Project > Project Settings > Plugins and enable Godot AI.

Check the extension panel for an Update Available message. If the version downloaded from the store needs an update, update the extension before continuing. Once the update finishes, check that the panel reports Server Connected.
Connect Codex and Test the Godot MCP Connection
In the Godot AI panel, click Clients & Tools. Find Codex in the client list and click Configure. Codex needs to be installed on the machine before you configure it. The client list also includes alternatives such as Claude Code.

Exit Codex and reopen it after enabling the MCP connection. Before asking it to build the entire game, use this prompt to check the connection:
the godot mcp is live, do a hello world just to test it's working
Check the response to confirm that the agent can access the Godot project and scene. Codex’s response lists the project, reads the editor state, displays project files, and retrieves the scene hierarchy. It also creates test files; stop the test once you’ve confirmed that the connection works.
Once that connection is working, you’re ready to ask the agent to build the actual game.
Build the Godot Game From the Design Document
Tell Codex to build the game according to the game design document. Having the plan already prepared means you can point the agent back to that design instead of describing every detail again.
This build took about 20 minutes. Once the game is built, inspect the generated project rather than treating completion as the end of the process.
Inspect the Generated Scene
Open the generated arena.tscn scene. Its scene tree contains an Arena root, but the background and characters aren’t laid out as separate visible child nodes. Instead, the attached arena.gd script loads and draws the assets through code.
This approach works, but representing those elements as nodes would make it easier for you to move things around or add elements directly in the editor. Inspecting the scene shows you how much direct creative control you have over the generated result.
Play-Test the Beat ‘Em Up
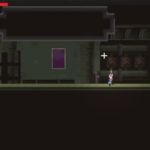
Run the game in Godot and start it with Enter or Space. Try the movement, combat, and animations, and check the enemies as they appear. The Godot version now reproduces the playable concept from the design document.

Look for details you’d want to refine, too. One refinement to consider is replacing the circular character shadow with an oval closer to the sprite’s size, or removing it.
This is also why basic Godot skills still matter when you’re using AI. Being able to inspect the project and make changes directly gives you more control over the prototype, rather than relying on the agent for every adjustment.
Bring the Workflow Together
You’ve followed the process from a visual reference to an AI-generated Godot beat ’em up. The key stages are:
- Generate separate backgrounds, character sprite sheets, and UI assets.
- Prepare an interactive game design document and synthesized audio.
- Review the playable concept, mechanics, and animation frames.
- Install Godot AI, configure Codex, and test the MCP connection.
- Build from the design document, inspect the scene, and play-test the result.
From here, use your play-test observations to decide what you’d like to change, and keep developing the engine skills that let you make the game your own.
Build your confidence with both AI coding and hands-on game development at Zenva Academy. Explore its courses and structured learning pathways to learn how to guide your coding tools and take creative control of your projects.
Did you come across any errors in this tutorial? Please let us know by completing this form and we’ll look into it!
FINAL DAYS: Unlock coding courses in Unity, Godot, Unreal, Python and more.