Whether turn-based, real-time, or resource management based, strategy games remain cemented in the world as one of the most popular genres. This is why numerous beginning and experienced developers alike dream of creating their own strategy games and building a balanced, challenging gameplay experience. So, what if we told you that making your own strategy game was completely possible with Godot?
If that sounds exciting, then this is the tutorial for you! Through this tutorial, we’re going to show you how to make a resource-based city building game with ease – all within the Godot game engine. You will learn several features common to strategy games such as:
- Making a turn-based system
- Having three different buildings which product resources
- Setting up a grid-based placement system
- Using a UI to show resources, turn, etc.
So, if you’re ready, buckle down, turn on your computer, and get pumped to make a strategy game project with Godot.
Before we begin though, it’s important to know that this tutorial will not go over the basics of Godot. If you’re new to the engine, we recommend you read through our introductory tutorial on the subject!
Already know all this and want to jump into building placement and turn-based game flow? Try out Part 2 instead!

Table of contents
Project Files
In this tutorial, we’ll be using some sprites from the kenney.nl website (an open domain game asset website) and fonts from Google Fonts. You can of course choose to use your own assets, but we’ll be designing the game around these:
- Download the sprite and font assets we’ll be using for this tutorial here.
- Download the complete strategy game Godot project here.
Did you come across any errors in this tutorial? Please let us know by completing this form and we’ll look into it!

FINAL DAYS: Unlock coding courses in Unity, Godot, Unreal, Python and more.
Setting up the Project
Create a new Godot project and for our first scene, we’re going to choose 2D Scene (Node2D node). Rename it to MainScene and save the scene to the file system.

Let’s also import our assets by dragging the two folders into the file system.

Something we also want to do is change the resolution of the screen. When we press play (you’ll be asked to choose a base scene – select the MainScene), you’ll see that the screen is pretty small. Due to our sprite size and the amount of tiles we’re going to have, let’s set the resolution.
Open the Project Settings window (Project > Project Settings…) and go down to the Display > Window tab.
- Set the Width to 1280
- Set the Height to 720
- Disable Resizable

Creating the Tiles
We’re going to start by creating the tile scene. This will contain the sprite, highlight, collider, script, etc. So create a new scene with a root node of Area2D. An Area2D node can detect collisions which is needed for selecting tiles later on.
- Rename the node to Tile
- Save the scene to the file system

We then want to create a few more nodes as a child of the main node.
- Drag in the Ground.png image to create a new Sprite node (make sure it’s at a position of 0, 0)
- Drag in the TileHighlight.png image to create a new Sprite node
- Rename it to Highlight
- Set the Scale to 6.4, 6.4
- Click the eye to disable it by default
- Create a new Sprite node
- Rename it to BuildingIcon
- Create a new CollisionShape2D node
- Set the Shape to RectangleShape2D
- Set the Extents to 32, 32

Back in the MainScene, let’s drag in the Tile scene to create a new instance. To make it easier to position, enable Grid Snapping.

With the tile node selected, press Ctrl + D to duplicate it. Fill in a 20 by 9 area with tiles. This is going to be where we play the game and make sure that it’s all contained within the blue box (the window).

You may notice that the scene hierarchy is pretty cluttered. We have over 100 nodes which will make it harder to find other things that aren’t tiles. In order to fix this, we can…
- Create a Node node (most basic node we’ll use as a container)
- Rename it to Tiles
- Drag all the tile nodes in as a child
- With this, we can retract the children to hide them in the scene hierarchy

We haven’t created the script for the tile yet, but next up is the UI.
More interested in hex-based tiles? Try out this video tutorial and see how you can incorporate the styles together!
Creating the UI
Our UI is going to be a bar at the bottom of the screen displaying our resources, turn and buttons. Create a new scene with a root node of type User Interface (Control node).
- Rename the node to UI
- Save the scene to the file system
- Set the Rect > Position to 0, 576
- Set the Rect > Size to 1280, 144

As a child of the UI node, create a ColorRect node. This is a control node that renders a certain color.
- Set the Color to dark grey
- Set the Size to 1280, 144

Before we continue, let’s setup out fonts. In the Font folder, we have two .ttf files. For each font file…
- Right click the .ttf file and select New Resource…
- Create a new DynamicFont resource

For each dynamic font resource…
- Double click on the DynamicFont resource
- Set the Size to…
- Regular = 30
- Bold = 35
- Drag the respective .ttf file into the Font Data property

Next, create a Button node and rename it as EndTurnButton.
- Set the Text to End Turn
- Set the Position to 1046, 34
- Set the Size to 200, 75
- Drag the bold dynamic font resource into the Custom Fonts > Font property

Create a new Label node and rename it to TurnText.
- Set the Text to a placeholder of Turn 257
- Set the Position to 878, 56
- Set the Size to 143, 36
- Drag the regular dynamic font into the Custom Fonts > Font property

Next, we’ll be creating the three building buttons. We’re going to store these inside of a node which can automatically resize its children. Create a new HBoxContainer node and rename it to BuildingButtons.
- Set the Alignment to Center
- Set the Position to 34, 34
- Set the Size to 236, 75

As a child of the BuildingButtons node, create three Button nodes. You’ll see that they automatically resize to fit the bounds of the BuildingButtons node.
- MineButton
- GreenhouseButton
- SolarPanelButton
For each button, set their Icon texture to their respective texture in the Sprites folder.

Create a new Label node and rename it to HeaderFoodMetal.
- Set the Text to Food: Metal:
- Set the Align to Right
- Set the Position to 368, 32
- Set the Size to 115, 75
- Set the Custom Font > Font property to the regular dynamic font

Duplicate the node and rename it to FoodMetalText.
- Move it over to the right like in the image below
- Set the Text to a placeholder of 25 (+80) 25 (+80)
- Set the Align to Left
- Set the Custom Colors > Font Color to yellow/orange

Select the two labels and duplicate them. Rename them respectively to:
- HeaderOyxgenEnergy
- OxygenEnergyText
Move them over to the right. Change the text of the header label to ‘Oxygen: Energy:’.

There we go. Our UI is now complete, so let’s go back to the MainScene and drag in the UI scene.

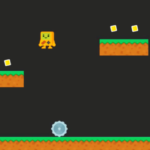
Now if we press play, you’ll see basically what the final game will look like – just without the functionality.

Tile Script
To begin scripting, we’ll create the Tile script. This will hold data and functions relative to each tile. In the Tile scene, select the Tile node and create a new script attached to it called Tile. We’ll start with our variables.
# is this the starting tile?
# a Base building will be placed here at the start of the game
export var startTile = false

# do we have a building on this tile?
var hasBuilding : bool = false

# can we place a building on this tile?
var canPlaceBuilding : bool = false

# components
onready var highlight : Sprite = get_node("Highlight")
onready var buildingIcon : Sprite = get_node("BuildingIcon")
Next, let’s create the _ready function – this gets called when the node is initialized. Here, we’re going to add the tile to the “Tiles” group. A group in Godot can allow us to easily access and modify a group of nodes.
# called once when the node is initialized
func _ready ():

    # add the tile to the "Tiles" group when the node is initialized
    add_to_group("Tiles")
The toggle_highlight function will toggle the highlight visual on or off, also toggling whether or not a building can be placed.
# turns on or off the green highlight
func toggle_highlight (toggle):

    highlight.visible = toggle
    canPlaceBuilding = toggle
The place_building function gets called when we place a building on the tile.
# called when a building is placed on the tile
# sets the tile's building texture to display it
func place_building (buildingTexture):

    hasBuilding = true
    buildingIcon.texture = buildingTexture
Next, we need to connect a signal to the script. The input_event signal gets emitted once an input is detected in the collider like a mouse click. So with the Tile node selected, go to the Node panel and double click the signal. Then connect it to the script.

This will create the _on_Tile_input_event function in the script. We need some other things implemented first, so let’s just add pass to the function which means it’s empty.
# called when an input event takes place on the tile
func _on_Tile_input_event (viewport, event, shape_idx):

    pass
Map Script
The Map script will reference all our tiles and have the ability to highlight the available ones, get a tile at a given position, etc. In the MainScene, select the Tiles node and attach a new script called Map. We can start with our variables.
# all the tiles in the game
var allTiles : Array

# all the tiles which have buildings on them
var tilesWithBuildings : Array

# size of a tile
var tileSize : float = 64.0
The get_tile_at_position function will return the tile that is at the given position.
# returns a tile at the given position - returns null if no tile is found
func get_tile_at_position (position):

    # loop through all of the tiles
    for x in range(allTiles.size()):
        # if the tile matches our given position, return it
        if allTiles[x].position == position and allTiles[x].hasBuilding == false:
            return allTiles[x]

    return null
The disable_tile_highlights function loops through all the tiles and disables their highlight visual.
# disables all of the tile highlights
func disable_tile_highlights ():

    for x in range(allTiles.size()):
        allTiles[x].toggle_highlight(false)
The highlight_available_tiles function will highlight all of the tiles which can have a building placed on. This is the surrounding tiles of all buildings. First, we’re going to loop through all tiles that have a building on it.
# highlights the tiles we can place buildings on
func highlight_available_tiles ():

    # loop through all of the tiles with buildings
    for x in range(tilesWithBuildings.size()):
Inside the for loop, we’re first going to get the north, south, east and west tile relative to the current one.
# get the tile north, south, east and west of this one
var northTile = get_tile_at_position(tilesWithBuildings[x].position + Vector2(0, tileSize))
var southTile = get_tile_at_position(tilesWithBuildings[x].position + Vector2(0, -tileSize))
var eastTile = get_tile_at_position(tilesWithBuildings[x].position + Vector2(tileSize, 0))
var westTile = get_tile_at_position(tilesWithBuildings[x].position + Vector2(-tileSize, 0))
After this, we’re going to check each of the tiles. If they’re not null, enable the highlight.
# if the directional tiles aren't null, toggle their highlight - allowing us to build
if northTile != null:
    northTile.toggle_highlight(true)
if southTile != null:
    southTile.toggle_highlight(true)
if eastTile != null:
    eastTile.toggle_highlight(true)
if westTile != null:
    westTile.toggle_highlight(true)
We’re not finished with the Map script yet, but we do need to work on a few other things first.
BuildingData Script
The BuildingData script isn’t a script which is attached to a node. This is going to be a global class which can be accessed anywhere in the project. In the Script tab, go File > New Script… and create a new script called BuildingData.
Then we need to go to the Project Settings (Project > Project Settings…) and click on the AutoLoad tab.
- Select the file button and find the BuildingData.gd script
- Click the Add button
This will create a new singleton for the BuildingData script.

Back in the BuildingData script, let’s begin by creating a new class called Building. This is going to be an object to hold the data for each building.
class Building:

    # building type
    var type : int

    # building texture
    var iconTexture : Texture

    # resource the building produces
    var prodResource : int = 0
    var prodResourceAmount : int

    # resource the building needs to be maintained
    var upkeepResource : int = 0
    var upkeepResourceAmount : int

    func _init (type, iconTexture, prodResource, prodResourceAmount, upkeepResource, upkeepResourceAmount):
        self.type = type
        self.iconTexture = iconTexture
        self.prodResource = prodResource
        self.prodResourceAmount = prodResourceAmount
        self.upkeepResource = upkeepResource
        self.upkeepResourceAmount = upkeepResourceAmount
We’re using integers for the building type and resources. These integers refer to a specific thing.
Building Types
- Base = 0
- Mine = 1
- Greenhouse = 2
- Solar Panel = 3
Resources
- None = 0
- Food = 1
- Metal = 2
- Oxygen = 3
- Energy = 4
Outside of the Building class, we can create 4 variables for each of our 4 buildings (Base, Mine, Greenhouse, Solar Panel).
var base = Building.new(0, preload("res://Sprites/Base.png"), 0, 0, 0, 0)
var mine = Building.new(1, preload("res://Sprites/Mine.png"), 2, 1, 4, 1)
var greenhouse = Building.new(2, preload("res://Sprites/Greenhouse.png"), 1, 1, 0, 0)
var solarpanel = Building.new(3, preload("res://Sprites/SolarPanel.png"), 4, 1, 0, 0)
We’ll be using these variables to know what each building produces, takes, the texture and other values.
Continued in Part 2
While there are certainly more elements to add, we’ve gone on quite the journey here so far! As the basis of our game, we’ve already set up a grid-based tile system that will allow us to place buildings later and highlight tiles where applicable buildings can be played. Additionally, we’ve also set up the buildings themselves which will provide the crucial resource management functionality to our game (along with an accompanying UI).
While this is a great start in building a strategy game with Godot, we have a bit more to go! In Part 2, we’re going to finish off our map, create the ability to place the buildings, create the turn-based gameplay flow, and beyond to connect all our features up to work as one, coherent game project! See you then!