Godot utility AI replaces rigid behavior scripts with a simple idea: score every possible action each frame, then perform the one that best fits the situation. In this tutorial, you will use that idea to build an autonomous villager that gathers, deposits, eats, and sleeps based on hunger, energy, and its surroundings. Zenva has helped a community of over 1,000,000 learners and developers build exactly this kind of practical game-development skill, and the same step-by-step approach will take you from the core concepts to a working Brain script.
This tutorial assumes you know basic GDScript and have Godot installed. You will also use the pre-made assets provided with the project files.
Download Project Files
The project files, including the animated character and building models used throughout, are available through the course included in Intermediate Godot Mini-Degree. Follow that guided path for the complete project, or keep reading to build the utility AI foundations here.
Understand Godot Utility AI
The Overall Goal of the Project
Build a villager simulation in which an agent manages three stats: hunger, energy, and inventory. Hunger increases over time, energy depletes, and the agent must gather and deposit resources while keeping both in balance. The agent autonomously decides which action to perform based on its current state and surroundings, and the same approach works for any game where AI-driven entities need to make decisions.
Agent Actions and Behaviors
At any given time, the agent can perform one of four actions:
- Gather: collect resources from the environment.
- Deposit: store gathered resources, reducing inventory.
- Eat: consume food to reduce hunger.
- Sleep: rest to restore energy.
The agent’s choice depends on its internal stats and its environment, such as the distance to each resource location.
What Is Utility AI?
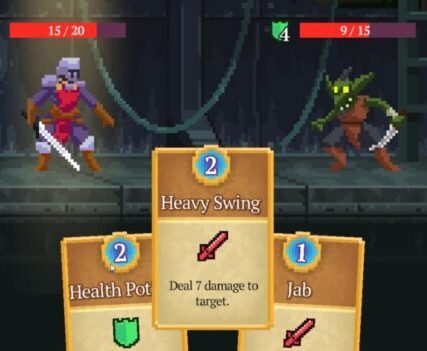
Utility AI is a decision-making framework that determines an agent’s behavior. An agent is any entity driven by AI, such as an enemy, NPC, or unit. By scoring options against a variety of factors, Utility AI produces more dynamic and less predictable behavior than fixed rules.
Comparing Decision-Making Systems
There are several common approaches to AI decision-making in games:
- If statements: behaviors controlled by stacked conditionals. Easy to implement, but quickly becomes unwieldy and inflexible for complex behaviors.
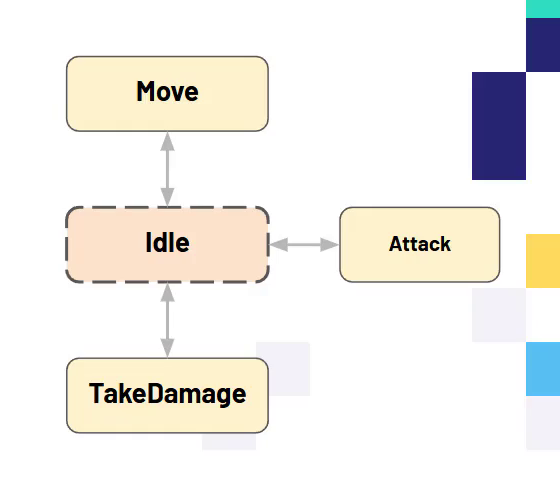
- State machines: behaviors organized into distinct states, such as idle, move, and attack, with transitions defined by specific conditions. More structured, but still rigid.
- Utility AI: scores all possible actions and selects the one with the highest score, allowing emergent behaviors that adapt to changing situations.
How Utility AI Works
Utility AI evaluates every available action by assigning each a score based on the agent’s current state and environment. The action with the highest score is chosen and executed, so agents adapt their behavior in real time and produce more believable gameplay.
The Four Main Concepts of Utility AI
Four key concepts make up the system:
- Actions
- Considerations
- Brain
- Context
Actions: What the Agent Can Do
An action is a specific behavior the agent can perform: eating, sleeping, gathering, or depositing. The Utility AI system exists to select and execute one of these actions based on the agent’s needs and environment.
Considerations: Scoring the Options
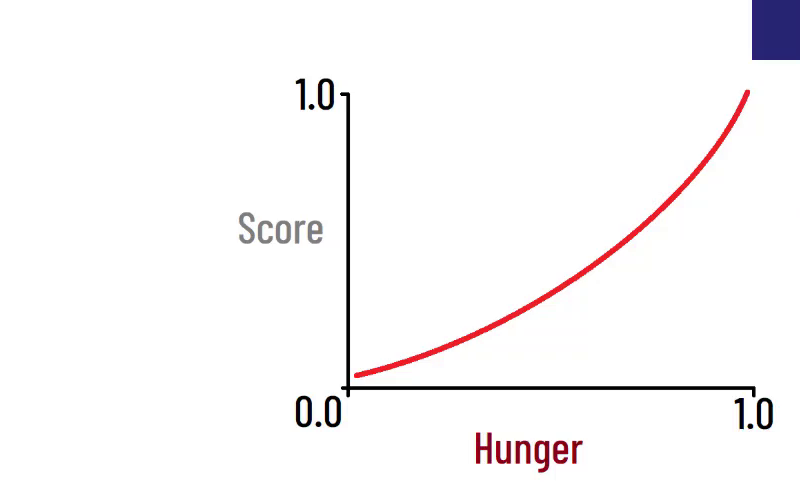
A consideration is a rule or factor that outputs a value between 0 and 1, representing how important a particular aspect is right now. A hunger consideration outputs 0 when the agent is not hungry and 1 when it is starving. Actions can have multiple considerations, such as hunger, energy, distance to a location, or inventory fullness.
When deciding which action to perform, each consideration’s score is combined, typically by multiplying them together, to produce an overall score for the action. The highest-scoring action wins.
Combining Considerations: An Example
See how the scores combine for a gather action:
- Inventory fullness consideration: returns 0 if the inventory is full and 1 if it is empty. At 20% full, the score is 0.8.
- Distance to gathering location consideration: returns 0 if far away and 1 if very close. At a medium distance, the score is 0.5.
The action score multiplies these values: 0.8 × 0.5 = 0.4. That score is compared against the other actions, such as sleep, eat, and deposit, and the highest is selected.
The Brain: Choosing the Best Action
The brain calculates the scores for all actions and selects the one with the highest score. It acts as the interface between the agent’s current state and its available actions.
Utility AI Structure in Godot
In Godot, the system is organized as follows:
- The Agent Controller node defines the agent’s context and manages movement and stats.
- The Brain node receives the context and determines the best action to perform.
- Actions and Considerations are implemented as reusable resources, allowing flexible and modular AI behaviors.
The context is generated by the agent each frame and contains all relevant data, such as hunger, energy, inventory, and positions. It is passed to the brain, which uses it to score actions and considerations.
Utility AI Workflow

The process follows these steps each frame:
- The agent creates the context for the current frame, including stats and environmental data.
- The context is sent to the brain.
- The brain scores each action using the considerations and selects the best one.
- The chosen action is executed for that frame.
As the agent’s stats and environment change, the consideration values change too, so the agent switches actions as needed and stays responsive.
Challenge: Reflect on Utility AI
Before moving on, consider how Utility AI could fit into your own projects. What actions and considerations would your agents need, and how could scoring make their behavior more dynamic?
Set Up the Villager Simulation Project
Importing Assets Into Godot
To keep the focus on the utility AI implementation, use the pre-made assets provided in the course files. After downloading and extracting them, you will have two main folders:
- Character: an animated character that switches between idle and walking animations depending on movement.
- Models: building models representing locations for eating, gathering, depositing, and sleeping.
Drag both folders into the Godot FileSystem dock and check that no errors appear in the output panel.
Creating and Organizing the Main Scene
Create a new 3D scene, rename the root node to Main, and save it in a new folder called Scenes to keep the project organized as it grows.
Setting Up the Ground
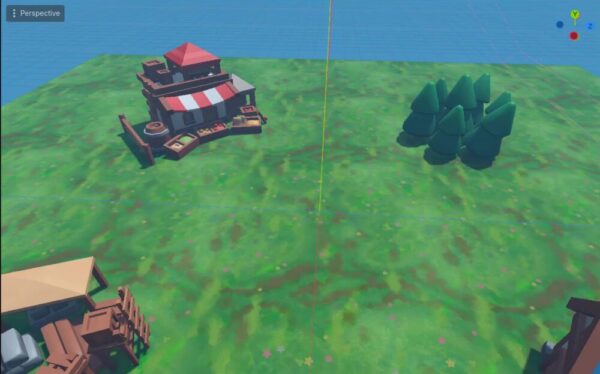
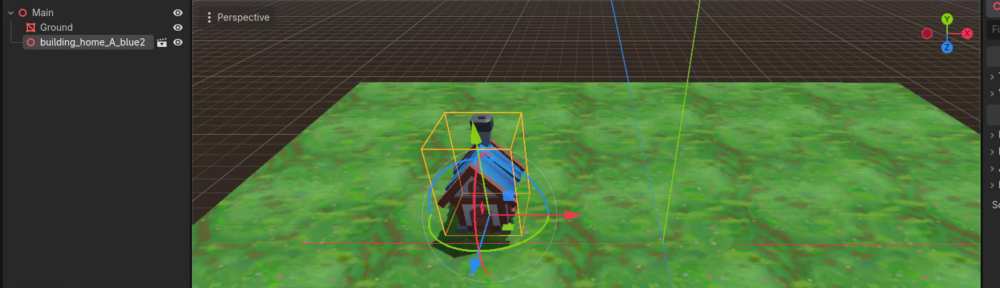
For the ground, add a MeshInstance3D node, rename it to Ground, and set the mesh type to Plane in the Inspector. Increase the scale, for example to 15 on all axes, and apply the grass material by dragging grass.tres from the Models folder onto the mesh.
Adding Buildings and Environment Assets
Next, populate the scene with the provided building models:
- House: where the agent will sleep.
- Market: where the agent will eat.
- Scaffolding: the deposit location.
- Trees/Forest: where the agent will gather resources.
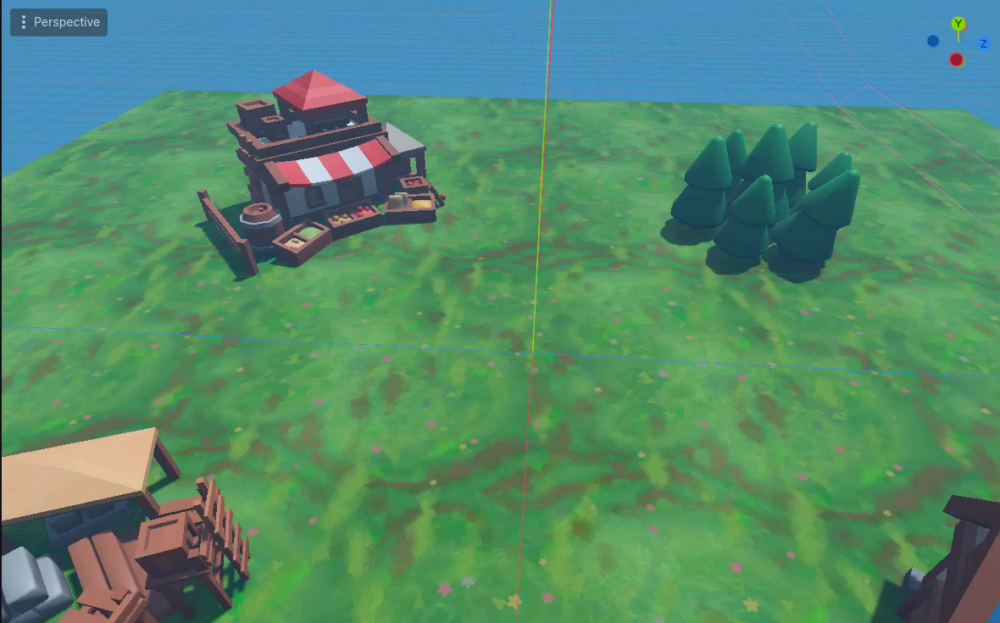
Drag these models from the Models folder into the scene and arrange them toward the four corners of the ground so each represents a different location for the agent’s actions.
Adding and Configuring the Camera
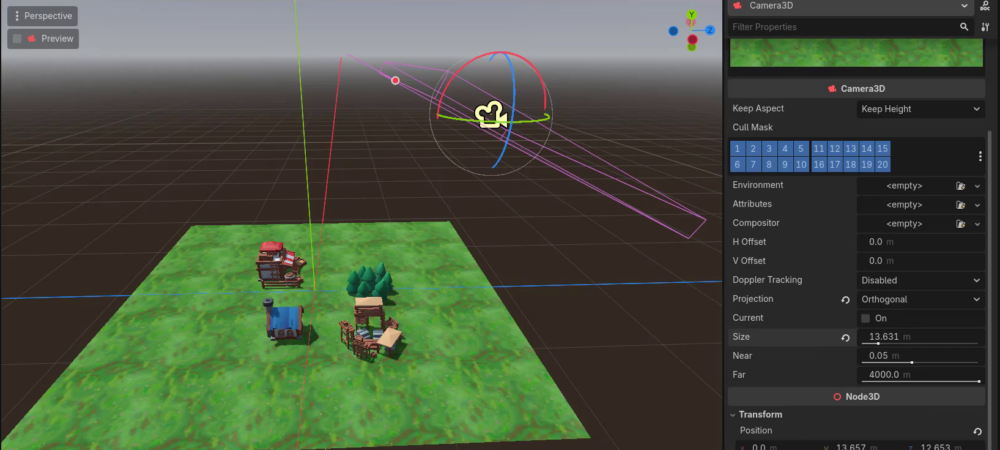
Add a Camera3D node for a clear view of the environment:
- Move the camera above the center of the scene and rotate it downward for a top-down view.
- Change the camera’s Projection from Perspective to Orthogonal. This removes perspective distortion for a flat, easily readable view.
- Adjust the Size property to zoom in or out. A size of 16 gives a good overview.
- Set the camera’s rotation X to -45 degrees, or adjust as preferred, for a steep top-down angle.
Positioning Buildings
Arrange the buildings in their designated corners:
- Market: top right, for example X = 5, Z = -5.
- House: bottom left, for example X = -5, Z = 5.
- Scaffolding: top left.
- Forest: bottom right.
Rotate each building so its front faces the center of the scene. The agent’s movement will then look more natural as it travels between locations.
Adding Lighting
Add a DirectionalLight3D node for visibility and depth. Position the light above the scene and rotate it downward, then enable Shadows in the Inspector. If the shadows are not visible, move the camera closer until they appear, but avoid moving it so close that the ground clips out of view.
Enhancing the Environment
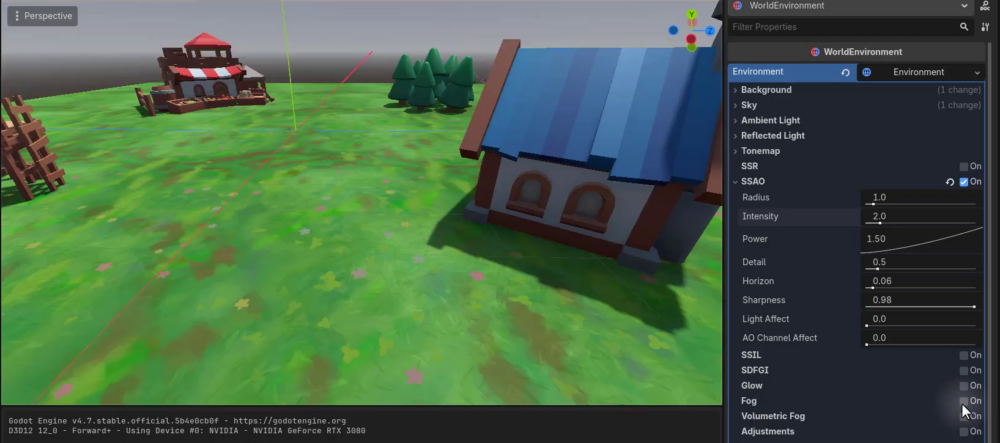
For a more polished look, add a WorldEnvironment node:
- Create a new Environment resource in the Inspector.
- Set the background to Sky and assign a Procedural Sky material.
- Enable SSAO (Screen Space Ambient Occlusion) and increase its intensity, for example to 2.0, for better contact shadows and depth.
- Optionally, enable Fog and set its color to a light blue for atmosphere.
Organizing the Scene Tree
Keep the project tidy with two organizer nodes:
- Create an Environment node and move the ground, world environment, and directional light under it.
- Create a Buildings node and move all building models under it.
Adding the Agent Visual
Finally, add the AI agent’s visual representation:
- Open the Character folder in the FileSystem dock.
- Drag agent_visual.tscn into the scene. This pre-animated 3D model will later be controlled by the utility AI system.
- Press play to preview the scene and confirm the agent appears as expected.
- Adjust the camera’s size if needed to better frame the scene and agent.
Challenge: Prepare for Utility AI Implementation
With the environment and agent visual in place, you are ready to begin implementing the utility AI system. Next, you will set up the agent’s stats, such as hunger, energy, and inventory, and develop the logic that lets the agent decide which location to visit based on its needs.
Write the Base Scripts for the Utility AI System
Setting Up the Scripts Folder and Context Script
Start by organizing the project with a dedicated scripts folder:
- In the Godot editor, right-click in the FileSystem dock and select Create New Folder. Name it
Scripts. - Inside the
Scriptsfolder, create a new script file calledcontext.gd.
The context.gd script is a data container holding everything the agent needs to make decisions: hunger, energy, inventory space, and the positions of the deposit, gather, sleep, and eat locations.
Defining the Context Class
Instead of attaching the context to a node, make it a standalone data object that inherits from RefCounted rather than Node. You can then create instances of the class in code without adding them to the scene tree:
# The data generated by the agent which gets sent to the Brain
class_name Context
extends RefCounted

# Dictionary storing all agent state data with string keys
var data : Dictionary[String, Variant]

# Expected keys in the data dictionary:
# agent - AgentController
# hunger - float
# energy - float
# inventory_space - float
# deposit_location - Vector3
# gather_location - Vector3
# sleep_location - Vector3
# eat_location - Vector3
# delta - float
The data variable is a dictionary where each key is a string, such as "hunger" or "energy", and each value is a Variant. A Variant can represent any data type, which keeps the container flexible.
Creating the Brain Script
In the Scripts folder, create a script called brain.gd. It extends Node because it will be added as a child node of the agent in the scene:
class_name Brain
extends Node
Leave the Brain mostly empty for now; its logic depends on the scripts you are about to create.
Introducing Considerations
Considerations are the factors that influence decision-making. Each one evaluates a specific aspect, such as hunger level or distance to a location, and returns a score between 0.0 and 1.0, where a higher score means the factor matters more right now. Create a script called consideration.gd that extends Resource so you can create reusable resources in the editor:
# Base class for all considerations
# Marked as abstract so we don't create a Resource of this type
@abstract
class_name Consideration
extends Resource

# Calculate the score of this consideration: 0.0 - 1.0
# 0.0 = low valued, not hungry, too far away, etc...
# 1.0 = highly valued, starving, very close, etc...
@abstract
func score (context : Context) -> float
# Must be implemented by child classes to evaluate specific factors
The class is marked @abstract so it cannot be instantiated directly. Subclasses such as CurveConsideration and DistanceConsideration will implement the score function with their own logic.
Defining the Action Base Class
Actions are the tasks the agent can perform, and each action carries a set of considerations that determine how desirable it is at any moment. Create action.gd, which also extends Resource and is marked @abstract:
# Base class for all actions
# Marked as abstract since we don't want a Resource being created
# of just this basic Action type
@abstract
class_name Action
extends Resource

# List of considerations that influence the action's selection score
@export var considerations : Array[Consideration]
Each action has an exported array of considerations. A gather action, for example, might consider both the agent’s inventory space and the distance to the gather location.
Implementing Scoring and Execution Functions
The Action base class needs two functions:
- execute(context: Context): an abstract function implemented by each action subclass to define what happens when the action runs.
- calculate_score(context: Context) -> float: calculates the overall score by multiplying the scores of all the action’s considerations.
# Scores each consideration then multiplies their values together
# Used when deciding which action to perform
func calculate_score (context : Context) -> float:
    var score : float = 1.0

    # Multiply all consideration scores together
    for c in considerations:
        score *= c.score(context)

    return score

# Called each frame this action is the chosen one
@abstract
func execute (context : Context)
The calculate_score function loops through each consideration, calls its score method, and multiplies the results into a final value the agent can compare against other actions.
Challenge: Implement the Scoring Logic
As a brief challenge, try implementing calculate_score yourself before reading on. Loop through the considerations array, call score(context) on each entry, multiply the results, and return the final value. The next section shows the complete solution.
Build the Brain and Score Your Actions
Implementing the Action Scoring System
Each action’s score is the product of all its considerations, so any single low score pulls the action down and makes it less likely to be chosen. Here is the complete Action class with the scoring logic in place:
# Base class for all actions
@abstract
class_name Action
extends Resource

@export var considerations : Array[Consideration]

func calculate_score(context : Context) -> float:
    var score : float = 1.0
    for c in considerations:
        score *= c.score(context)
    return score

@abstract
func execute(context : Context)
Multiplying the consideration scores together means an action only scores highly when all of its considerations are favorable.
Designing the Brain: Selecting the Best Action
The Brain evaluates every possible action and selects the one with the highest score for the current context. First, define its variables and exported properties:
# The decision maker
class_name Brain
extends Node

@export var actions : Array[Action]
var cur_context : Context
var cur_action : Action
The actions array holds every action the agent can perform, cur_context stores the current context, and cur_action tracks the currently selected action.
Next, implement decide_action, which evaluates each action and keeps the best one:
func decide_action(context : Context):
    cur_context = context
    var best_action : Action = null
    var best_score : float = -1

    for action in actions:
        var score : float = action.calculate_score(context)
        if score > best_score:
            best_action = action
            best_score = score

    cur_action = best_action
The function loops through all actions, calculates each score, and updates cur_action whenever it finds a higher score.
Executing the Current Action Each Frame
Finally, execute the selected action continuously with a _process function:
func _process(delta : float):
    if cur_action:
        cur_action.execute(cur_context)
The chosen action keeps running every frame until a new decision replaces it.
Understanding Context and Extensibility
A key strength of this system is its flexibility. The Brain, Action, and Consideration classes are generic and never need to know about specific game variables like hunger or energy. All game-specific data travels through the Context object, which makes the whole system reusable across different projects.
Organizing Considerations for Extensibility
To keep the project extensible, create a dedicated folder for the different consideration types. Right-click in the FileSystem dock, select New Folder, and move the base Consideration script into this Considerations folder. You will then add new scripts for specific types, such as CurveConsideration and DistanceConsideration.
Curve and Distance Considerations: Planning the Next Steps
Two main consideration types are planned next:
- Curve consideration: maps a value such as hunger onto a curve, allowing non-linear decision-making.
- Distance consideration: scores how close the agent is to a target position, up to a maximum distance threshold.
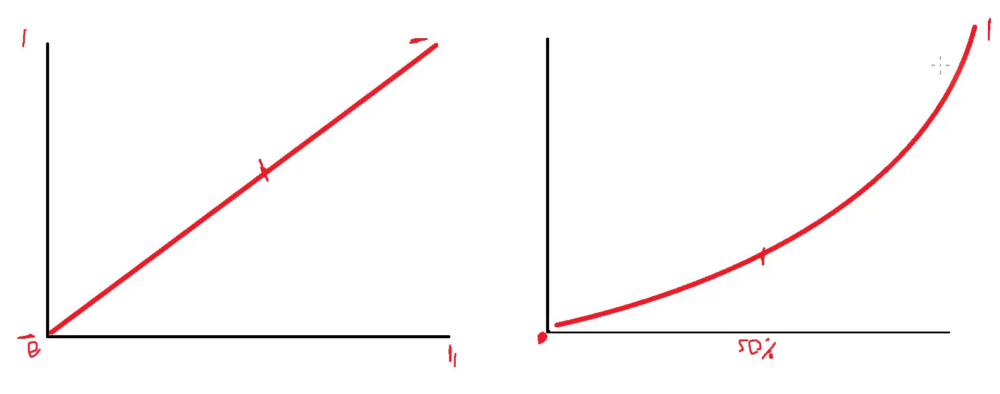
A linear function increases the score in proportion to the input value. A curve lets you delay or accelerate a variable’s impact, for example making hunger strongly influence the AI only when it becomes critical.
Godot Utility AI Foundations Recap
You now have a complete decision-making foundation and a scene ready for an autonomous villager. Along the way, you learned to:
- Compare utility-based scoring with if statements and state machines.
- Combine action considerations by multiplying their 0-to-1 scores.
- Build a reusable
Contextdata container from aRefCountedclass. - Define abstract
ConsiderationandActionresources for modular behaviors. - Implement a
Brainthat selects the highest-scoring action and executes it each frame. - Organize considerations into a folder ready for curve and distance scoring.
From here, you can implement CurveConsideration and DistanceConsideration so your agent reacts to both stat values and spatial relationships.
Continue building autonomous agents with Intermediate Godot Mini-Degree. Follow the guided path that includes this course and take your Godot AI systems further.
Did you come across any errors in this tutorial? Please let us know by completing this form and we’ll look into it!
FINAL DAYS: Unlock coding courses in Unity, Godot, Unreal, Python and more.