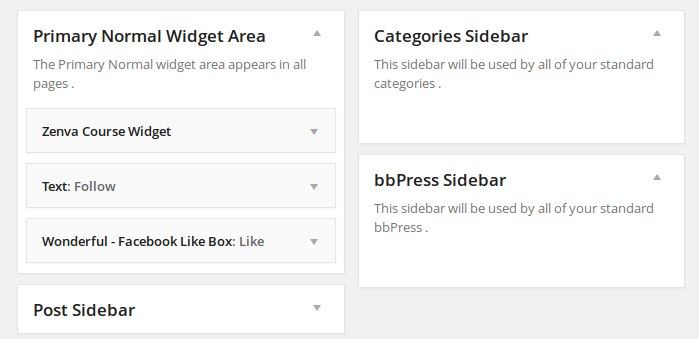
In WordPress, a sidebar allows us to assign certain widgets to a sidebar_id and later reference this with the get_sidebar() function. Thus, allowing us to render specific widgets on any template page.
To get started open up your theme’s functions.php file into your favourite text editor and add the following contents to the bottom of the functions.php file:
<!--?php if ( function_exists('register_sidebar') ) register_sidebar(array( 'name' => 'Sidebar Name', 'id' => 'sidebar_id', 'before_widget' => 'tag_before_widget', 'after_widget' => 'tag_after_widget', 'before_title' => 'tag_before_widget_title', 'after_title' => 'tag_after_widget_title' )); ?-->and replace the ‘placeholders’ with your sidebar name, id and opening and closing HTML tags.
In the above example we have just registered a sidebar!
We can now drag a widget into the sidebar- in the WordPress Dashboard- Appearance > Widgets area and give the widget a title; the title of the widget will be styled by the ‘before_title’ and ‘after_title’ arguments. The widget will also be surrounded by the elements specified in the ‘before_widget’ and after_widget’ arguments. If we wanted to style the widget with some css, we could use:
for the ‘before_widget’ and
for the ‘after_widget’ argument.
To display a sidebar in WordPress, we can use the
<!--?php dynamic_sidebar('sidebar_id'); ?-->function (the ‘sidebar_id’ argument is the sidebar’s id- as specified in the register_sidebar() function) in any of our theme’s template files.
Let’s take a closer look at creating custom sidebars in WordPress with an example!
In the following example, we are going to create a simple sidebar and surround each of the widgets within the sidebar with a logical division (with a class of ‘widget-area’) and style the widget’s heading with a level 3 heading.
<!--?php /* This code belongs in the functions.php file of your WP Theme */ if ( function_exists('register_sidebar') ) register_sidebar(array( 'name' => 'Awesome Sidebar', 'id' => 'mywidgets', 'before_widget' => '</p> <div class="widget-area">', 'after_widget' => '</div> <p>', 'before_title' => '</p> <h3>', 'after_title' => '</h3> <p>' )); ?-->To display this sidebar, we can now reference the dynamic_sidebar() function and pass in the id of the sidebar we want to render in any of our theme template files, like so:
<!--?php dynamic_sidebar('mywidgets'); ?-->We can now head over to our Theme’s Settings: Appearance > Widgets and on the right-hand side, and add any widgets that we want to; with the drag-drop action!
Some things to remember:
- When giving the sidebar an id, it cannot be the same as the name of the sidebar, also The sidebar id cannot have spaces nor capital letters, but you can use underscores.
- The sidebar name is displayed in Appearance > Widgets
- The sidebar id is called or referenced in WordPress template files.
I hope you found this resource useful!
Interested in WordPress Plugin Development?
At ZENVA we have a comprehensive video course on WordPress Plugin Development, check it out here.


