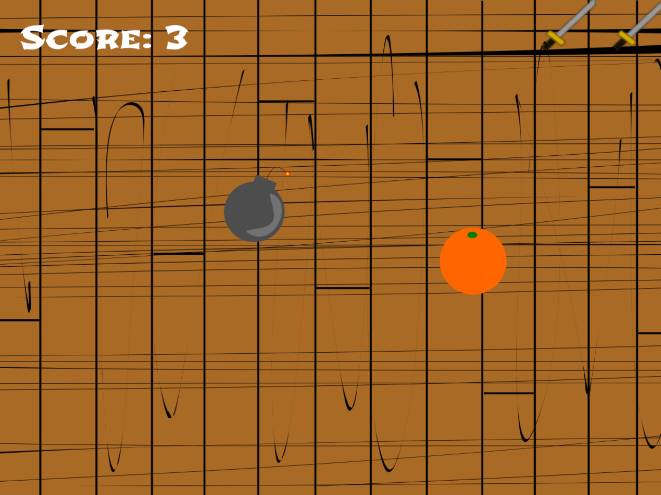
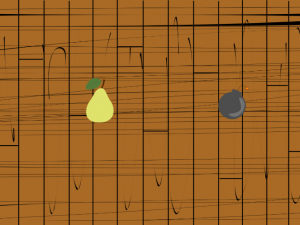
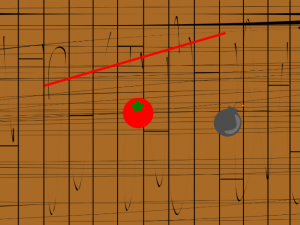
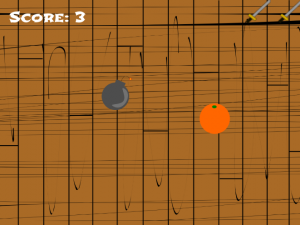
In this tutorial we are going to build a Fruit Ninja game using Unity. Our game will have two scenes: a title scene and a game scene, where the game will actually be played.
In order to follow this tutorial, you are expected to be familiar with the following concepts:
- C# programming
- Using Unity inspector, such as importing assets, creating prefabs and adding components
Table of contents
Creating project and importing assets
Before starting reading the tutorial, you need to create a new Unity project and import all sprites available through the source code. In order to do that, create a folder called Sprites and copy all sprites to this folder. Unity Inspector will automatically import them to your project.
However, some of those sprites are in spritesheets, such as the fruits spritesheet below. In those cases we need to slice the spritesheet. In order to do that, we need to set the Sprite Mode as Multiple and open the Sprite Editor.
In the Sprite Editor (shown below), you need to open the slice menu and click in the Slice button, with the slice type as automatic. Finally, hit apply before closing.
Did you come across any errors in this tutorial? Please let us know by completing this form and we’ll look into it! FINAL DAYS: Unlock coding courses in Unity, Godot, Unreal, Python and more.![]()

Pre-Order The Complete Virtual Reality Game Development with Unity and learn to create immersive games and experiences by building 10 VR games. The course assumes no prior Unity or VR experience – We’ll teach you C#, Unity and 3D programming from the ground-up
Check it out on Zenva Academy and get Early Access!
Source code files
You can download the tutorial source code files here.
Title scene
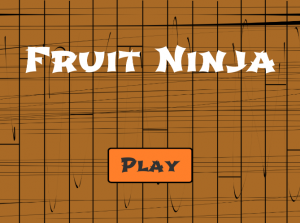
We are going to start by creating the Title scene. This scene will show the game title and the play button. Once the player hits the button, the game will start.
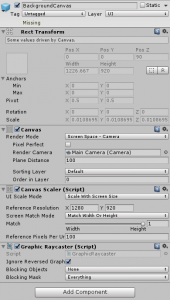
Let’s start by creating a new canvas called BackgroundCanvas. This canvas will show the background image, the game title and the play button. First, we are going to set its Render Mode to be Screen Space – Camera (remember to attach your Main Camera to it). Then, we are going to set its UI Scale Mode to Scale With Screen Size. In the end, the BackgroundCanvas should look like the figure below.
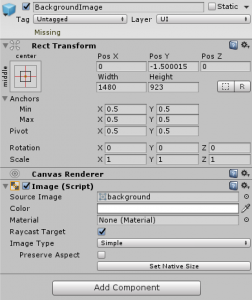
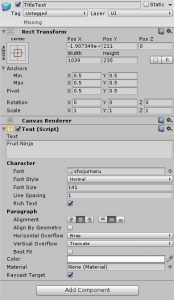
Now let’s add the background image to this canvas. The only thing we need to do is defining its Source Image and set its native size. The title text is also simple, we only need to add a text to the canvas, configure its size and alignment, and change the Text to be Fruit Ninja.
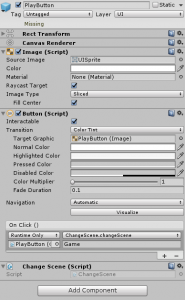
In order to create the PlayButton we need to define its OnClick callback. The PlayButton should start the Game scene when clicked. So, let’s create the following ChangeScene script to attach to it. This script will simply have a method to load another scene given its name.
public class ChangeScene : MonoBehaviour {

	public void changeScene(string sceneName) {
		SceneManager.LoadScene (sceneName);
	}

}
Now we attach this script to PlayButton, and set the changeScene method as the OnClick callback. The parameter will be Game, in order to start the Game scene.
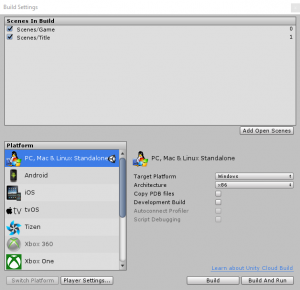
By now, your Title scene should look like the figure below. In order to test if the PlayButton is working, you need to create another scene called Game, and you need to add it in File -> Build Settings -> Scenes in Build.
Game scene
Now that we have our Title scene, let’s start creating the Game scene, where the game will be actually played.
We are going to need another BackgroundCanvas in the Game scene. For now, we are only going to need the Canvas and the BackgroundImage, which will be exactly the same as in Title Scene. Later on we are going to add some other elements to show the player score, lives and game over message, but that’s it for now.
Creating fruits
The first thing we are going to add in our game is the fruit creation. In our game fruits will be constantly created with random positions and velocities. In order to do that, we are going to need a Fruit prefab. So, create a new GameObject called Fruit and make it a prefab.
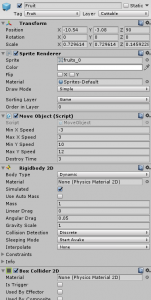
The Fruit prefab will have a Sprite Renderer, a Rigidbody2D to move it, a Collider Box 2D to check for collisions with the cuts later and a MoveObject script. This MoveObject script will be responsible for setting the fruit velocity and destroying it after some time. So, when adding it we need to set the fruit’s maximum and minimum speeds, as well as the destroy time. Also, observe that the Fruit is in a Layer called Cuttable. This will be used later to properly configure collisions.
The MoveObject script is shown below. In the Start method it is going to select a random velocity for the fruit, by choosing a random value between the minimum and maximum speeds (for both directions). After setting the velocity, it will call the Destroy method, which will destroy the fruit object after some time. The time is defined by the destroyTime attribute.
public class MoveObject : MonoBehaviour {

	[SerializeField]
	private float minXSpeed, maxXSpeed, minYSpeed, maxYSpeed;

	[SerializeField]
	private float destroyTime;

	// Use this for initialization
	void Start () {
		this.gameObject.GetComponent<Rigidbody2D> ().velocity = new Vector2 (Random.Range(minXSpeed, maxXSpeed), Random.Range(minYSpeed, maxYSpeed));
		Destroy (this.gameObject, this.destroyTime);
	}

}
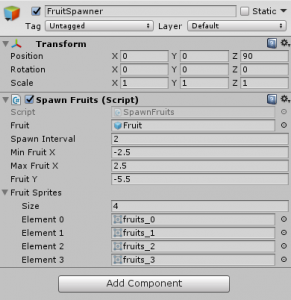
Now that we have the Fruit prefab, we need to spawn fruits. In order to do that, we are going to create a Spawner object and make it a prefab with a SpawnObjects script. This prefab will be used to spawn fruits and bombs, but for now let’s only create the FruitSpawner one (by creating a copy of it called FruitSpawner in your game). As parameters, we need to define the Fruit prefab, the spawn interval, the possible coordinates to spawn fruits (minimum X, maximum X and Y coordinate) and the possible fruit sprites.
The SpawnObjects script is shown below. In the Start method it will call InvokeRepeating, to call the spawnObject method at every spawn interval. The spawnObject method, by its turn, will instantiate a new object (in this case a fruit), set its position to be one of the possible ones and select a random sprite to it (from the fruitSprites array).
public class SpawnObjects : MonoBehaviour {

	[SerializeField]
	private GameObject prefabToSpawn;

	[SerializeField]
	private float spawnInterval, objectMinX, objectMaxX, objectY;

	[SerializeField]
	private Sprite[] objectSprites;

	// Use this for initialization
	void Start () {
		InvokeRepeating ("spawnObject", this.spawnInterval, this.spawnInterval);
	}

	private void spawnObject() {
		GameObject newObject = Instantiate (this.prefabToSpawn);
		newObject.transform.position = new Vector2 (Random.Range(this.objectMinX, this.objectMaxX), this.objectY);

		Sprite objectSprite = objectSprites [Random.Range (0, this.objectSprites.Length)];
		newObject.GetComponent<SpriteRenderer> ().sprite = objectSprite;
	}
}
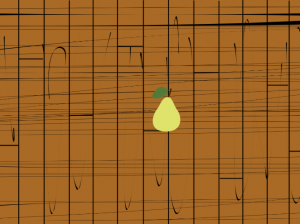
By now, you can try playing your game to check if the fruits are being properly created in different positions and with different velocities.
Creating bombs
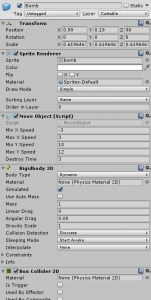
Creating bombs is very similar to creating fruits. We are going to create a Bomb prefab with the same components as the Fruit one (Sprite Renderer, MoveObject script, Rigidbody2D and BoxCollider2D). You can change the components parameters to make the game less predictable as well.
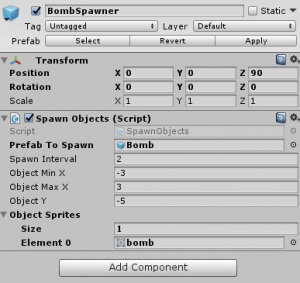
Then, we create another copy of the Spawner prefab, naming the new copy as BombSpawner. In this case, the prefab to spawn will be the Bomb prefab, and it will have only one possible sprite.
Before moving on, we are going to change the Unity Physics Settings to make the fruits and bombs uncollidable between each other. That’s because we don’t want them to interfere on each other movements.
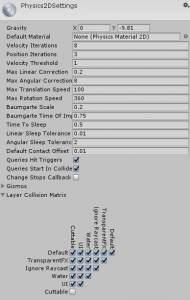
In order to do so, we need both the Fruit and Bomb prefabs in the Cuttable layer. Then, we are going to the Unity Physics 2D settings (Edit -> Project Settings -> Physics 2D) and change the Layer Collision Matrix by unchecking the box that allows collisions between objects in the Cuttable layer. Now, fruits and bombs won’t collide with each other.
By now, you can try playing your game to check if bombs are also being created randomly, and if the collisions are being properly applied.
Cutting fruits and bombs
Now that we have fruits and bombs, the player should be able to cut them. First, let’s create a Cut object and make it a prefab. This prefab will be created when the player swipes the screen, and will collide with fruits and bombs to cut them.
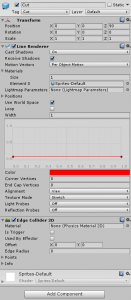
The Cut prefab will simply have a Line Renderer to show the cut and an Edge Collider 2D to collide with fruits and bombs. The only thing we need to change in those components now is the Line Renderer color and width. You can choose the values you prefer for those parameters.
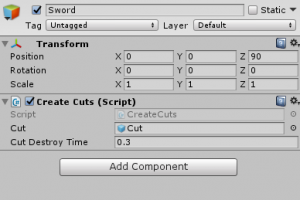
Now we are going to create a GameObject called Sword, which will be responsible for creating cuts when the player swipes the screen. This will be an invisible object, having only a script called CreateCuts. In this script we need to define the Cut prefab and the time each cut will live after being created (called Cut destroy time).
The CreateCuts script is shown below. In the Update method it will check for MouseButtonDown and MouseButtonUp events. When the mouse is clicked (MouseButtonDown), it saves the start point of the swipe. Observe that we need to convert it from screen coordinates to world coordinates. When the mouse button is released (MouseButtonUp and this.dragging is true), it calls the createCut method.
The createCut method saves the end point of the swipe and create a Cut object (using the Cut prefab). Then, it sets the positions of the Line Renderer according to the start and end points of the swipe. The EdgeCollider2D is also configured accordingly, except its coordinates are relative to the object position, so the first point should always be (0, 0), and the end point should be (swipeEnd – swipeStart). Finally, we set the Cut to be destroyed after some time.
public class CreateCuts : MonoBehaviour {

	[SerializeField]
	private GameObject cut;
	[SerializeField]
	private float cutDestroyTime;

	private bool dragging = false;
	private Vector2 swipeStart;

	// Update is called once per frame
	void Update () {
		if (Input.GetMouseButtonDown (0)) {
			this.dragging = true;
			this.swipeStart = Camera.main.ScreenToWorldPoint (Input.mousePosition);
		} else if (Input.GetMouseButtonUp (0) && this.dragging) {
			this.createCut ();
		}
	}

	private void createCut() {
		this.dragging = false;
		Vector2 swipeEnd = Camera.main.ScreenToWorldPoint (Input.mousePosition);
		GameObject cut = Instantiate (this.cut, this.swipeStart, Quaternion.identity) as GameObject;
		cut.GetComponent<LineRenderer> ().SetPosition (0, this.swipeStart);
		cut.GetComponent<LineRenderer> ().SetPosition (1, swipeEnd);
		Vector2[] colliderPoints = new Vector2[2];
		colliderPoints [0] = new Vector2(0.0f, 0.0f);
		colliderPoints [1] = swipeEnd - this.swipeStart;
		cut.GetComponent<EdgeCollider2D> ().points = colliderPoints;
		Destroy (cut.gameObject, this.cutDestroyTime);
	}
}
You can already create some cuts, but they won’t do anything yet. We still need to check for collisions with fruits and bombs. We are going to do that by adding to the Fruit and Bomb prefabs scripts that check for collisions with cuts.
For the Fruit prefab, we are going to add the script below called CutFruit. This script will simply implement the OnCollisionEnter2D method. If the collided object has the Cut tag (remember to properly set it in the Cut prefab), it is going to destroy the Fruit. It also needs to increase the player score, but we are going to do that later, when we have objects to show the score.
public class CutFruit : MonoBehaviour {

	void OnCollisionEnter2D(Collision2D collision) {
		if (collision.gameObject.tag == "Cut") {
			Destroy (this.gameObject);
		}
	}
}
The CutBomb script (added to the Bomb prefab) will be the same for now. Later on we are going to change it to decrease the player number of lives.
public class CutBomb : MonoBehaviour {

	void OnCollisionEnter2D(Collision2D collision) {
		if (collision.gameObject.tag == "Cut") {
			Destroy (this.gameObject);
		}
	}
}
By now you can already try playing the game to cut fruits and bombs. They should be destroyed when cut.
Showing score and number of lives
The next step in our game will be to show the player score and number of lives.
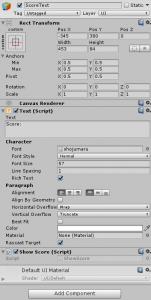
First, let’s create a ScoreText object to show the player score. This will be a Text object inside the BackgroundCanvas, with a script called ShowScore.
The ShowScore script will be responsible for updating the text with the current score. As shown below, this will be done by creating a method called incrementScore, which will update the current score and the text showing it. In the Start method the score text is updated to show the initial score.
public class ShowScore : MonoBehaviour {

	private int score = 0;

	// Use this for initialization
	void Start () {
		GetComponent<Text> ().text = "Score: " + this.score;
	}

	public void incrementScore(int incrementValue) {
		this.score += incrementValue;
		GetComponent<Text> ().text = "Score: " + this.score;
	}

	public int getScore() {
		return this.score;
	}
}
Now we need to properly call the incrementScore method when cutting fruits. In order to do that, we are going to change the CutFruit script to Find the ScoreText object and call its incrementScore method, with an increment of one.
public class CutFruit : MonoBehaviour {

	void OnCollisionEnter2D(Collision2D collision) {
		if (collision.gameObject.tag == "Cut") {
			Destroy (this.gameObject);
			GameObject scoreText = GameObject.Find ("ScoreText");
			scoreText.GetComponent<ShowScore> ().incrementScore (1);
		}
	}
}
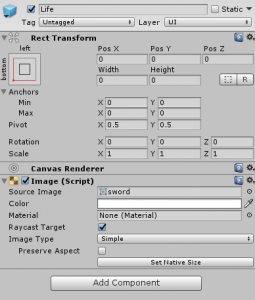
To show the player number of lives, on the other hand, we are going to create an Image object, call it Life and make it a prefab.
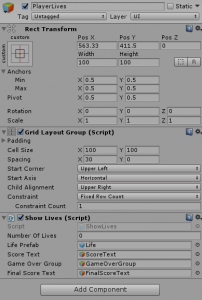
Then, we are going to create an object called PlayerLives in the BackgroundCanvas. This object will have a Grid Layout Group, which will be used to show the lives. A Grid Layout Group will automatically layout the object children according to some predefined configurations. In our case we want the lives to be shown in a single row, so we are going to configure as in the figure below.
The PlayerLives object will also have a ShowLives script, which will be responsible for destroying Life images when the player cuts bombs. Also, it must detect when the player looses to show a game over message. In order to do that, it will need the initial number of lives, the Life prefab, and references to the ScoreText, GameOverGroup and FinalScoreText. The two last ones we are going to create later. So, for now, you can leave them blank.
In the Start method of ShowLives, it will instantiate a Life image object for each one of the initial lives, saving them in a List. Then, in the looseLife method, it can remove the last Life in the list and destroy it. If the player has no more lives, we need to show the game over message, by setting the GameOverGroup object as active. Since we still don’t have the GameOverGroup we can simply print a message in the console by now. Later on we are going to finish this method.
public class ShowLives : MonoBehaviour {

	[SerializeField]
	private int numberOfLives;

	[SerializeField]
	private GameObject lifePrefab;

	private List<GameObject> lives;

	[SerializeField]
	private GameObject scoreText, gameOverGroup, finalScoreText;

	// Use this for initialization
	void Start () {
		lives = new List<GameObject> ();
		for (int lifeIndex = 0; lifeIndex < this.numberOfLives; lifeIndex++) {
			GameObject life = Instantiate (lifePrefab, this.gameObject.transform);
			lives.Add (life);
		}
	}

	public void looseLife() {
		this.numberOfLives -= 1;
		GameObject life = this.lives [this.lives.Count - 1];
		this.lives.RemoveAt(this.lives.Count - 1);
		Destroy (life);

		if (this.numberOfLives == 0) {
			this.scoreText.SetActive (false);
			Debug.Log("Game Over");
		}
	}
}
Finally, we need to update the CutBomb script to decrease the number of lives when a bomb is cut, as below.
public class CutBomb : MonoBehaviour {

	void OnCollisionEnter2D(Collision2D collision) {
		if (collision.gameObject.tag == "Cut") {
			Destroy (this.gameObject);
			GameObject playerLives = GameObject.Find ("PlayerLives");
			playerLives.GetComponent<ShowLives> ().looseLife ();
		}
	}
}
By now, you can try playing the game to see if the score and lives are being updated correctly.
Game over message
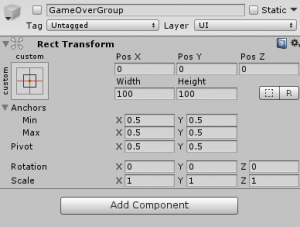
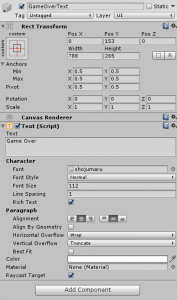
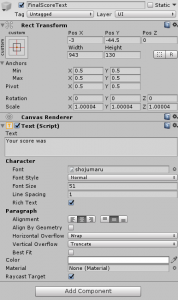
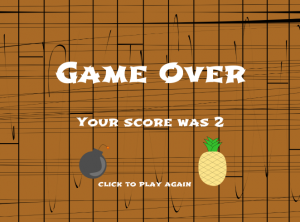
The last thing we need to do is showing the game over message when the player looses. In order to do that, we are going to create an empty object called GameOverGroup in the BackgroundCanvas with three texts as children: GameOverText, FinalScoreText and PlayAgainText.
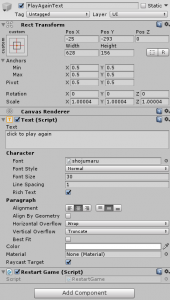
The first two will simply show their texts. The third one will also have a RestartGame script.
This script will simply check for mouse clicks to go back to the Title scene.
public class RestartGame : MonoBehaviour {

	// Update is called once per frame
	void Update () {
		if (Input.GetMouseButtonDown (0)) {
			SceneManager.LoadScene ("Title");
		}
	}
}
Now that we have the GameOverGroup object, we will set it as inactive by default. Then, in the ShowLives script we are going to set it as active when the player looses the game (remember to properly set the GameOverGroup and FinalScoreText references in the script).
public void looseLife() {
		this.numberOfLives -= 1;
		GameObject life = this.lives [this.lives.Count - 1];
		this.lives.RemoveAt(this.lives.Count - 1);
		Destroy (life);

		if (this.numberOfLives == 0) {
			this.scoreText.SetActive (false);
			this.gameOverGroup.SetActive (true);
			this.finalScoreText.GetComponent<Text> ().text = "Your score was " + this.scoreText.GetComponent<ShowScore> ().getScore ();
		}
	}
Finally, now you can try playing the game with all its features until it shows the game over message.
And that concludes this tutorial. Let me know in the comments section your opinions and questions!
