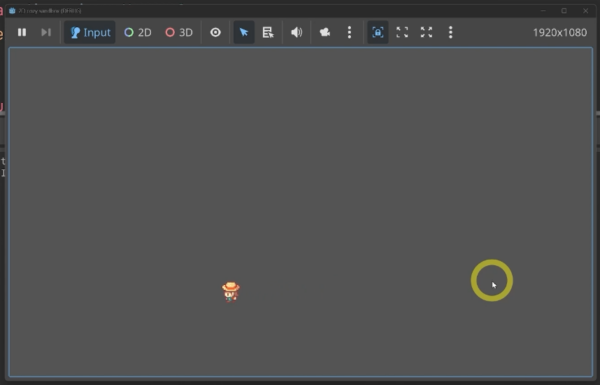
Getting Godot cozy player movement working is only part of the setup: your character also needs to face the right direction, switch between idle and walking, and pause while using a tool. Drawing on Zenva’s experience developing over 400 coding and game development courses, this tutorial guides you through connecting those behaviors with an AnimationTree in Godot 4.
This tutorial assumes you have Godot installed, know basic editor navigation, and are working with the supplied project.
Table of contents
Download Project Files
The files and full project are available through the course included in the Godot 4 Game Development Mini-Degree. Follow that guided path if you want the complete project, or keep reading for the free movement and animation walkthrough.
Godot Cozy Player Movement Setup
Implementing Player Movement
Your player scene uses a CharacterBody2D node, which lets you control the character through code.
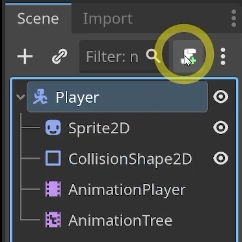
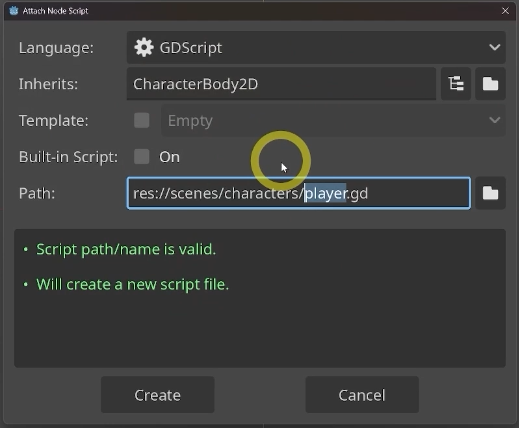
Select the Player node in the Scene dock and attach a new script. Save it as player.gd inside scenes/characters.
Start with a Vector2 for the movement direction and an exported speed variable. The @export annotation lets you adjust the speed in the Inspector.
extends CharacterBody2D

var direction: Vector2
@export var speed := 200
Handle movement in _physics_process: read the input direction, calculate the velocity, then call move_and_slide(). Input.get_vector() takes four input actions for negative X, positive X, negative Y, and positive Y, returning the direction vector.
func _physics_process(_delta: float) -> void:
	var direction = Input.get_vector("left", "right", "up", "down")
	velocity = direction * speed
	move_and_slide()
The underscore in _delta tells Godot that you intentionally leave that parameter unused, preventing a warning. Run the main game scene to try moving the player.
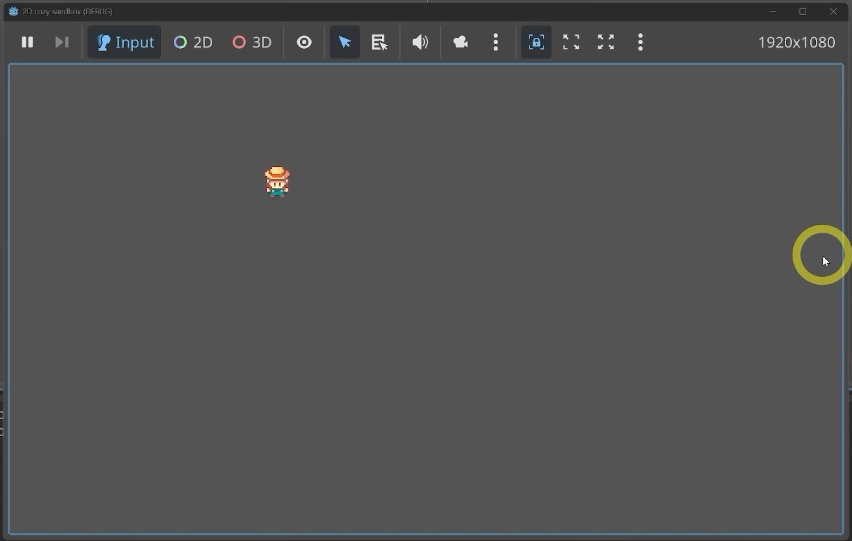
Before adding animations, separate the input into get_input and add a set_animation placeholder. Your script now looks like this:
extends CharacterBody2D

var direction: Vector2
@export var speed := 200

func _physics_process(_delta: float) -> void:
	get_input()
	set_animation()
	velocity = direction * speed
	move_and_slide()

func get_input():
	direction = Input.get_vector("left", "right", "up", "down")

func set_animation():
	pass
Inside get_input, you assign to the direction variable at the top of the script instead of declaring a new local variable. That makes the direction available throughout the script.
Introduction to the AnimationTree
The player has idle, walking, and tool animations with four directional variations. An AnimationTree gives you a graph or state machine to control which animation plays for each character state.
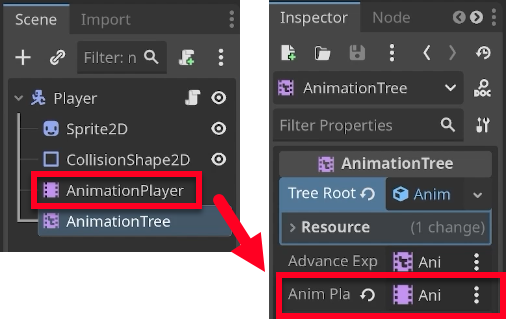
The animation node connected to Output determines what plays. Before continuing, assign the scene’s AnimationPlayer to the AnimationTree‘s Anim Player property.
Creating a State Machine and Blend Space
Use a state machine to switch between the idle and movement states:
- Right-click the empty grid in the
AnimationTreepanel and add anAnimationNodeStateMachine. Rename itMoveStateMachine. - Connect
MoveStateMachinetoOutput. - Click Open Editor on
MoveStateMachineto enter its graph.
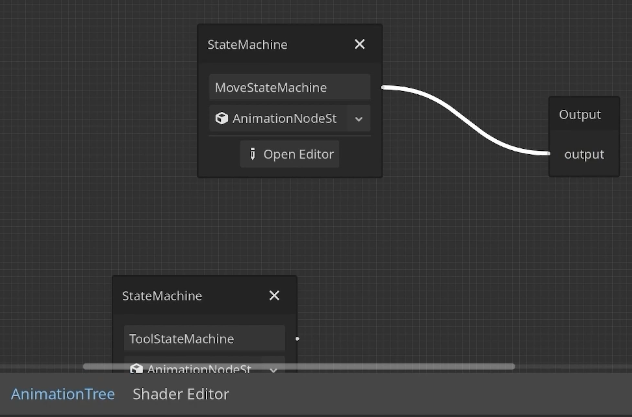
Inside that graph, add a BlendSpace2D and rename it idle. This blend space selects a directional idle animation using a 2D value, such as your movement direction.
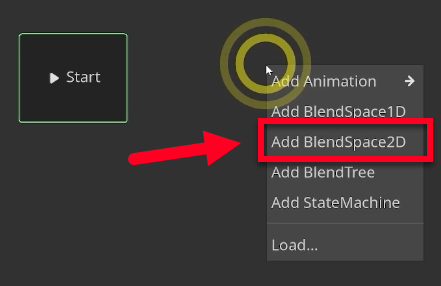
Connect Start to idle so idle is the starting state.
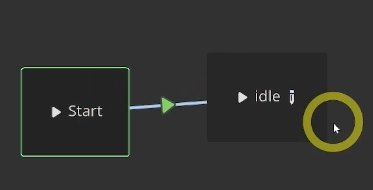
Select idle to open its grid, then use the green Add Point icon to place the animations at these coordinates:
idle_right: (1, 0)idle_left: (-1, 0)idle_up: (0, -1)idle_down: (0, 1)
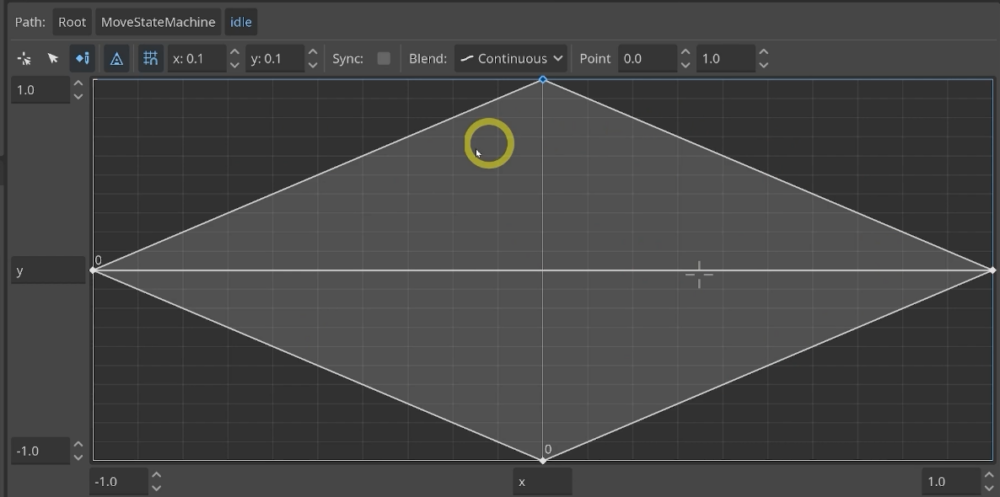
The BlendSpace2D editor displays its Y-axis differently from Godot’s 2D scene coordinates: the top of the grid represents positive Y (down), and the bottom represents negative Y (up).
Controlling Animations With Code
To move the blend space’s marker, set its blend_position parameter from set_animation. The parameter path identifies the idle blend space inside MoveStateMachine.
func set_animation():
	$AnimationTree.set("parameters/MoveStateMachine/idle/blend_position", direction)
Run the game and press the movement keys. The idle animation now changes with your input, but stopping can still produce an incorrect animation. The next changes address that behavior.
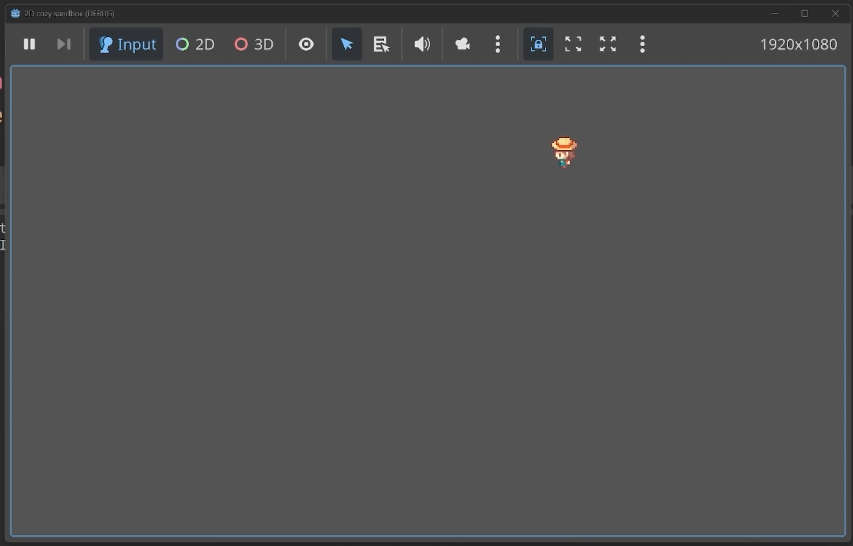
Fixing Directional Idle Animations
Fixing the Default Animation
The idle blend space has no animation at its center, (0, 0), leaving the default state undefined.
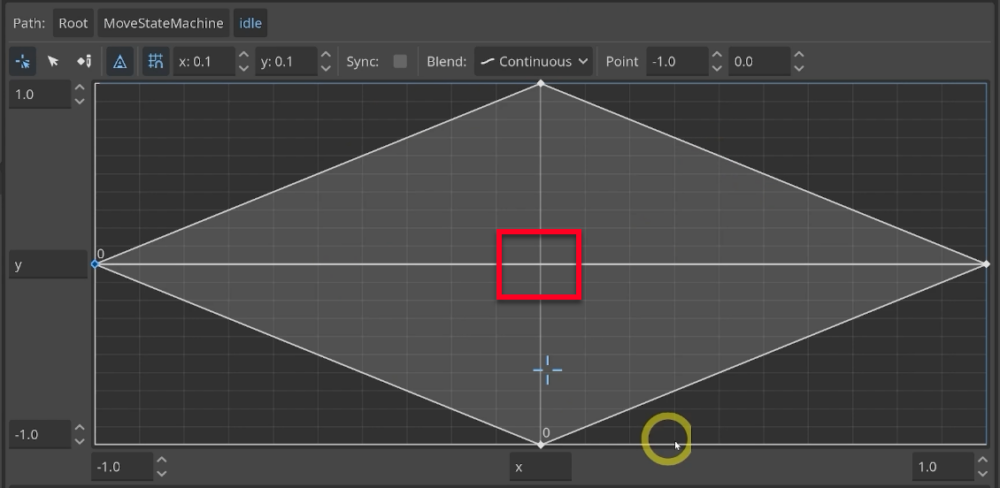
- Select
AnimationTreeand open theidleBlendSpace2D. - Use Add Point to place a point at (0, 0).
- Assign
idle_downto that point.
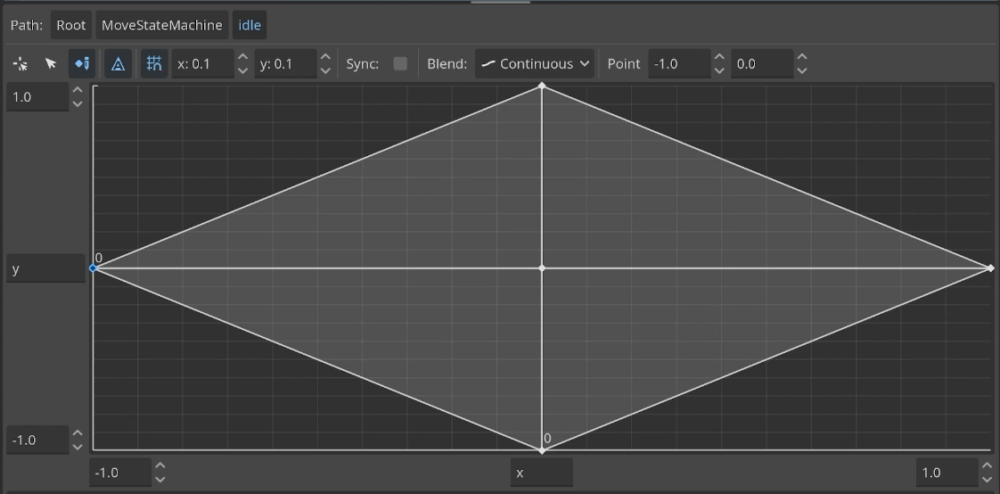
The player now starts with the idle_down animation.
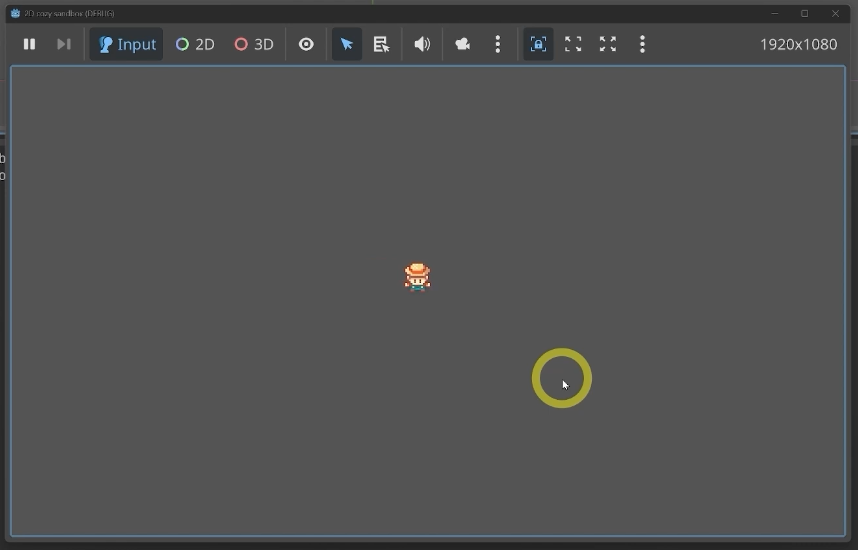
Handling Diagonal Animations
Diagonal movement needs another adjustment. The blend space is missing corner points, and normalized diagonal input produces values such as (0.7, -0.7), rather than the points you have placed.
Add idle_left at the top-left and bottom-left corners, and idle_right at the top-right and bottom-right corners.
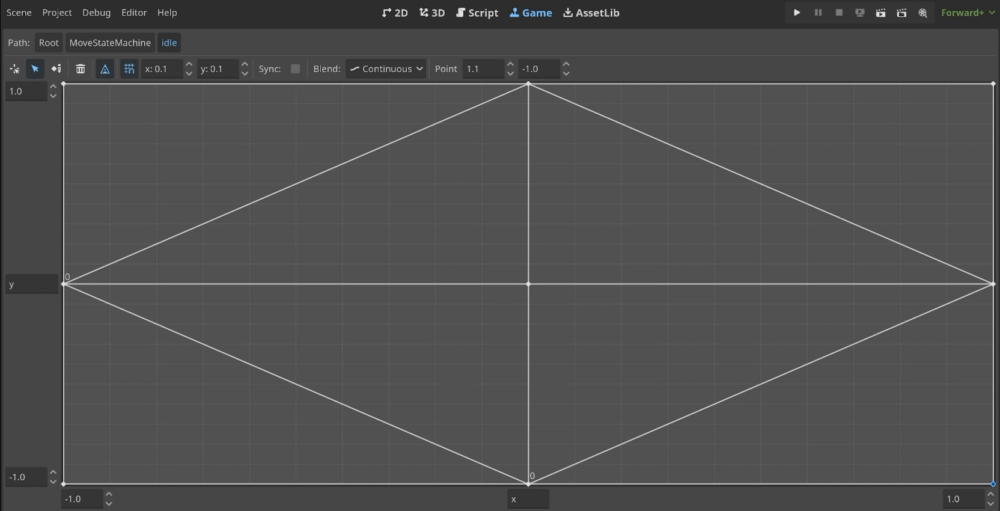
Next, round each component of the animation direction to -1, 0, or 1 before passing it to the blend space.
func set_animation():
	var direction_animation: Vector2 = Vector2(round(direction.x), round(direction.y))
	$AnimationTree.set("parameters/MoveStateMachine/idle/blend_position", direction_animation)
The idle animation now follows diagonal input as well.
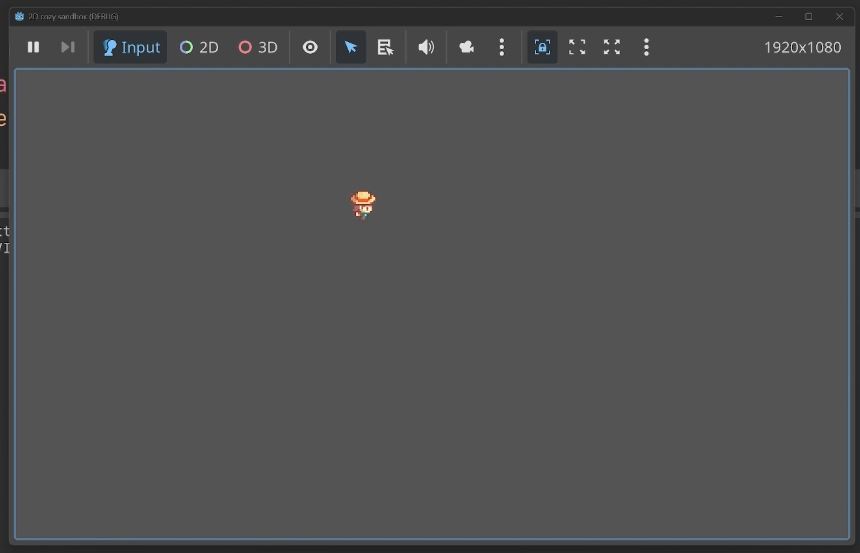
Preserving the Idle Direction
When you release the movement keys, continuously updating the blend position sends the character back to idle_down. Keep the last facing direction by updating the blend position only when direction is non-zero.
func set_animation():
	if direction:
		var direction_animation: Vector2 = Vector2(round(direction.x), round(direction.y))
		$AnimationTree.set("parameters/MoveStateMachine/idle/blend_position", direction_animation)
Once the player stops, the blend position stays where it was, preserving the last directional idle animation.
Creating a Move State
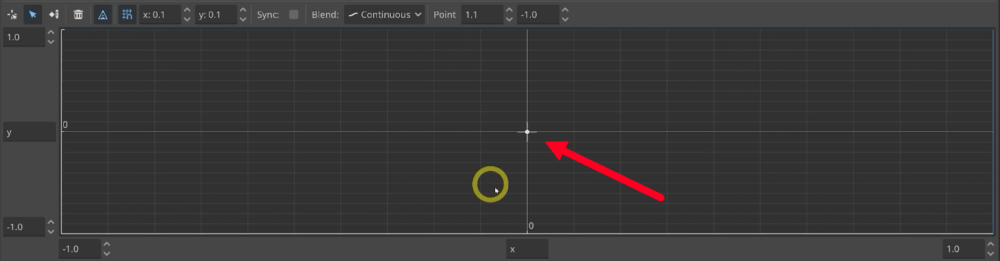
With idle animations working, add a separate state for walking. In MoveStateMachine, use Add Node to add another BlendSpace2D. Name the state move.

Open this blend space and add a single animation, such as move_down, to begin.
Transitioning Between States
Set the starting transition to run automatically, while leaving the idle/move transitions under script control:
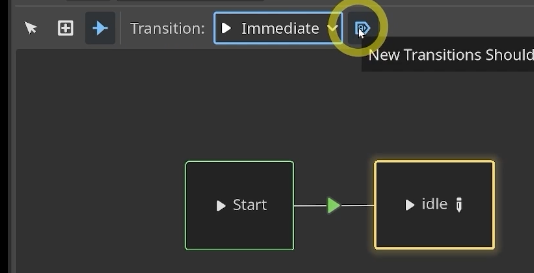
- Select the transition arrow from
Starttoidleand enable Auto in the Inspector.
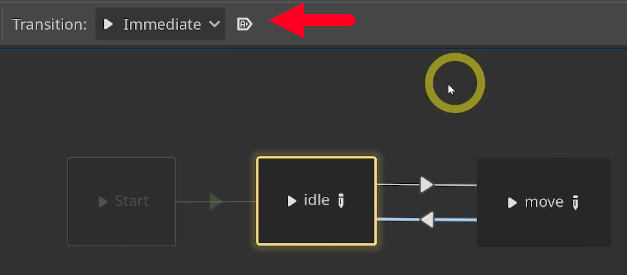
- Draw transition arrows between
idleandmovein both directions. Leave Auto disabled for these transitions.
Controlling Transitions in Code
Add a reference to the state machine playback object in your script. Use @onready so the reference is obtained when the scene’s nodes are ready.
@onready var move_state_machine: AnimationNodeStateMachinePlayback = $AnimationTree.get("parameters/MoveStateMachine/playback")In set_animation, use travel() to enter move when the player has a direction, or idle when they stop.
func set_animation():
	if direction:
		move_state_machine.travel('move')
		var direction_animation: Vector2 = Vector2(round(direction.x), round(direction.y))
		$AnimationTree.set("parameters/MoveStateMachine/idle/blend_position", direction_animation)
	else:
		move_state_machine.travel('idle')
The state transitions are in place. Next, finish the walking blend space and send it the movement direction.
Exercise: Directional Player Animations
Before following the solution, try making the walking animation match the player’s movement. Moving up should play the upward walking animation, and moving left should play the leftward one.
Areas of Focus
This exercise connects two parts of the project:
- Blend Space 2D: map directional values to the walking animation clips.
- GDScript: send the current movement direction to the animation system.
Task Outline
- Open the Blend Space 2D resource for the player’s walking animations.
- Assign the up, down, left, and right walking animations to the appropriate points on the graph.
- Open the player’s GDScript file.
- Find the input and movement code.
- Get the player’s input direction vector.
- Pass the directional vector to the walking blend space’s
blend_positionparameter.
Try the setup yourself, then use the following sections to check your work.
Configuring the Move Blend Space
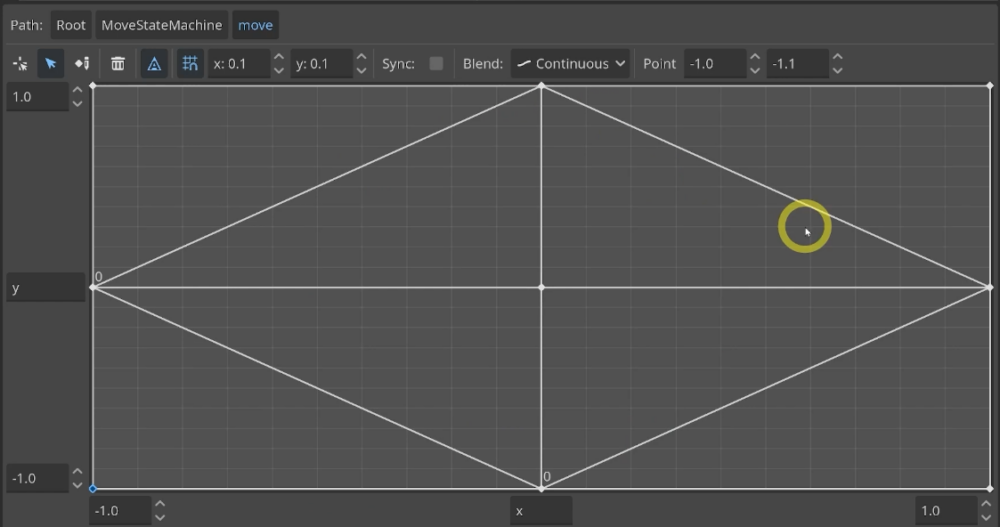
Open AnimationTree, enter MoveStateMachine, and select the move blend space. Use Add Point to arrange the walking animations in a diamond:
move_righton the far right.move_lefton the far left.move_upat the bottom.move_downat the top.
For the diagonal corners, reuse move_left at the top-left and bottom-left, and move_right at the top-right and bottom-right. This provides directional animations for eight-direction movement.
Activating the Walk Animations
The script currently updates only the idle blend position. Add a second set() call so the move blend space receives the same rounded direction.
func set_animation():
	if direction:
		move_state_machine.travel('move')
		var direction_animation: Vector2 = Vector2(round(direction.x),round(direction.y))
		$AnimationTree.set("parameters/MoveStateMachine/idle/blend_position", direction_animation)
		$AnimationTree.set("parameters/MoveStateMachine/move/blend_position", direction_animation)
	else:
		move_state_machine.travel('idle')
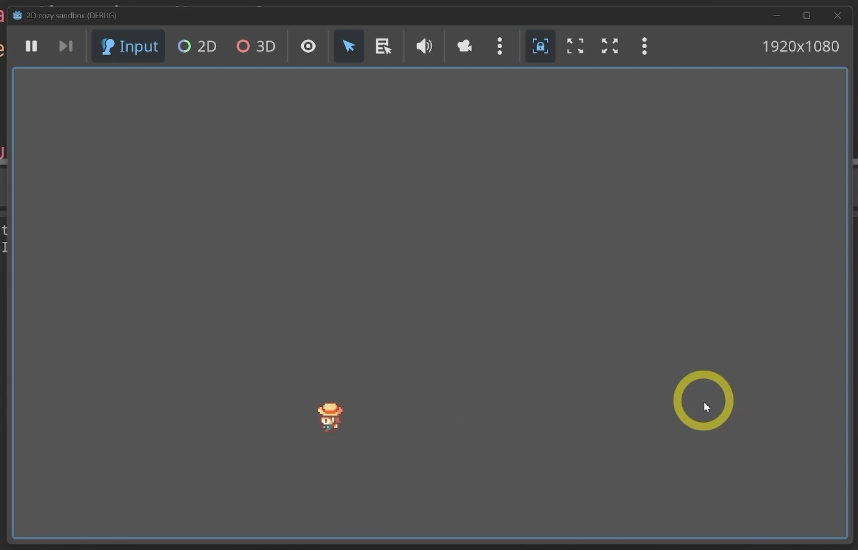
Run the game to check that walking animations now follow the player’s movement direction.
An Overview of the Tool Animation System
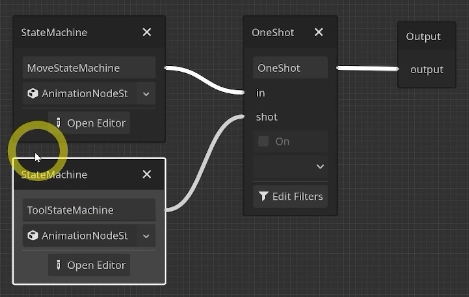
With walking animations in place, you can connect the tool animations. A OneShot node plays a single action, such as a tool swing, over a continuous animation such as walking or idling. The ToolStateMachine determines which tool animation to play. Unlike movement animations, tool animations should play once and finish.
Right-click the main AnimationTree graph and add a OneShot node. Connect MoveStateMachine to its in input, ToolStateMachine to its shot input, and OneShot to Output.
Triggering the Tool Animation
Add a playback reference for ToolStateMachine, just as you did for the movement state machine.
@onready var tool_state_machine: AnimationNodeStateMachinePlayback = $AnimationTree.get("parameters/ToolStateMachine/playback")Inside get_input, check for the action input. Set the OneShot request parameter to AnimationNodeOneShot.ONE_SHOT_REQUEST_FIRE to trigger it.
func get_input():
	direction = Input.get_vector("left", "right", "up", "down")

	if Input.is_action_just_pressed("action"):
		# We will travel to a specific tool state here later
		$AnimationTree.set("parameters/OneShot/request", AnimationNodeOneShot.ONE_SHOT_REQUEST_FIRE)
Setting the Tool Animation Direction
The tool state machine also needs a specific state to play. For testing, travel to sword when the action is pressed, then update the sword blend position in set_animation.
func get_input():
  direction = Input.get_vector("left", "right", "up", "down")

  if Input.is_action_just_pressed("action"):
    tool_state_machine.travel('sword')
    $AnimationTree.set("parameters/OneShot/request",AnimationNodeOneShot.ONE_SHOT_REQUEST_FIRE)

func set_animation():
  if direction:
    move_state_machine.travel('move')
    var direction_animation: Vector2 = Vector2(round(direction.x),round(direction.y))
    $AnimationTree.set("parameters/MoveStateMachine/idle/blend_position", direction_animation)
    $AnimationTree.set("parameters/MoveStateMachine/move/blend_position", direction_animation)
    $AnimationTree.set("parameters/ToolStateMachine/sword/blend_position", direction_animation)

  else:
    move_state_machine.travel('idle')
Rather than writing a separate blend-position update for every tool, you can organize the tool states in a dictionary and update them in a loop.

Organizing Tool States
Map the project’s tool enum values to their animation state names. This keeps the names together and reduces opportunities for typos.
const state_names = {
	Global.Tools.HOE: 'hoe',
	Global.Tools.AXE: 'axe',
	Global.Tools.WATER: 'water',
	Global.Tools.SWORD: 'sword',
	Global.Tools.FISH: 'fish',
}
Now loop through the dictionary’s values inside set_animation, updating the blend position for every tool state.
func set_animation():
	if direction:
		move_state_machine.travel('move')
		var direction_animation: Vector2 = Vector2(round(direction.x),round(direction.y))
		$AnimationTree.set("parameters/MoveStateMachine/idle/blend_position", direction_animation)
		$AnimationTree.set("parameters/MoveStateMachine/move/blend_position", direction_animation)

		for state in state_names.values():
			$AnimationTree.set("parameters/ToolStateMachine/" + state +"/blend_position", direction_animation)

	else:
		move_state_machine.travel('idle')
Halting Movement During an Action
The player should pause while using a tool. Add a boolean at the top of the script to control whether movement is allowed.
var can_move := true
When the action input is pressed, set can_move to false alongside the animation trigger.
if Input.is_action_just_pressed("action"):
	# ... trigger animation
	can_move = false
In _physics_process, only read input when can_move is true. Multiply the velocity by int(can_move): true becomes 1, while false becomes 0 and stops the movement.
func _physics_process(_delta: float) -> void:
	if can_move:
		get_input()
	set_animation()
	velocity = direction * speed * int(can_move)
	move_and_slide()
Resuming Movement After an Action
To restore movement when the tool animation ends, connect the AnimationTree‘s animation_finished signal to a new function in the player script.
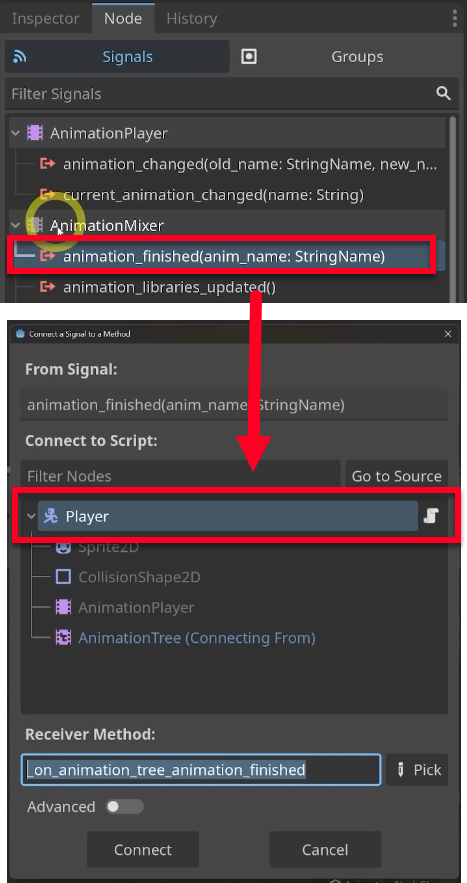
Reset can_move in that function.
func _on_animation_tree_animation_finished(_anim_name: StringName) -> void:
	can_move = true
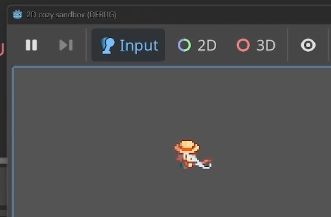
The player now pauses during the tool animation and can move again once it finishes. You can also test the other tool animations.
Your Player Movement and Animation Checklist
You have connected the player’s movement, directional animations, and tool-action pauses. Here is what your setup now covers:
- Reading directional input and moving a
CharacterBody2D. - Using blend spaces for directional idle and walking animations.
- Preserving the character’s facing direction when movement stops.
- Switching between idle and move states through code.
- Triggering tool animations with
OneShotand updating their directions through a dictionary. - Pausing movement during an action and restoring it when the animation finishes.
Next, test movement, stopping, and tool actions together to review how the animation states behave.
Keep building with the Godot 4 Game Development Mini-Degree. Follow the full project and a structured learning path to turn these player-control skills into progress on your own games.
Did you come across any errors in this tutorial? Please let us know by completing this form and we’ll look into it!
FINAL DAYS: Unlock coding courses in Unity, Godot, Unreal, Python and more.