You can access the full course here: Intro to 3D Modeling with Blender
Table of contents
Boolean Modifier
In this lesson, we’re going over Booleans in Blender.
First of all, let’s create two shapes.
Go to Add -> Mesh to create a cylinder and a UV sphere:
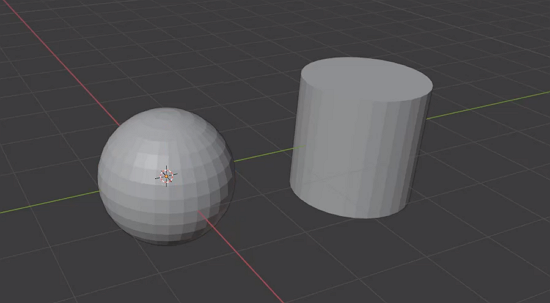
Press S to scale the cylinder up and place the sphere inside it as follows:
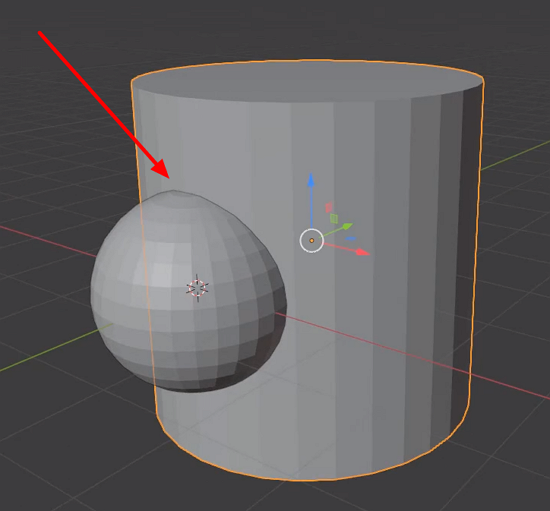
We’re going to use the sphere as a cutting tool in a way that we can have a spherical hole in the cylinder in the end.
Select the cylinder and go to the modifiers tab (the one with a wrench icon) in the Properties window.
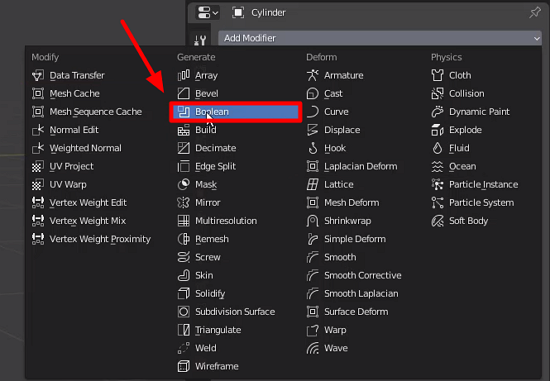
Next, choose the Boolean modifier:
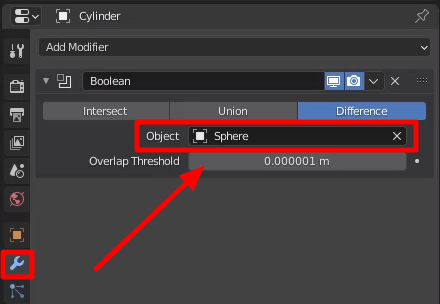
For the ‘Object‘ field, click on the eyedropper and click on the sphere to select it as the object we want to cut out of the cylinder:
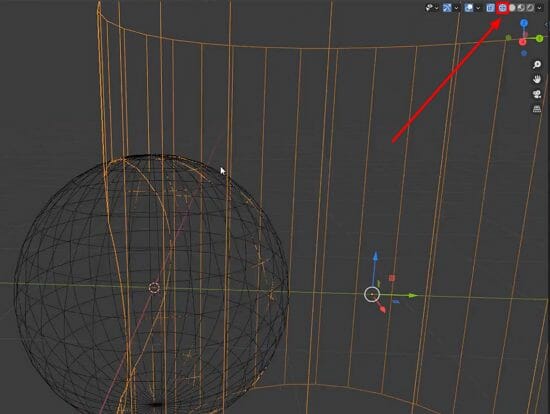
Located at the top right corner of our scene window, the ‘Wireframe‘ viewport shading allows us to see precisely where the wire edges of the cylinder (in orange) wrap around the sphere:
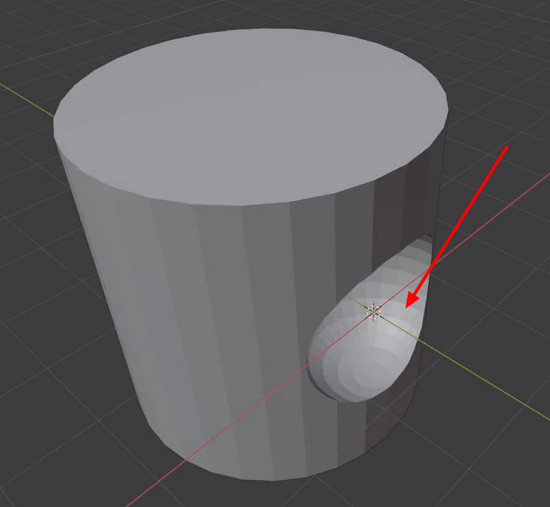
Go to the dropdown arrow and click ‘Apply‘ to perform the cut:

Select the sphere and hit the Delete key:
Attaching Objects with the Boolean Modifier
Let’s undo it all and add a brand new boolean modifier back on. Pick the sphere as the object of the modifier again and then select ‘Union‘:
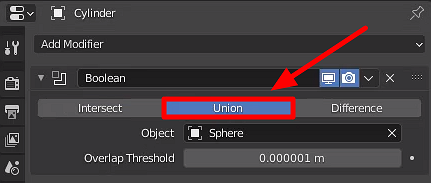
Click on the arrow and hit ‘Apply‘.
Once we delete the sphere, we now get a modified mesh with the two objects merged:
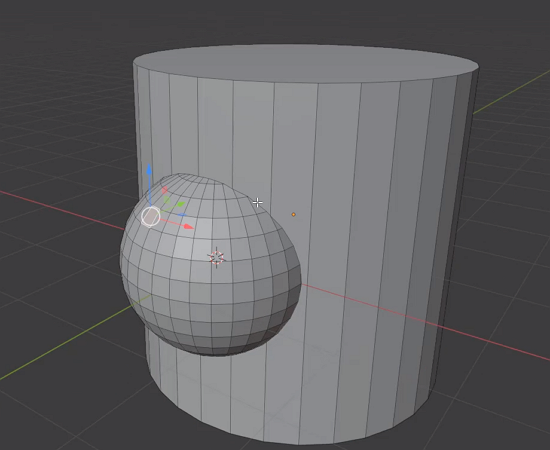
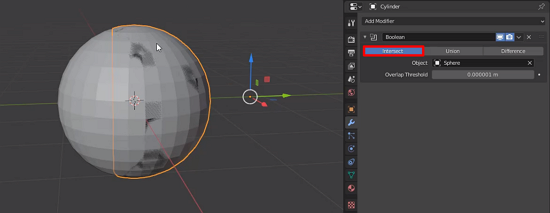
Note that you can also have your resulting mesh from the intersection of these objects by applying the same process but choosing the ‘Intersect‘ option instead:
Transcript
Welcome back, everyone. In this lesson, we are gonna be looking at Booleans inside of Blender. So first of all, we need create two shapes. Let’s go add, mesh, and let’s go ahead and create ourselves a cylinder right here. So we can drag that over there.
Then let’s go ahead and add in a new mesh and we’re gonna make this one, let’s just say we’re gonna make it a UV sphere. Just like that. So, with our cylinder, I’m gonna press S to scale it up a tiny bit.
And with our sphere, what I’m gonna do is I’m gonna move it inside of our cylinder, like so. Just not all the way in, but just enough so that we sort of have this cylinder intersecting… The sphere intersecting the cylinder like that.
So what we’re gonna be doing is we’re basically going to be using this sphere as a cutting tool. We’re gonna be using this sphere as a tool to basically cut out a bit of the cylinder so it leaves, basically, a cylindrical… A spherical hole in the cylinder.
So how do we do that? Well, we could, of course, go in with edge loops, extrusions, and all that, but you know, that’s quite messy. So a quick and easy way to do it is with booleans.
So I’m gonna select our cylinder here. And then in the properties window, I’m gonna go down to where we have this wrench icon. And he is where we can add modifiers.
Now in Blender, modifiers are basically these things that we can attach to objects in order to do many things. We can have a bevel modifier. We can have masking, we can have some vertex weight paints and all that. We can add physics. We can add in an armature.
So if you wanna have a character animation, you can do that. You can add fluid particles, pretty much anything can be done as a modifier. So we’re gonna go here, under generate, and select the boolean modifier.
Now, with the boolean modifier, it needs an object that it’s going to use in order to intersect it. So we can click on this little eyedropper icon right here and click on our sphere, just like that.
So now what’s happened is basically it has identified the sphere as the object we want to cut out of the cylinder. And you might not notice it just yet, but if we go up to the top right corner here, you’ll see there are a different number of rendering modes.
If we click on viewport shading, and we click on this wireframe, it’s gonna switch over to wireframe. And it might be a bit hard to see, but you can see here that we have the orange of the cylinder wrapping around the sphere.
So can switch back to the normal viewport shading here. And if we go over into our boolean modifier, and if we click on this little dropdown arrow, we can hit apply so those changes are made. We can then select our sphere, delete it.
And here you go, we now have a spherical hole inside of our cylinder right here. We can hop into edit mode, just like before, and modify it just fine. See yeah, that is the boolean modifier.
We can also attach stuff using boolean. So for example, let’s undo all of this right here. Undo the boolean modifier. Let’s add the boolean modifier back on. We can then select the sphere as the object we want to use.
And then what we can do is, right now, set a difference and difference basically means that we’re gonna subtract this sphere from the cylinder. We can also have intersect, which basically does the opposite.
So as you can see, it’s basically removed everything but what is inside of the sphere here. We then have union, which basically connects the two together. So we can apply the union, like so. We can select this sphere, delete it.
So now this sphere is now connected to this cylinder here. So yeah, that is the boolean modifier inside of Blender.
It’s a very powerful tool that you can use in order to connect two meshes together. You can also set it to difference in order to subtract one from another. So if you wanna create holes in meshes, for example, using booleans is a very good way to do that. And thank you for watching.
Interested in continuing? Check out our all-access plan which includes 250+ courses, guided curriculums, new courses monthly, access to expert course mentors, and more!


